How to upload to YouTube from Munshi
Start a video post in Munshi and pick YouTube. Choose Short or Video, add a title, thumbnail and privacy, then schedule the upload.
Before you start
- A YouTube channel connected to the workspace. YouTube and Munshi says what the connection covers.
- The video as an MP4, MOV or WebM file, up to 1 GB. For a thumbnail, a JPG, PNG, WebP or GIF.
-
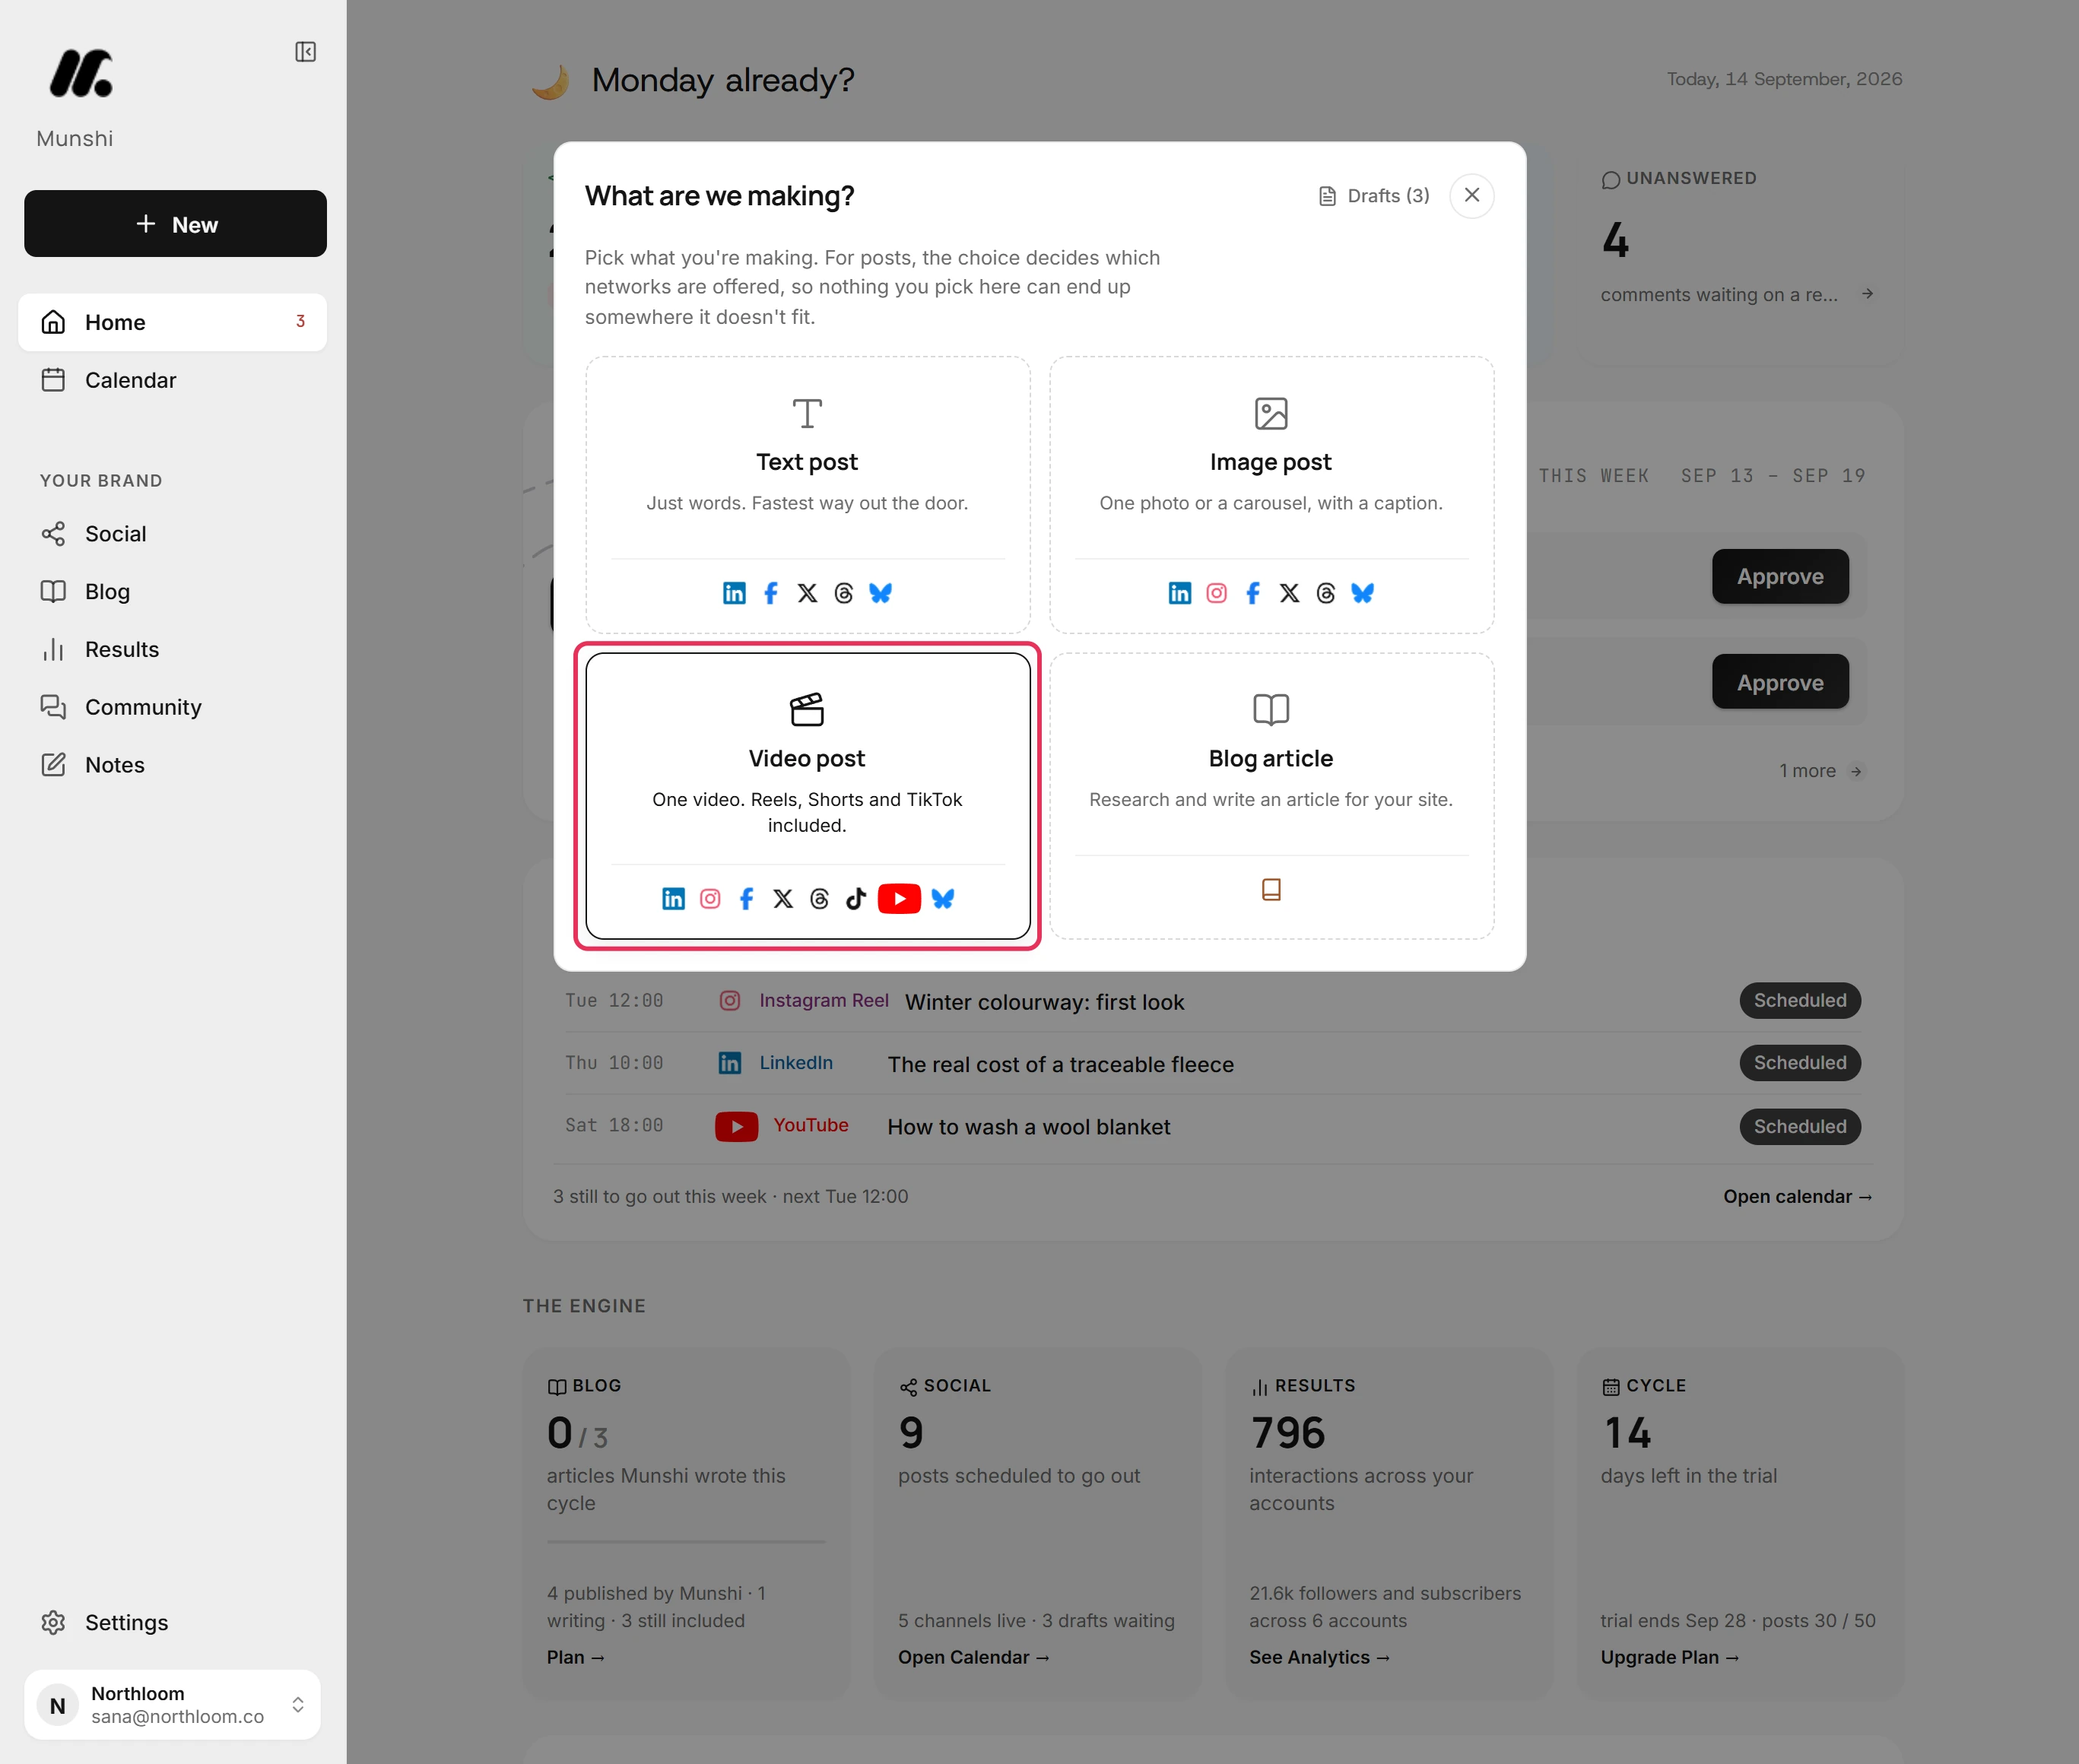
On Home, click Video, then pick Video post. The New button at the top of the sidebar opens the same chooser.
-
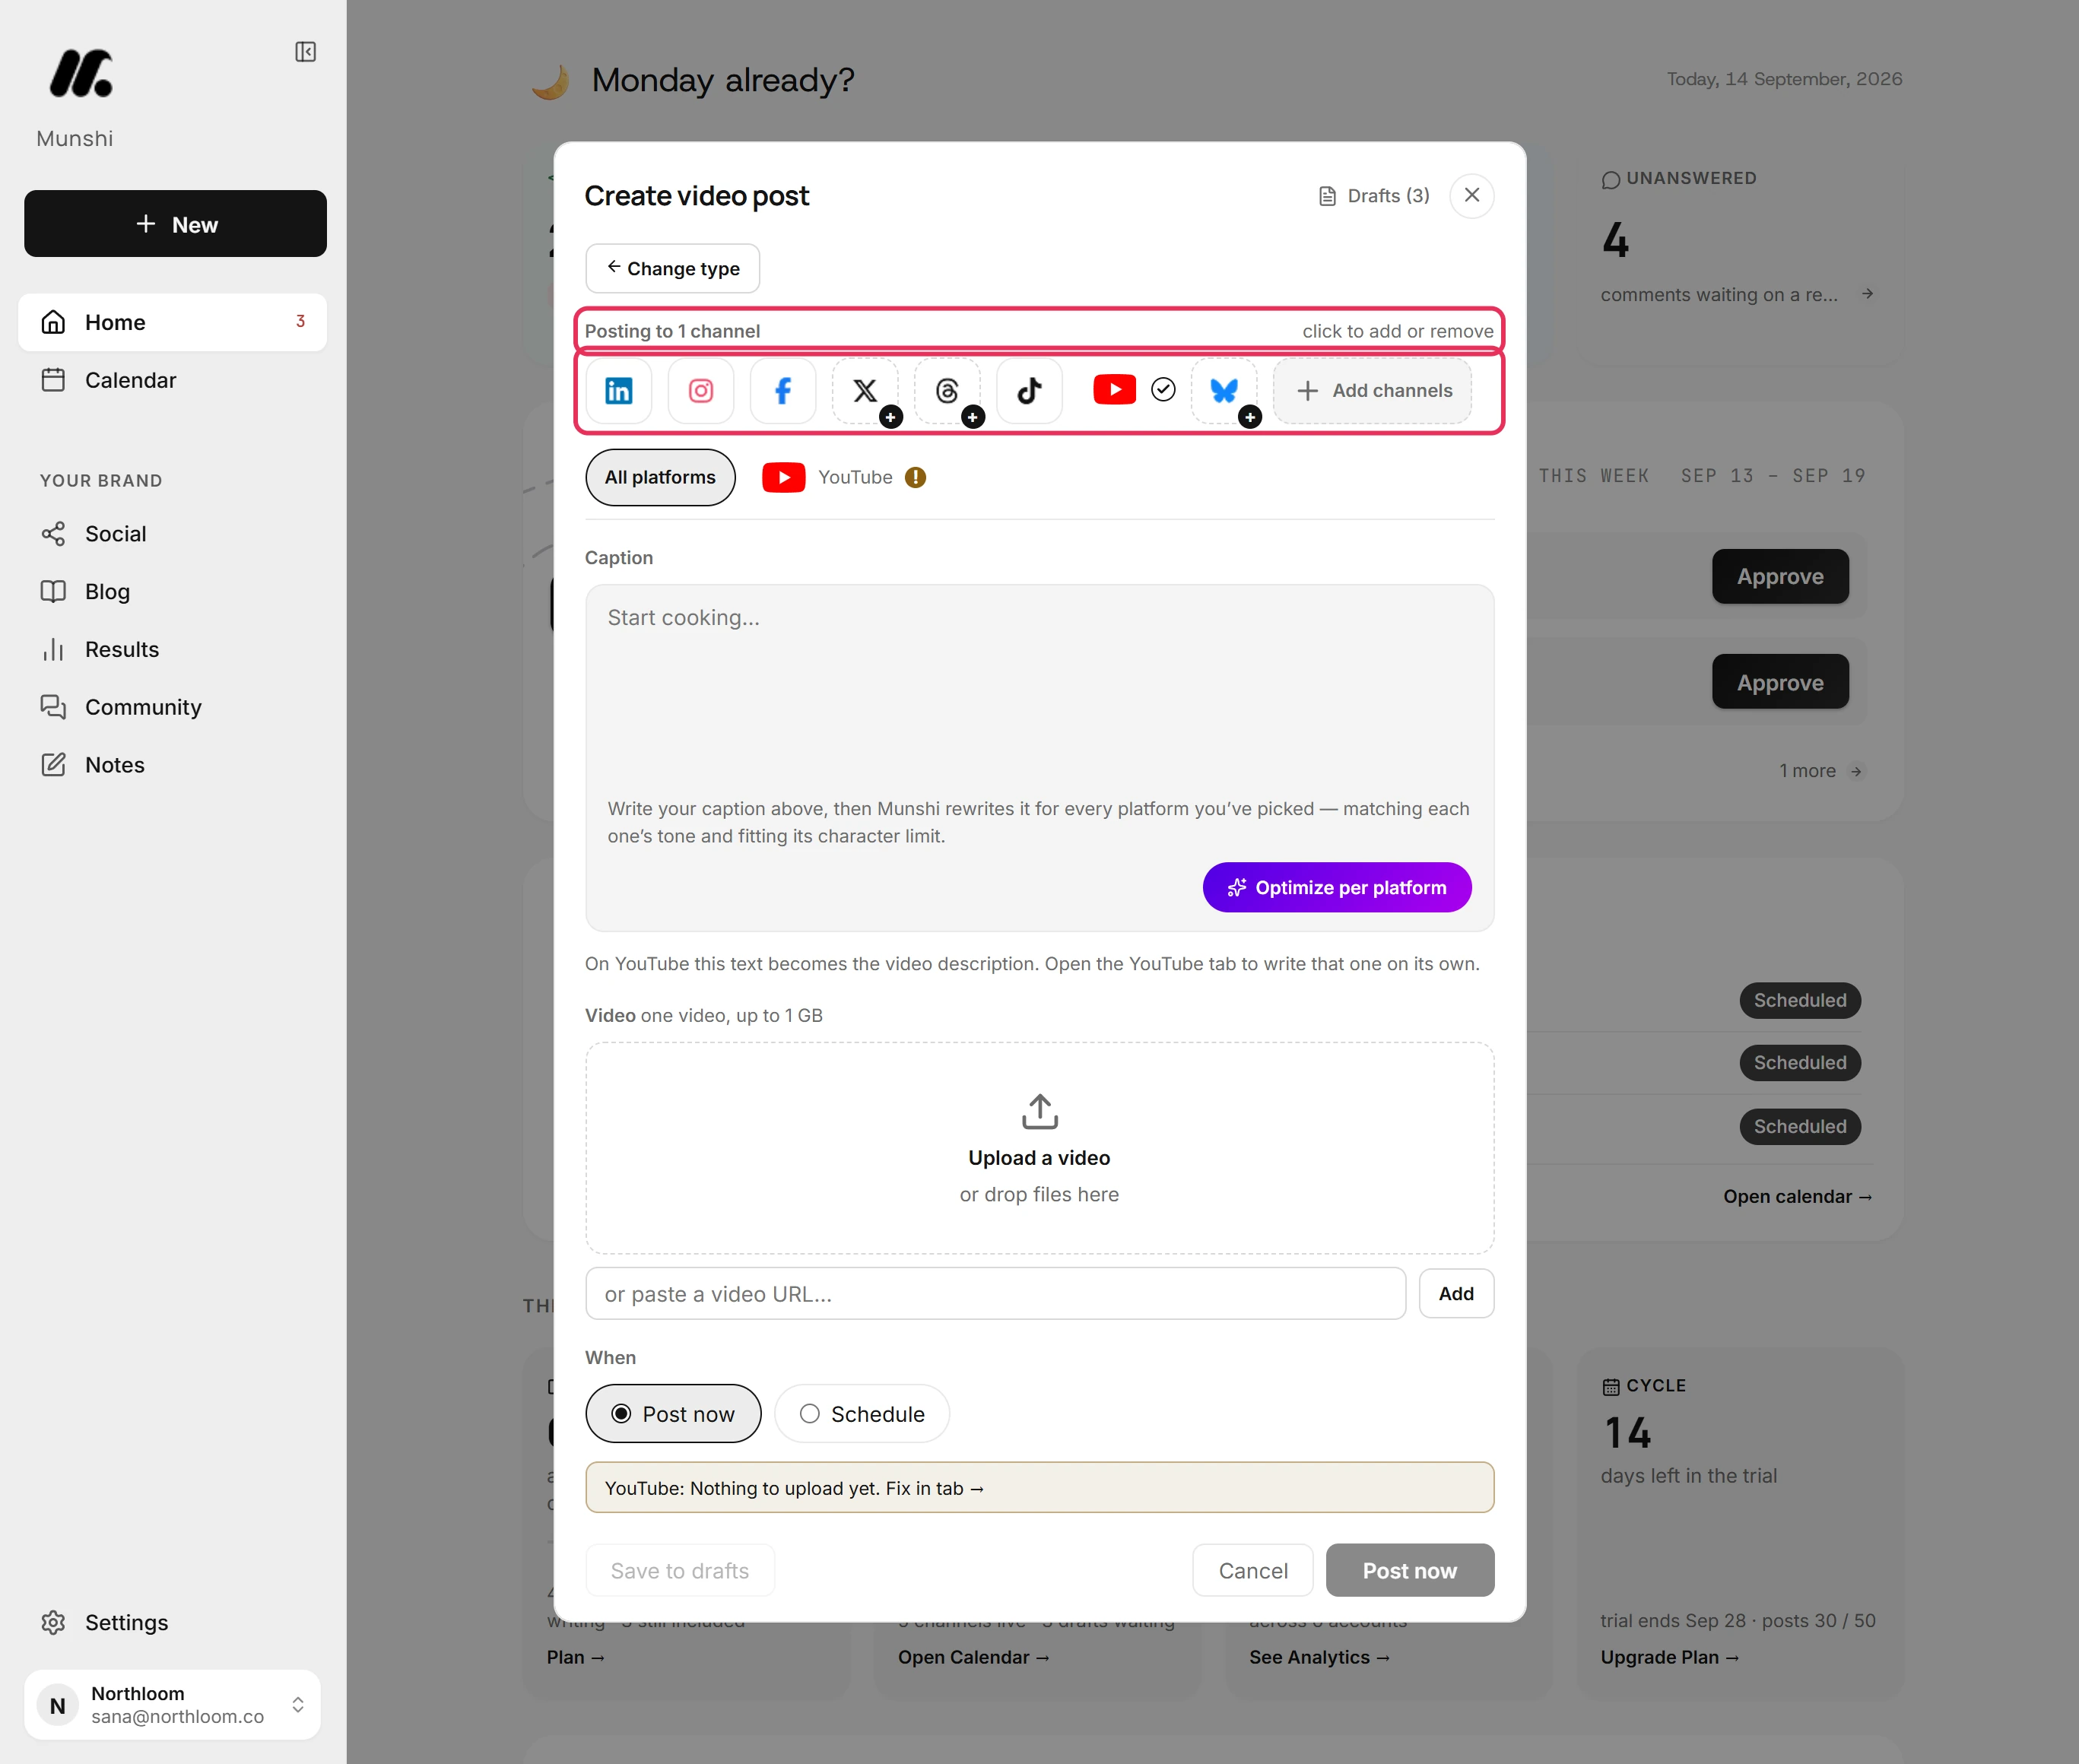
The first connected network is already on. Here it is LinkedIn. Click YouTube to add it, then click LinkedIn to take it off. The header now reads Posting to 1 channel.
-
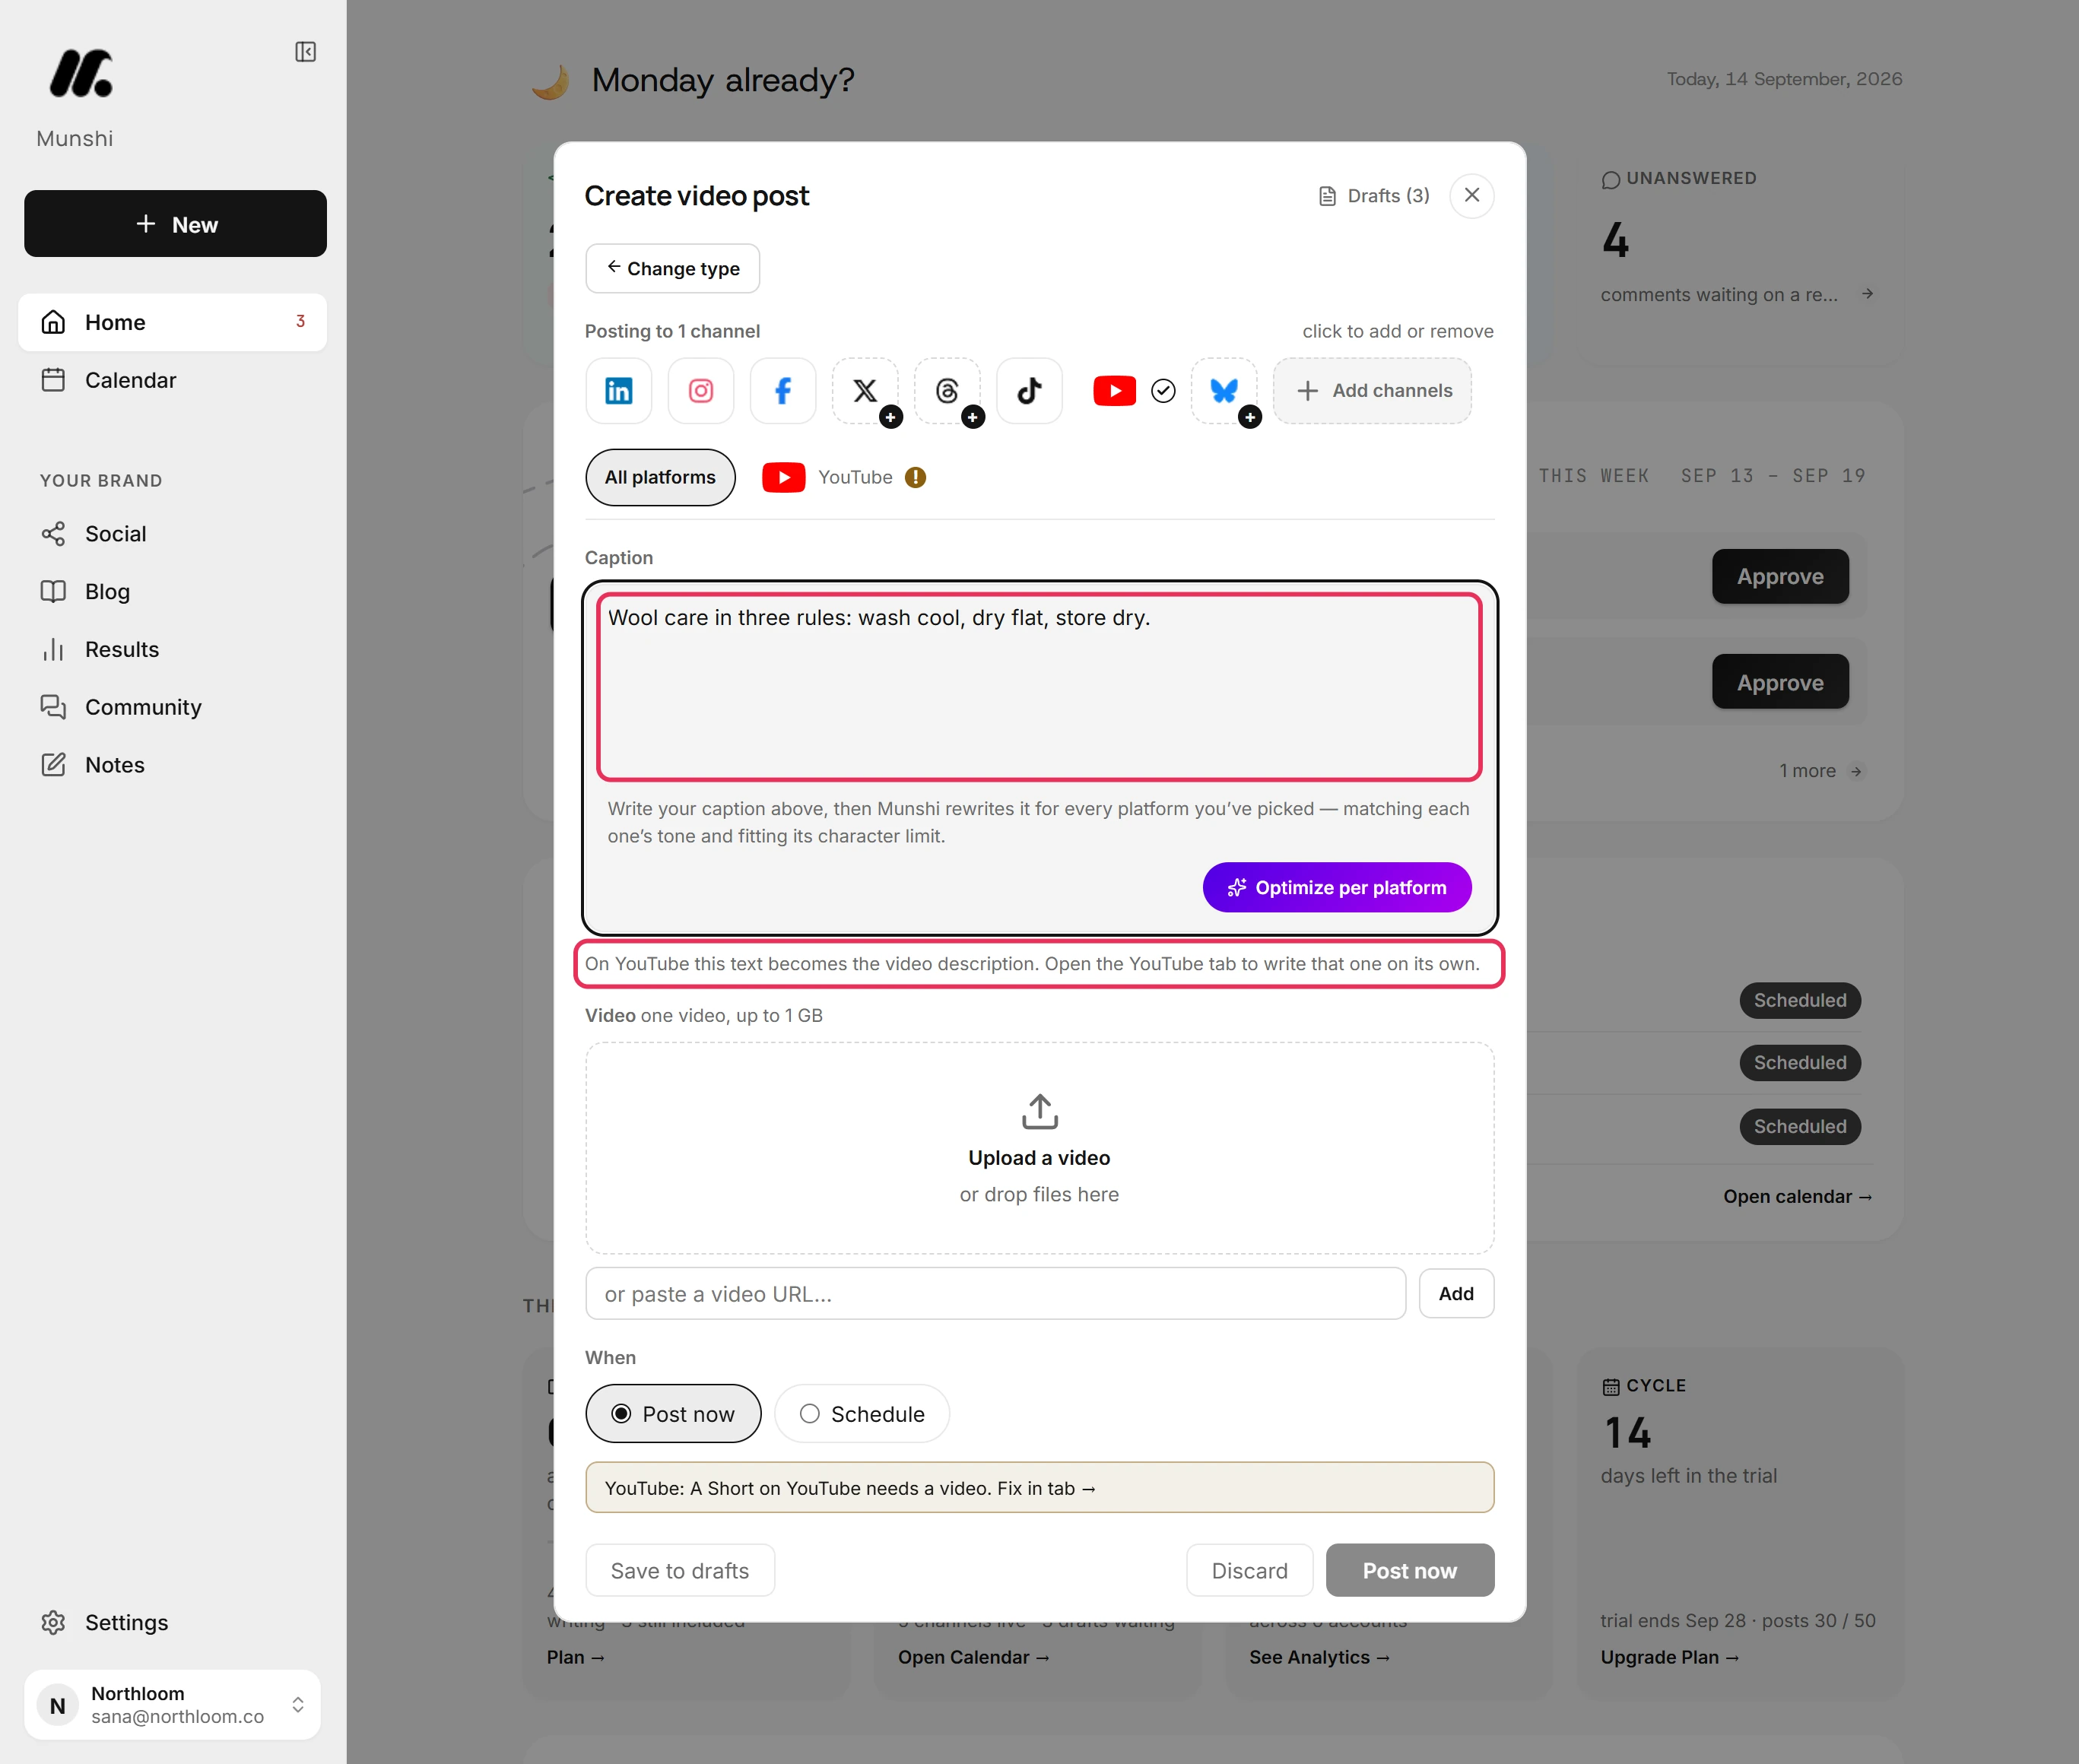
Write in the caption box on All platforms. On YouTube this text becomes the video's description. It can be up to 5,000 characters.
-
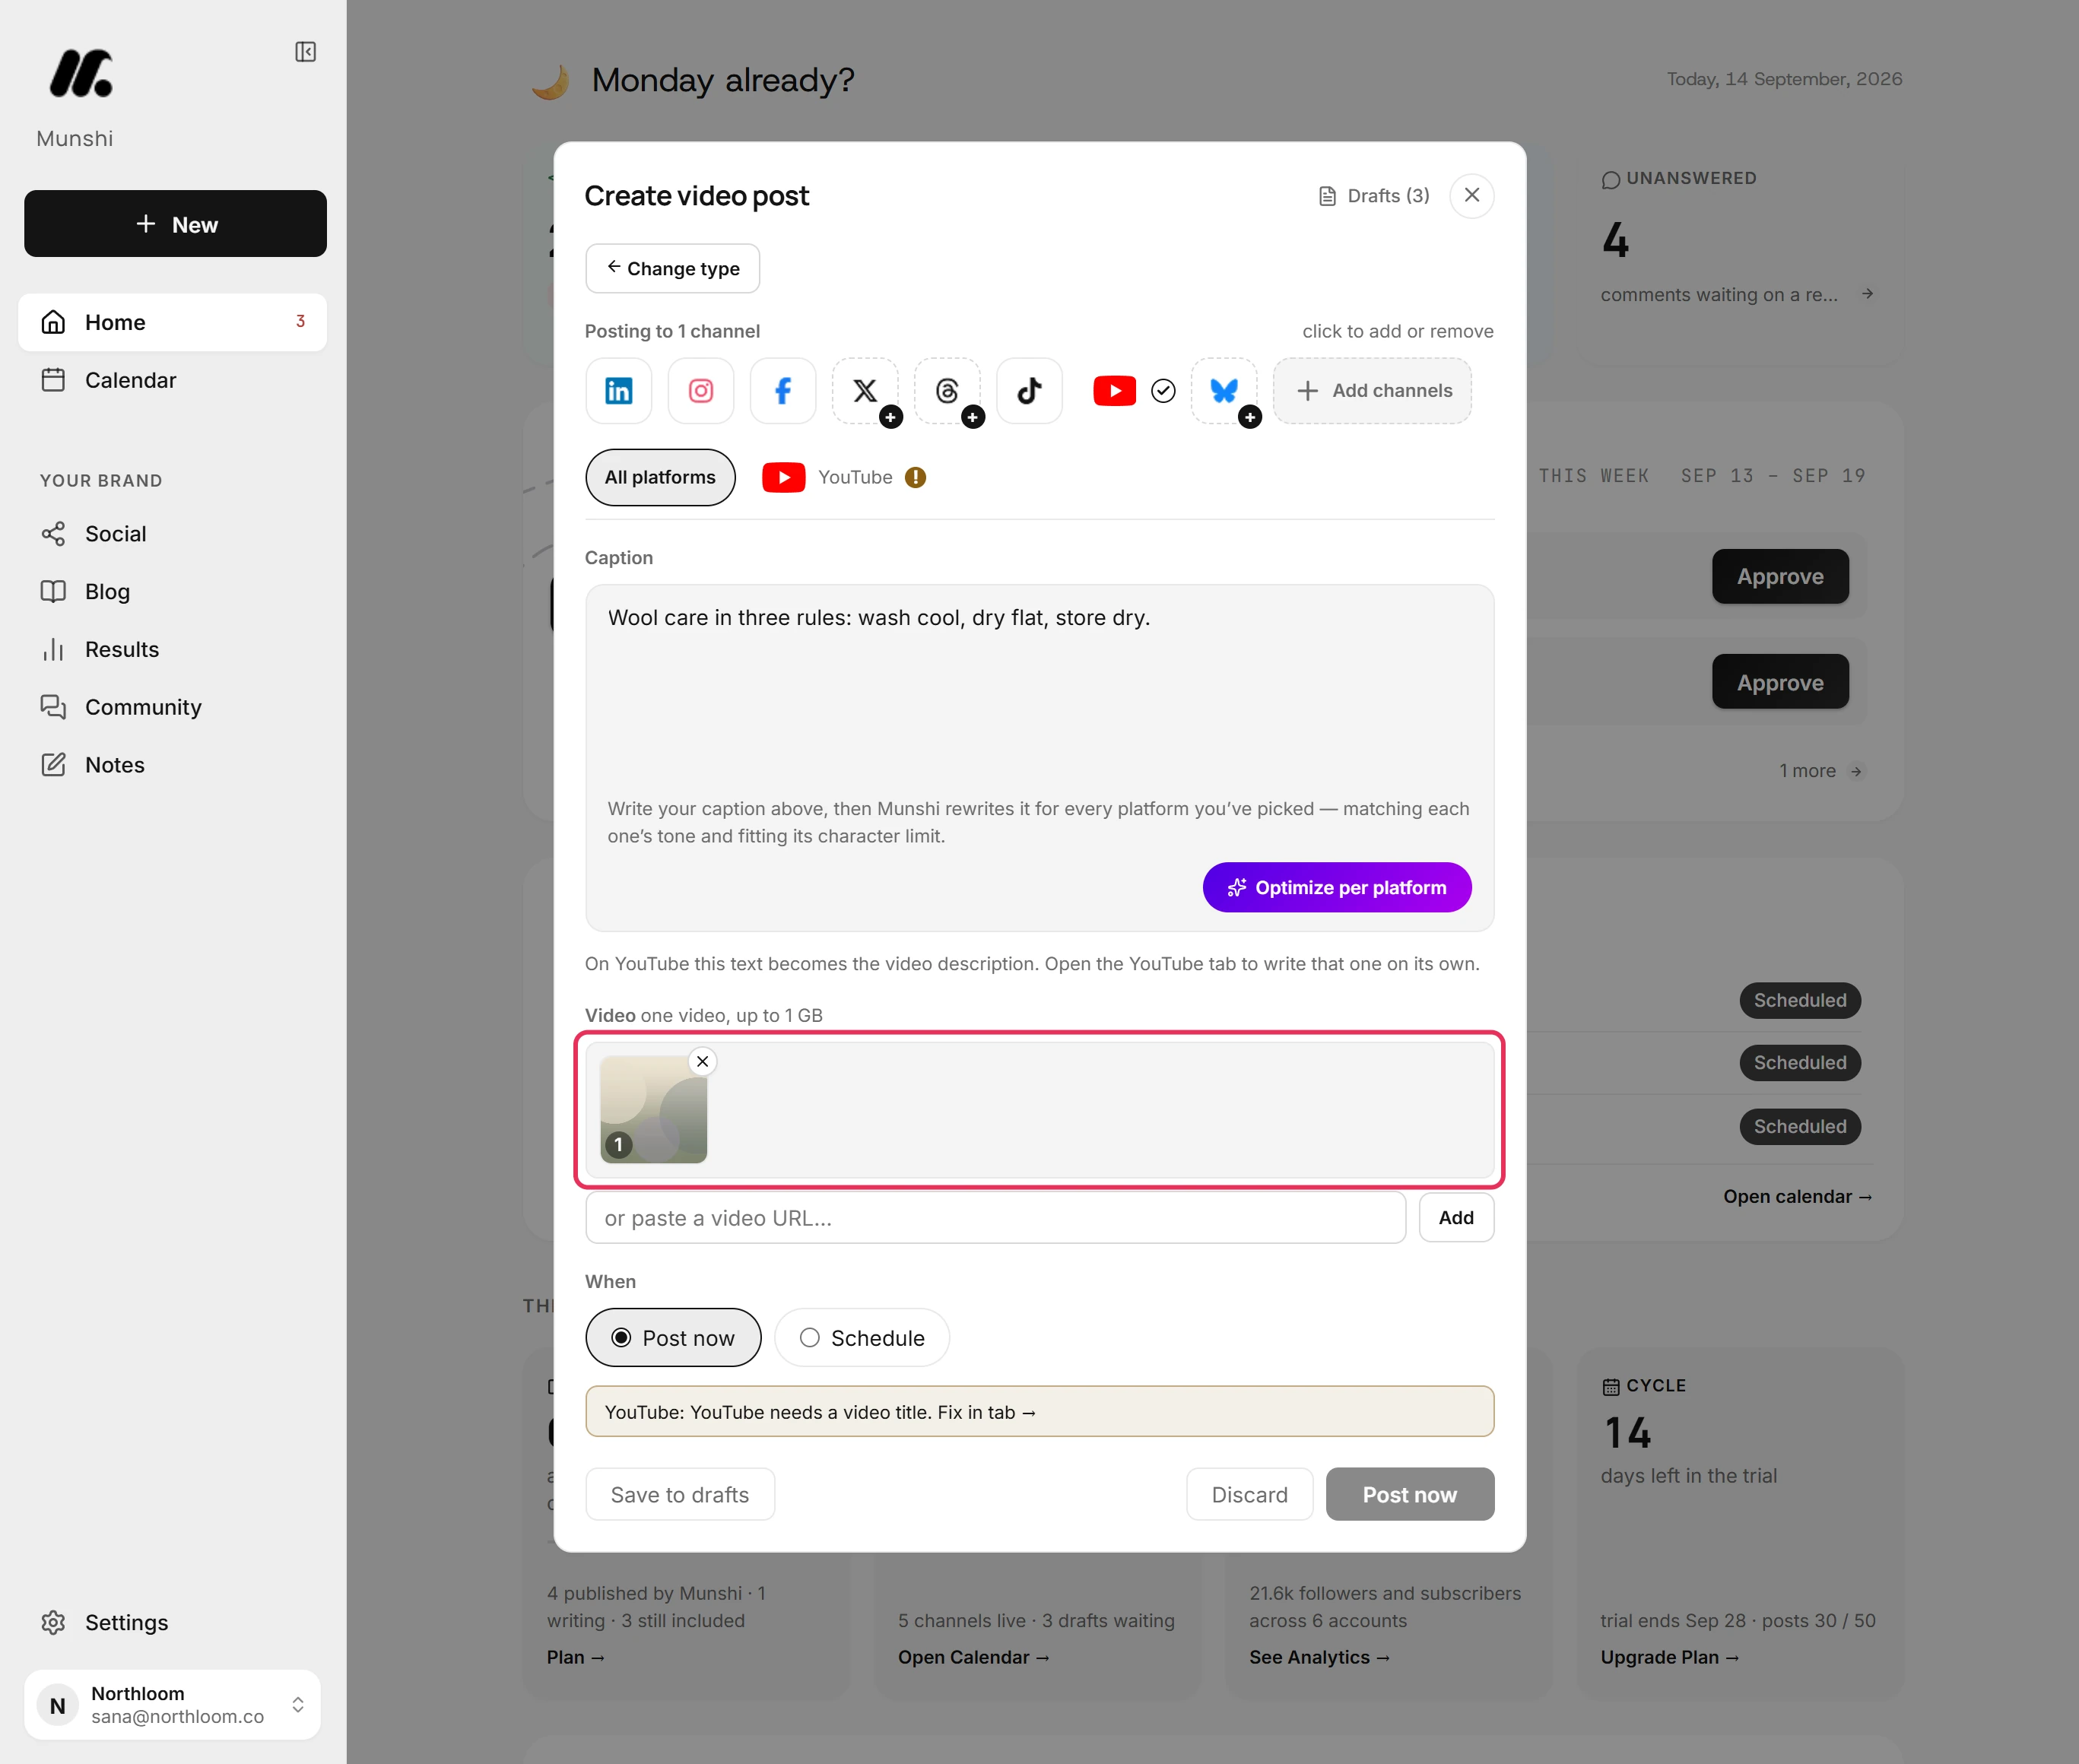
Click Upload a video, or drop the file onto it. A YouTube upload carries one video and nothing else.
-
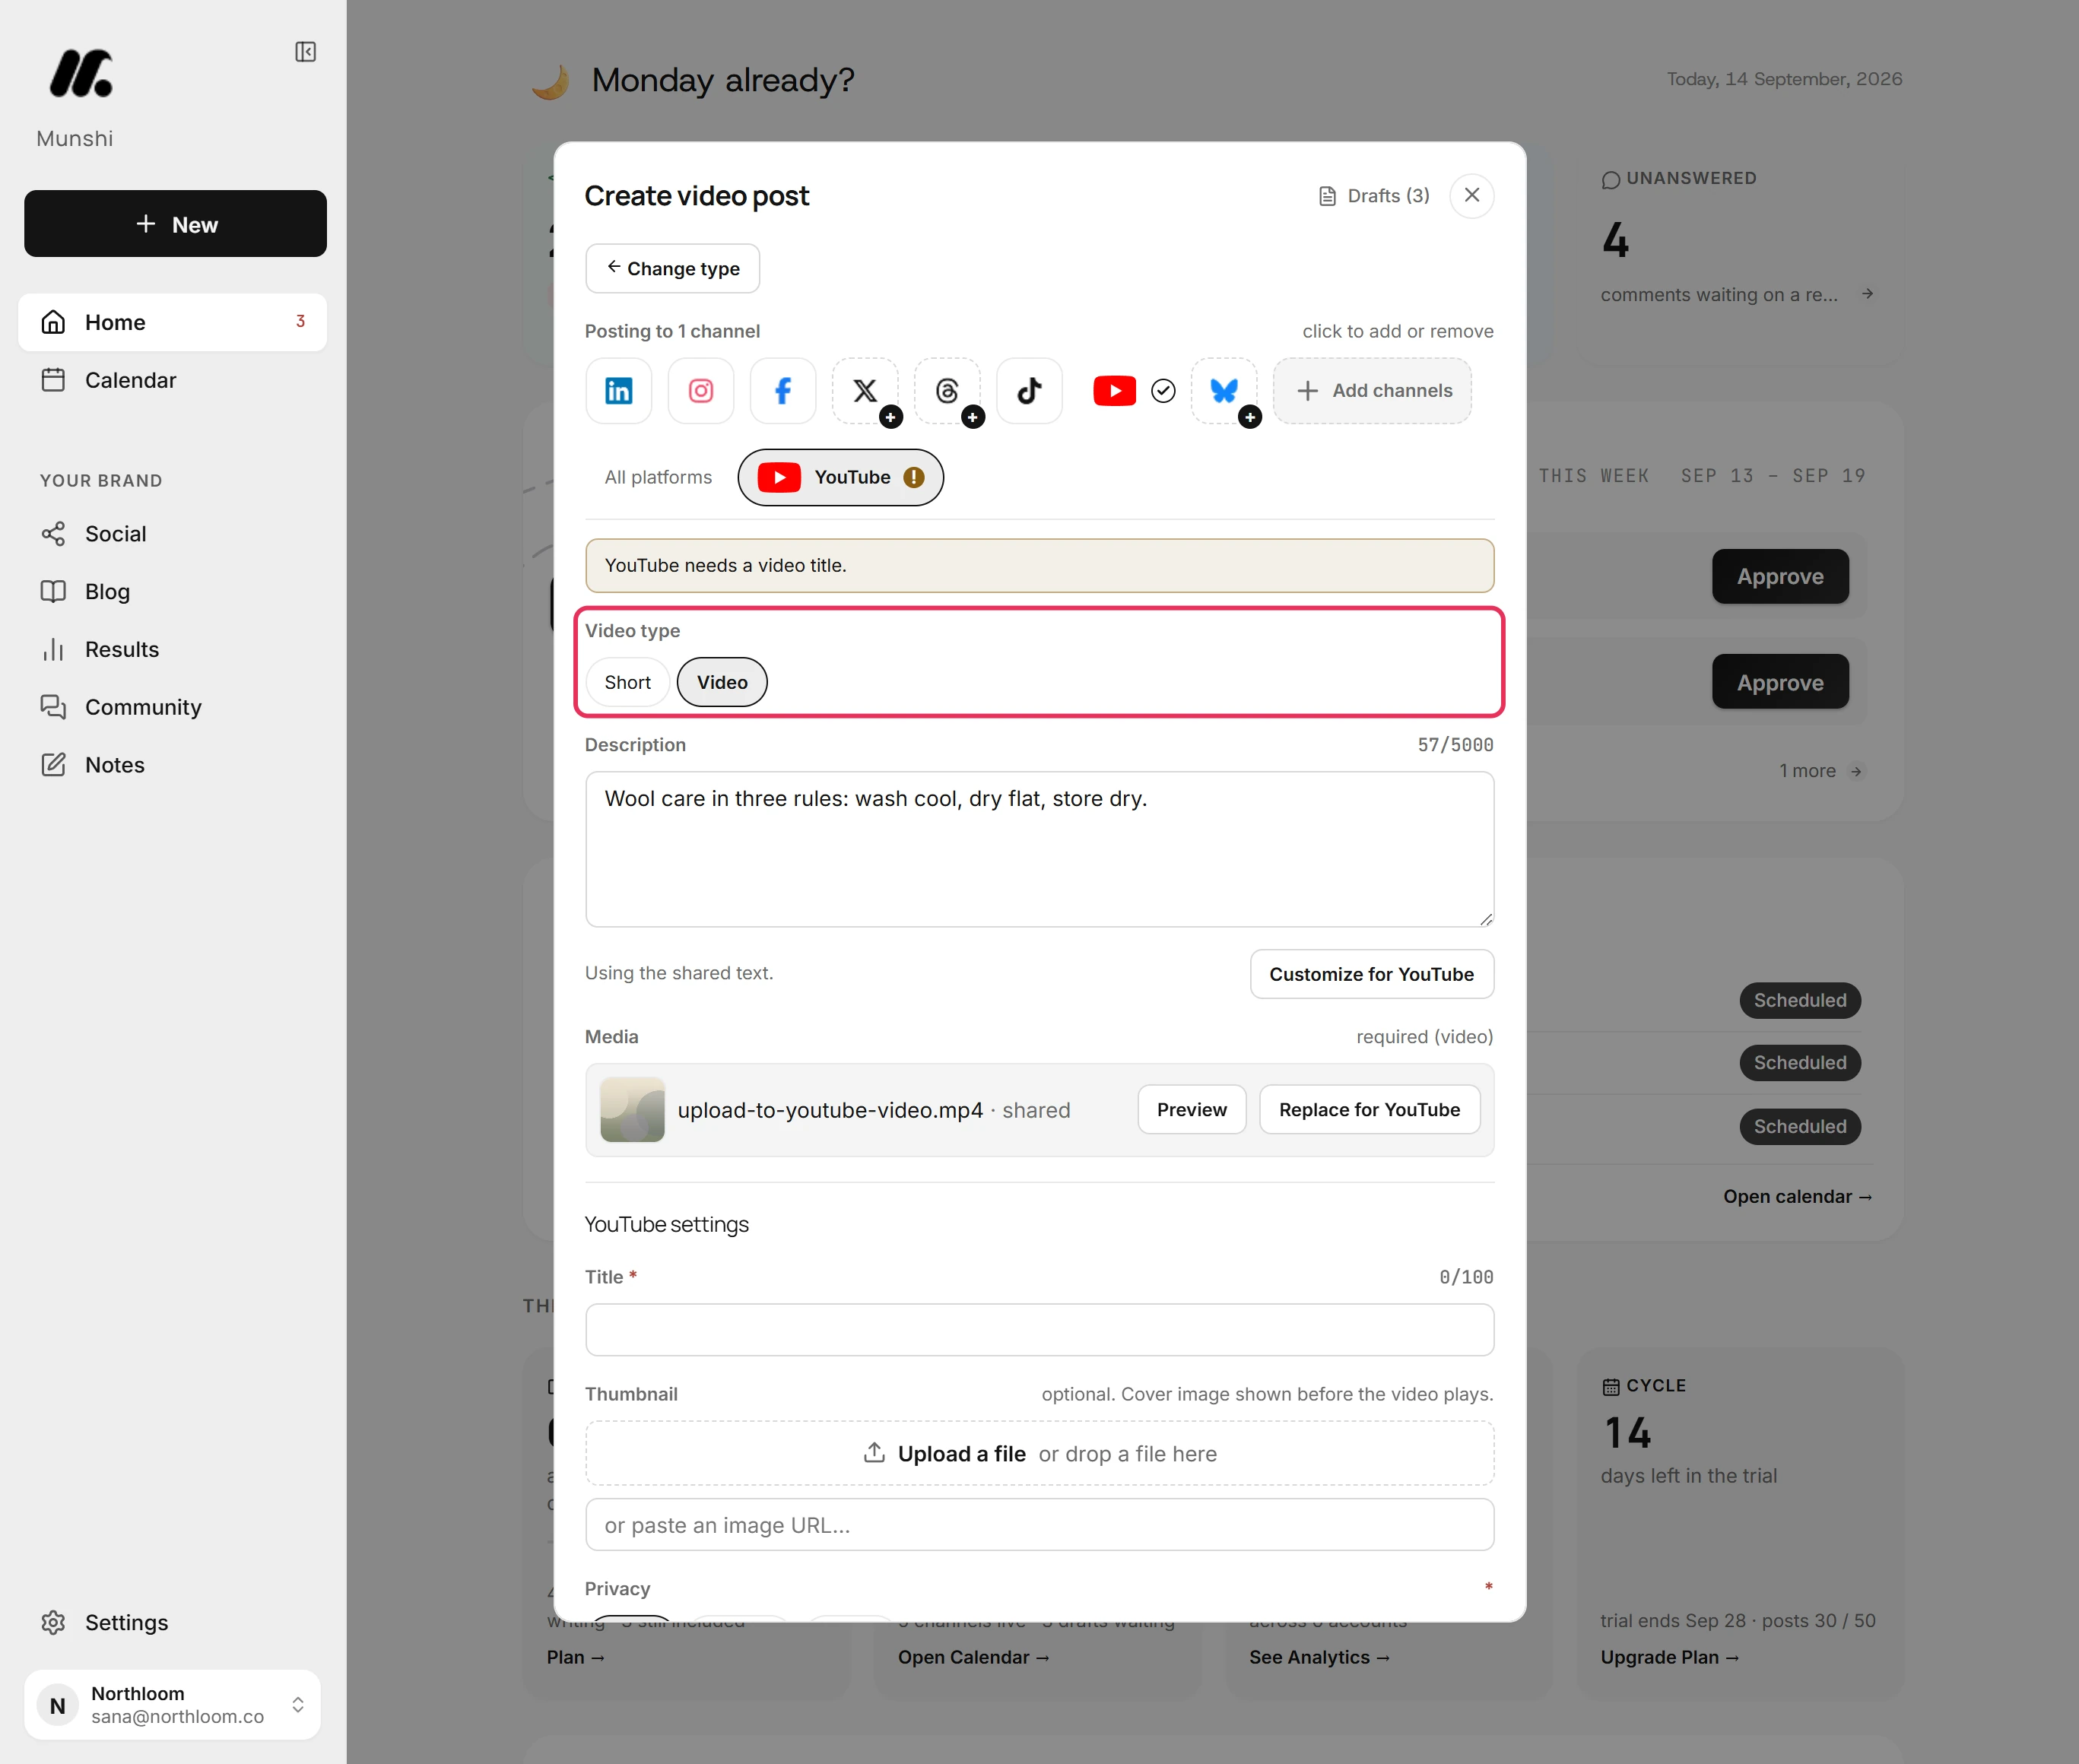
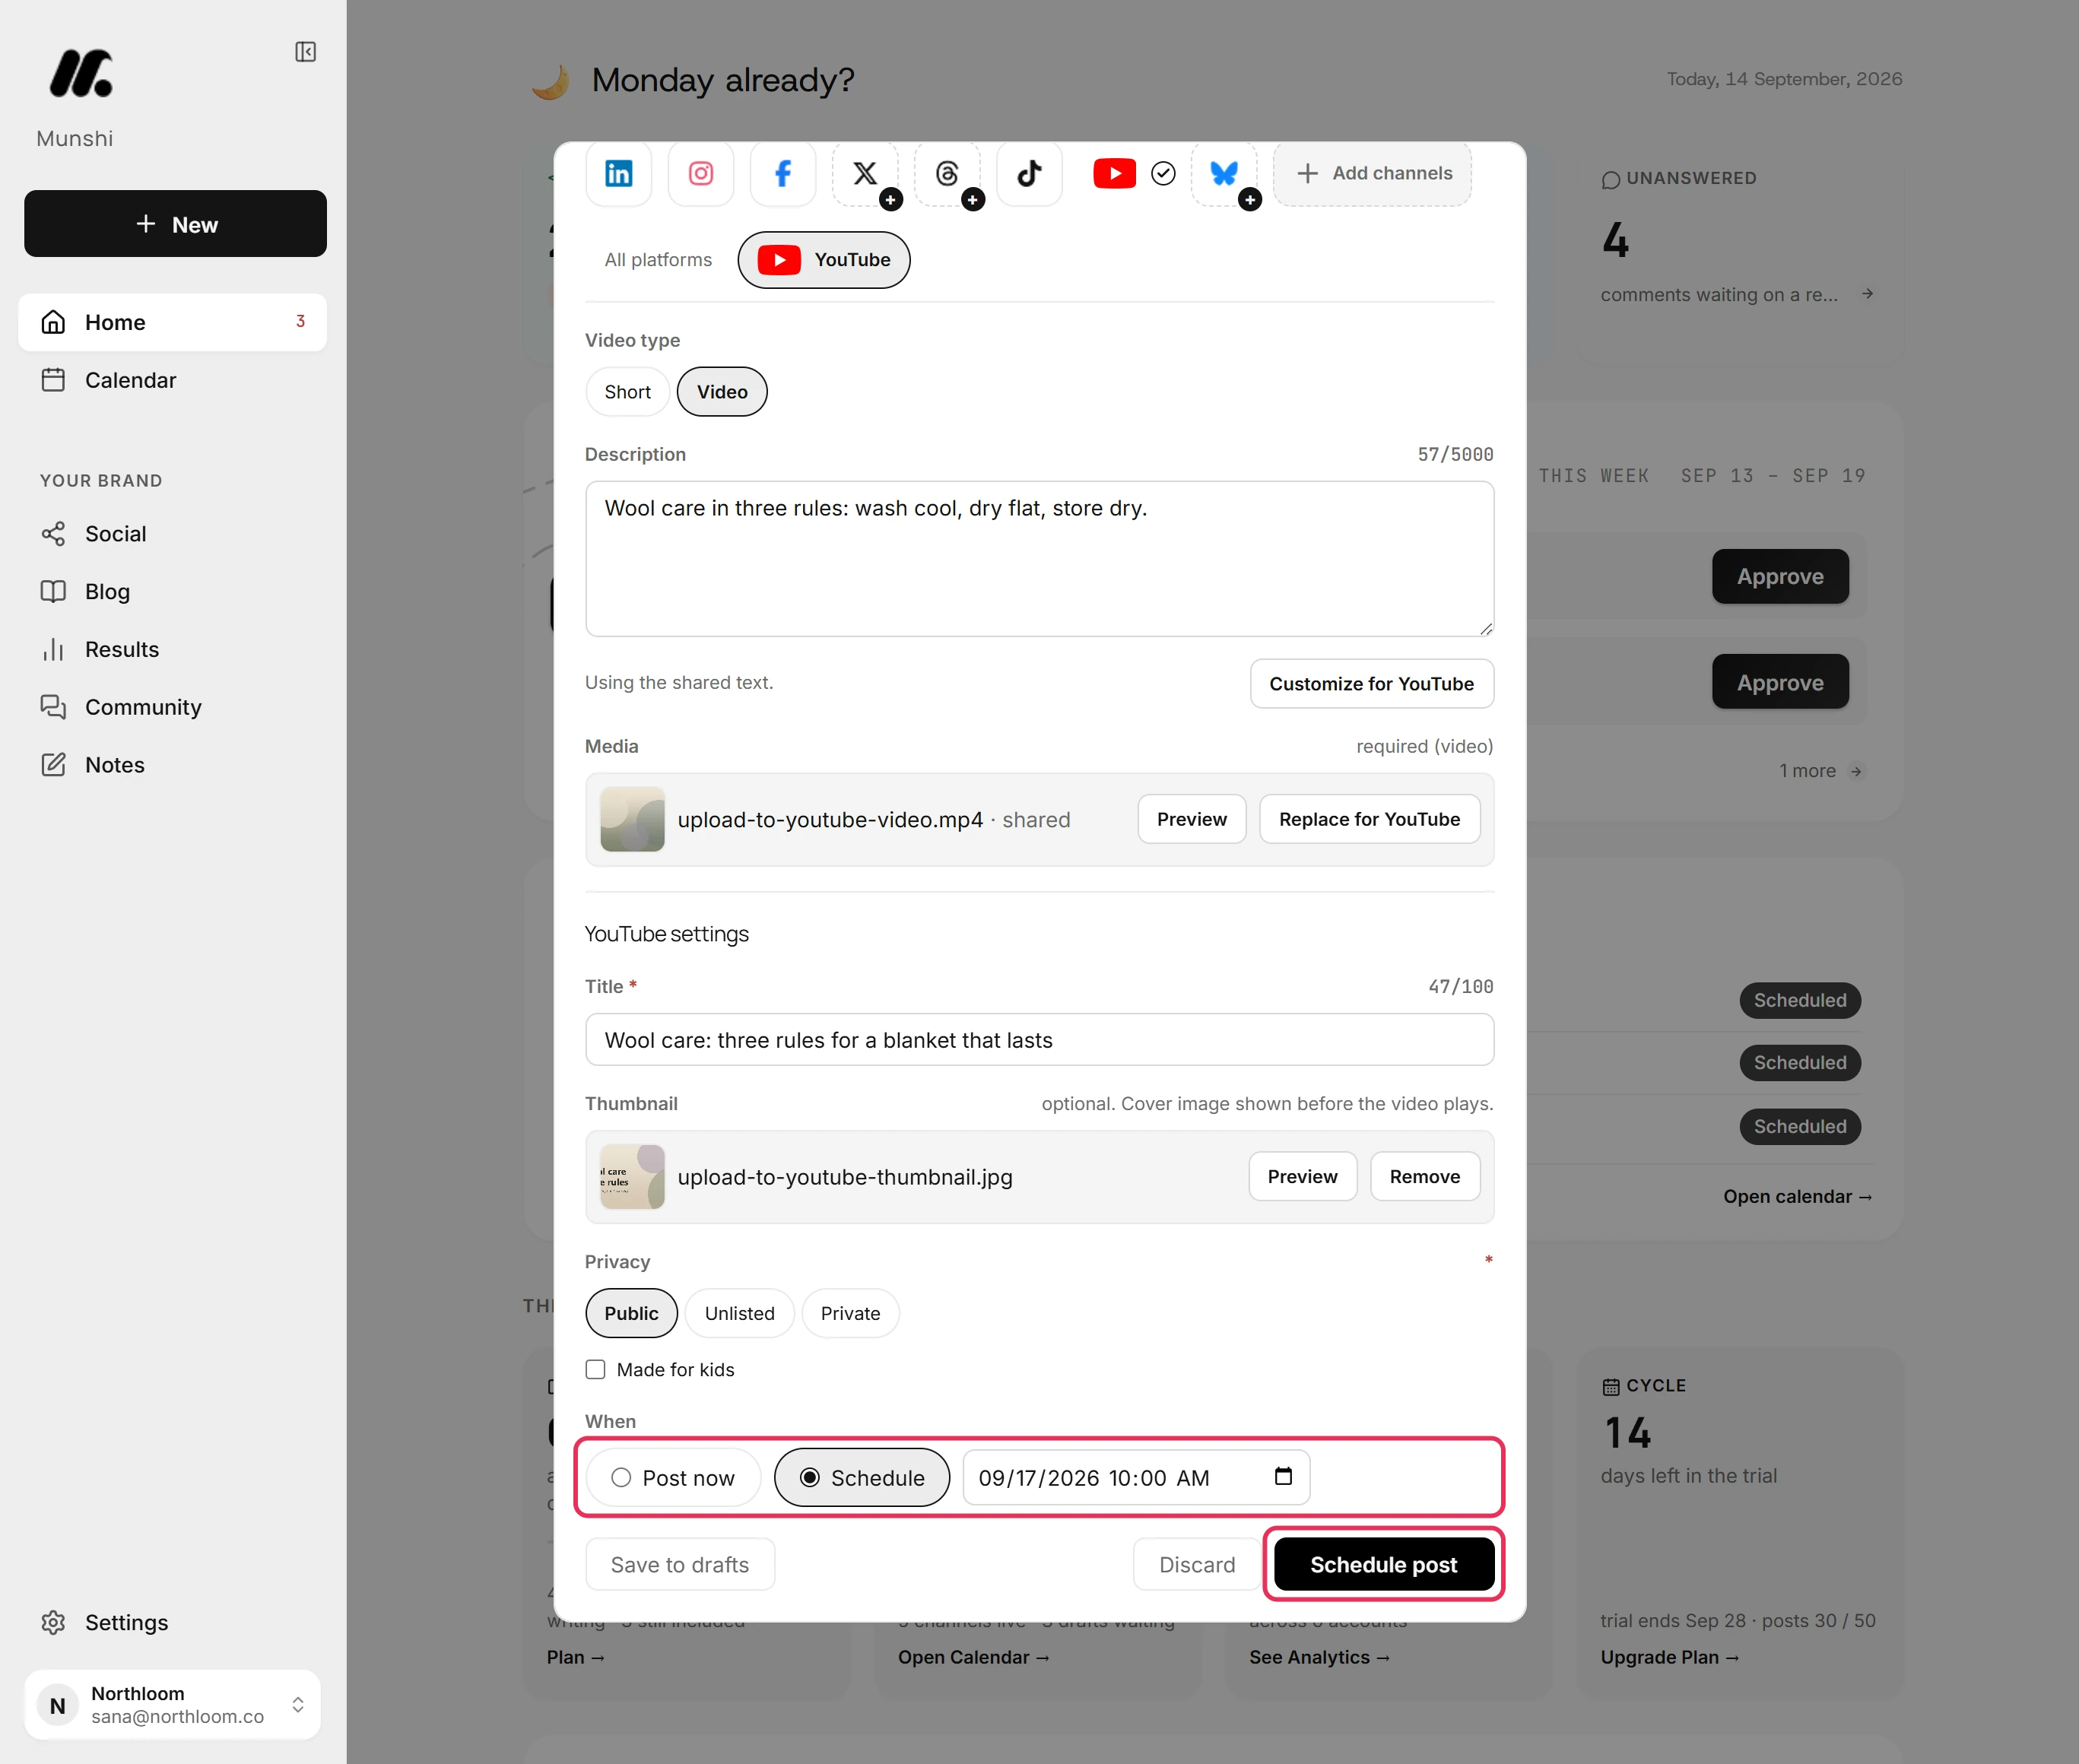
Open the YouTube tab. Video type starts on Short. Pick Video for a regular upload.
-
Type a title into Title, up to 100 characters. YouTube needs a title on every upload. Munshi does not schedule the video without one.
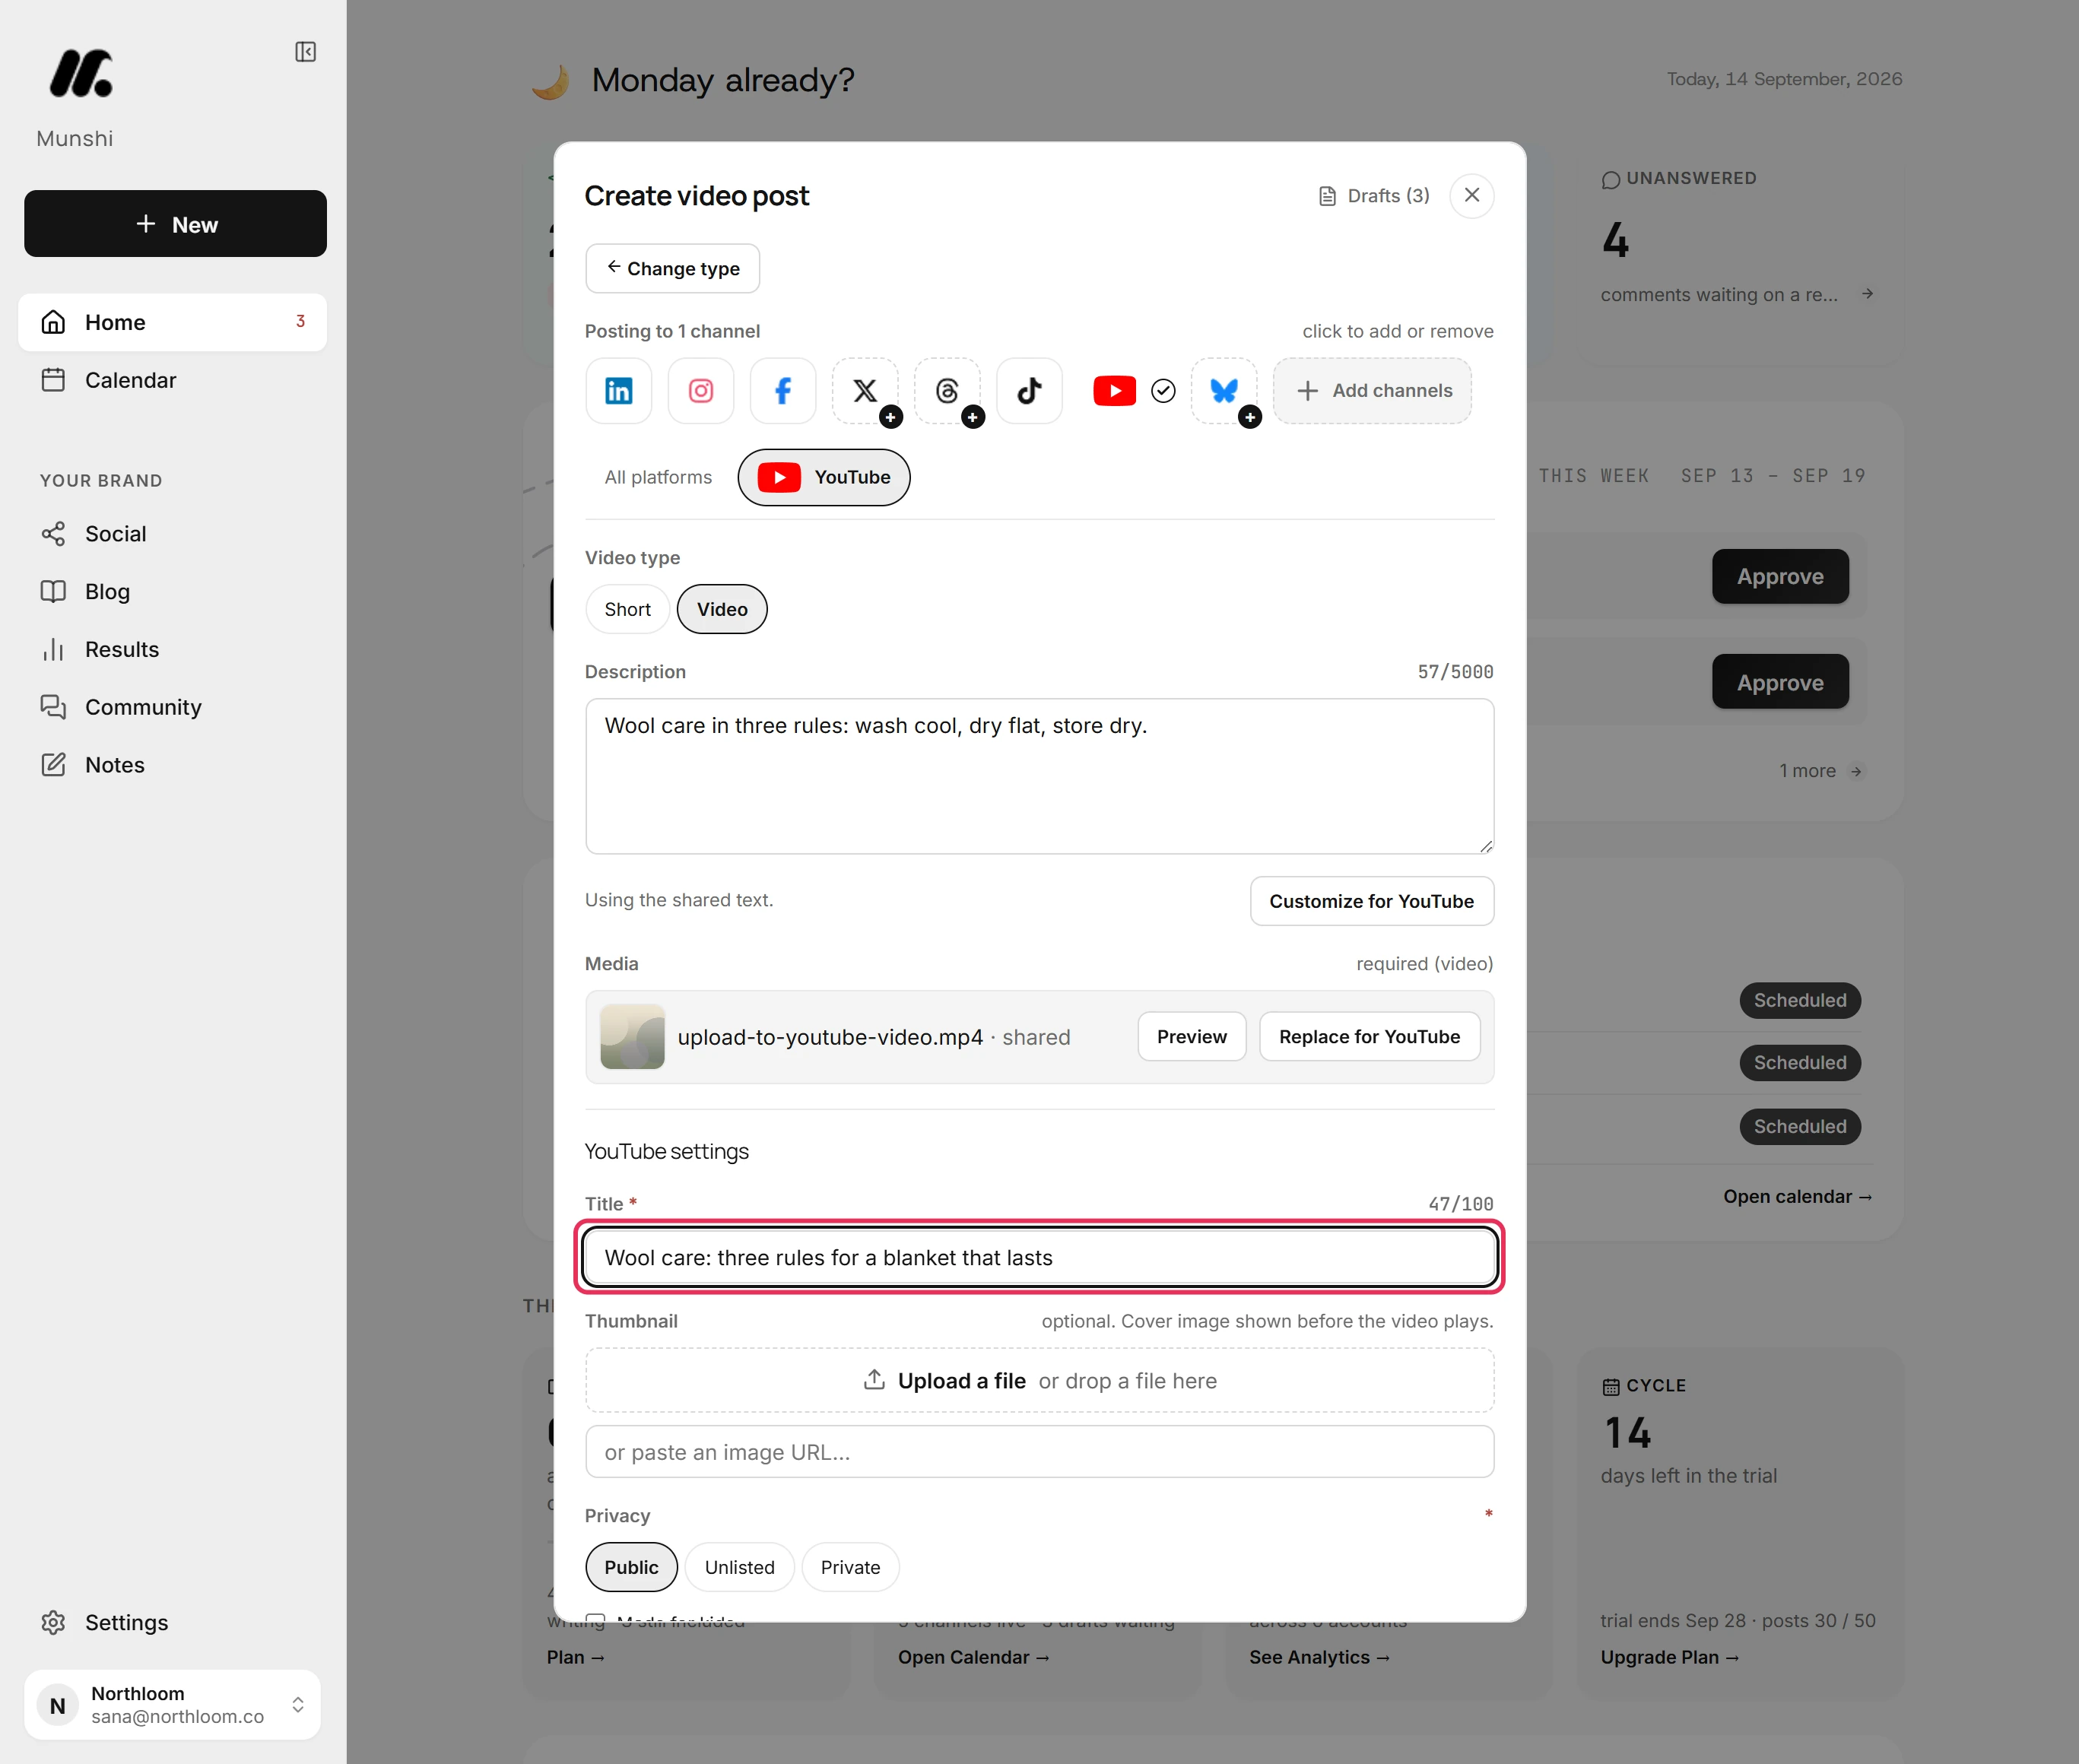
-
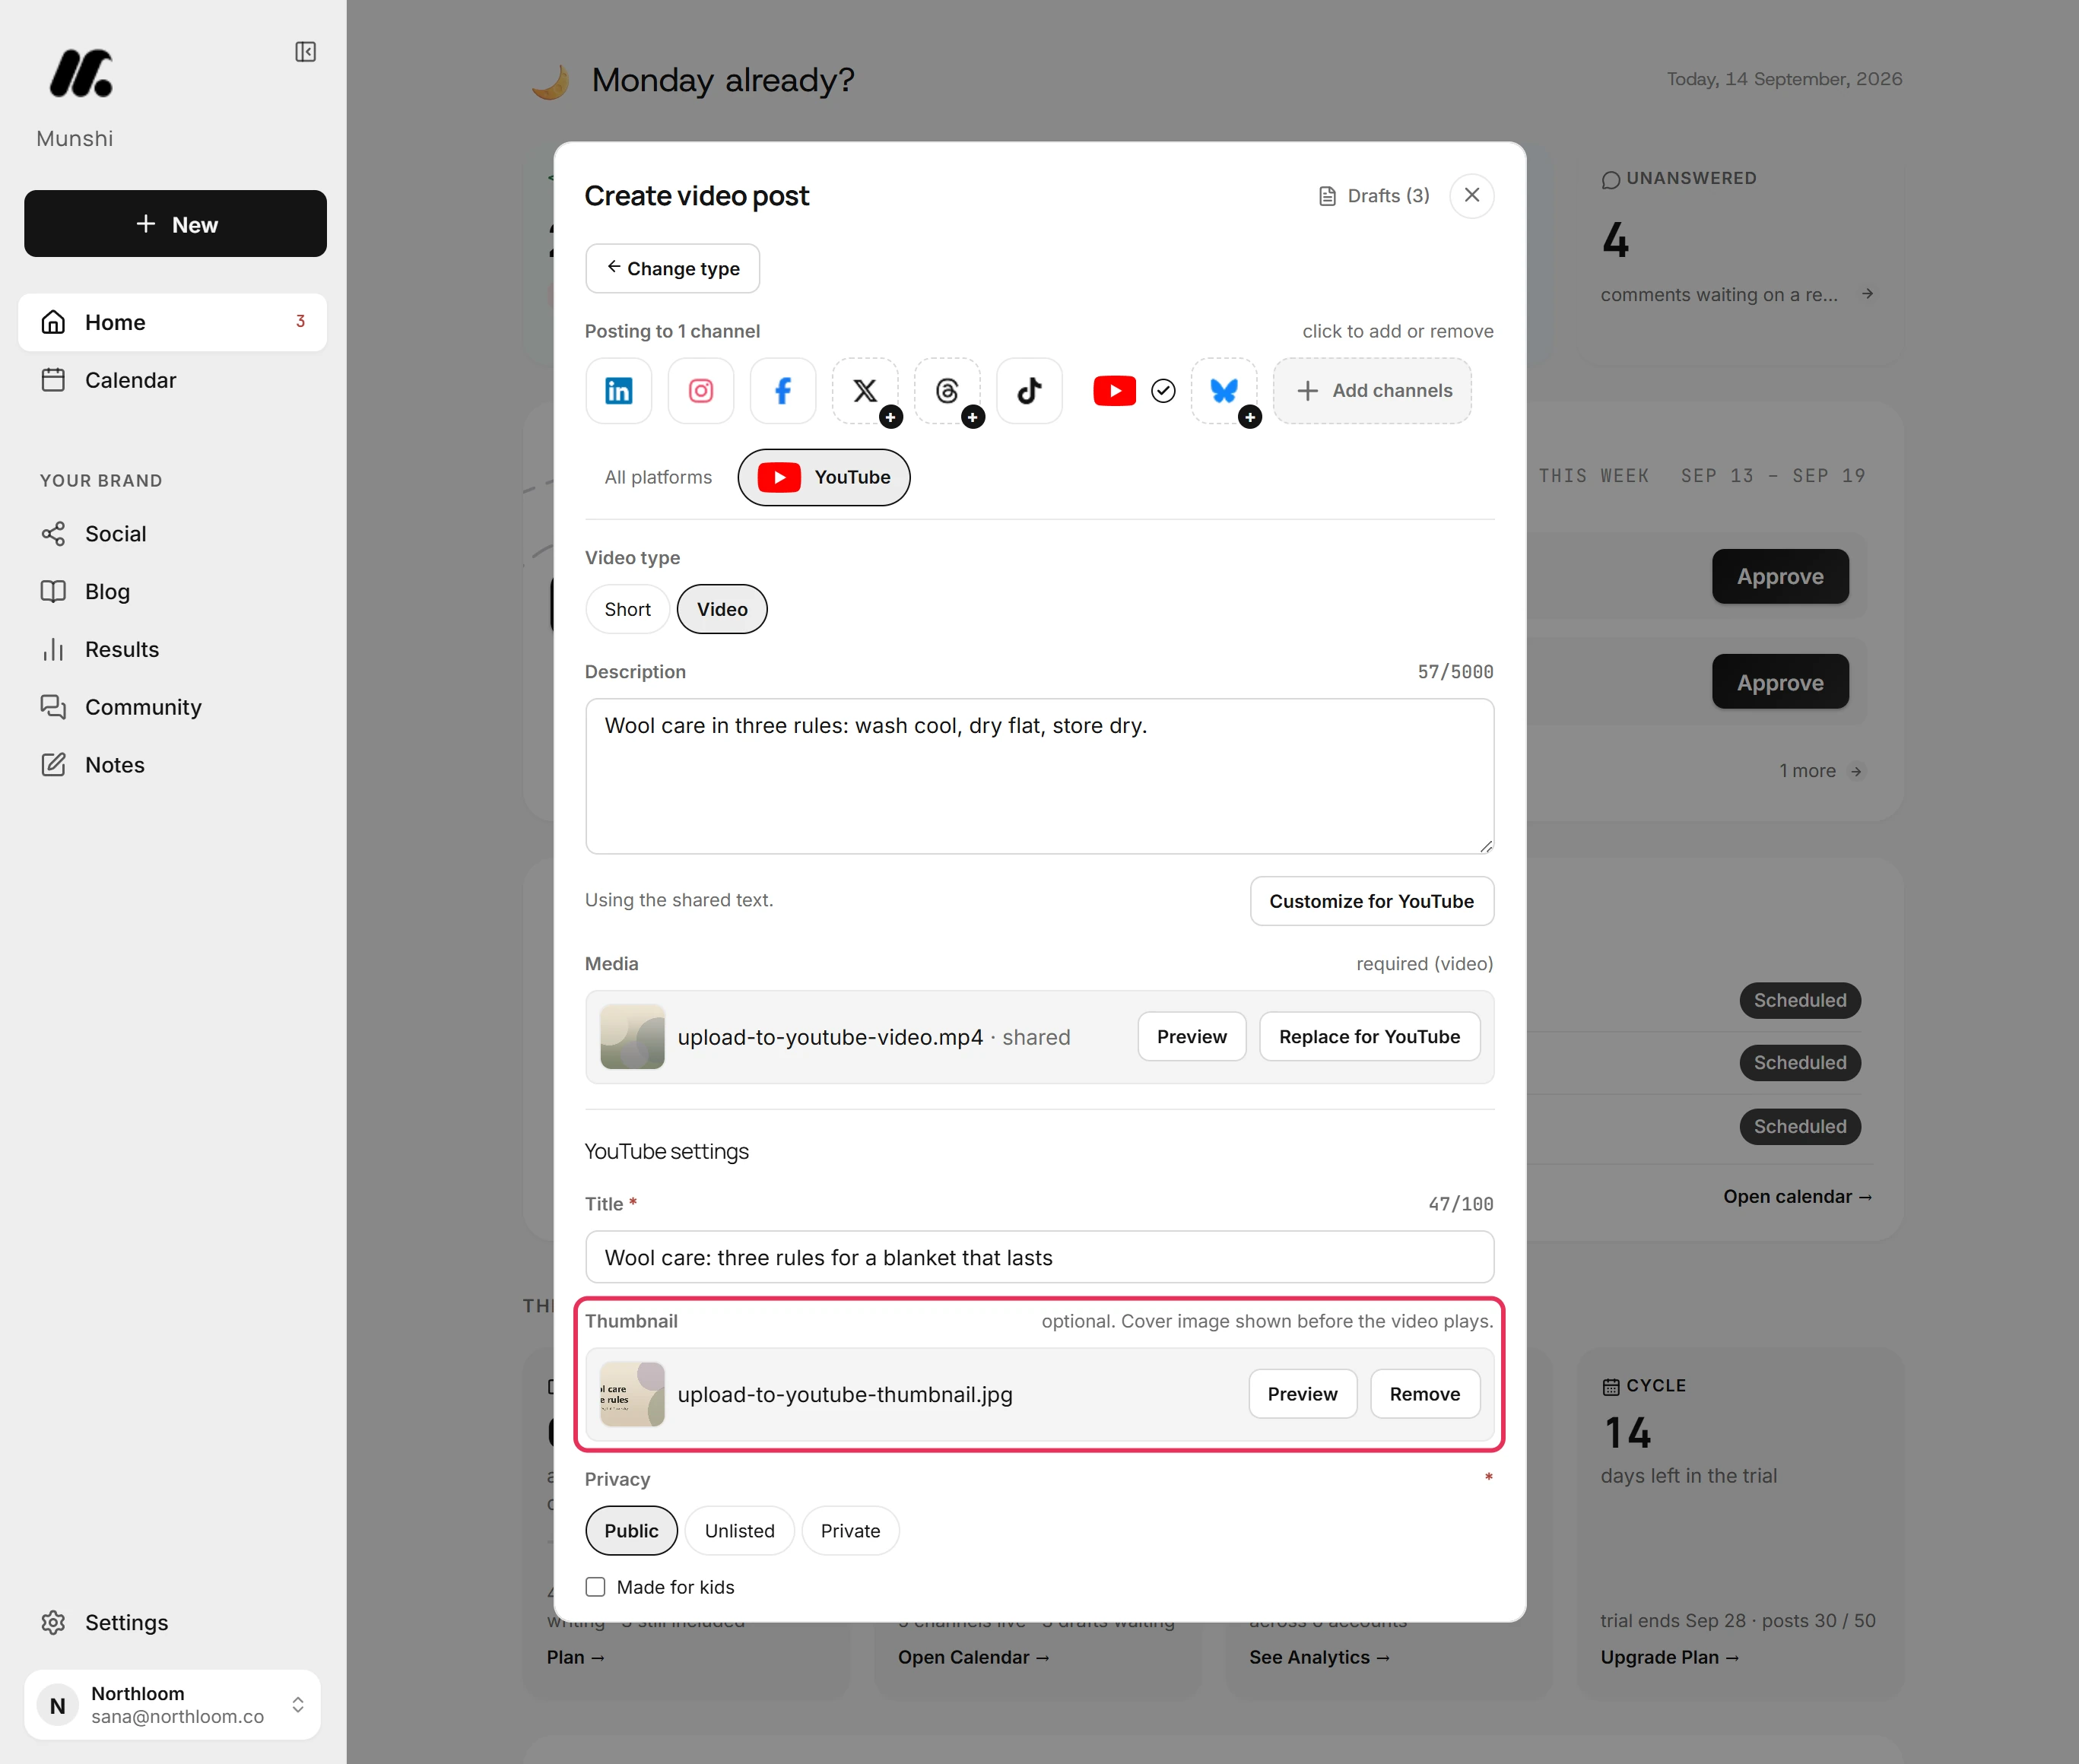
Under Thumbnail, click Upload a file and pick the cover picture. You can also paste the address of one. It is optional, and Remove takes it off again.
-
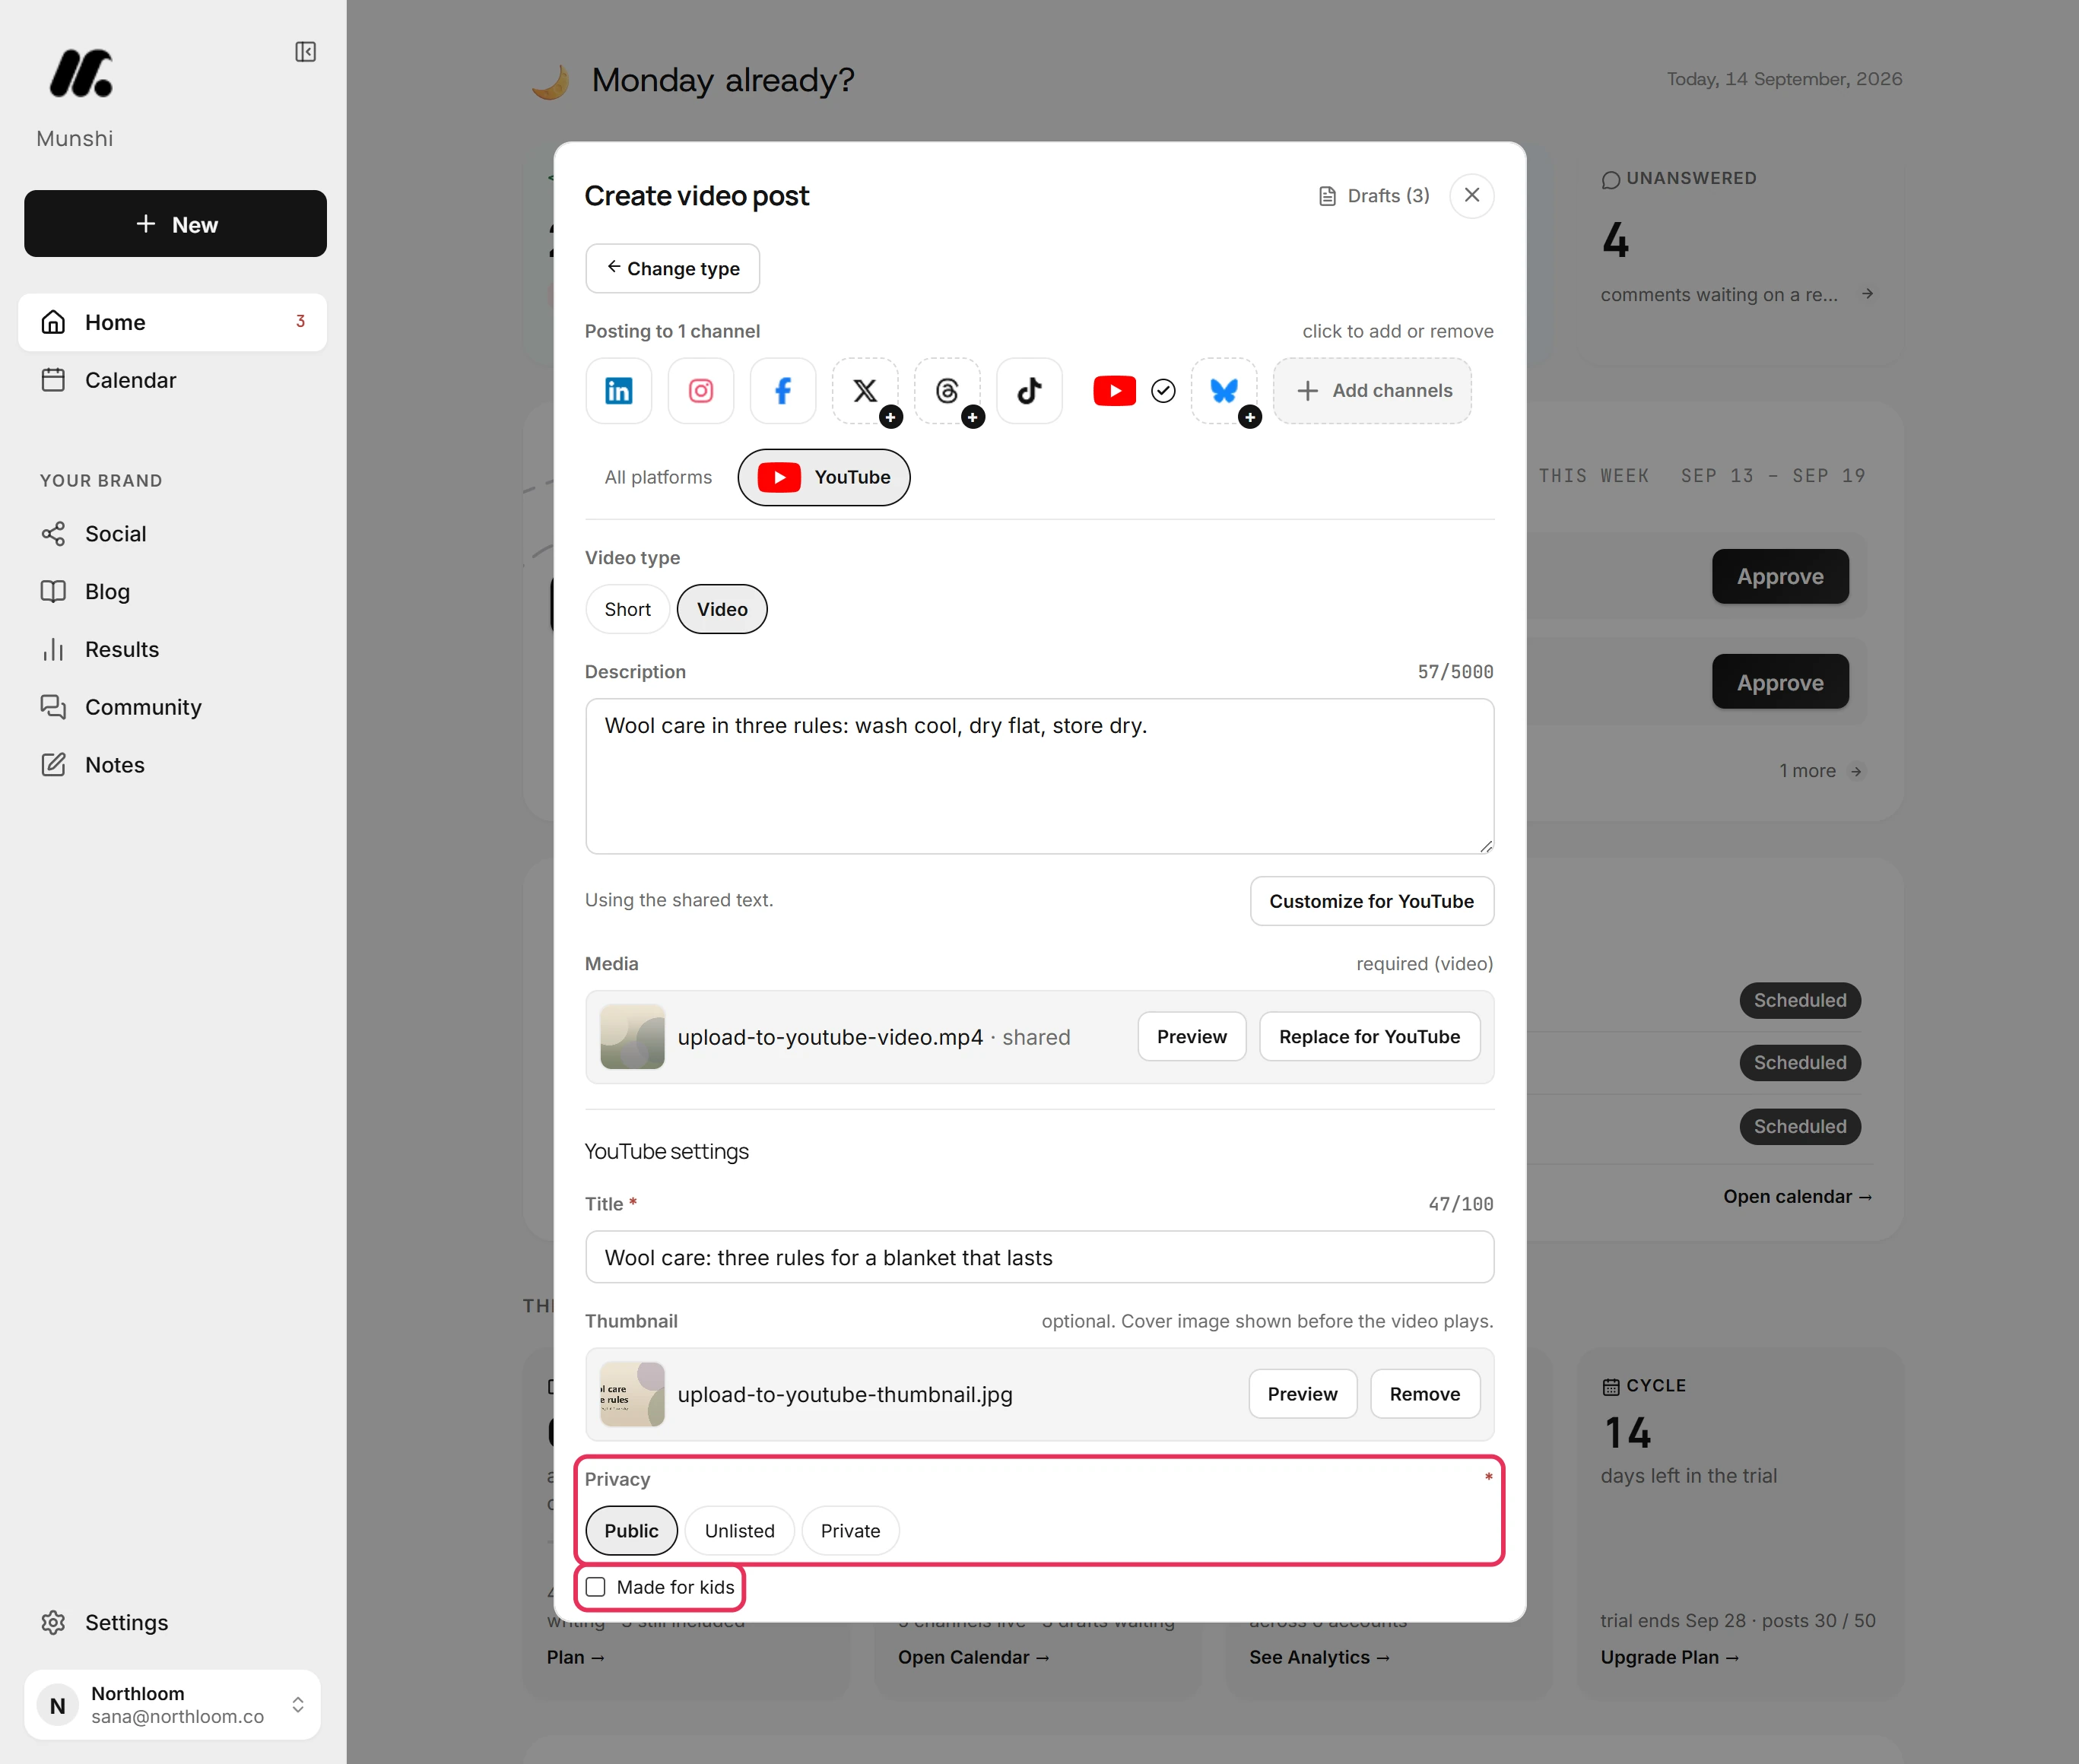
Privacy starts on Public. If the video should not be public, pick Unlisted or Private. Tick Made for kids only if the video is made for children. Every upload tells YouTube one way or the other.
-
Pick Schedule and set the date and time. Munshi reads the time in your workspace's time zone. To upload the video straight away, pick Post now instead.
-
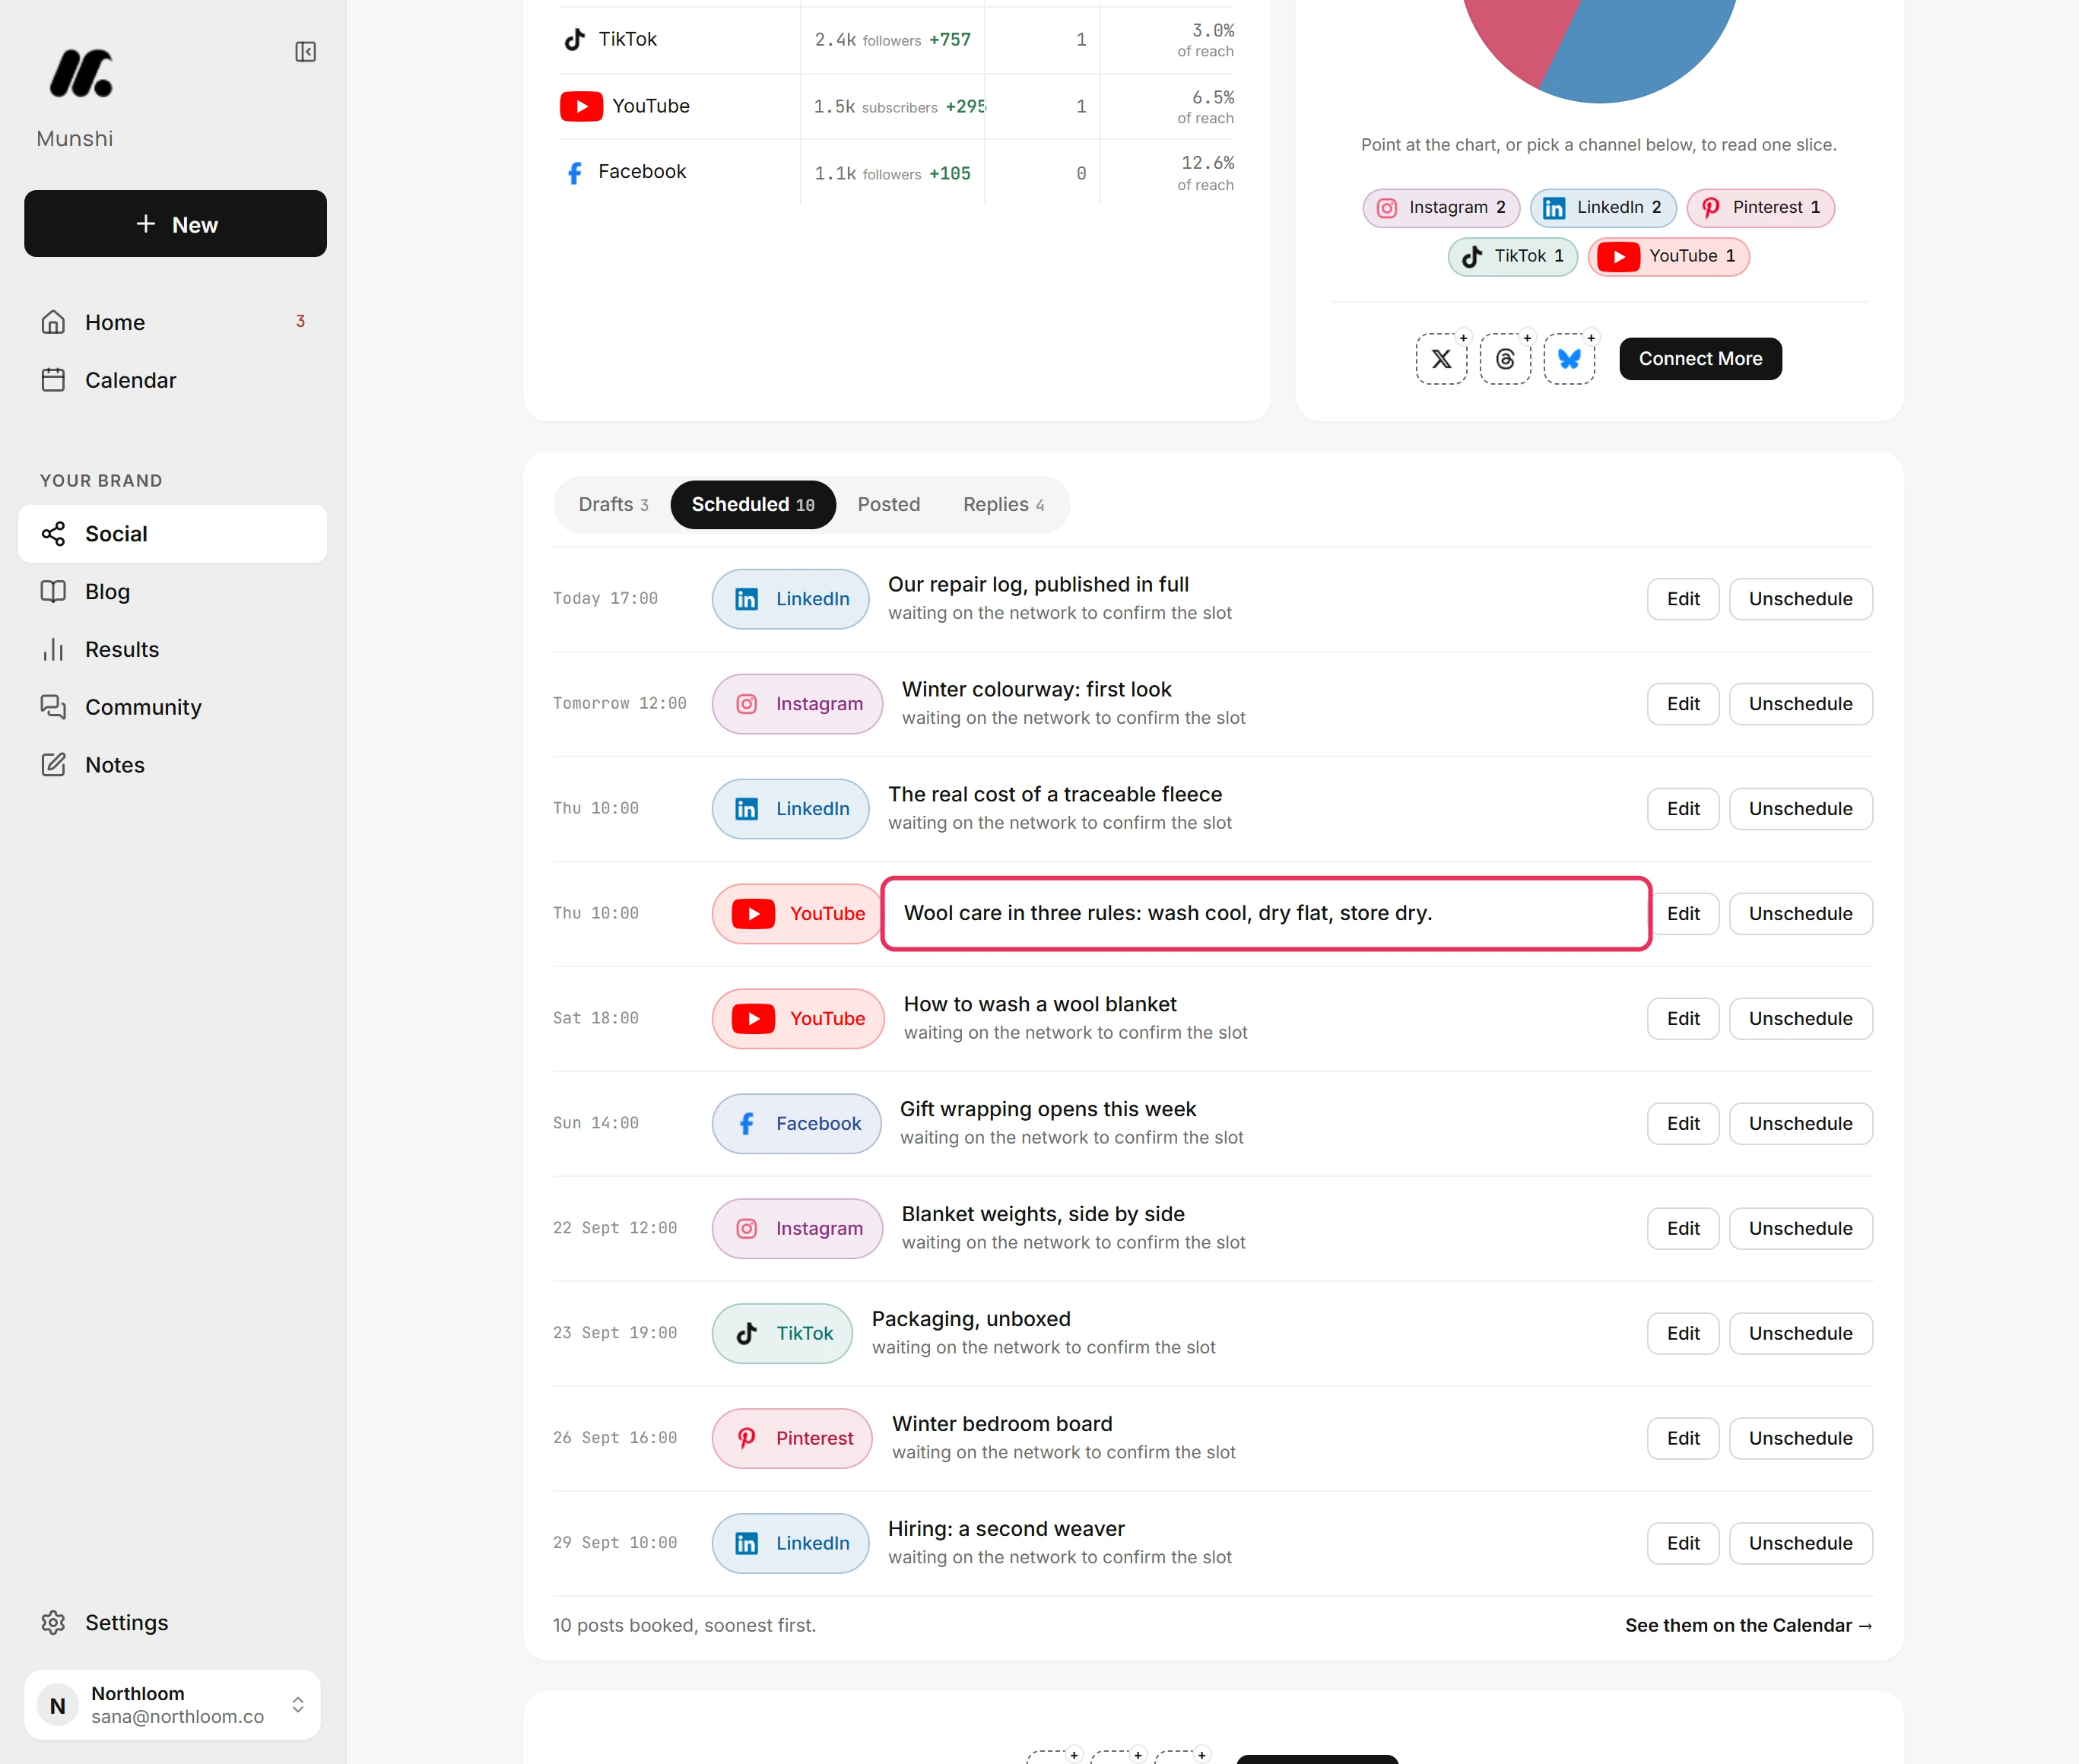
Click Schedule post, and Munshi takes you to Social. The upload waits on the Scheduled tab with its time. Edit reopens it to change the title, the thumbnail or the time.
Where you are now
The video is booked on your YouTube channel with its description, title, thumbnail and privacy set. It waits in the Scheduled queue until its time, then goes up on its own.
If something goes wrong
“YouTube needs a video title.”
Fill in the Title field under YouTube settings. The mark on the YouTube tab then clears.
“Nothing to upload yet.”
Write the description in the caption box on All platforms, or in the YouTube tab. The description is empty.
“use a JPG, PNG, WebP or GIF image for a thumbnail.”
Export a frame of the video as a JPG or PNG and upload that. The file you picked for the thumbnail is not a picture.
“Munshi's daily YouTube upload quota is used up for today”
Wait until after midnight Pacific time, then click Retry on Home. The quota is shared by every Munshi workspace, not your channel's. Until then, the upload is marked failed with this reason. The limit, explained.
Try it on your own brand this week.
Munshi Social, the AI content marketing engine for small teams, plans, writes, publishes, and tracks your blog and socials. The guide above shows the real app, not a mock-up.
Start your workspace