How to write an article with the ten-step writer
Munshi writes a blog article in ten steps. Regenerate or edit any step, run the rest in the background, then read the SEO and GEO scores.
Before you start
- A topic in your blog plan that is not written yet. Topics come from your blog strategy, or you can add one of your own.
- Room in this cycle's article allowance. A new article counts once, the first time Munshi writes it. Regenerating or editing it never counts again (your monthly allowance).
-
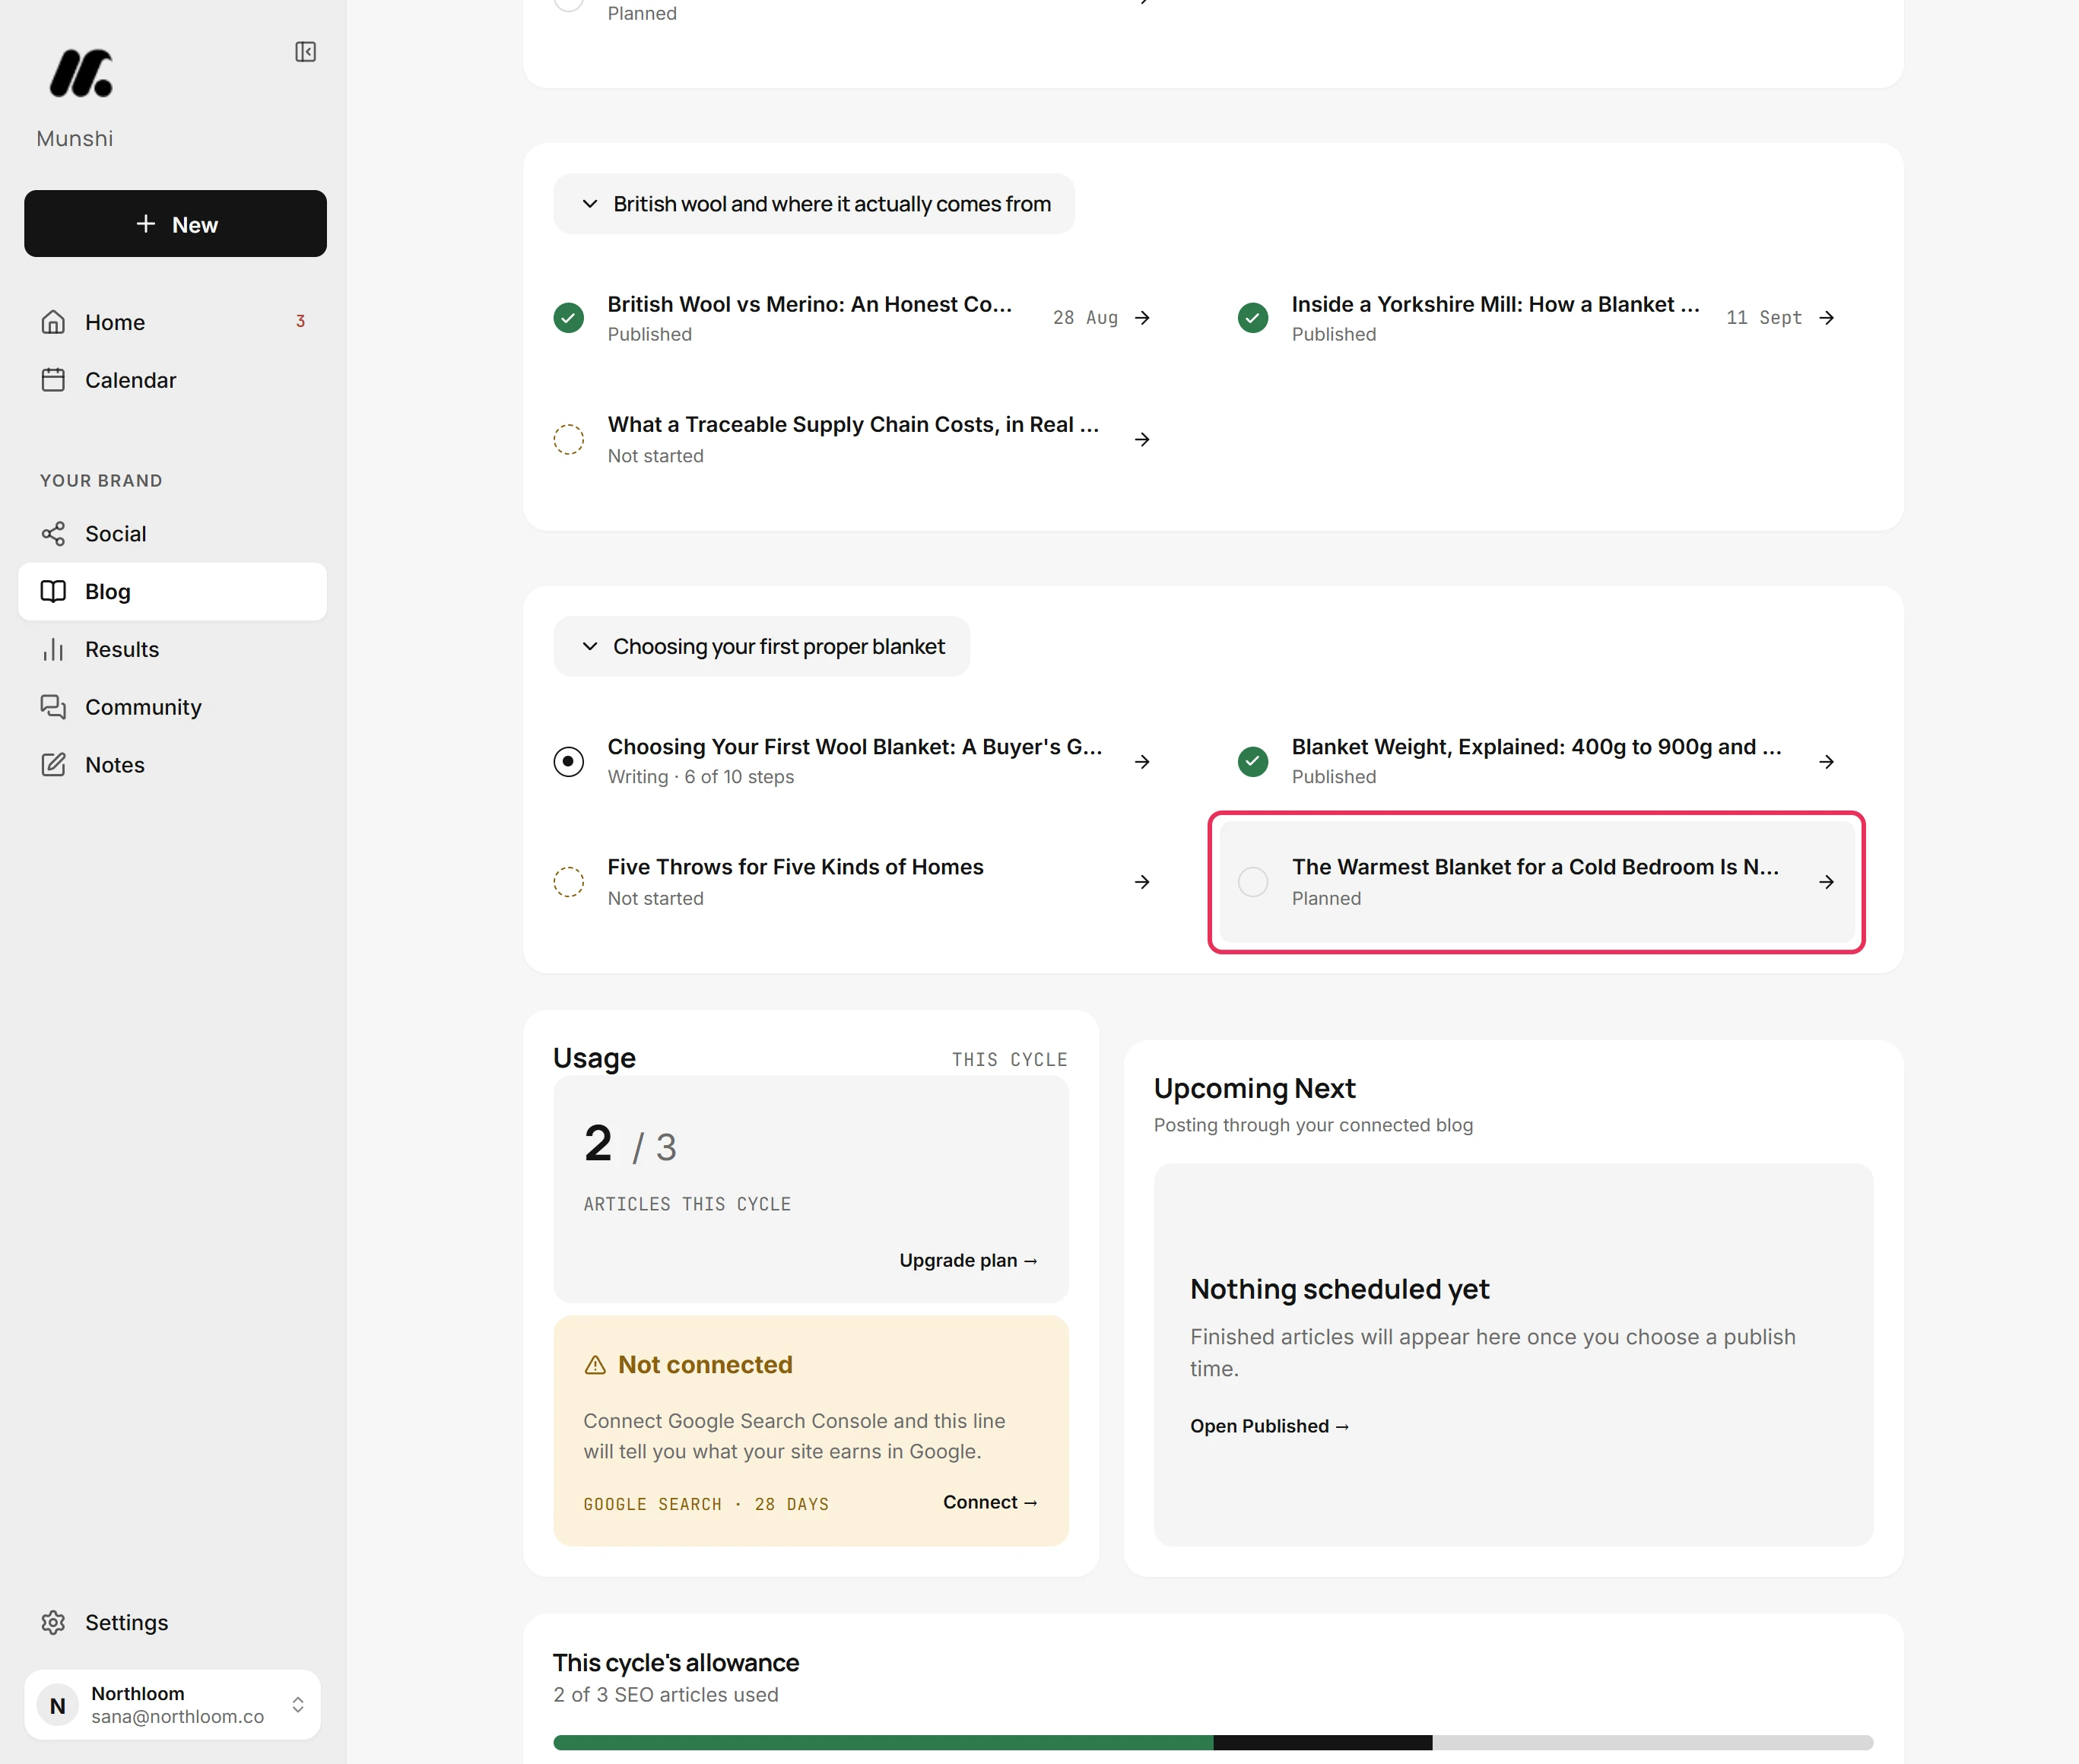
On the Blog Overview, click an article that reads Planned or Not started. It opens in the writer, with its ten steps down the left. They start with Topic & Angle Lock, SERP & Source Research and Outline & Heading Architecture. Next come Section-by-Section Drafting, SEO Optimization Pass and GEO Citability Pass. The last four are Meta, Title Tag & Schema, Internal Linking, Featured Image and Publish checklist & handoff.
-
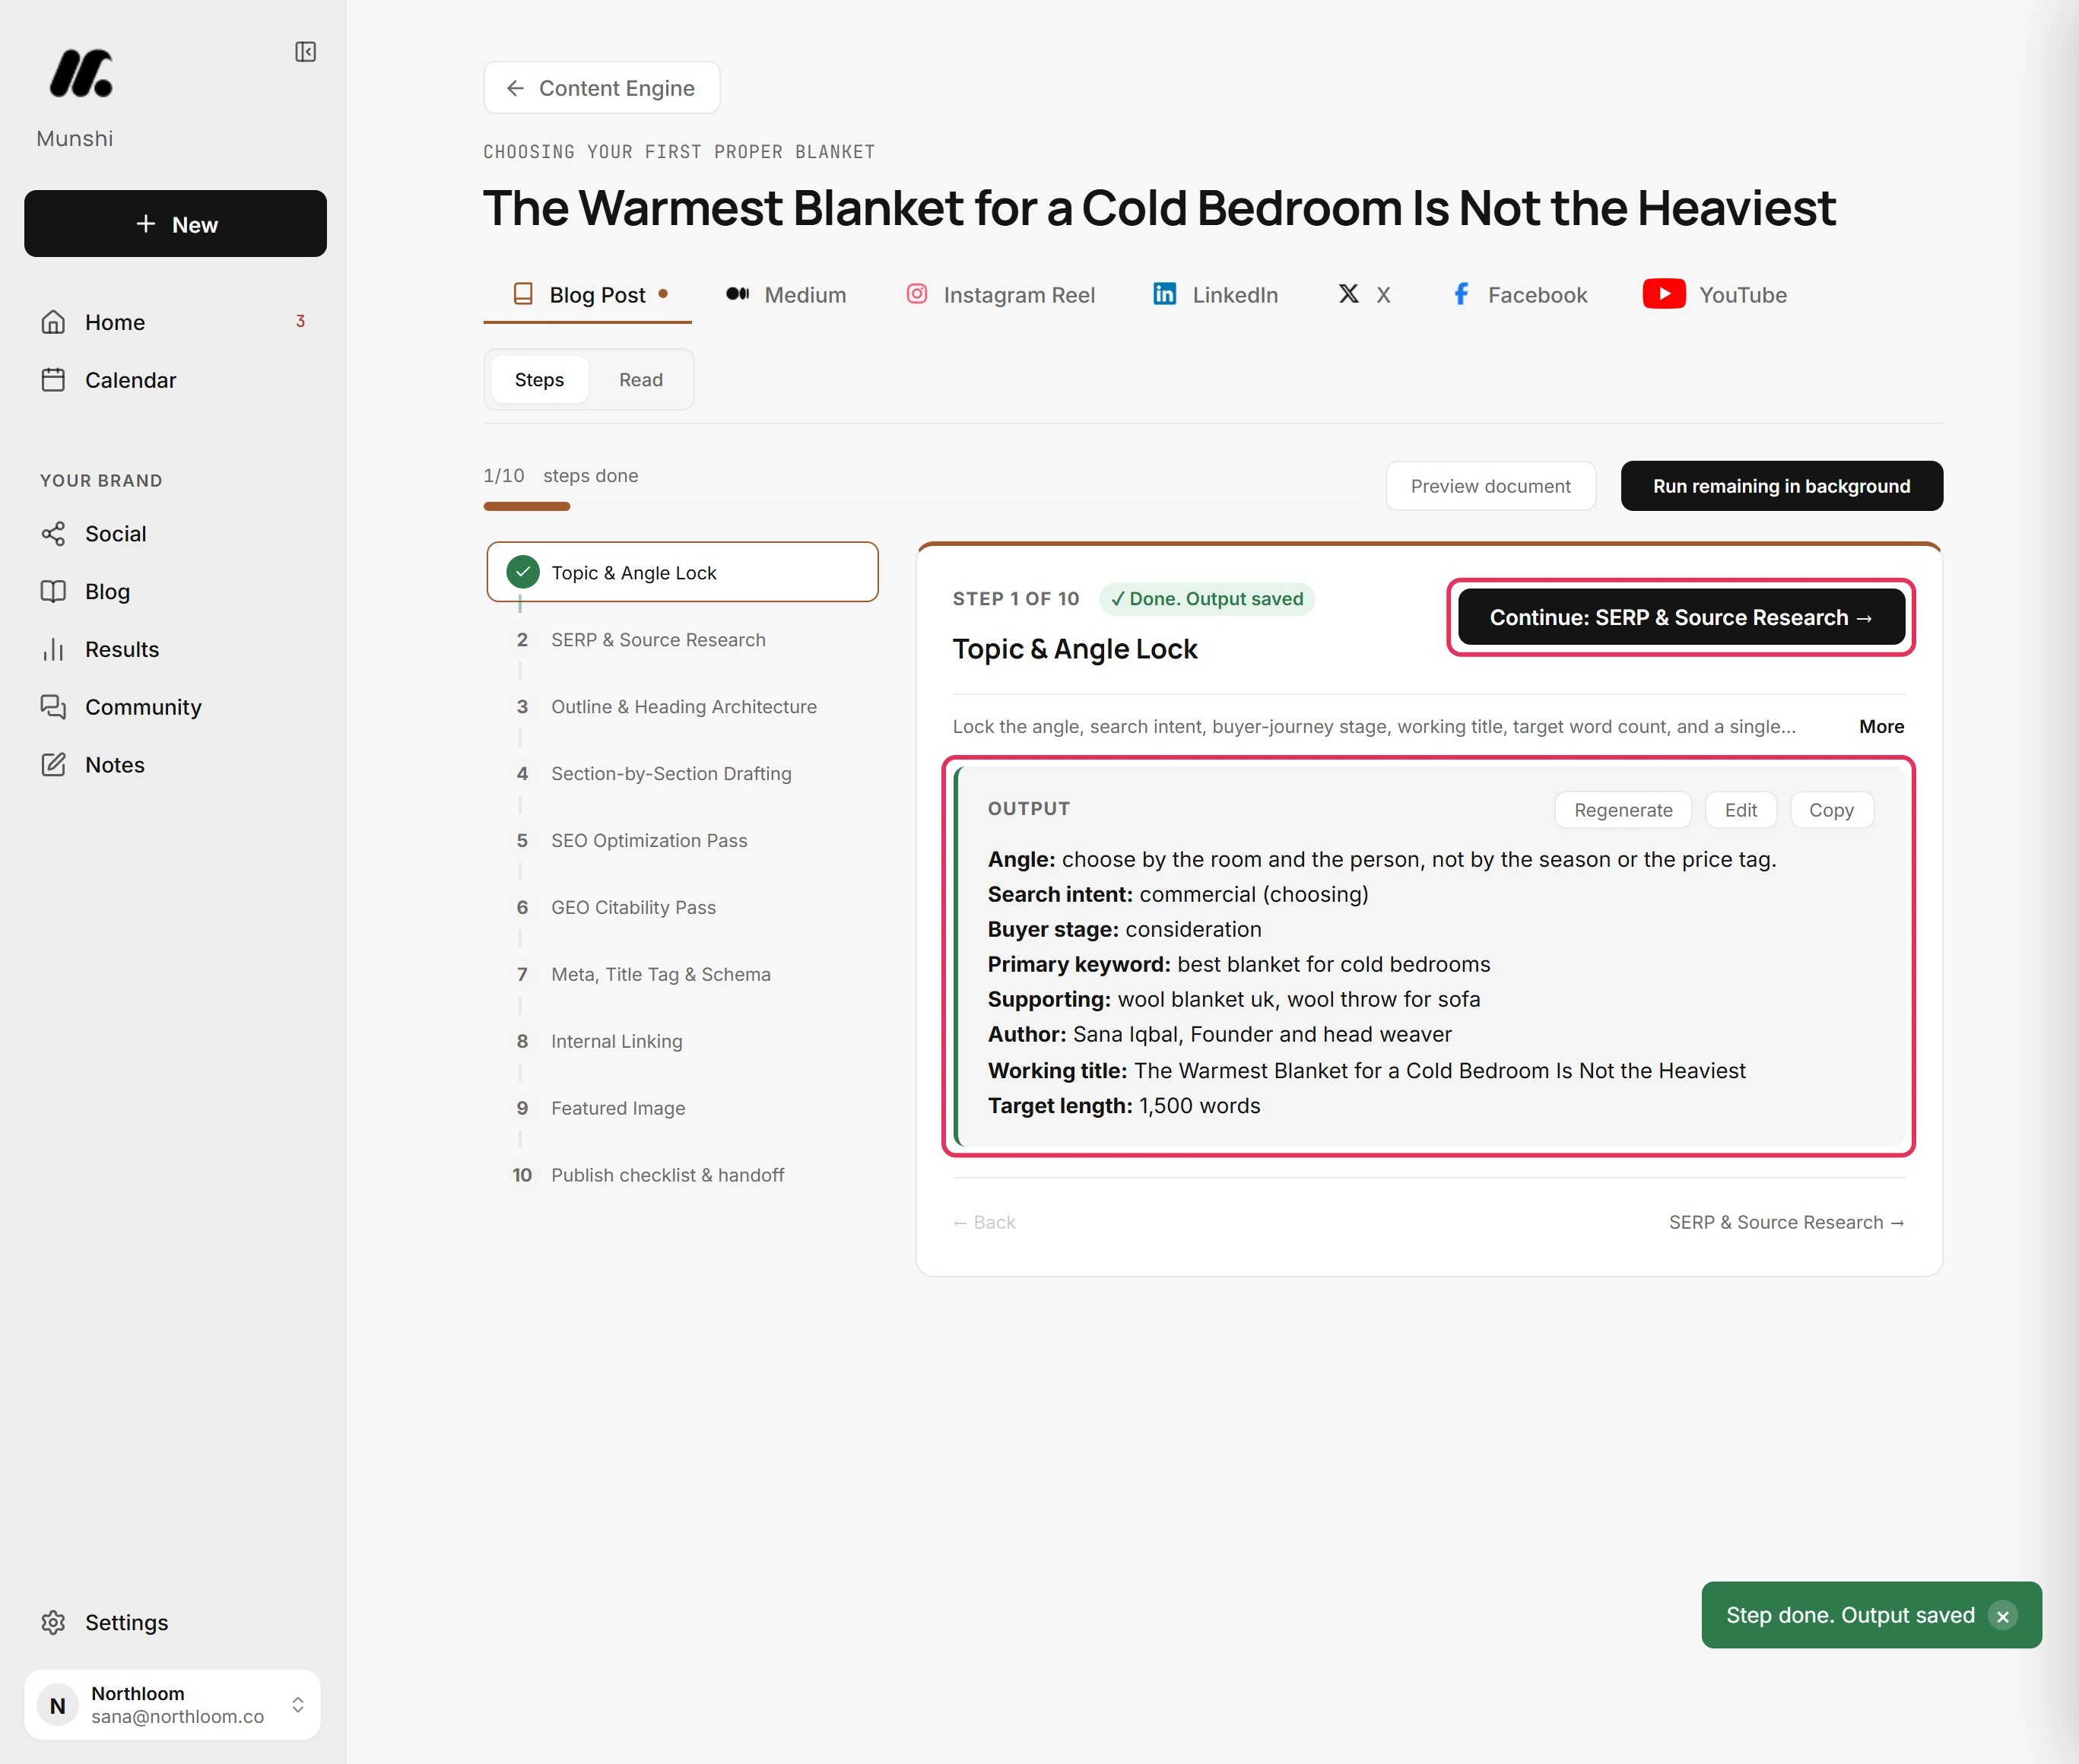
Each step says what it does under its name, with one button to write it, here Lock angle & brief. Munshi writes the step in a few seconds and saves it. Continue moves on to the next one.
-
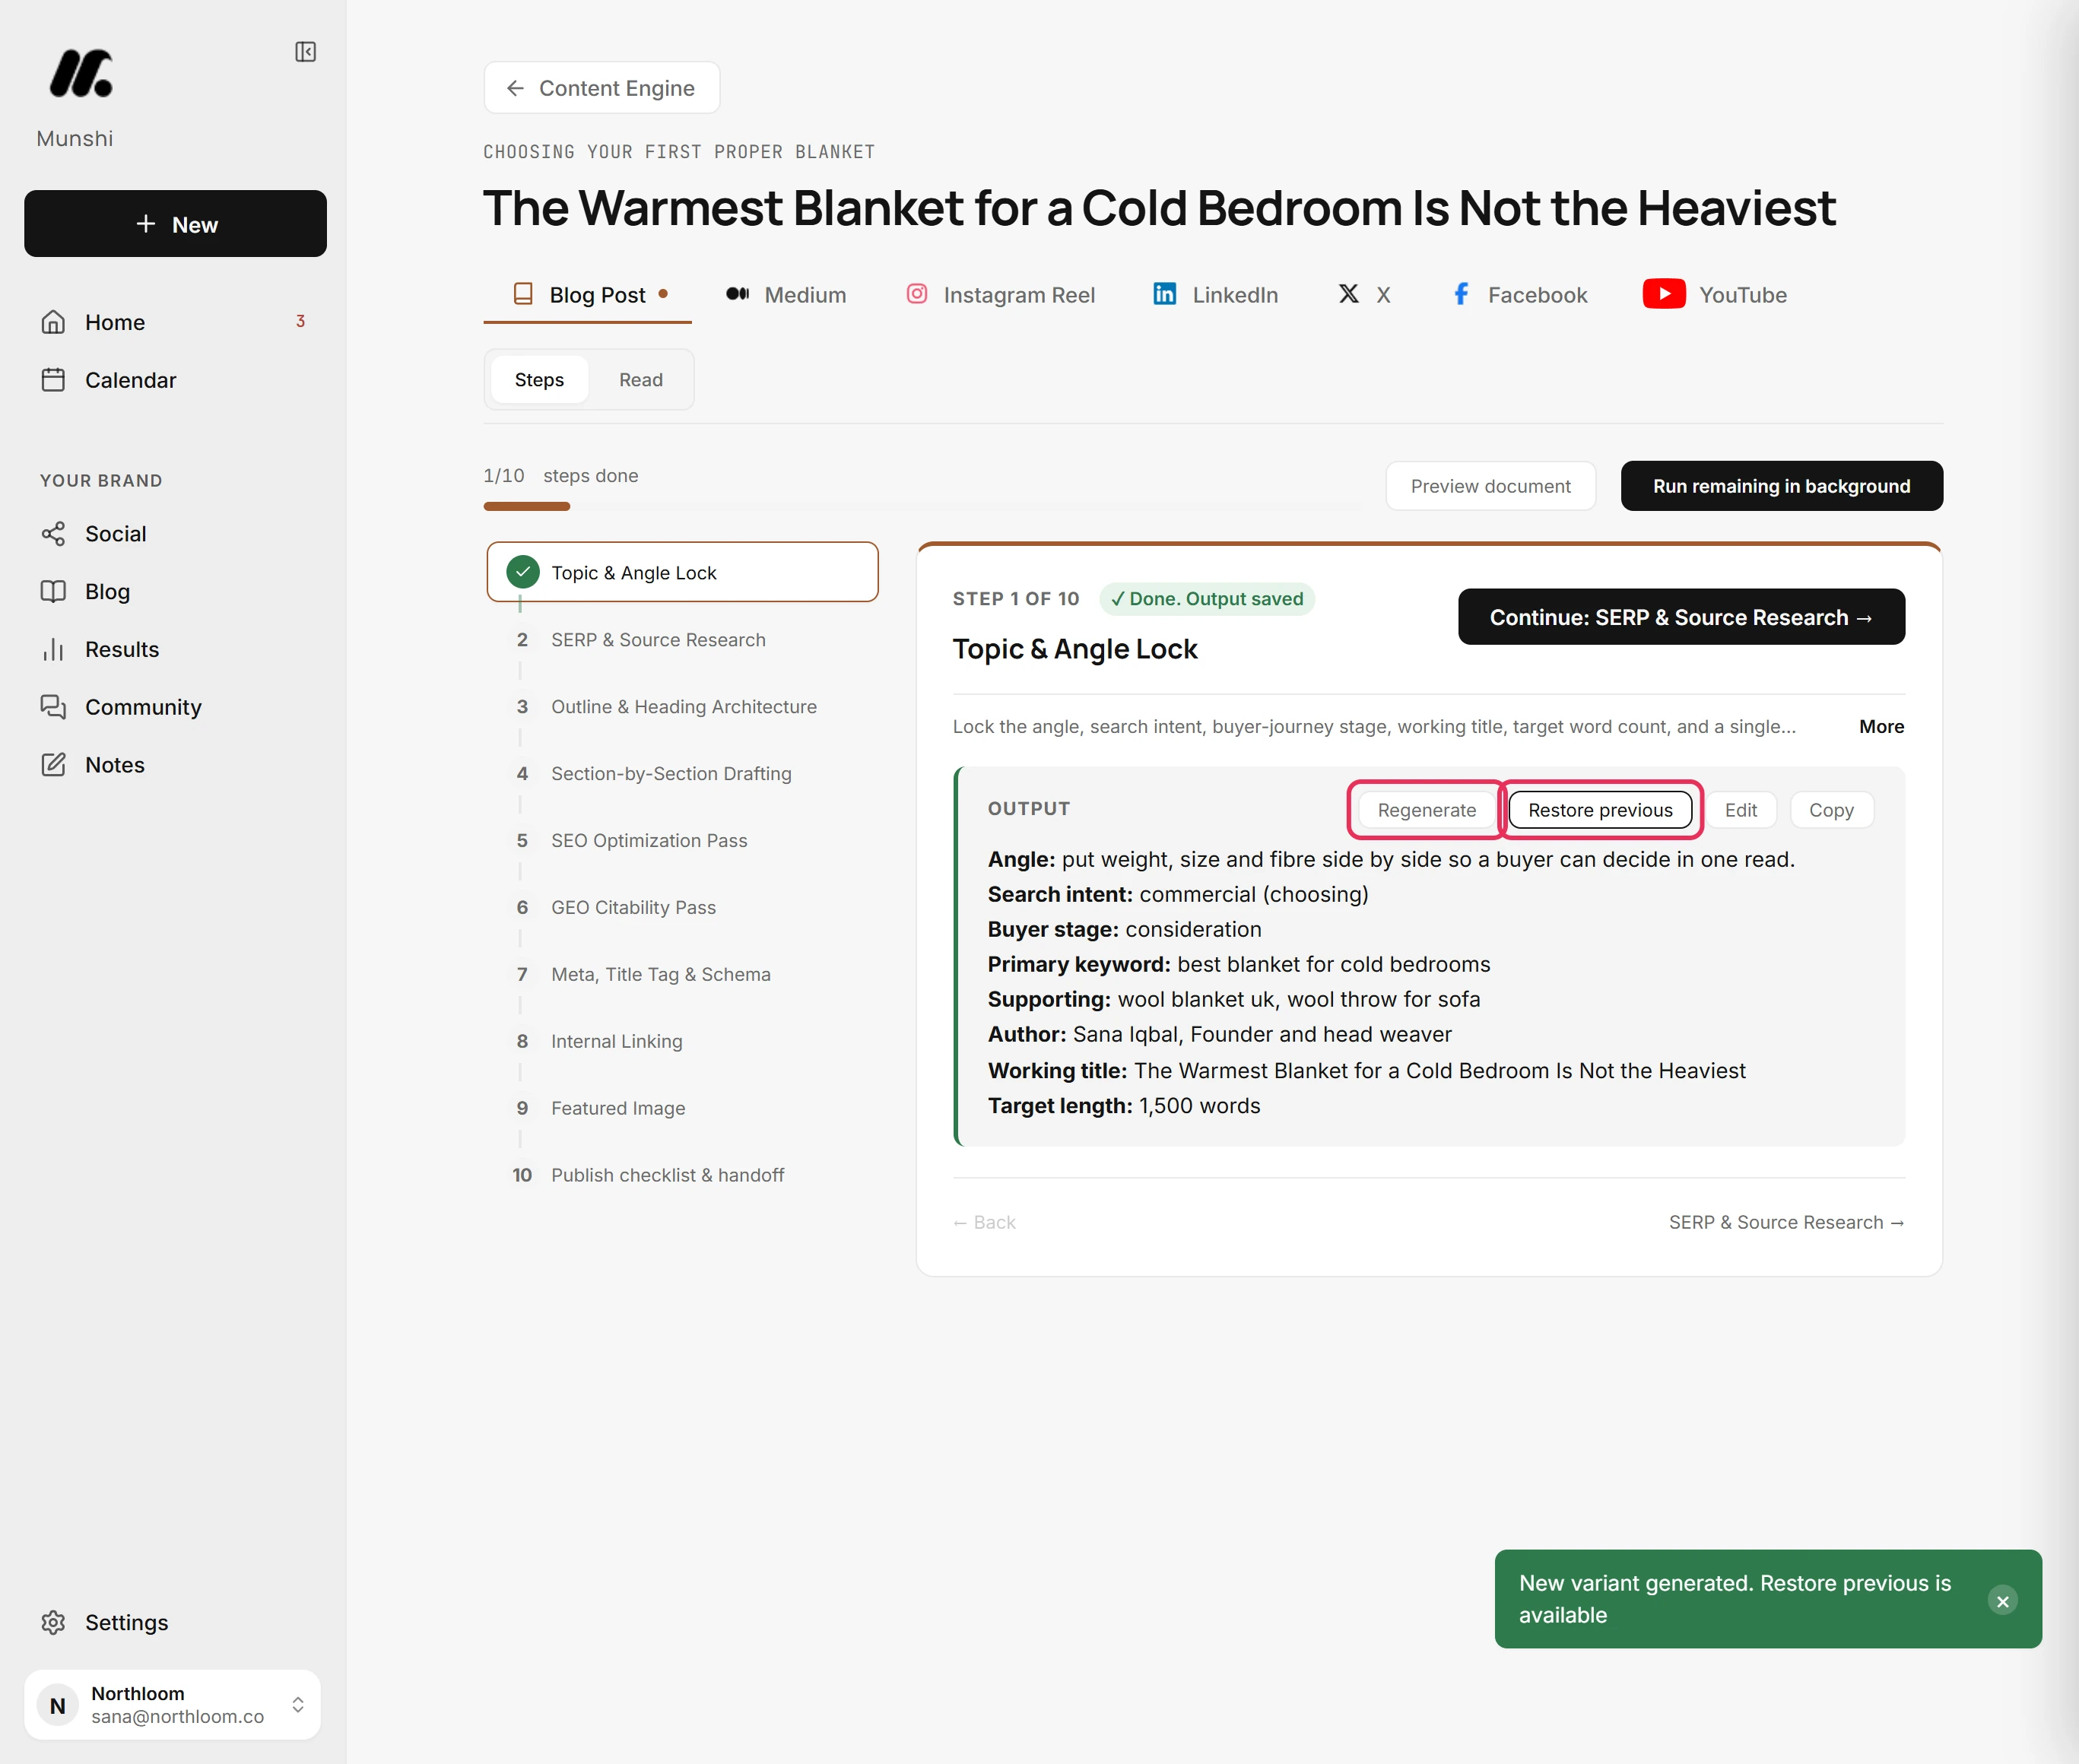
Click Regenerate above the step's text for a new version. Munshi confirms with New variant generated. Restore previous is available. Restore previous brings back the version it replaced.
-
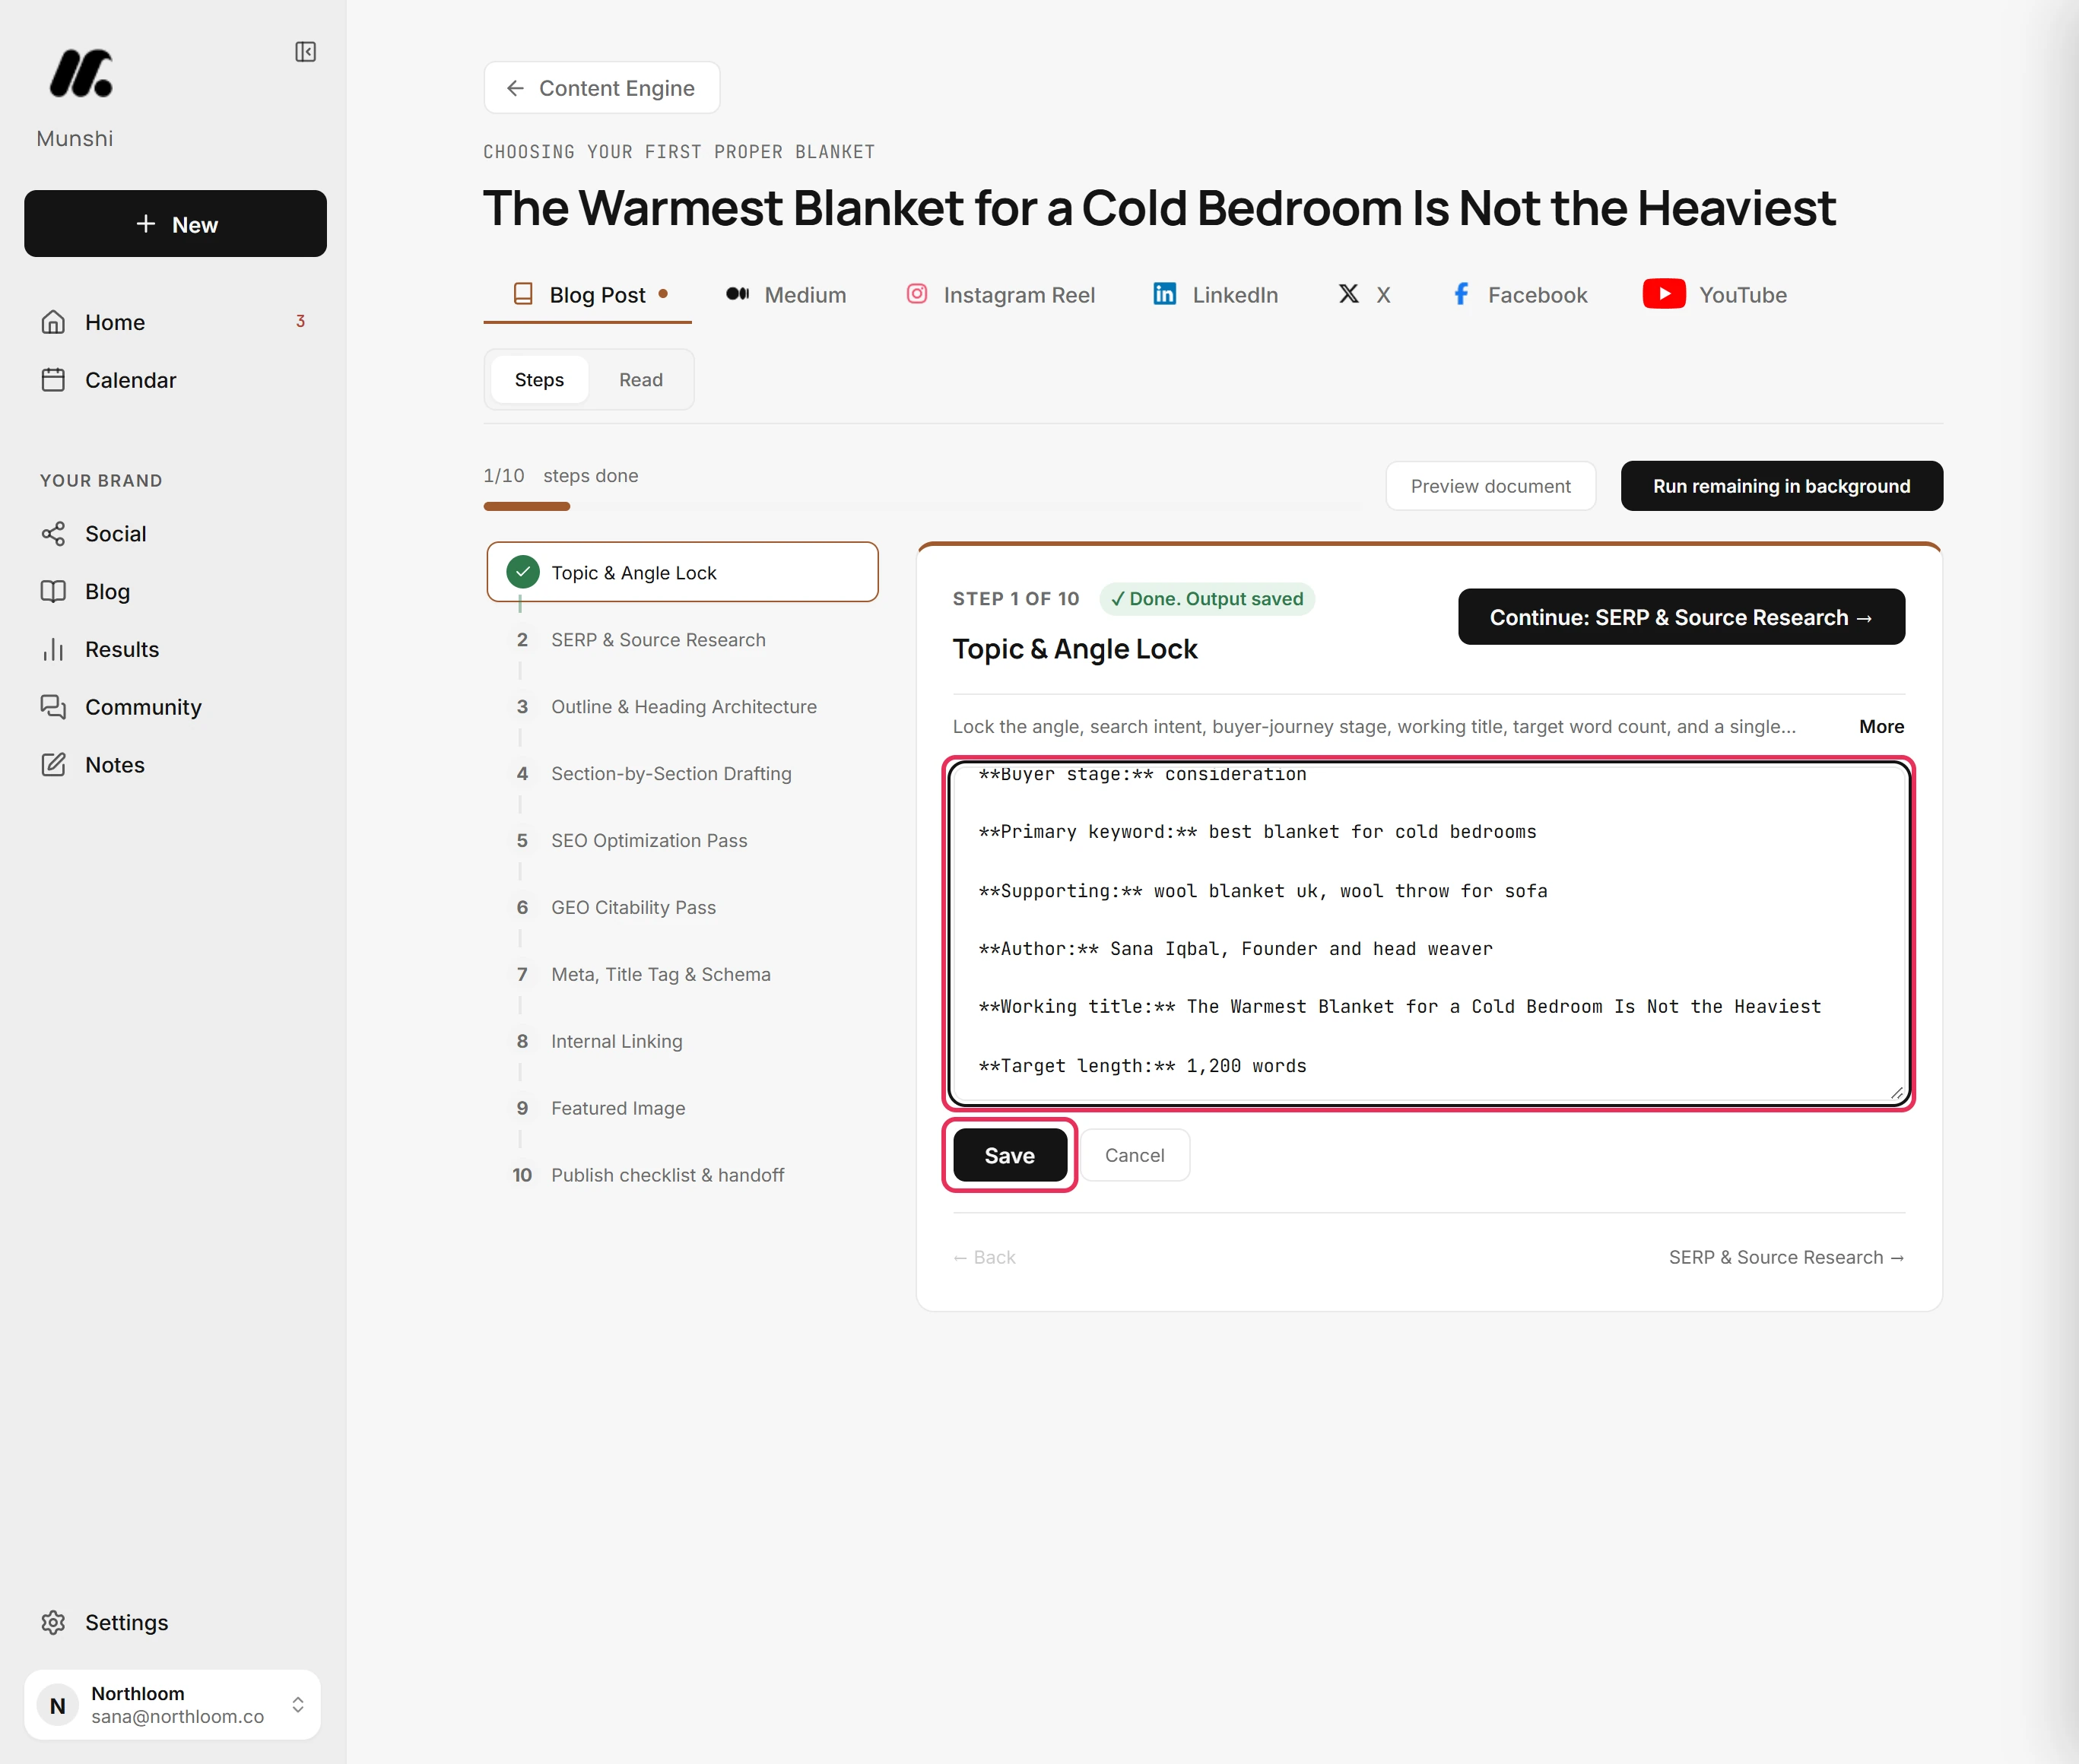
Click Edit, change the text and click Save. Here the target length drops from 1,500 to 1,200 words. Munshi keeps your version and says Output saved. Quality scores cleared (re-run to re-check).
-
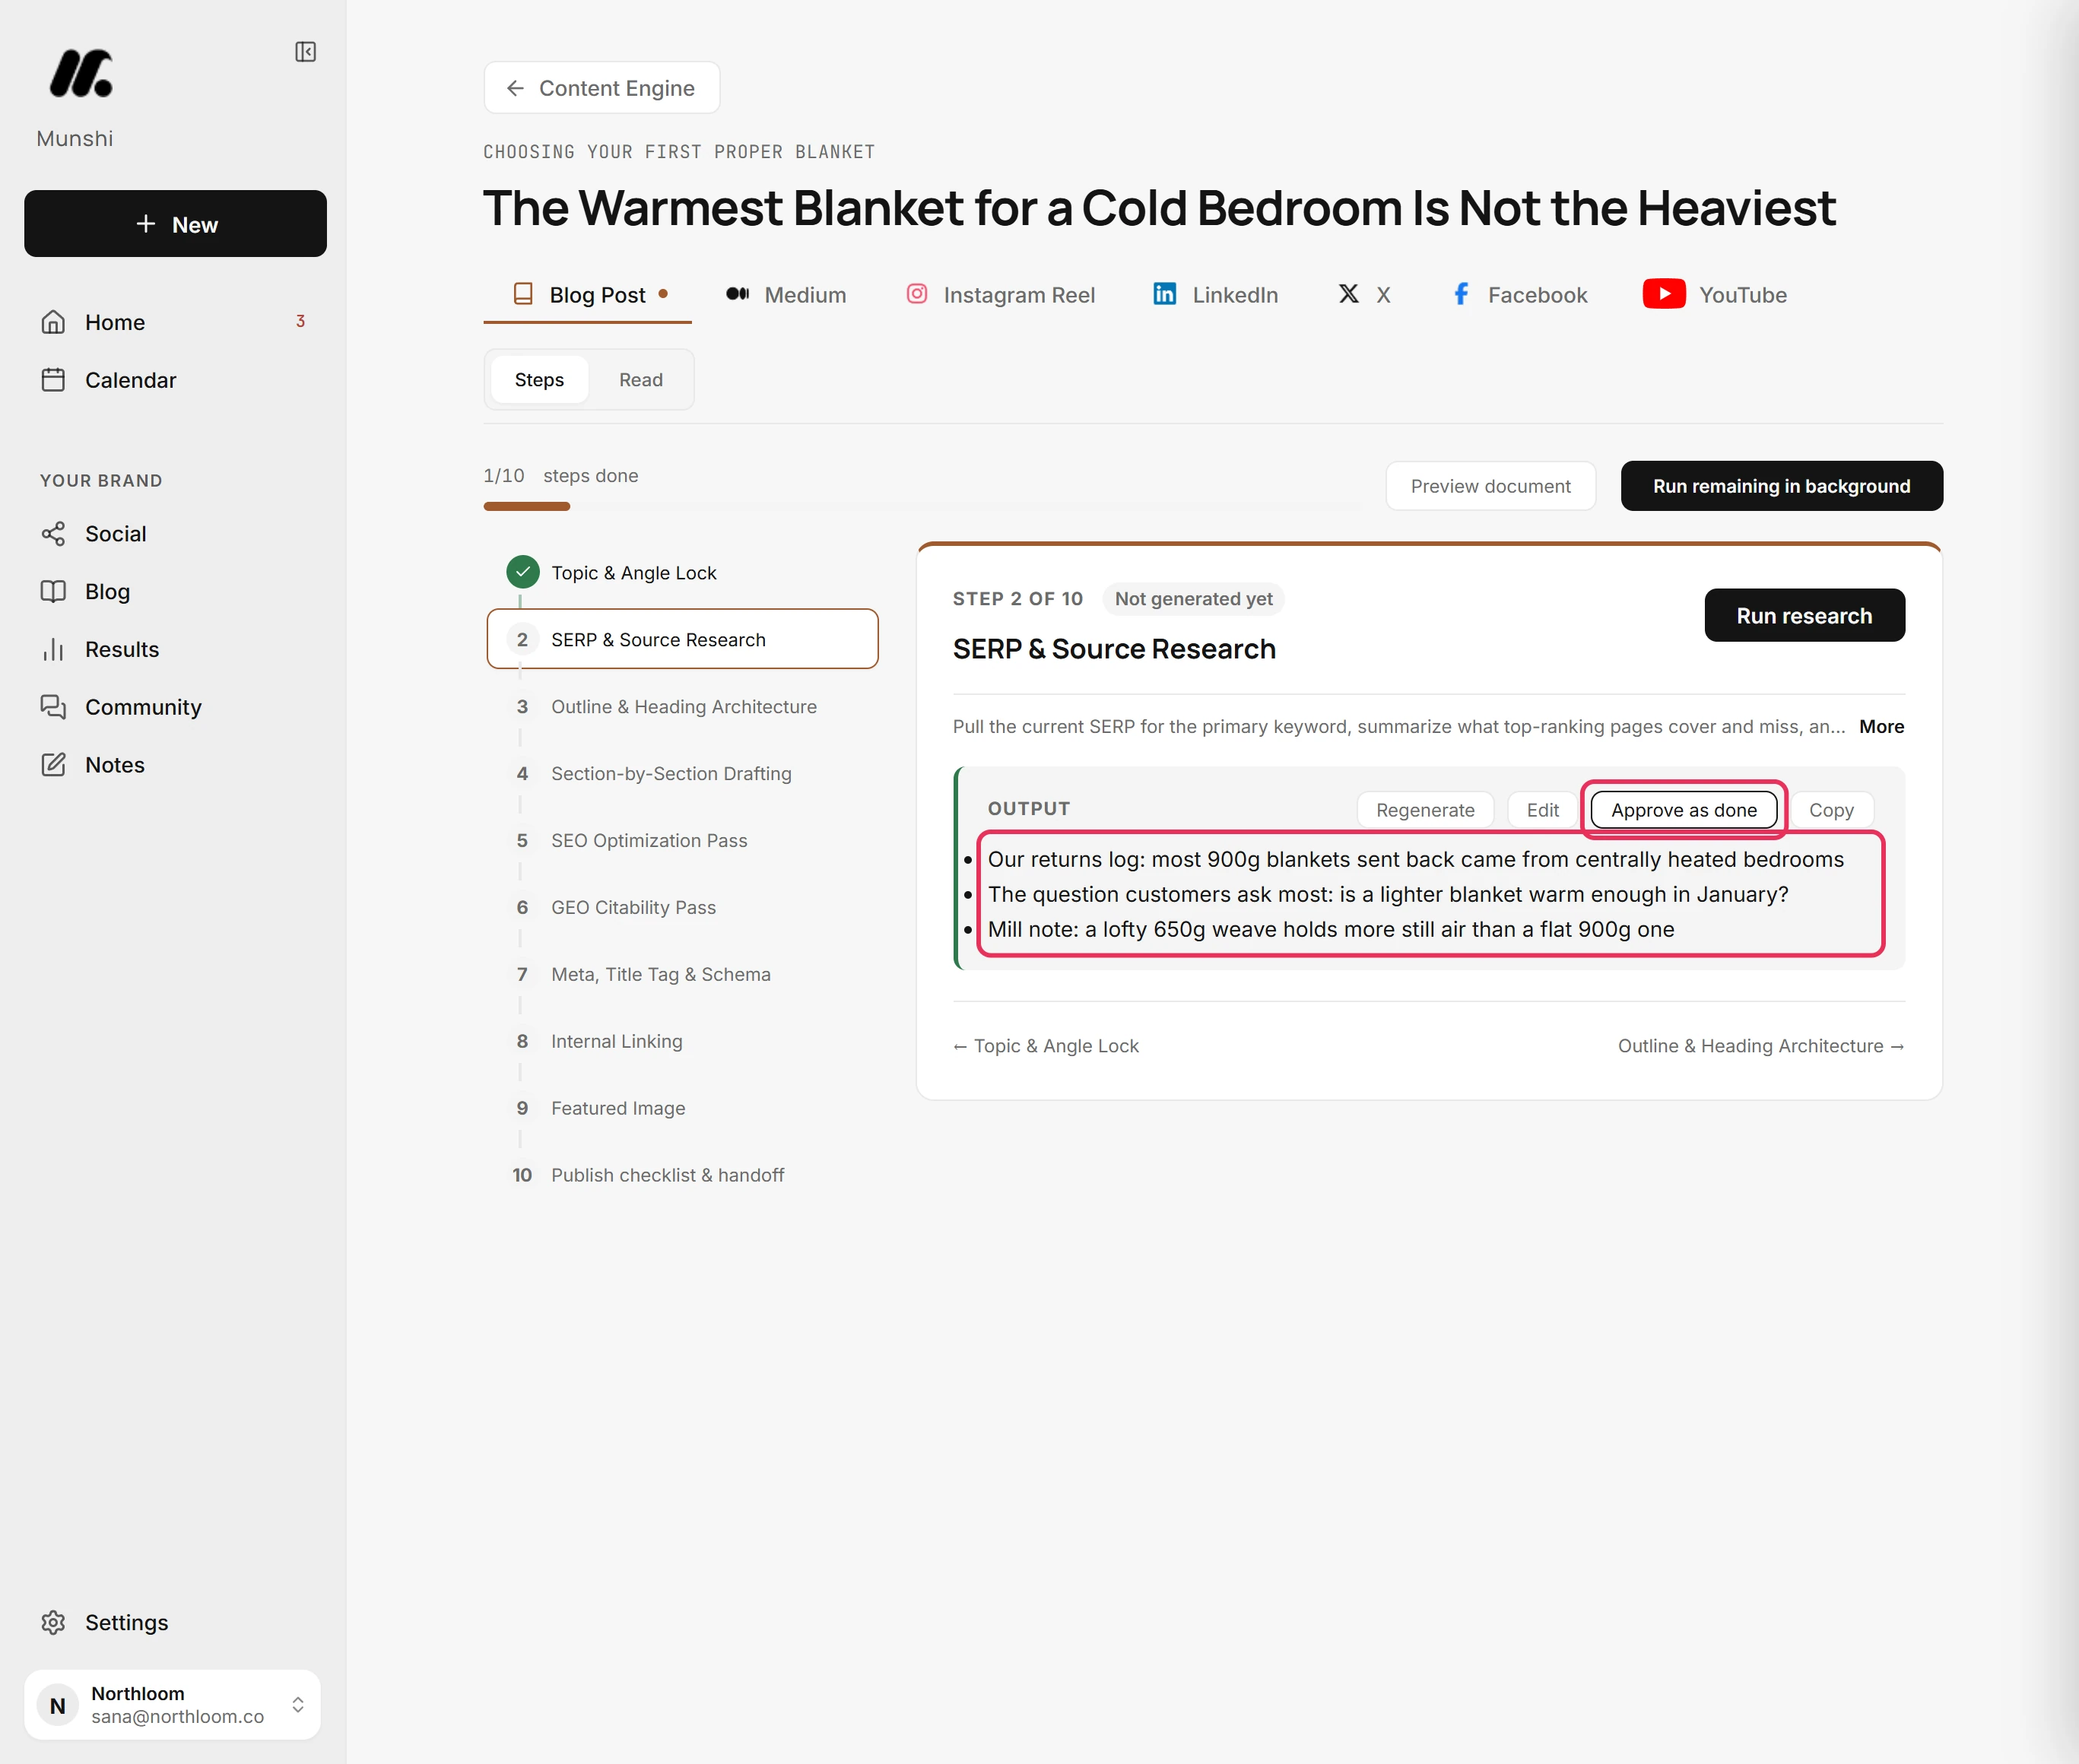
Click Continue. A step that already holds text you typed, such as your own research notes, reads Not generated yet with your text below it. Click Approve as done to mark it done as it is.
-
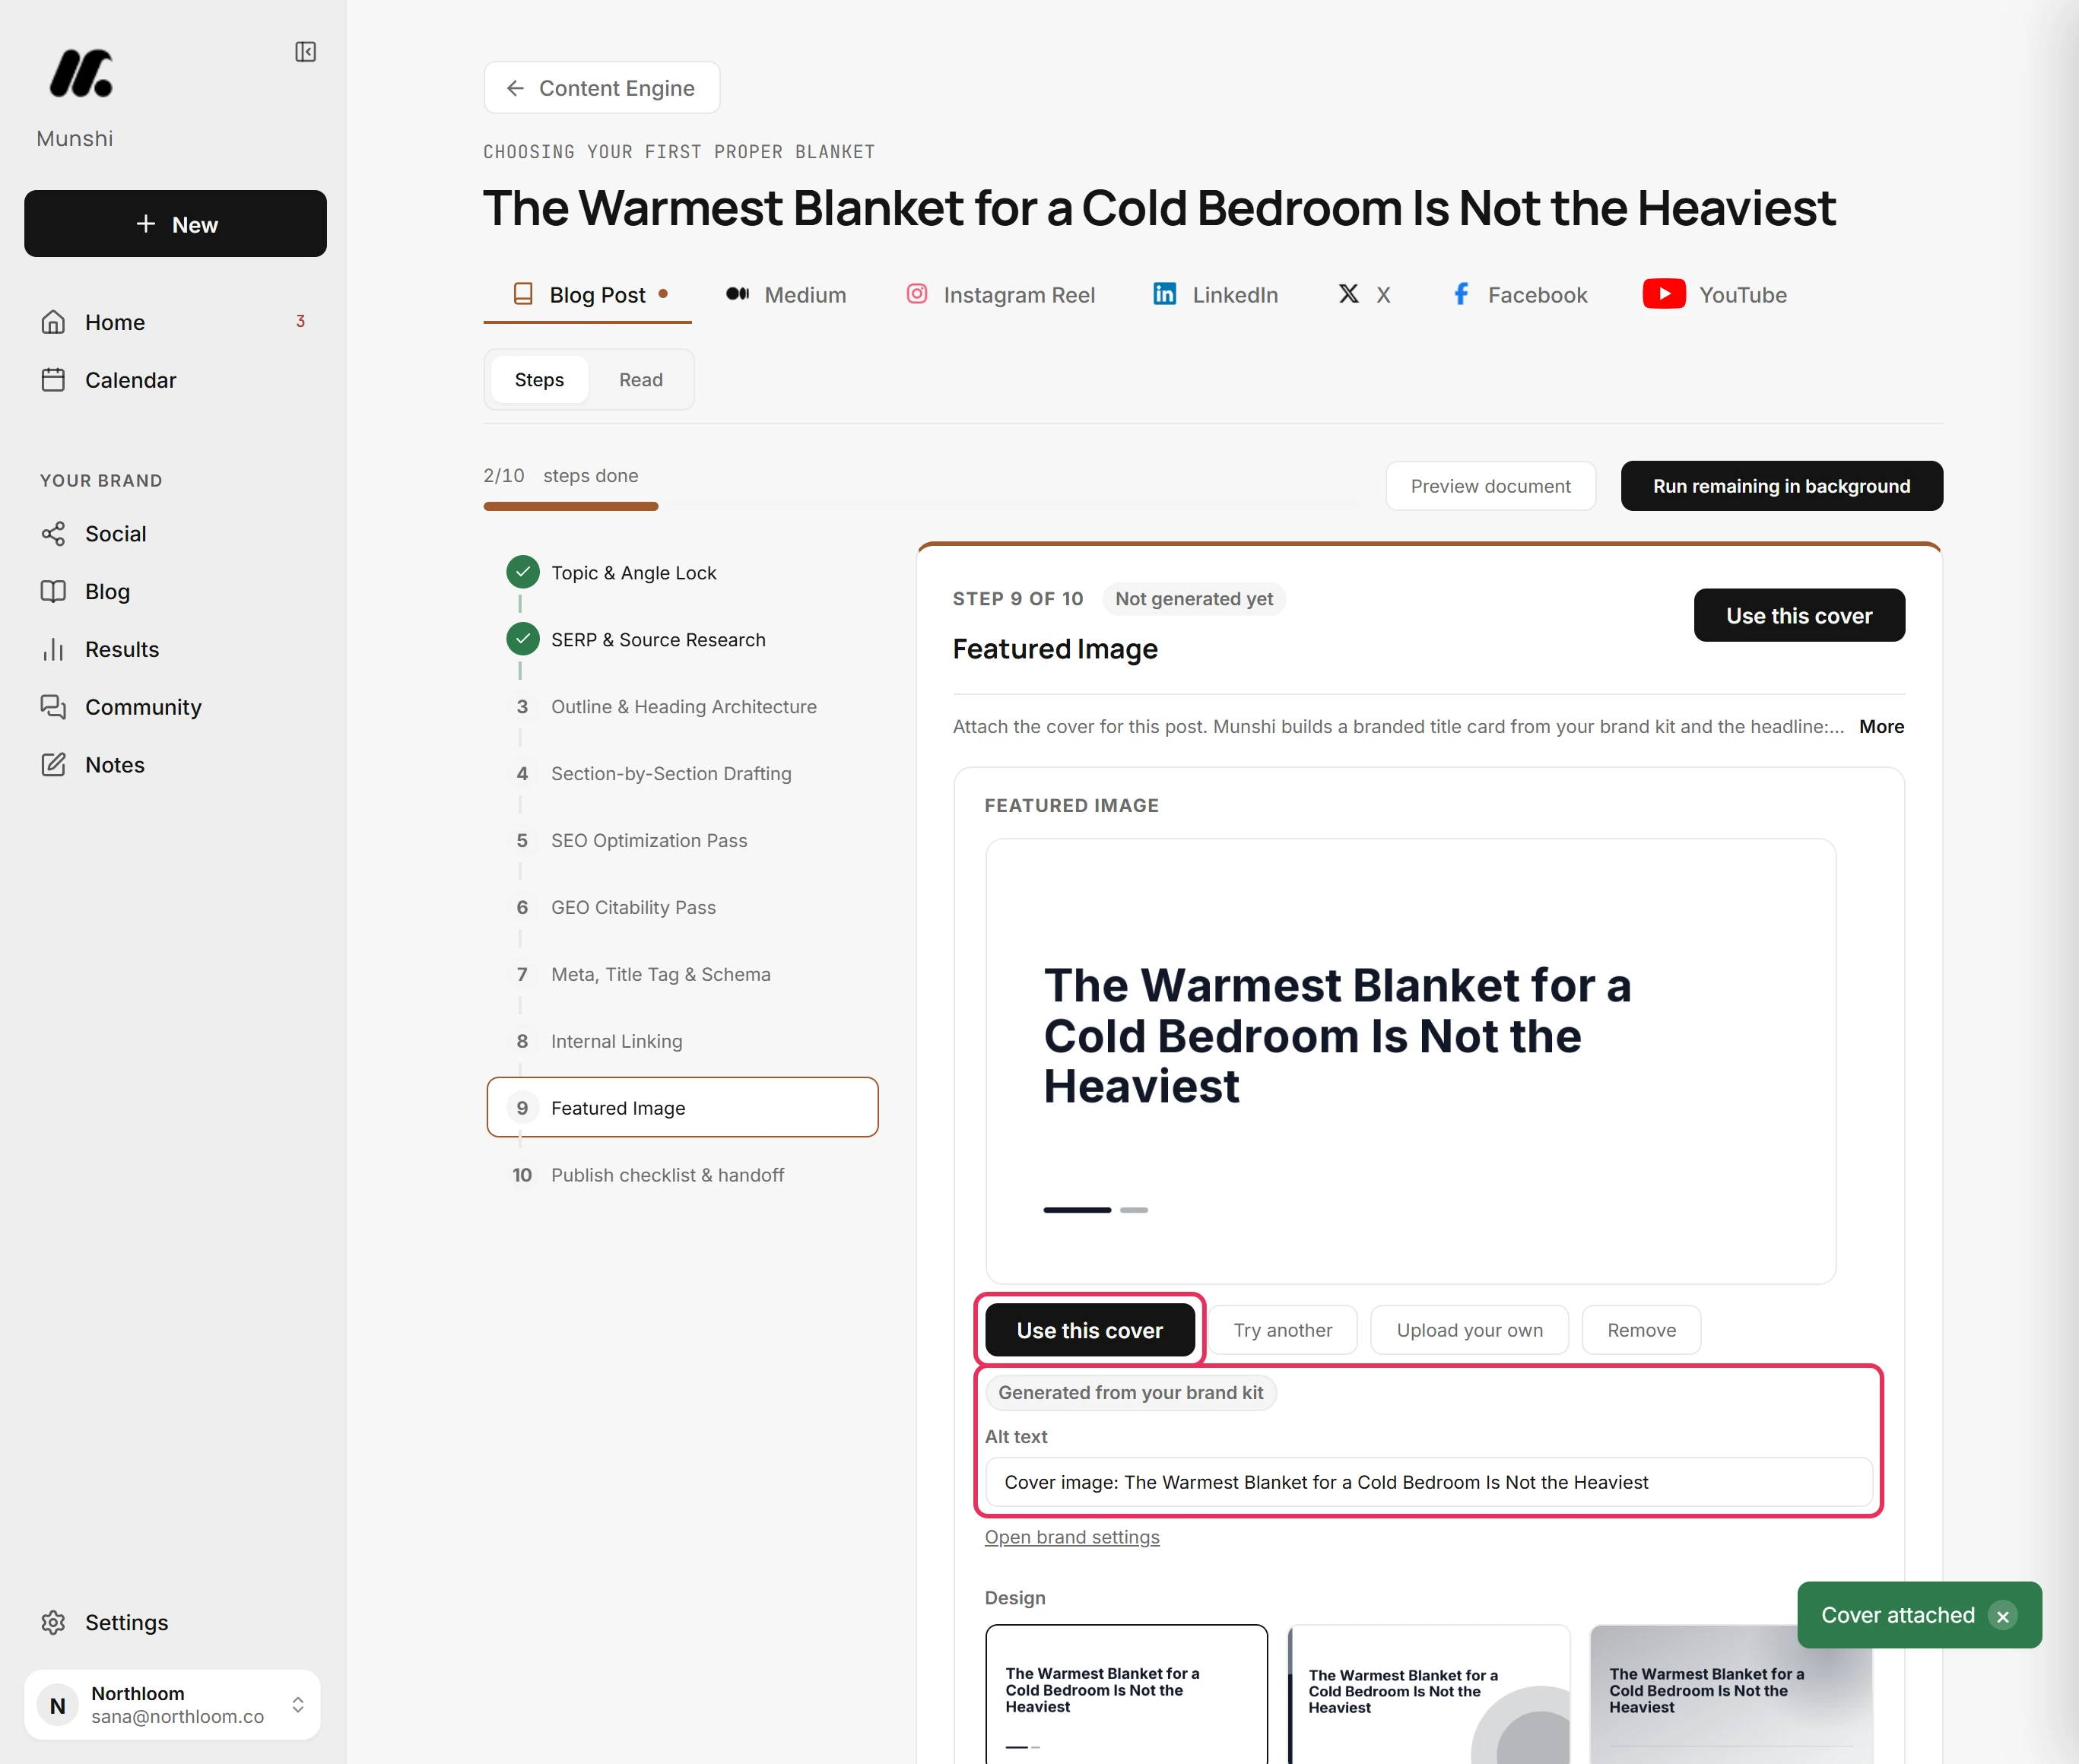
Click Featured Image in the list of steps, then Use this cover under the preview. The cover is attached and tagged Generated from your brand kit.
-
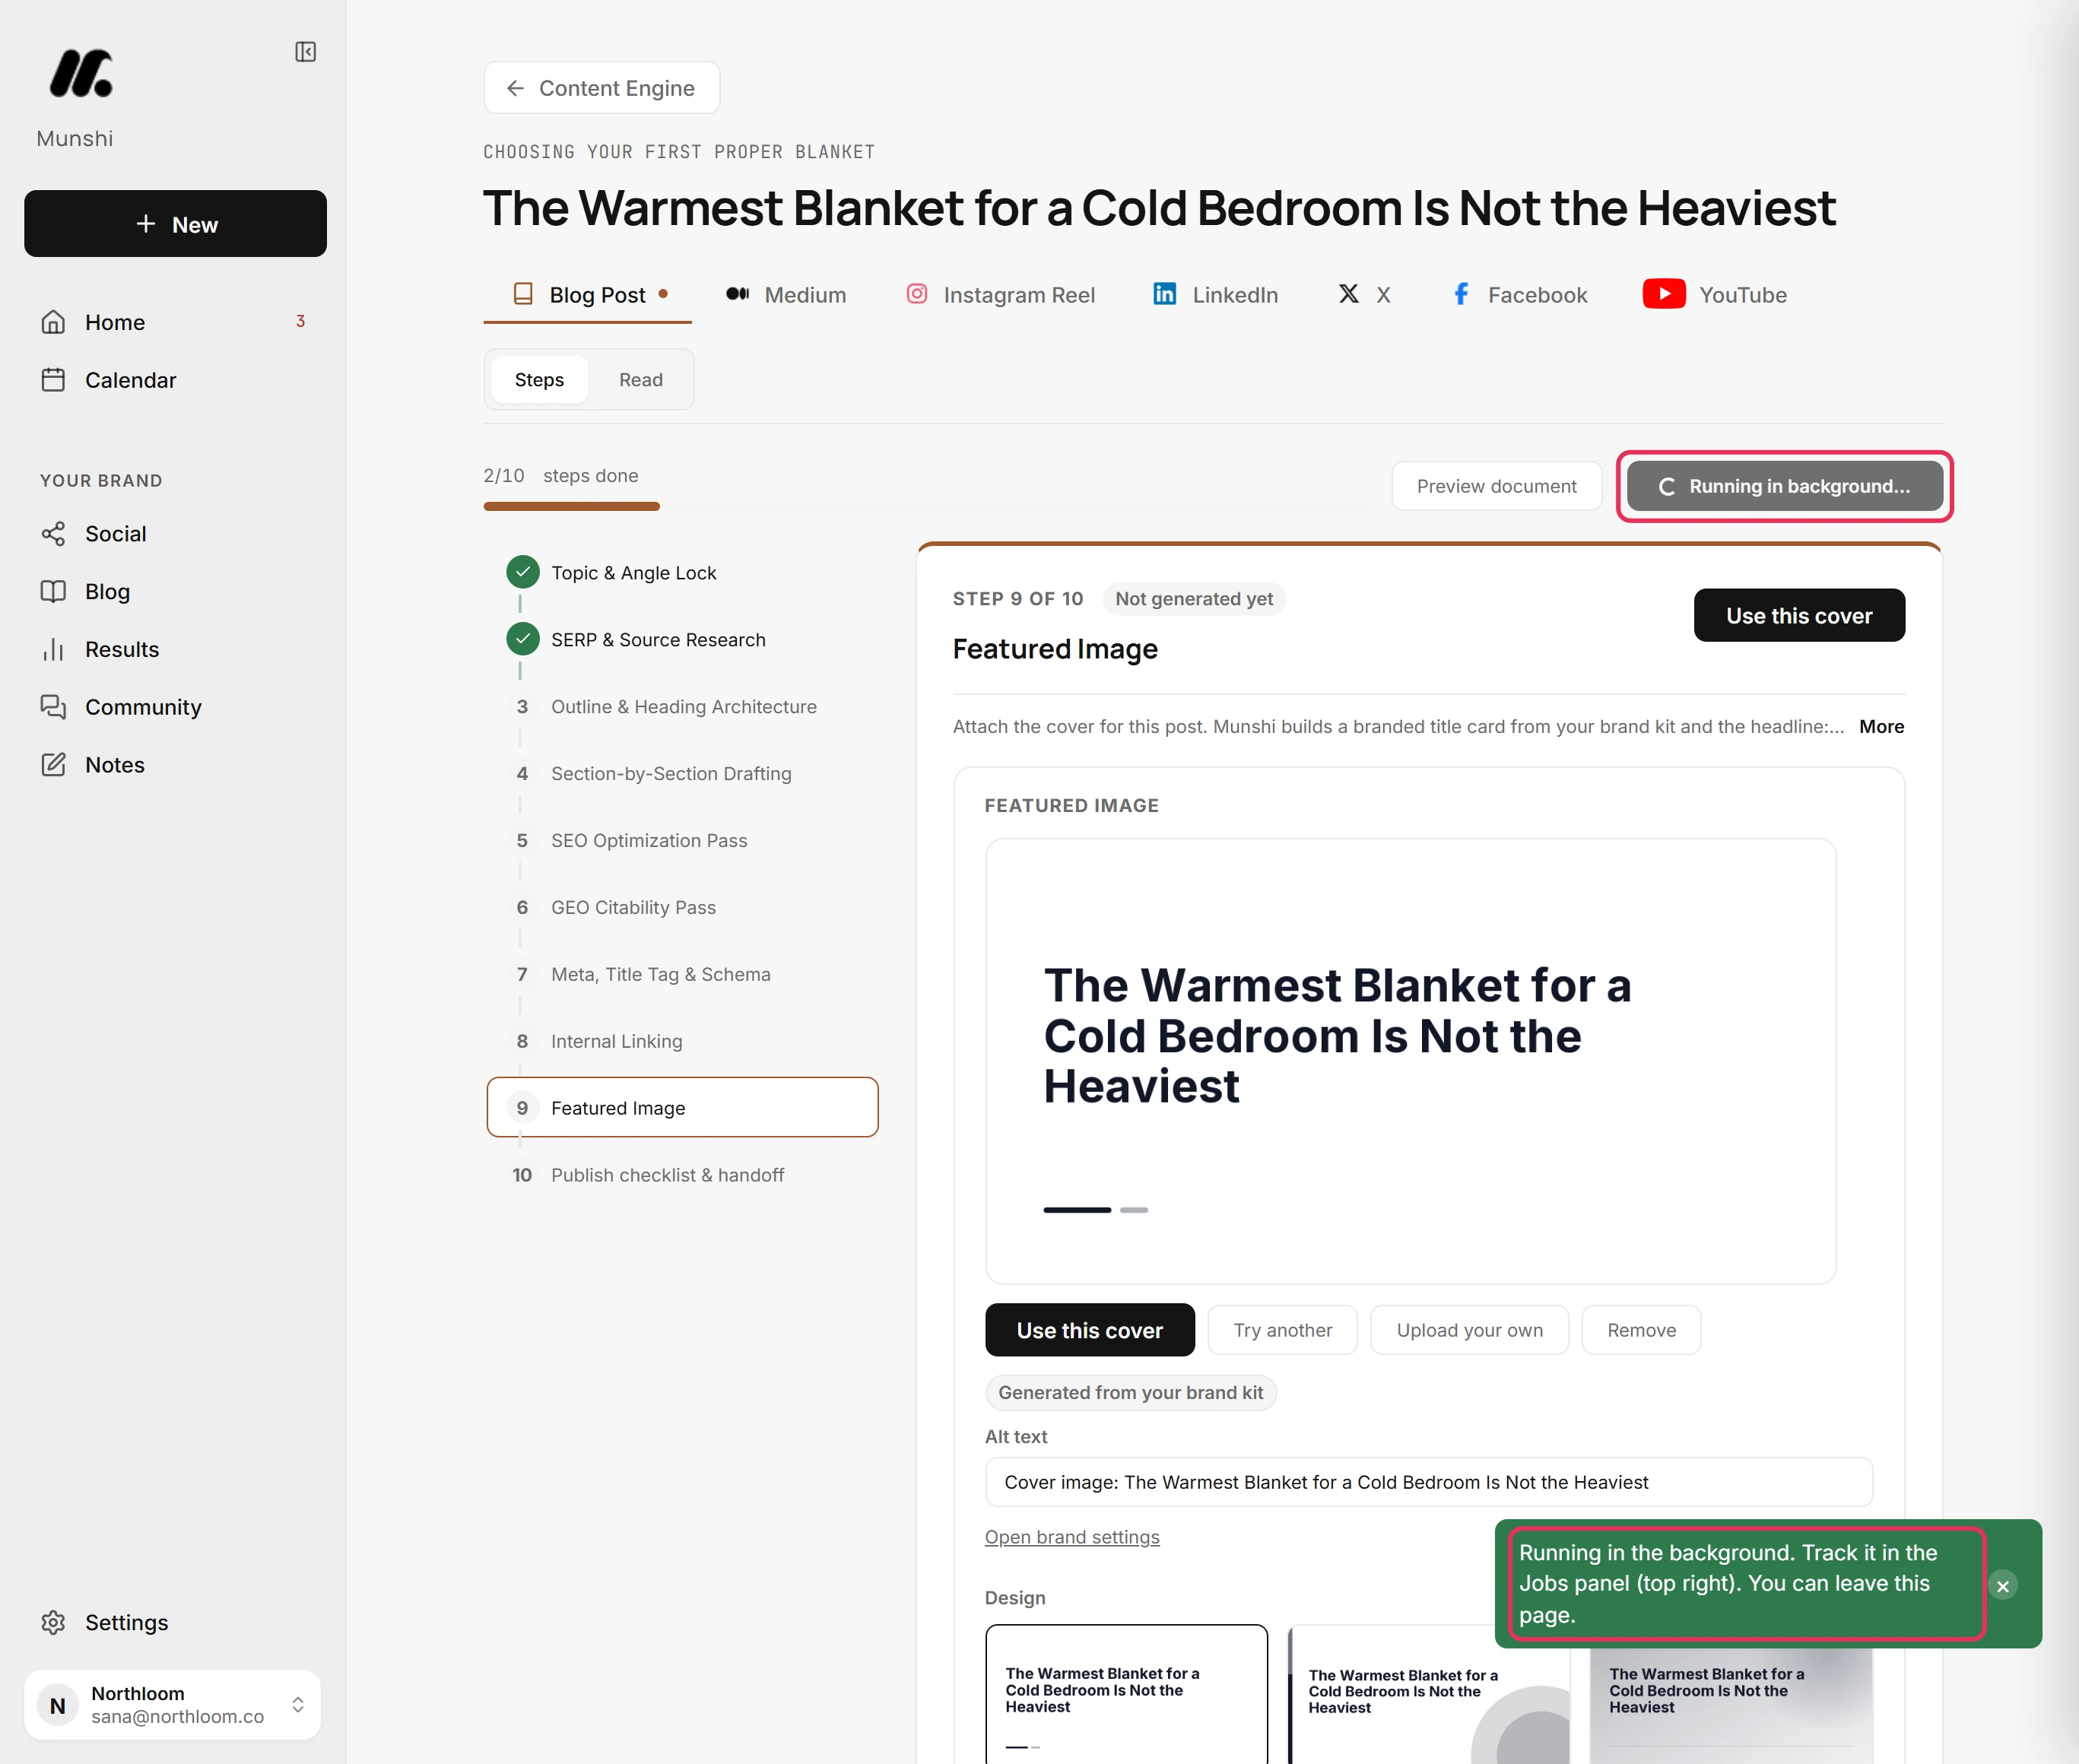
Click Run remaining in background at the top of the writer. Munshi says Running in the background. Track it in the Jobs panel (top right). You can leave this page. It ticks off each step as it lands, until the bar reads 10/10 steps done.
-
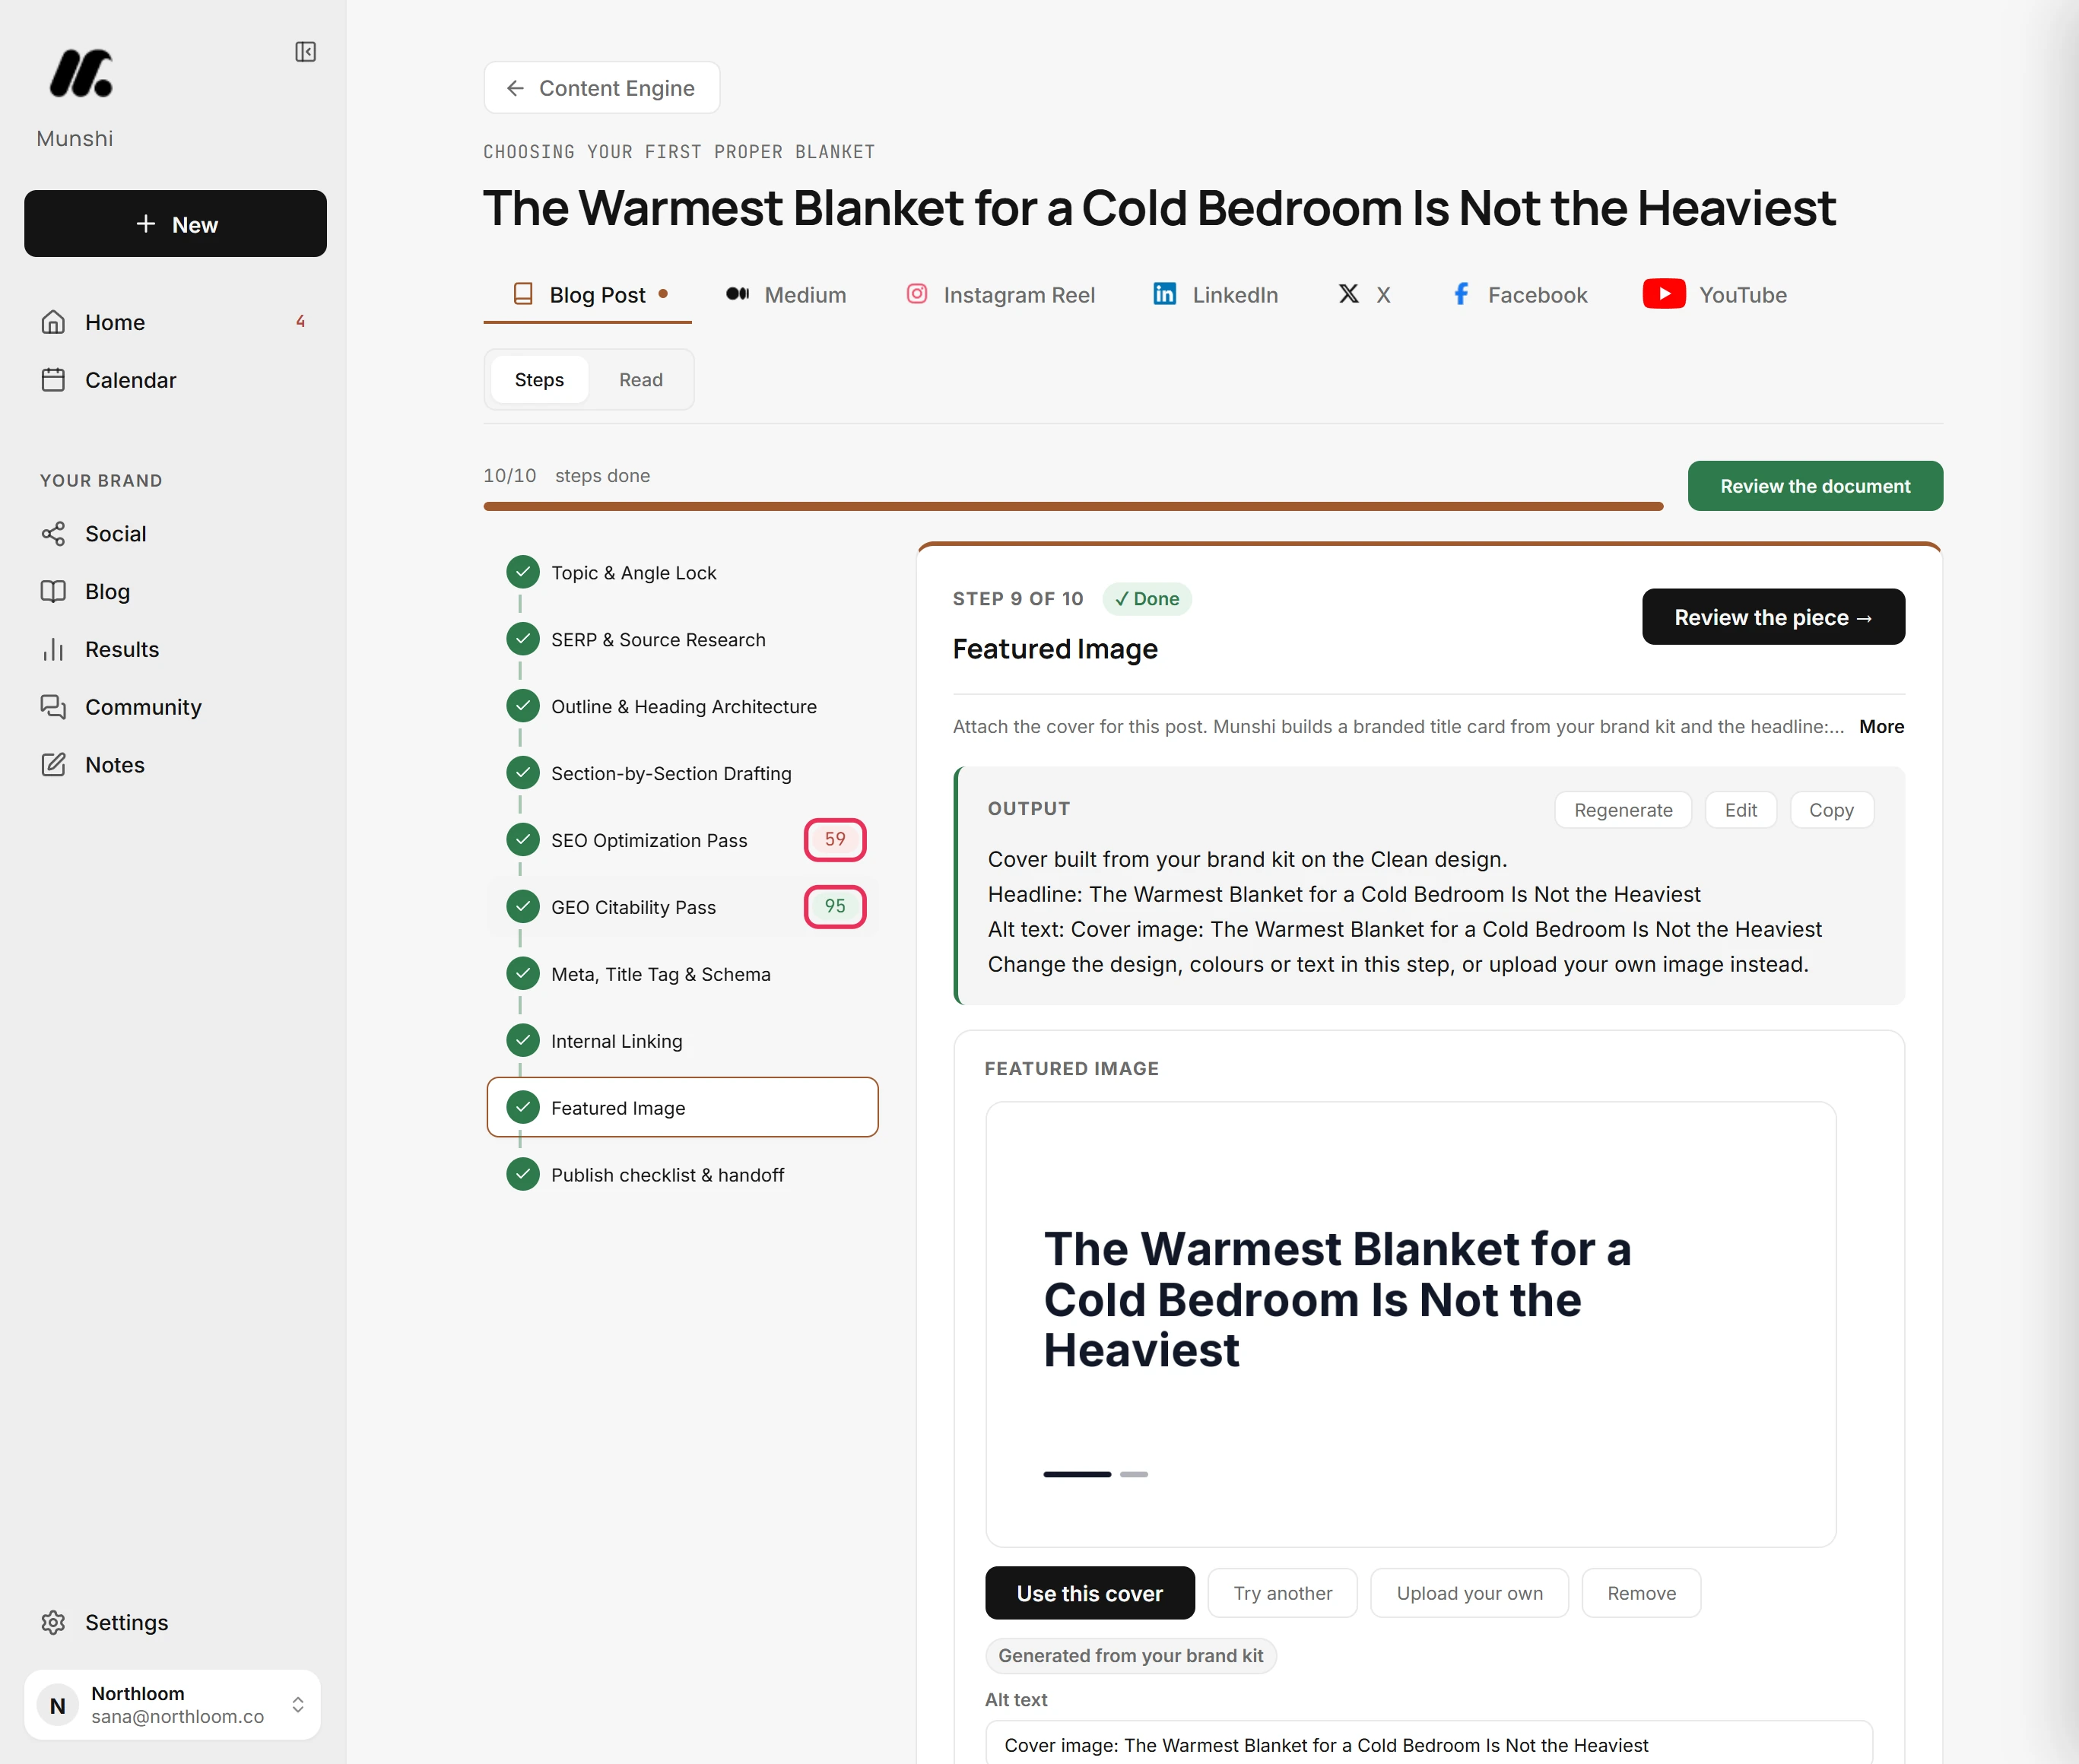
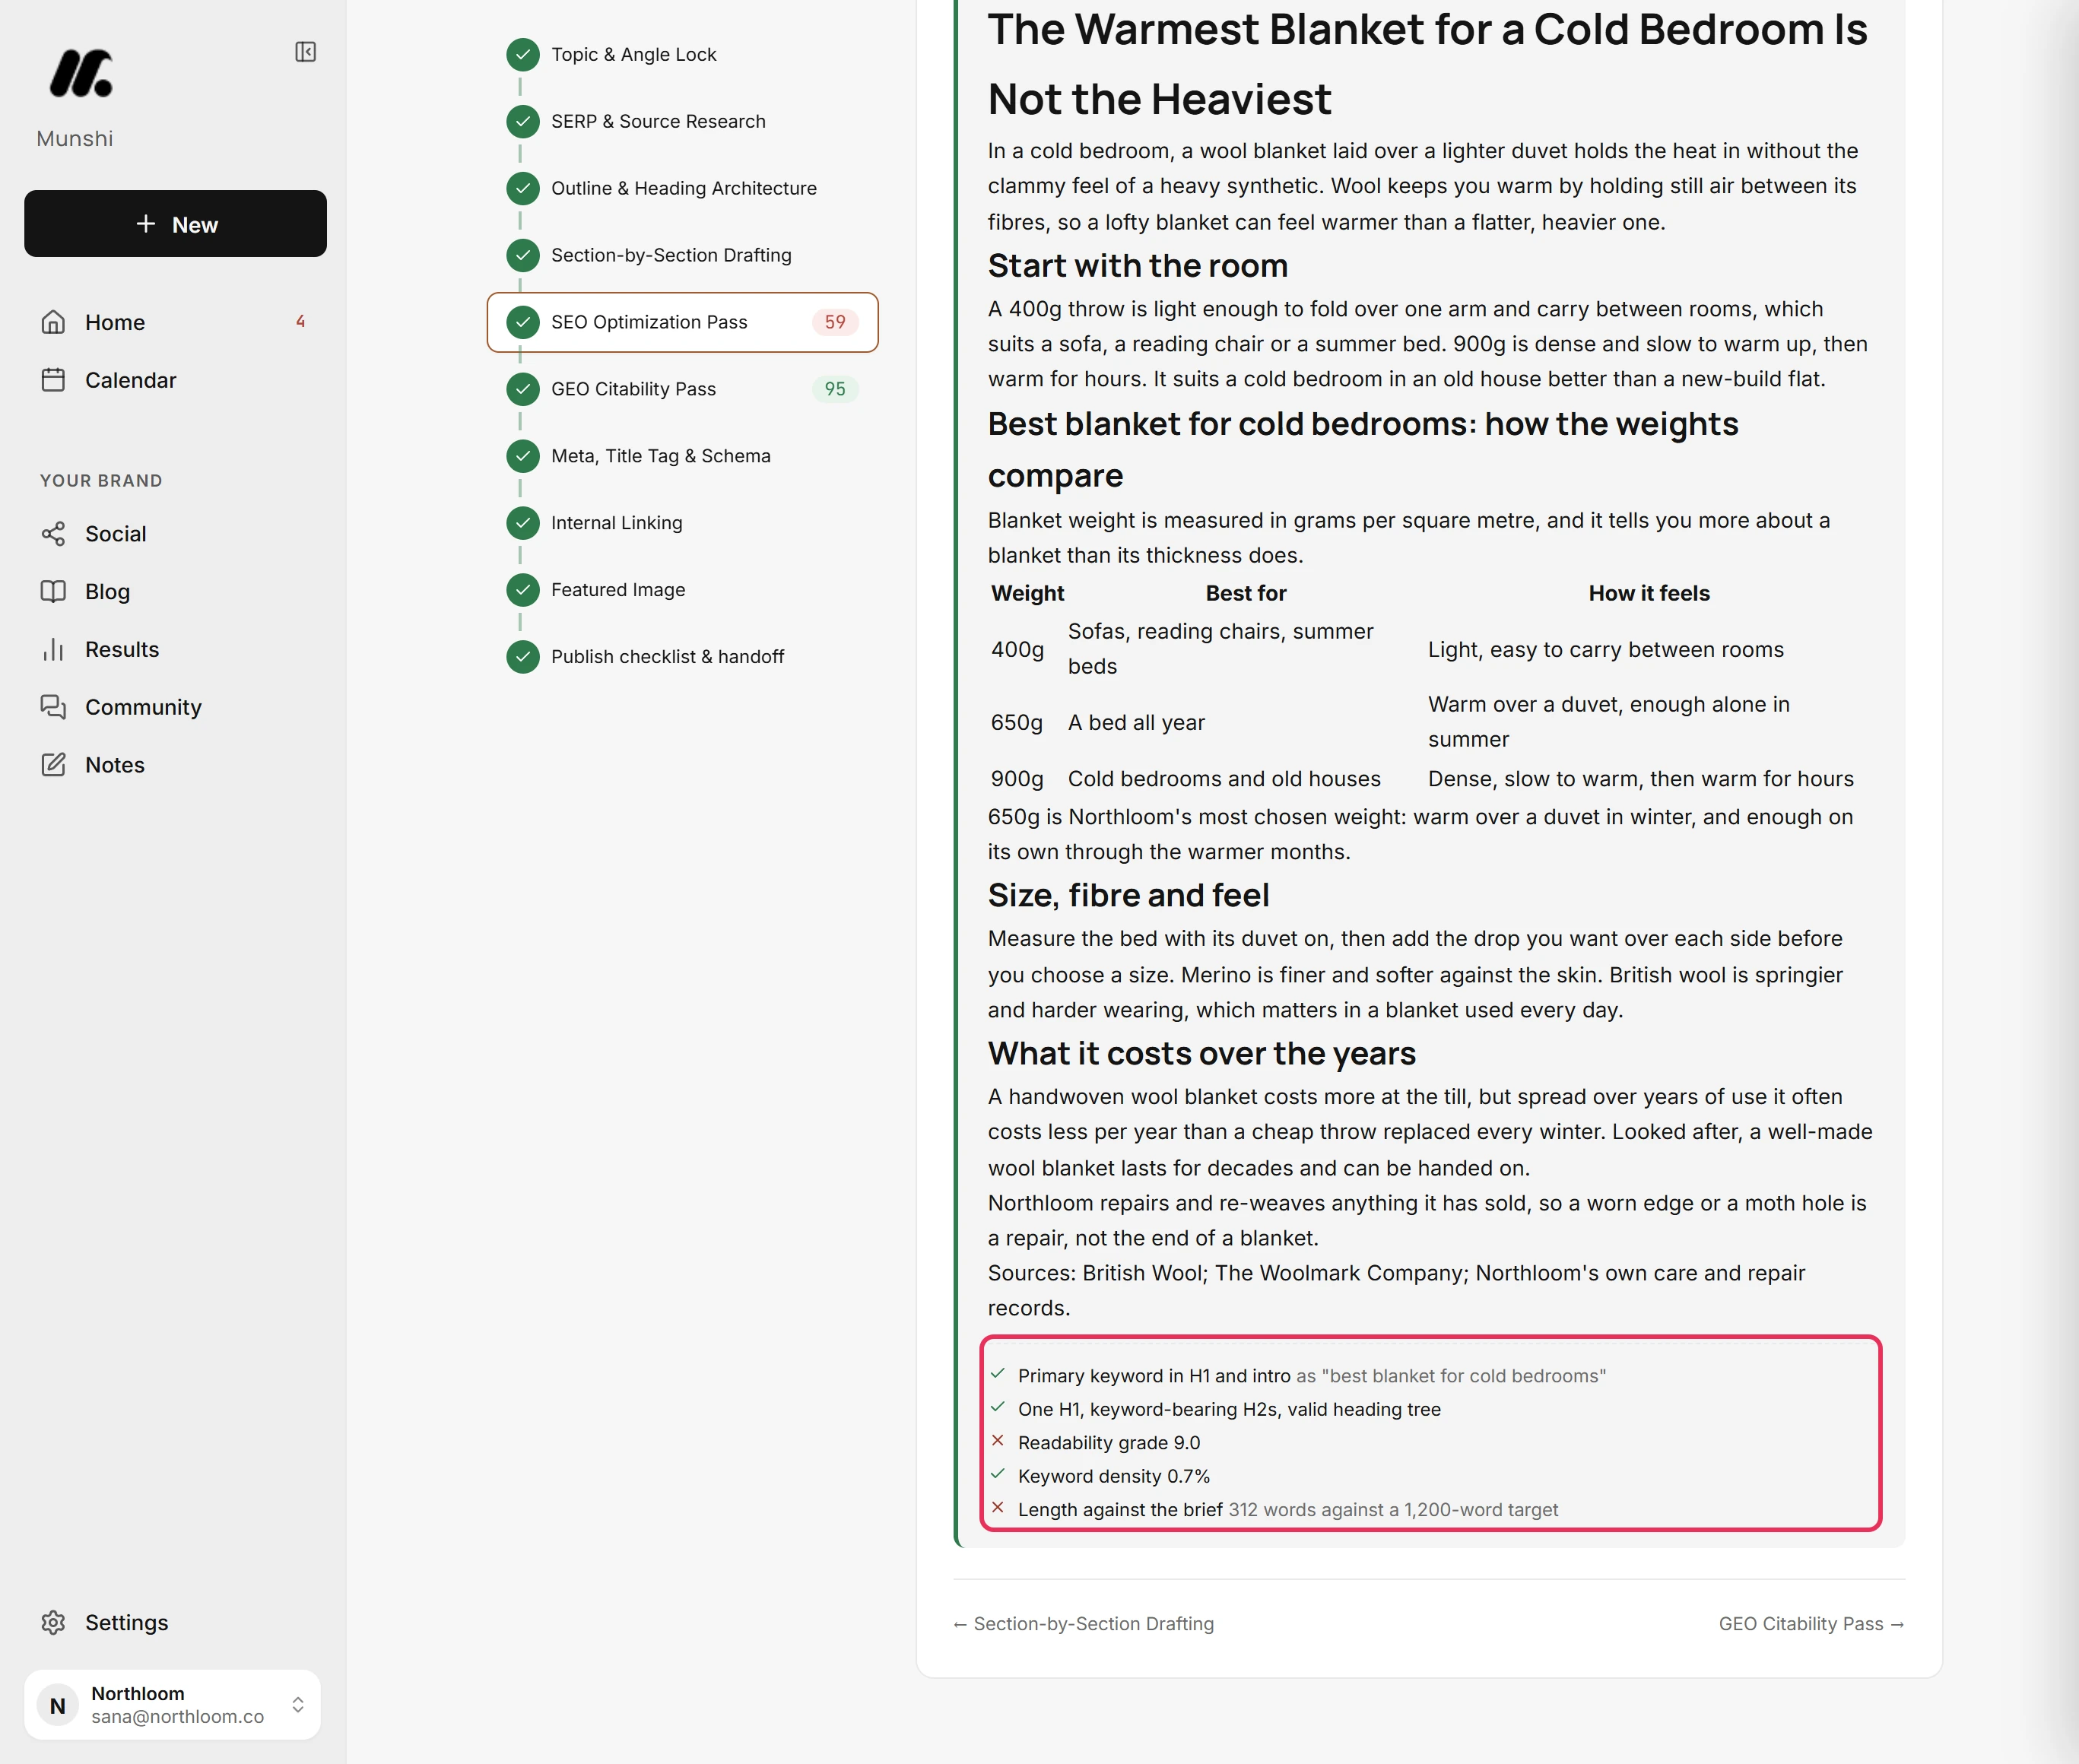
Two steps score the draft out of 100, with the score beside their names. SEO Optimization Pass grades it for search engines. GEO Citability Pass grades it for AI assistants such as ChatGPT, Perplexity and Google AI Overviews.
-
Click a scored step and scroll below its text. Each check has a tick or a cross. Some have a note, such as the draft's word count against its target.
-
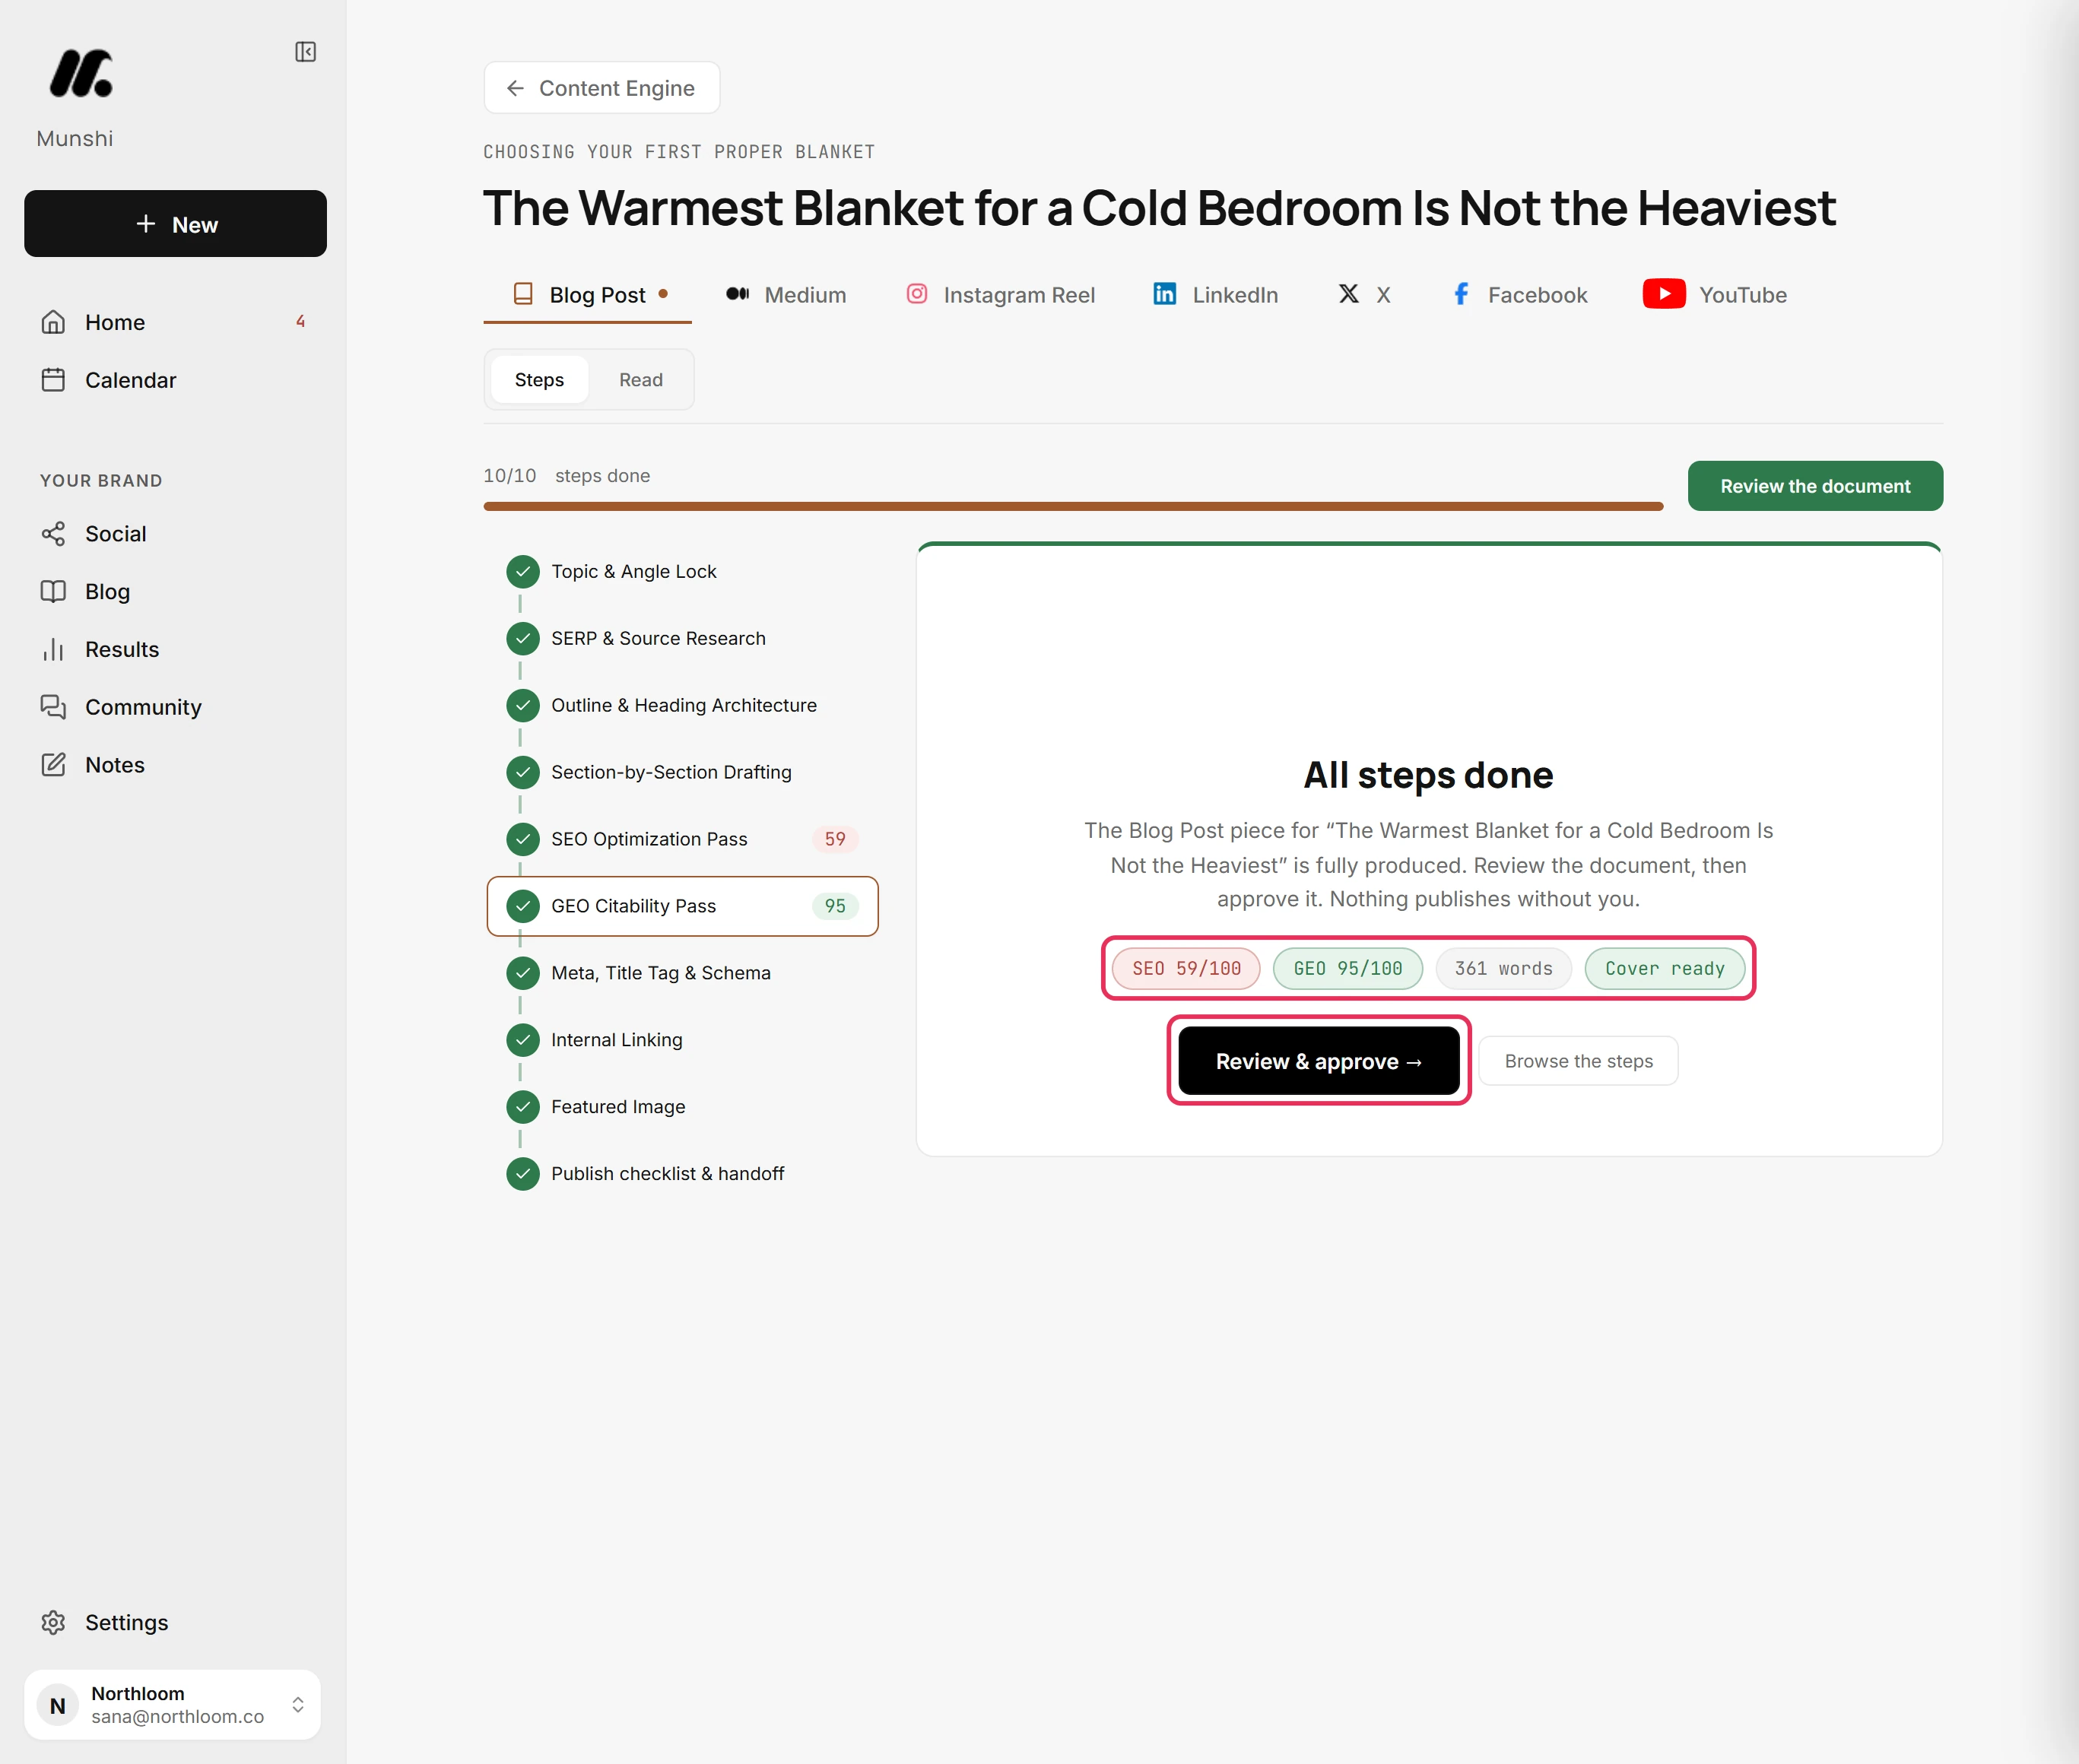
With every step done, click Review the piece. All steps done shows the SEO and GEO scores, the word count and the cover side by side. Review & approve opens the article to read.
Where you are now
Every step is written and saved, the cover is attached and both scores are in. The article waits for your review. Nothing is published until you say so.
If something goes wrong
“You've used all 3 articles in your plan this month.”
Wait for the allowance to reset. This cycle's article allowance is used up, so Munshi will not start a new article. The number in the message is your plan's. Articles already started still write to the end. When an allowance runs out explains your options.
“Daily generation limit reached for this workspace. Try again tomorrow.”
Run the step again after 00:00 UTC. The workspace has used its daily share of writing. Everything written so far is saved. The daily cap explains it.
“Munshi could not build a cover for this post. Upload an image in this step before you publish.”
Click Upload your own in the Featured Image step. You can also try Use this cover under the preview again in a moment. The step could not draw or store a cover.
The SEO and GEO scores are gone
Open each of the two steps and click Regenerate to score the draft again. An edit was saved after they were measured, and Munshi said Quality scores cleared (re-run to re-check).
Try it on your own brand this week.
Munshi Social, the AI content marketing engine for small teams, plans, writes, publishes, and tracks your blog and socials. The guide above shows the real app, not a mock-up.
Start your workspace