How to choose a cover for an article
Open the Featured Image step, pick a design built from your brand kit, set its words and colours, and attach it. You can also upload your own picture.
Before you start
- An article in the writer. The cover is its Featured Image step.
- Your brand colours and logo saved in Settings under Brand. Munshi draws covers from them.
-
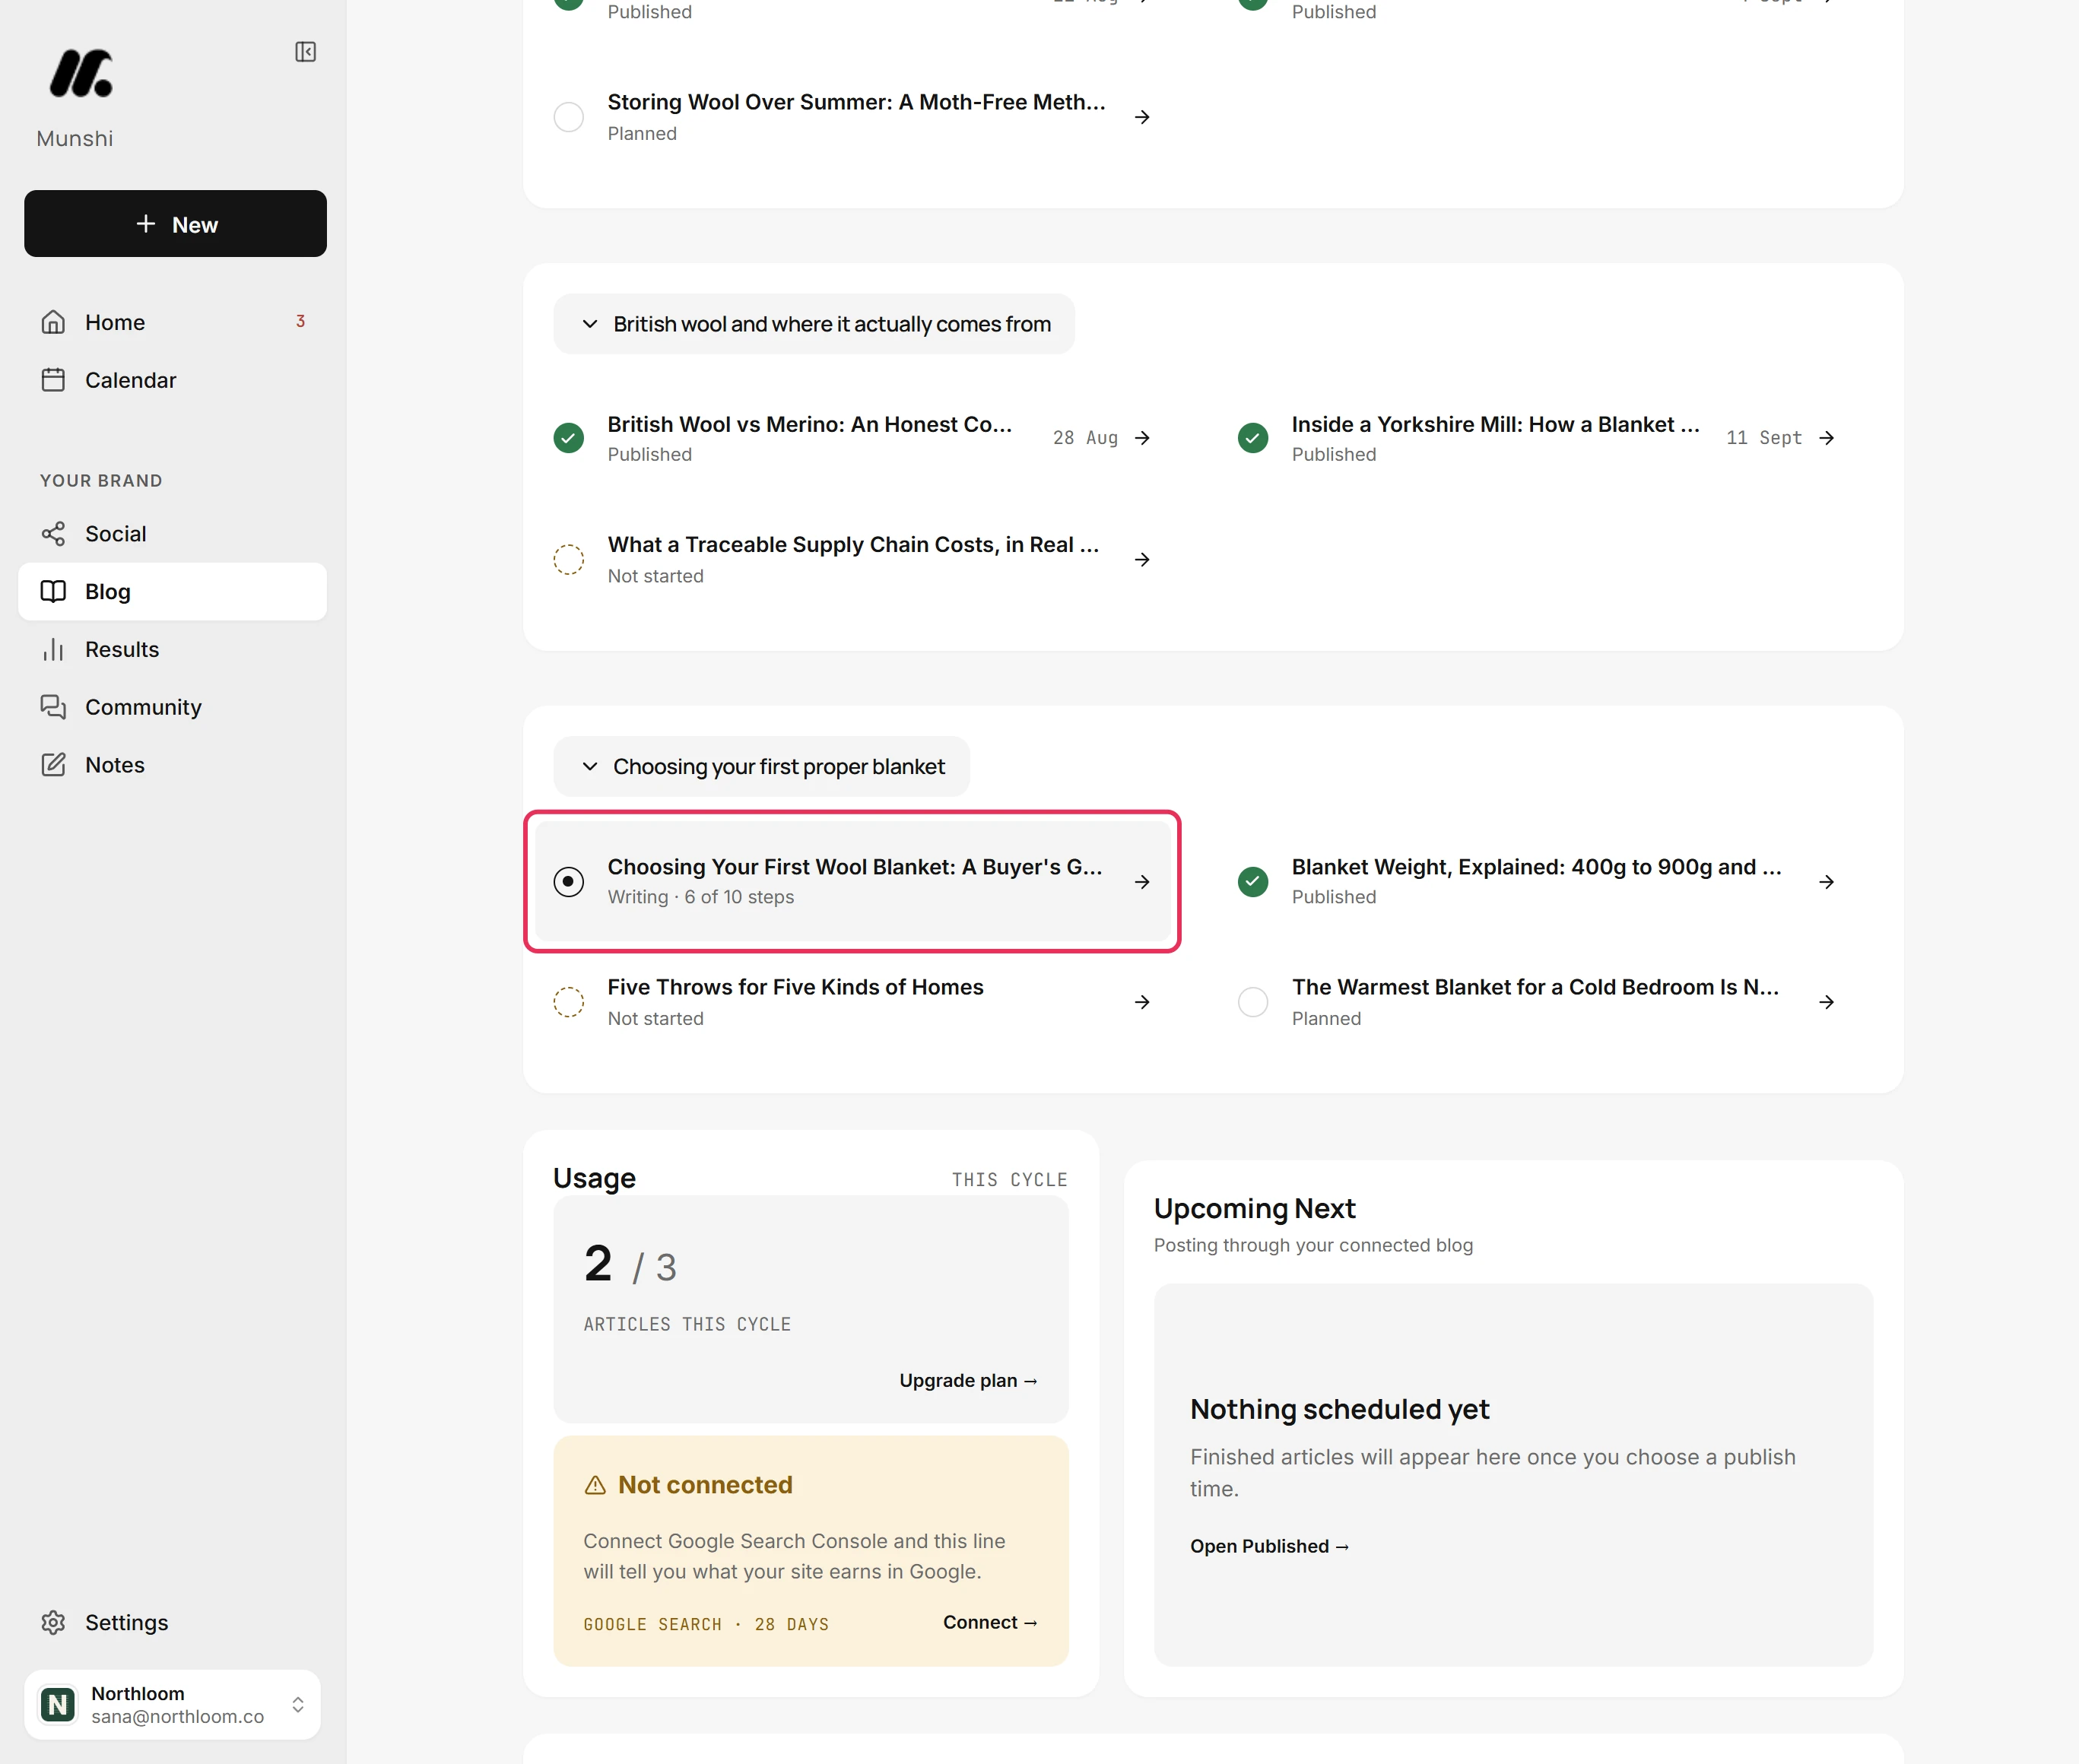
On the Blog Overview, click the article that needs a cover. It opens in the writer, on its steps.
-
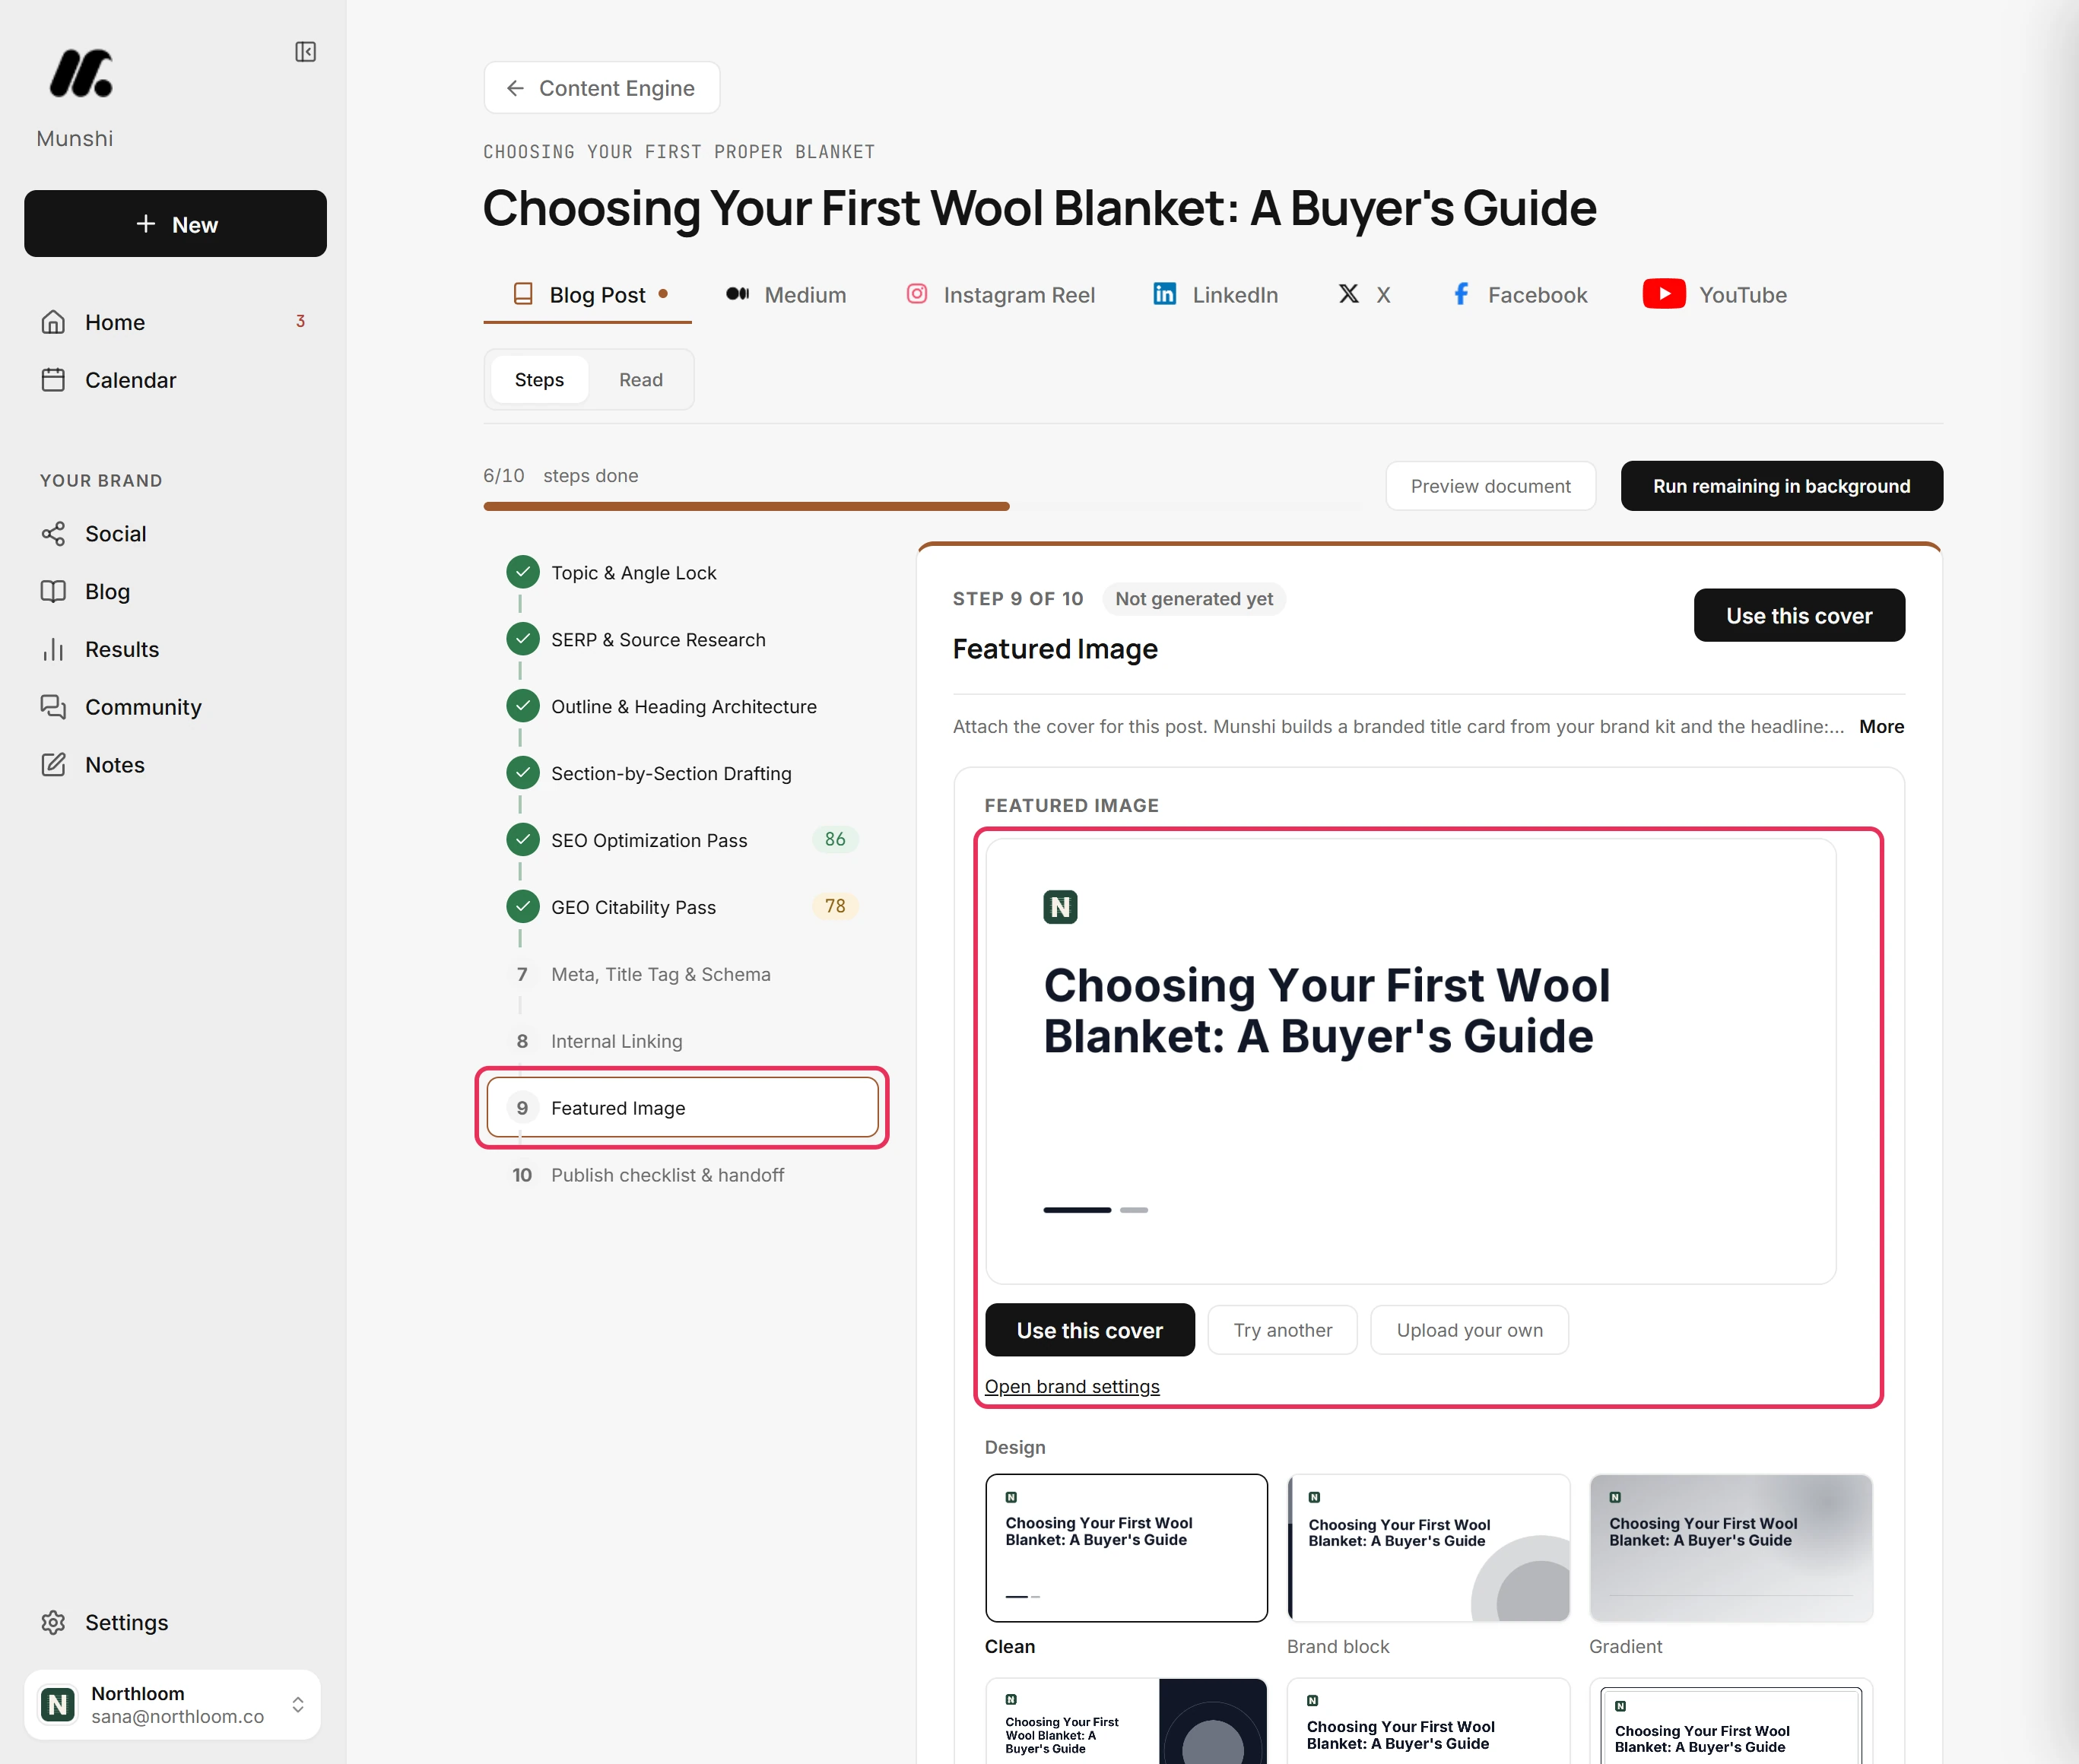
Click Featured Image in the list of steps. Munshi draws a cover right away from your brand kit and the article's title. It shows the cover as a preview.
-
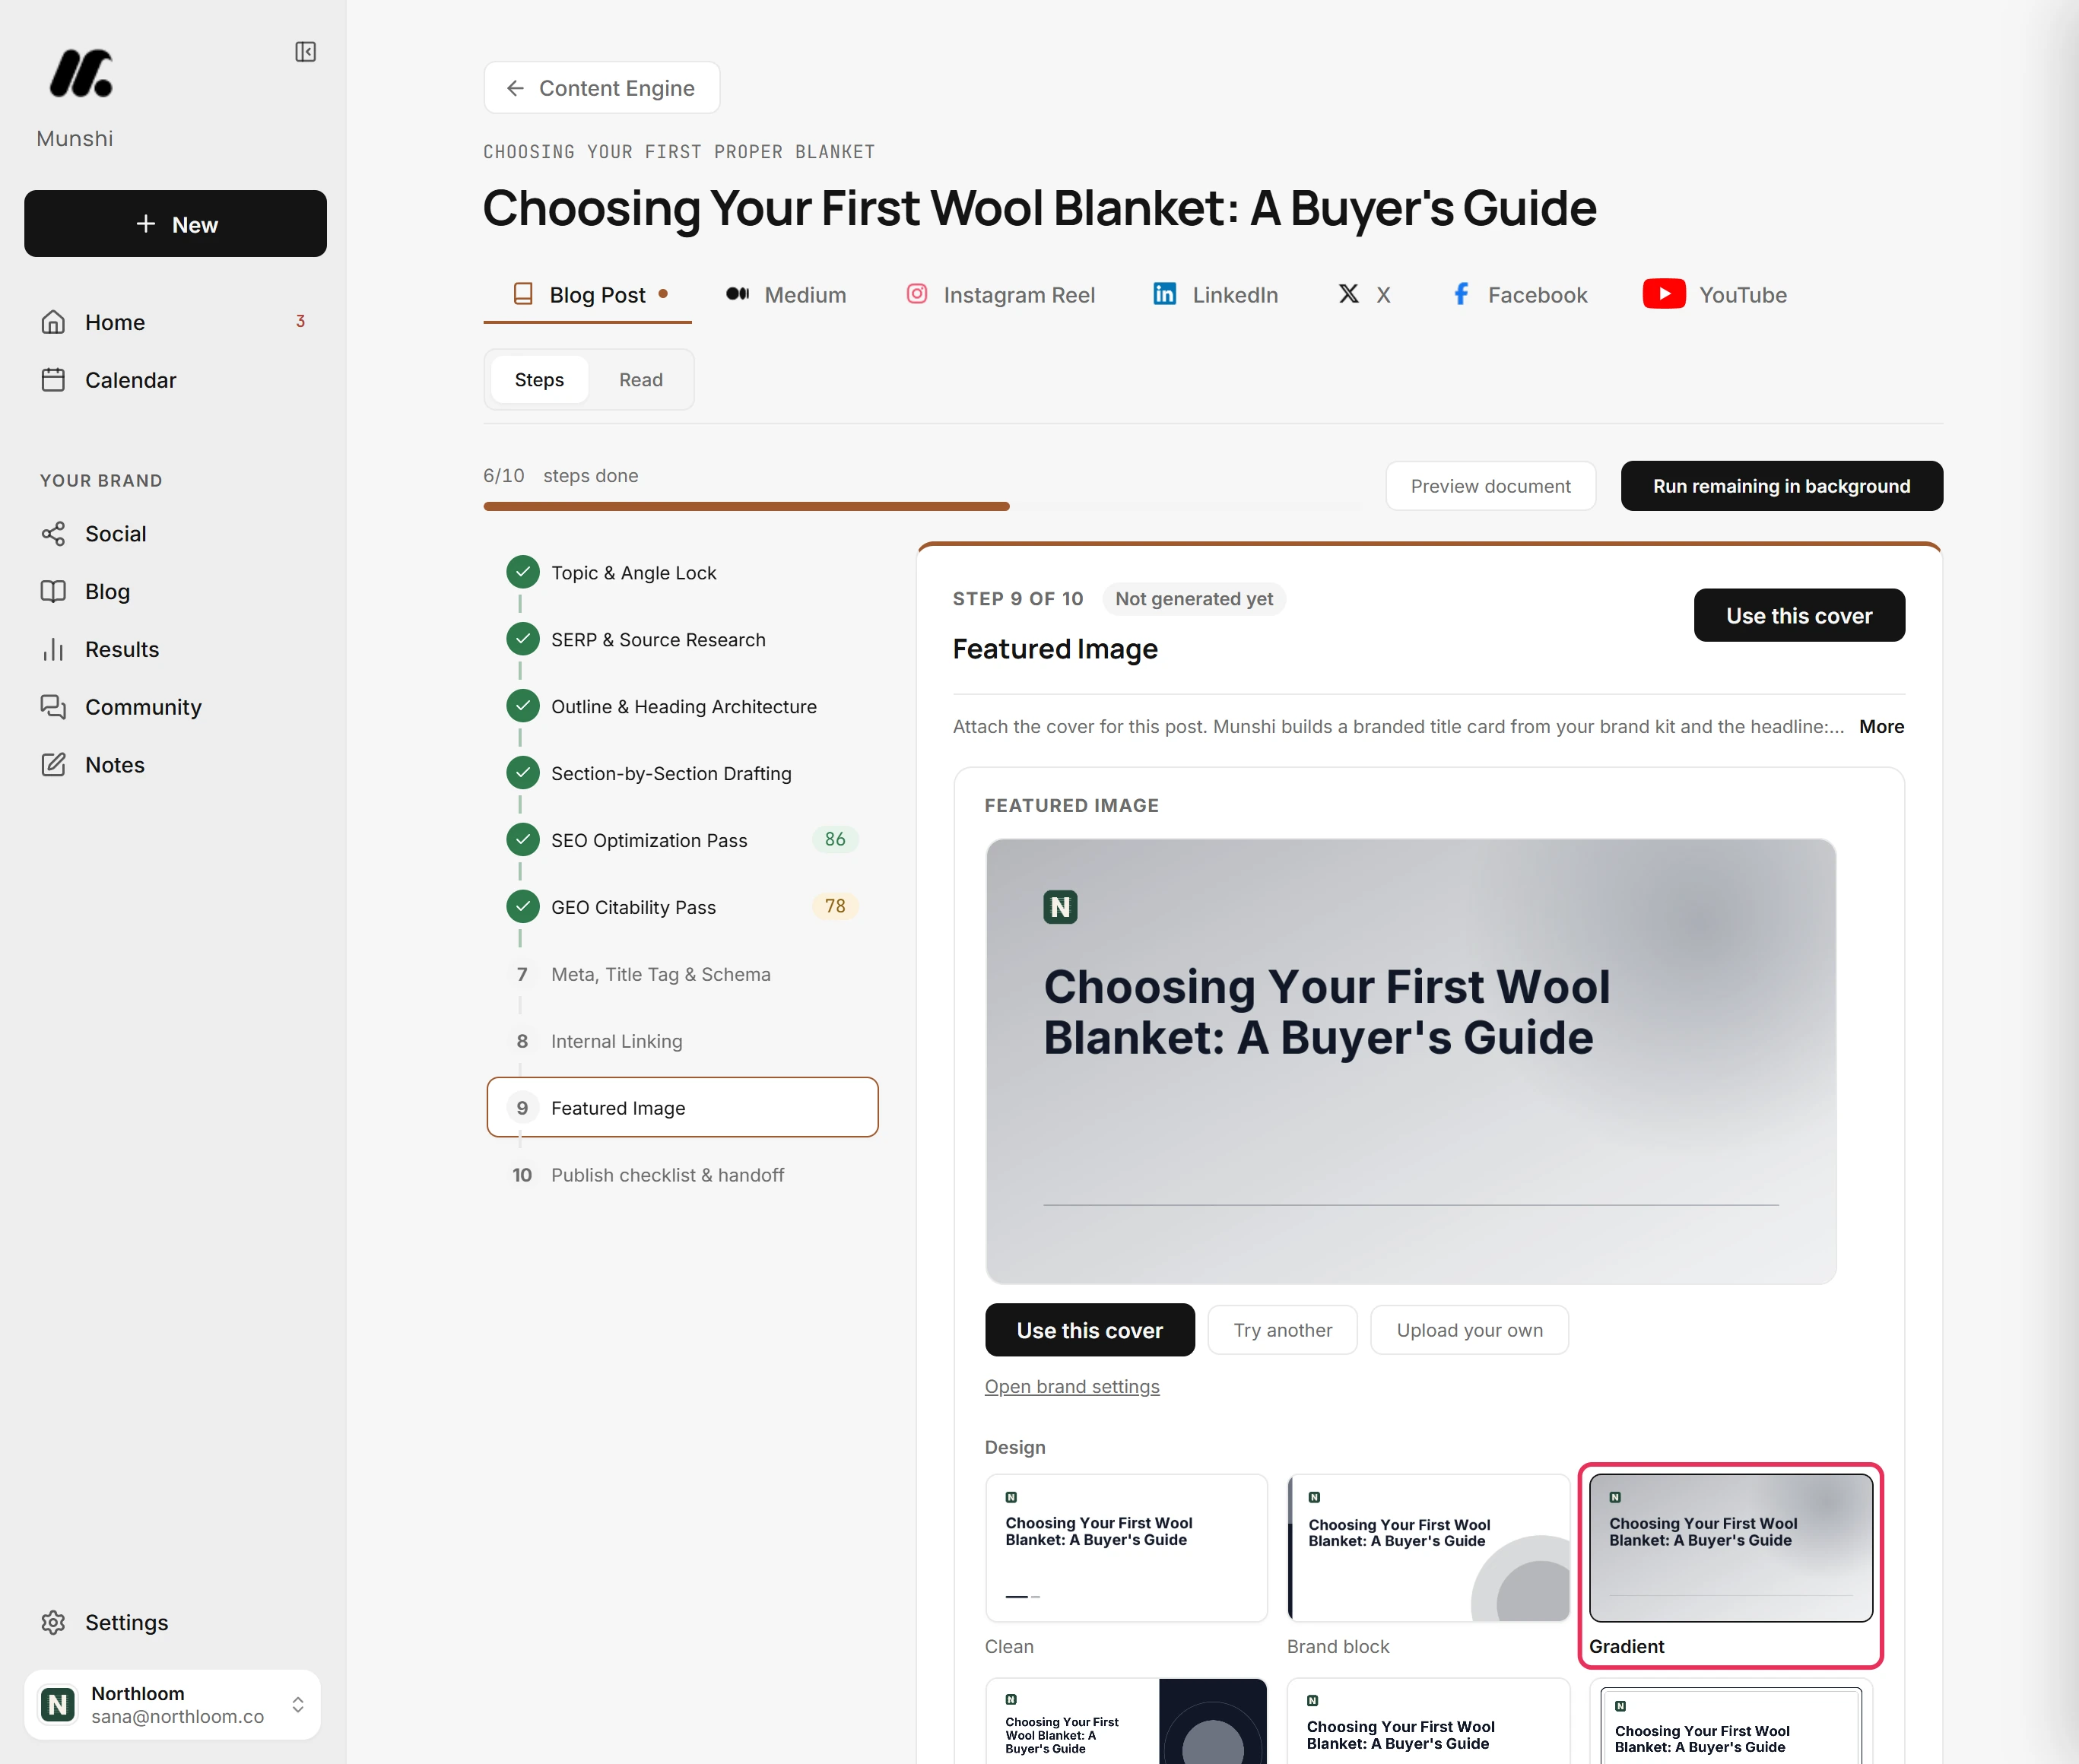
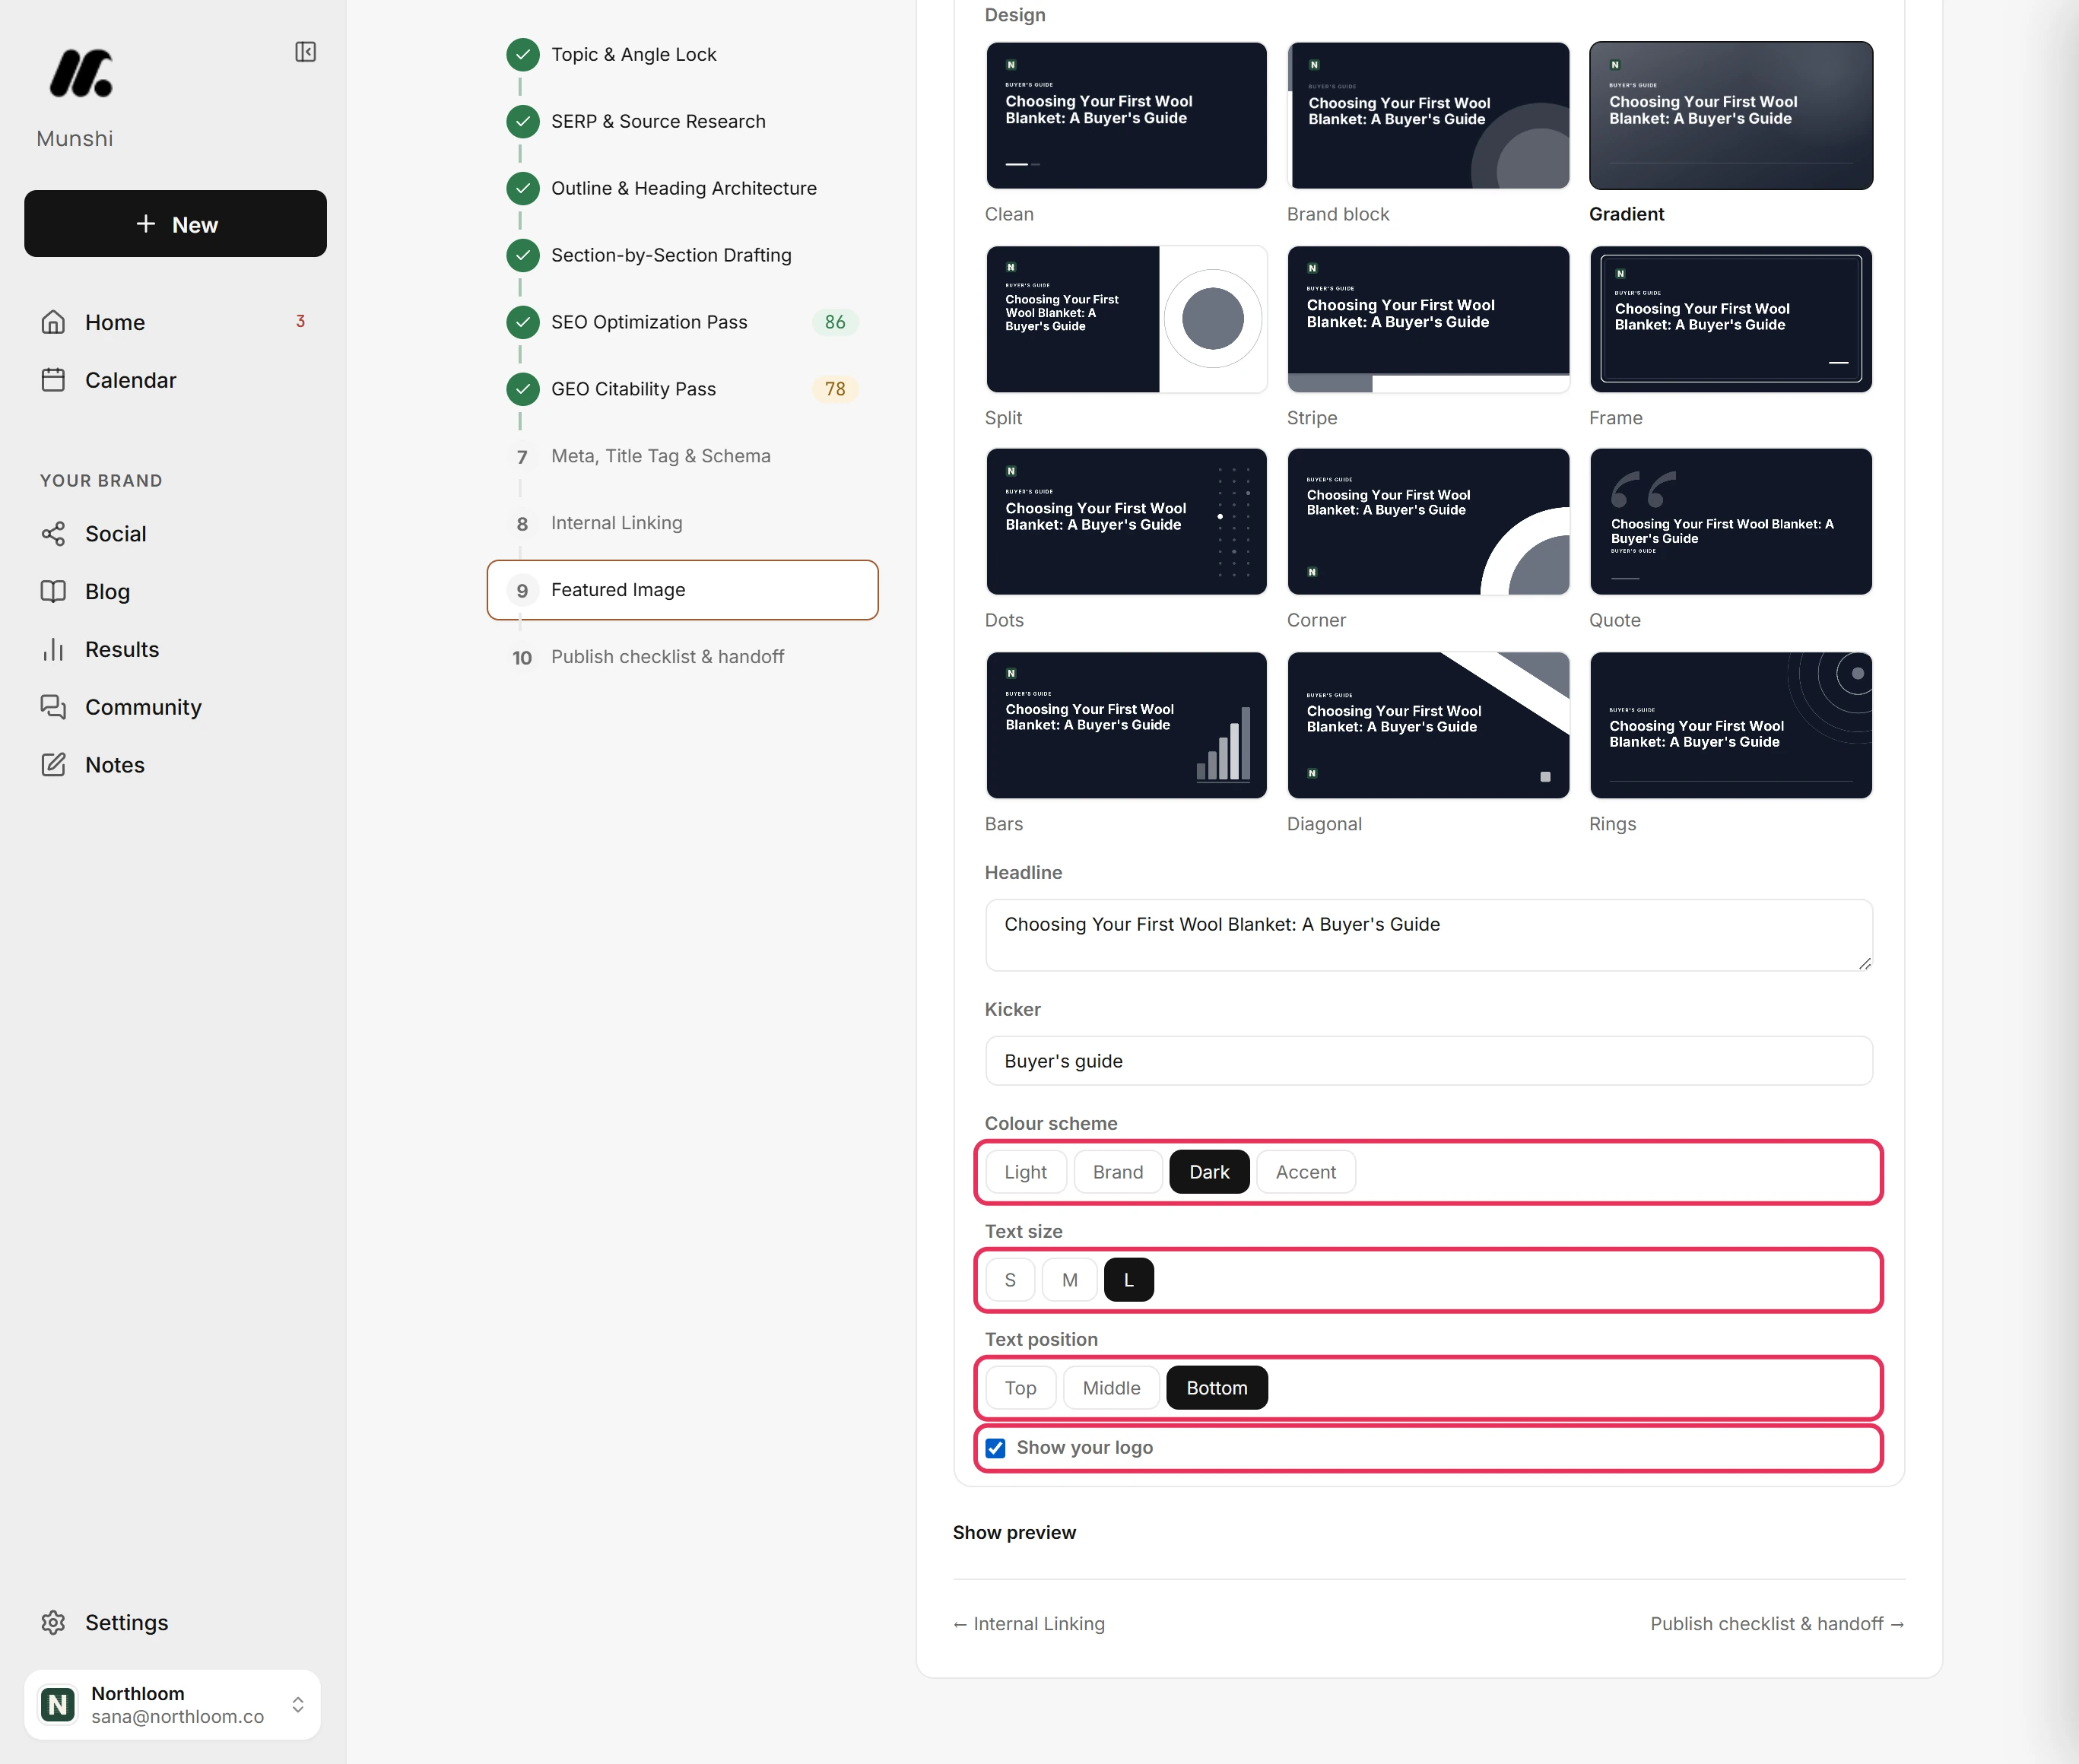
Click a design in the Design grid. Each thumbnail uses your own headline, so you see the real cover before you pick.
-
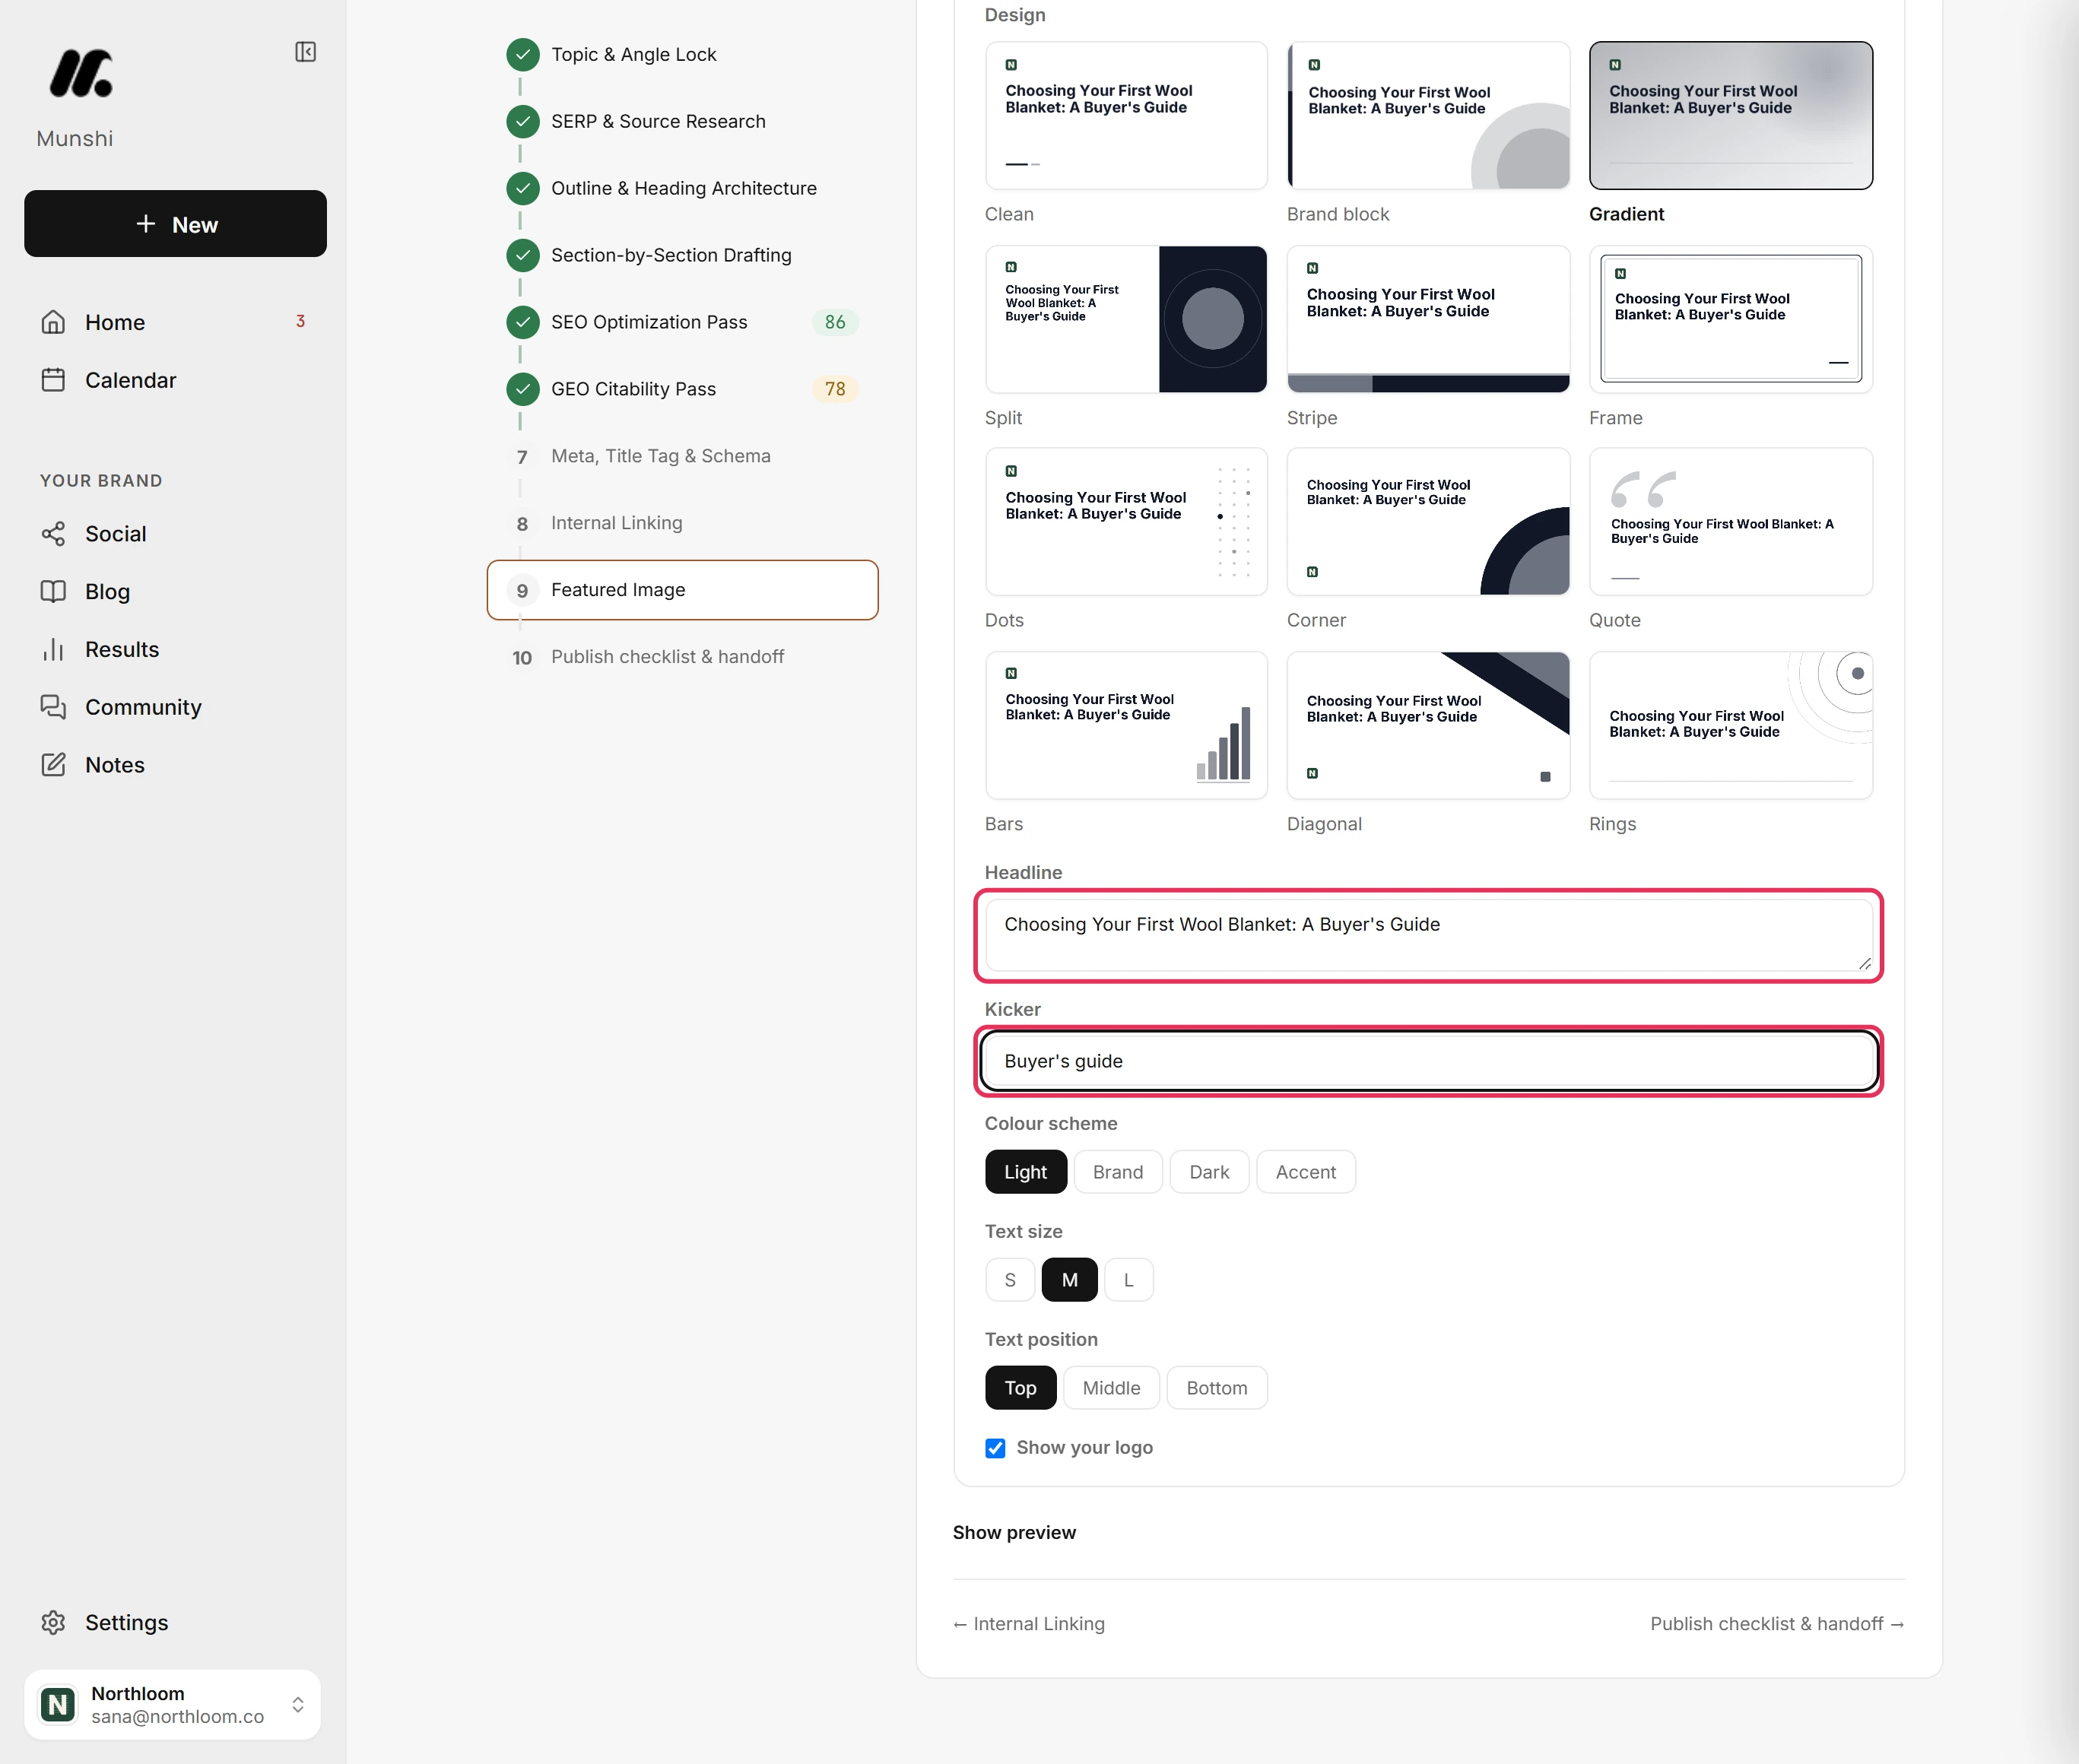
Headline starts as the article's title. Shorten it if the cover feels crowded. Kicker takes an optional short line, such as a series name.
-
Set Colour scheme, Text size and Text position. Each design offers only the schemes and positions made for it. Show your logo puts your brand kit logo on the cover. It starts ticked when you have a logo.
-
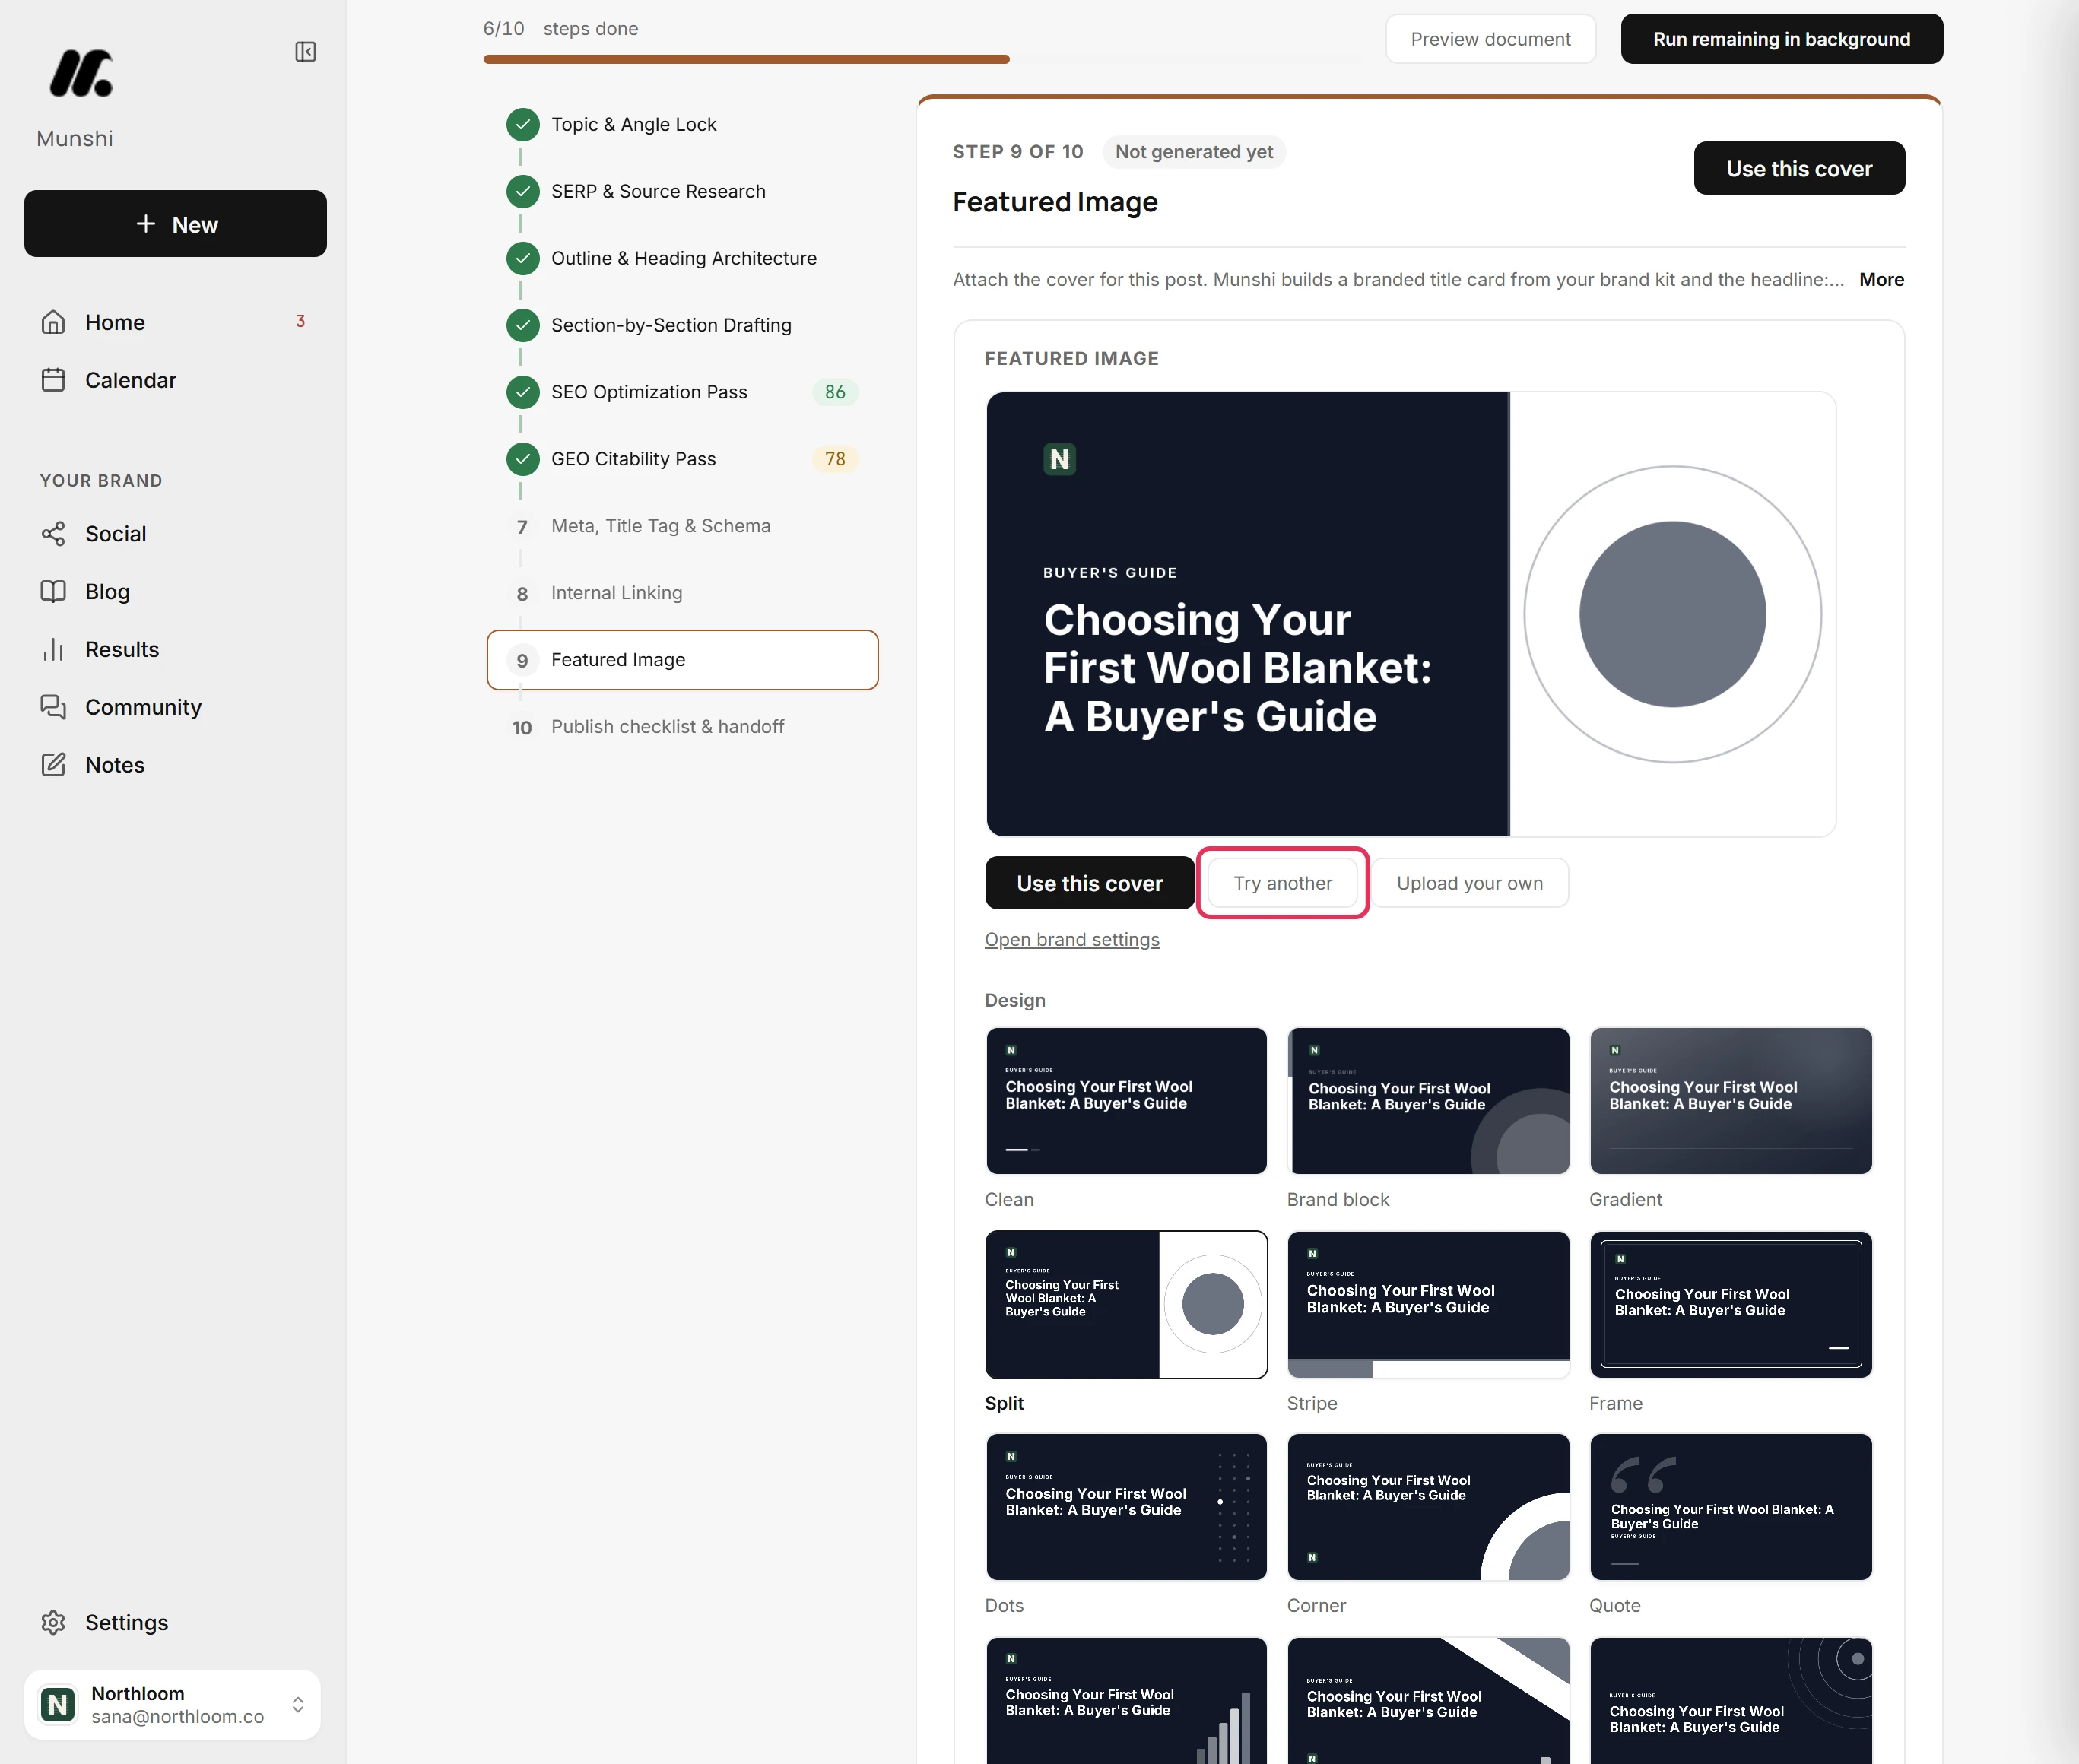
Click Try another to swap in the next design. Your headline and kicker stay as they are.
-
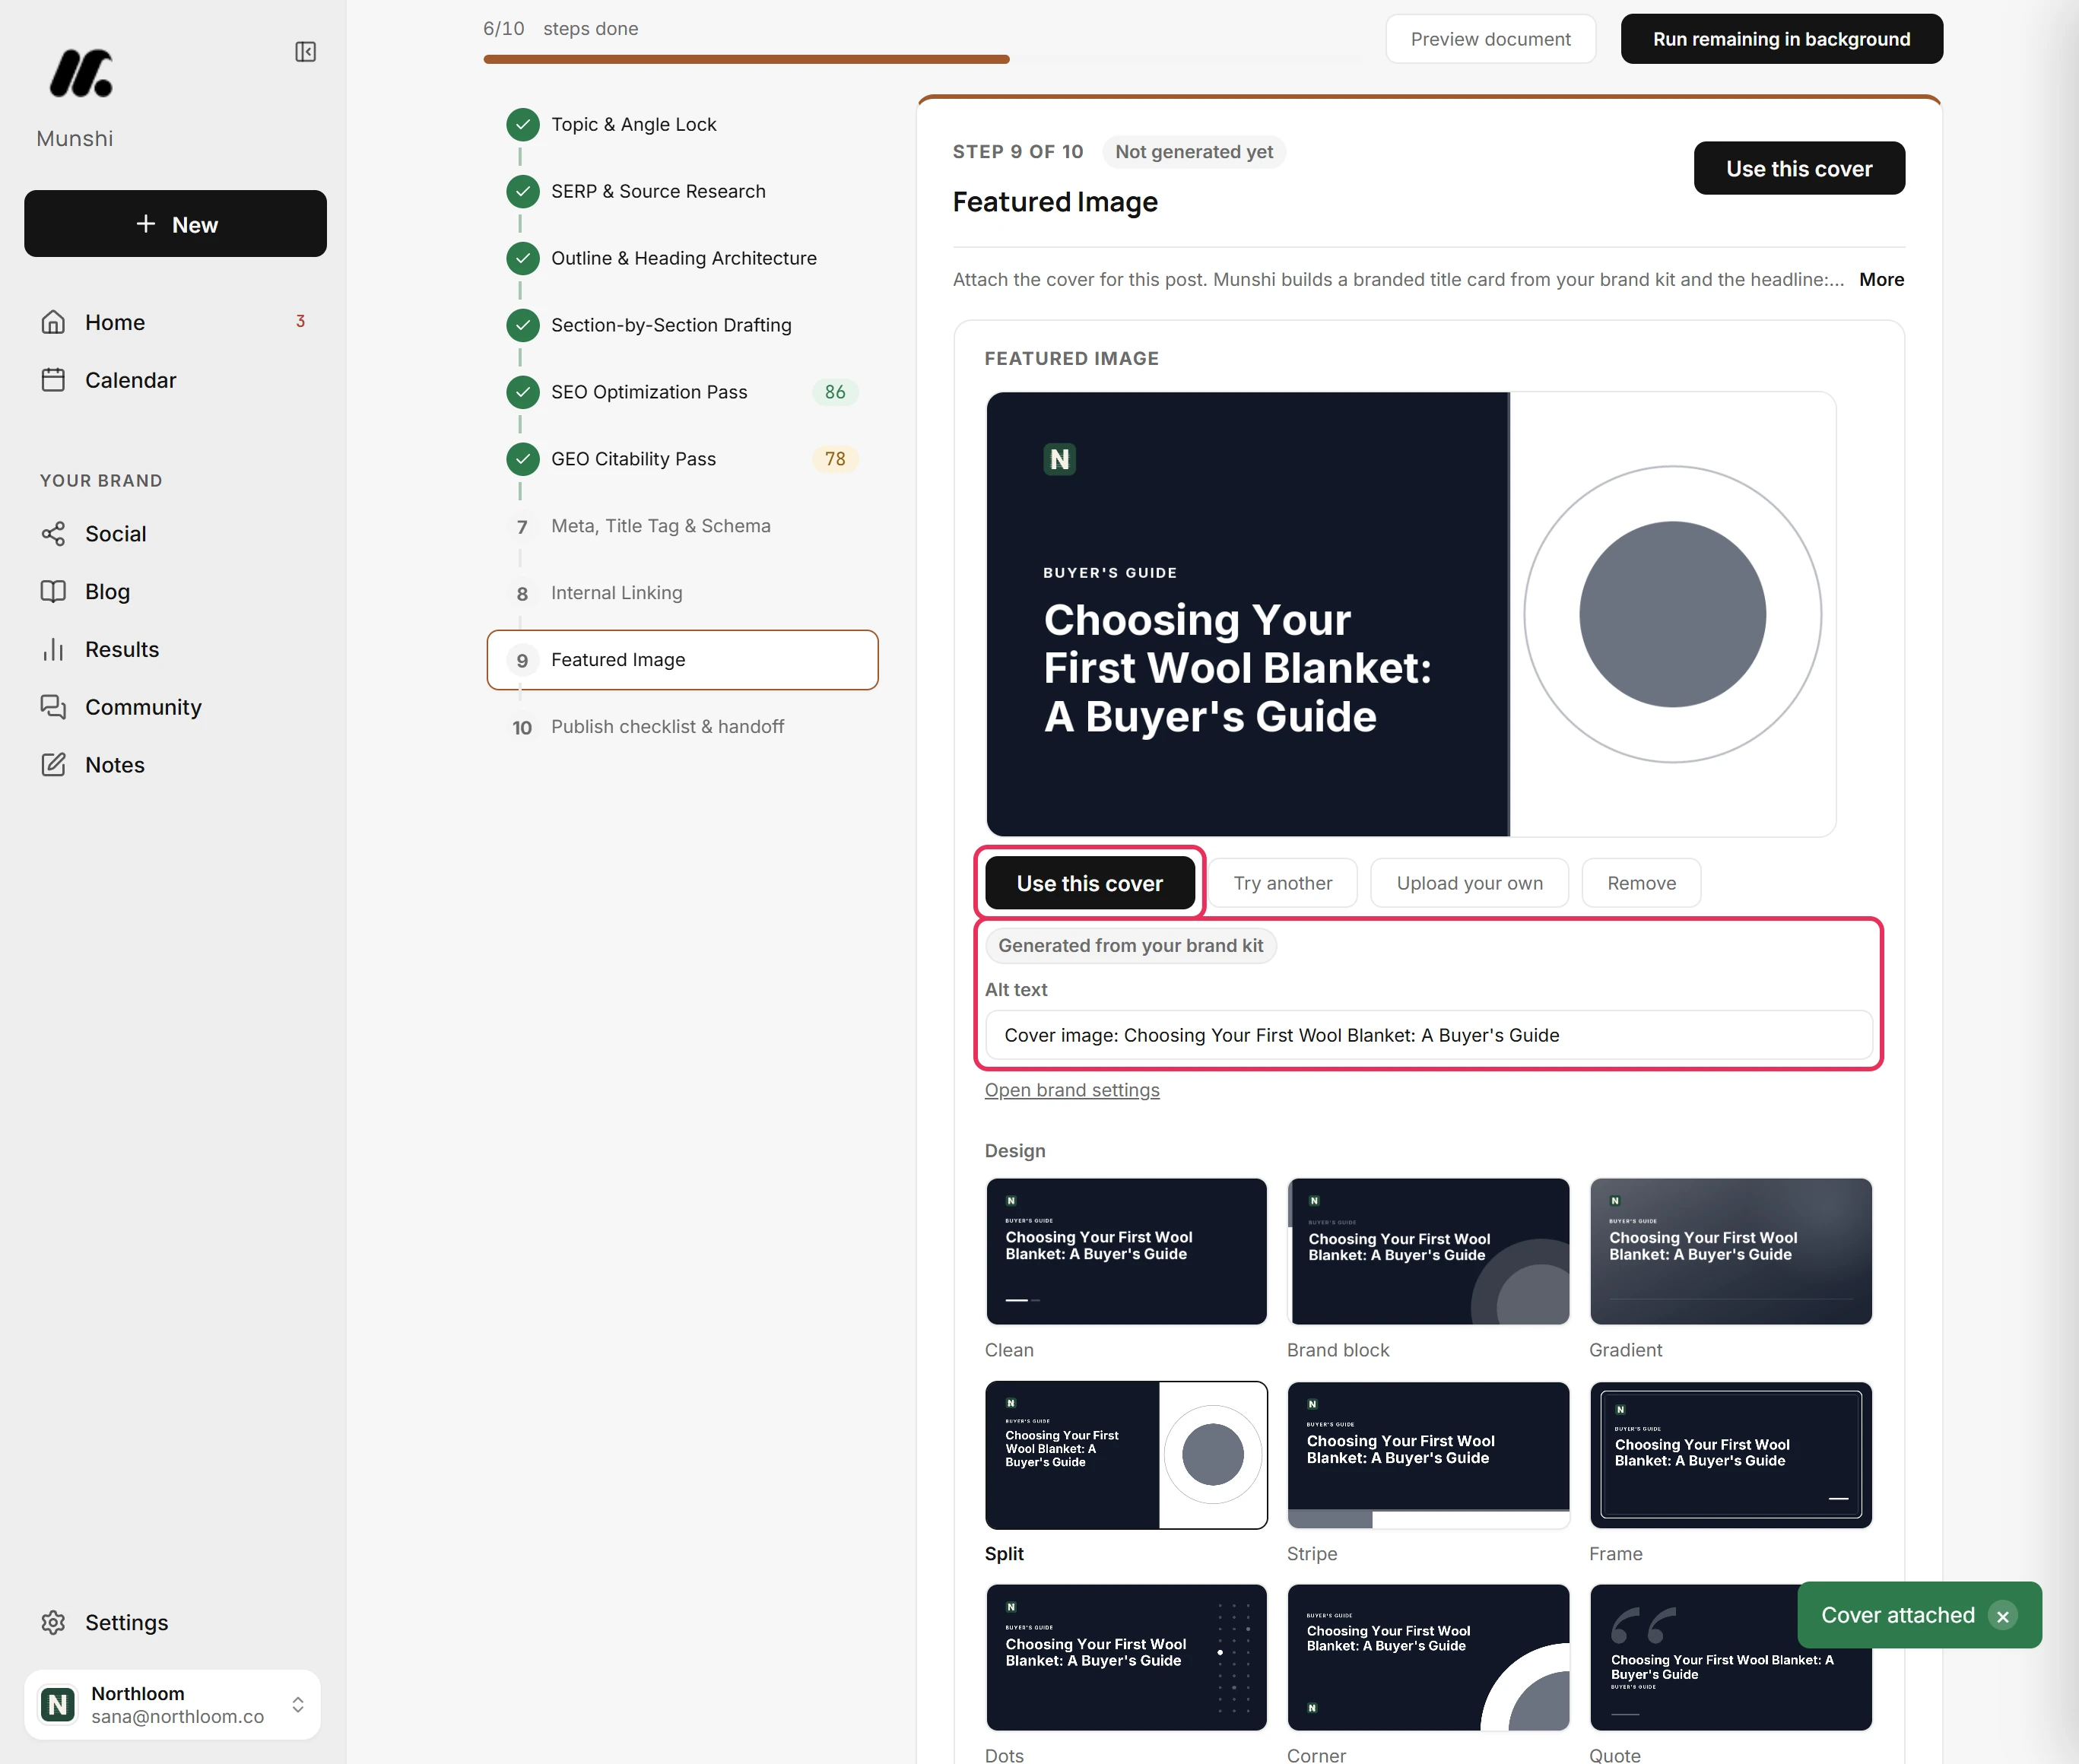
When the preview looks right, click Use this cover under it. Munshi attaches the cover and tags it Generated from your brand kit. It also fills in Alt text, which you can edit.
-
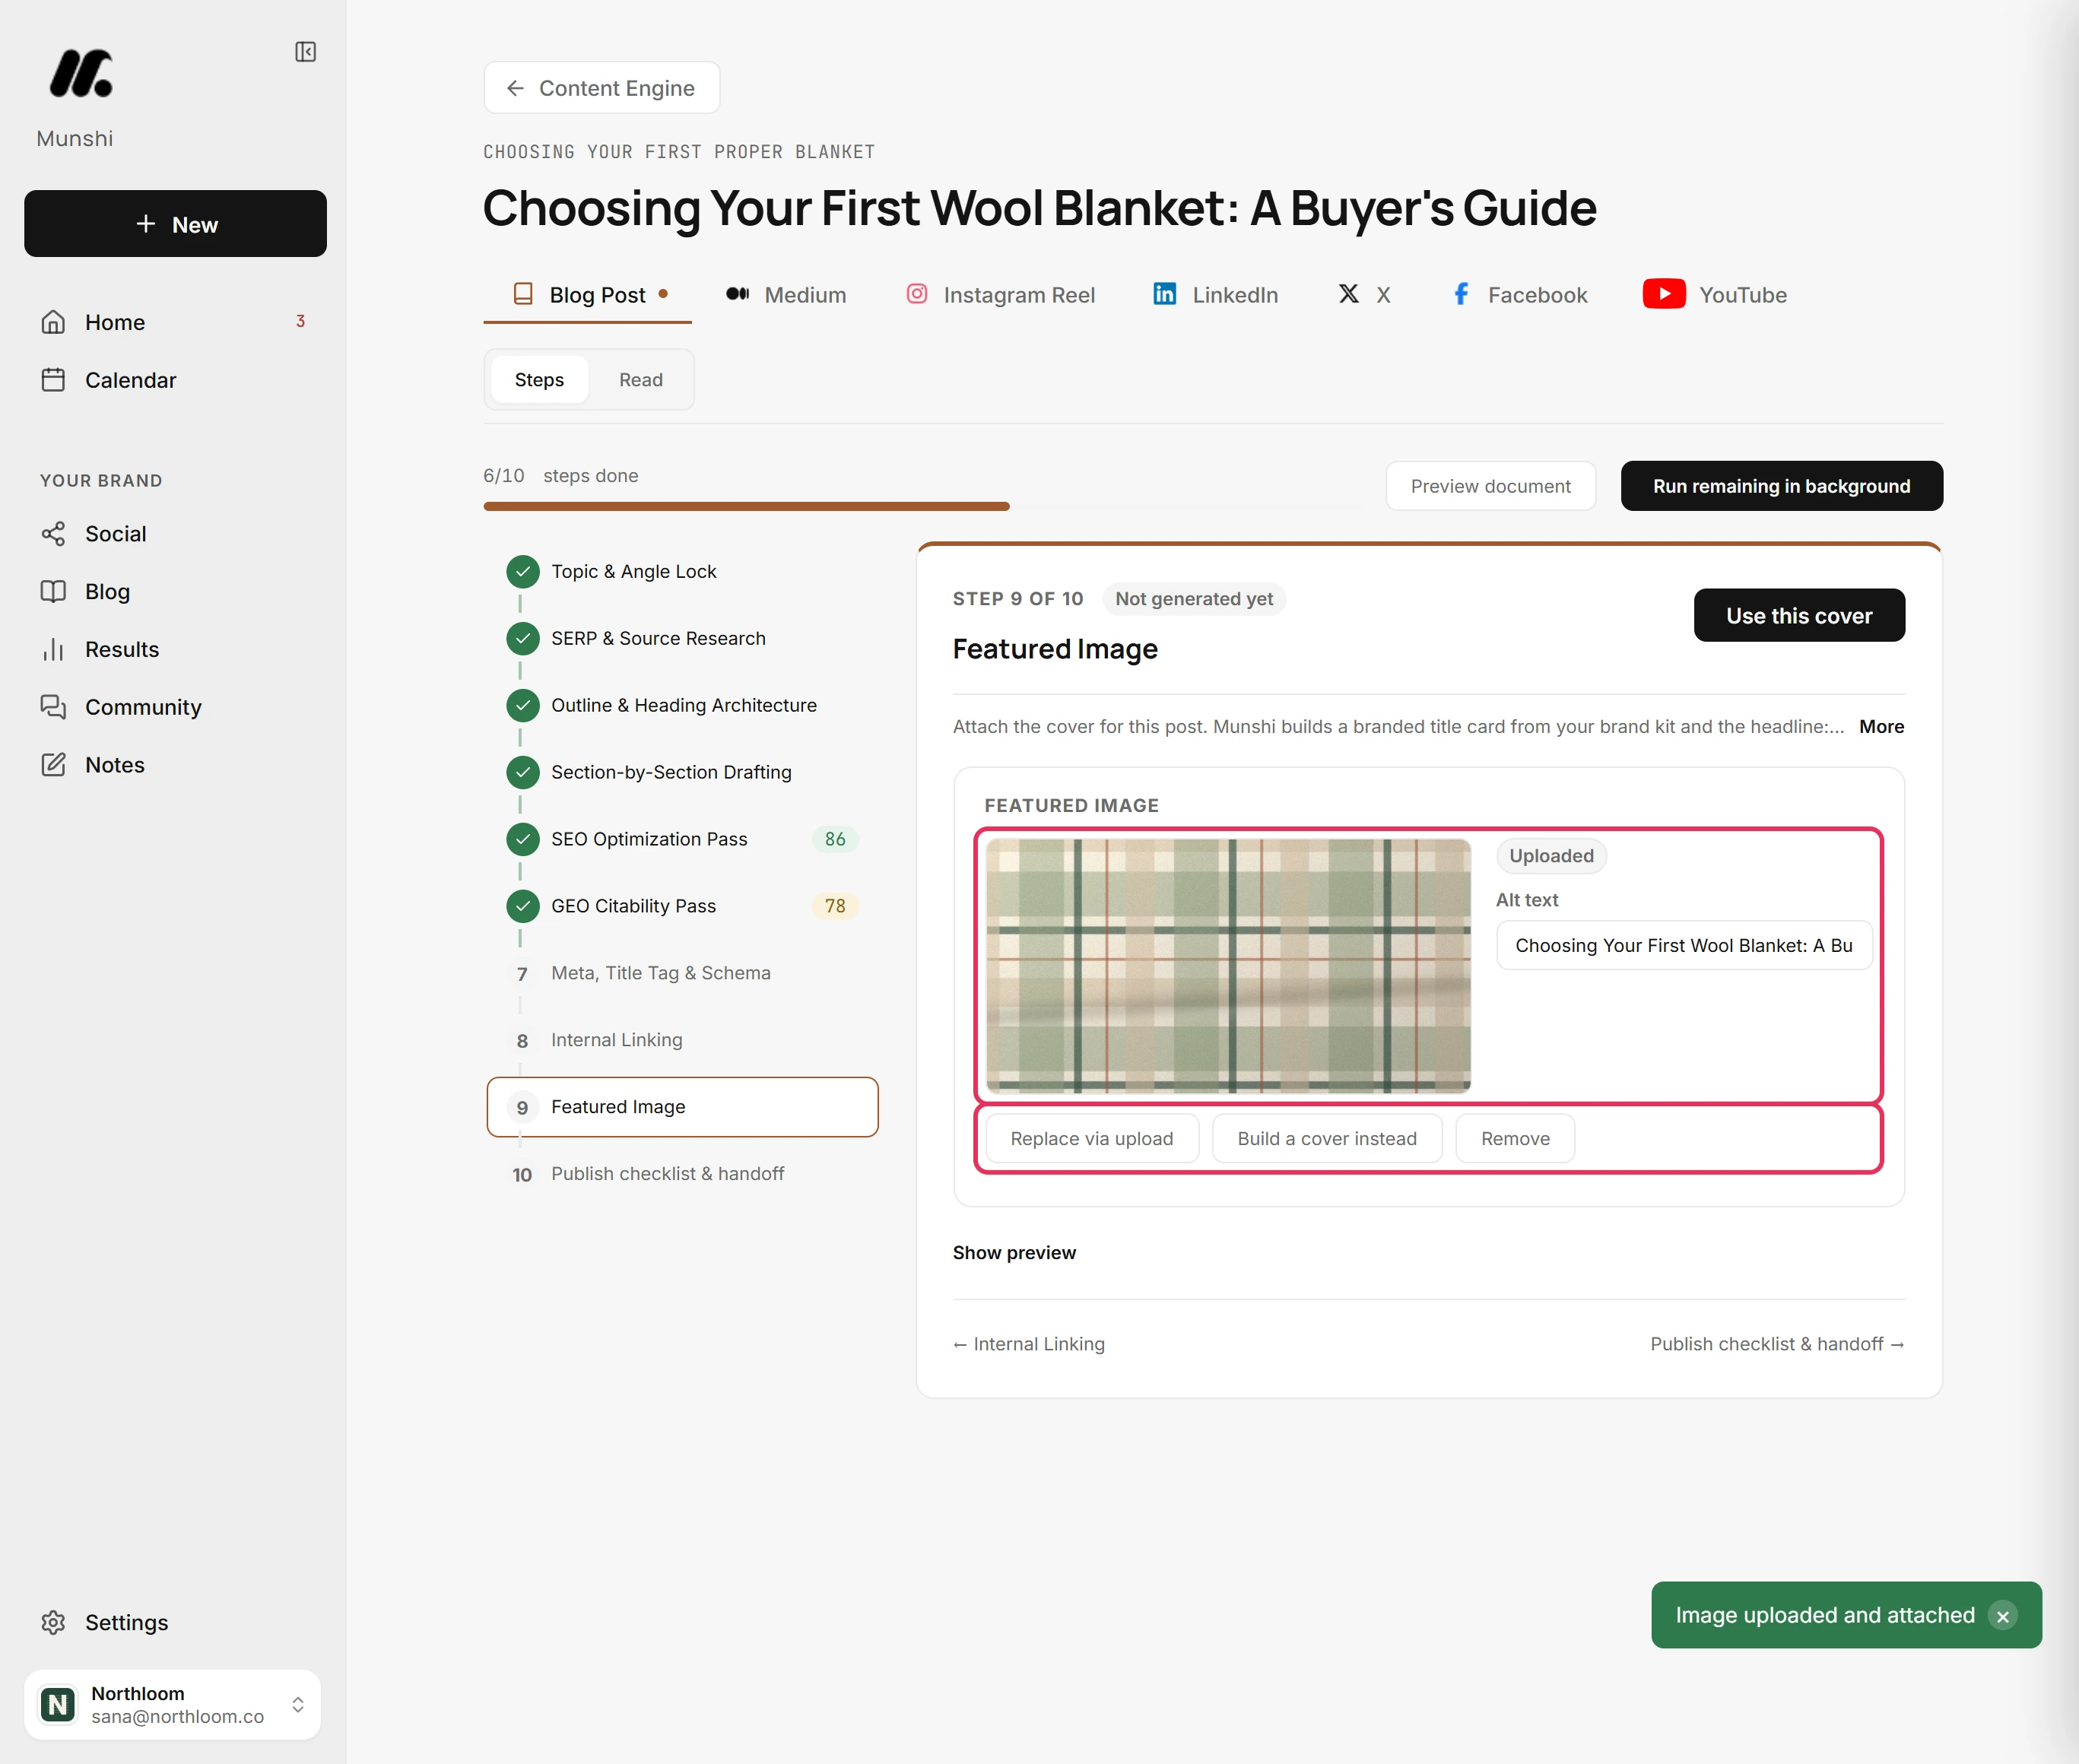
Click Upload your own and pick a JPG, PNG, WebP or GIF. It replaces the cover and is tagged Uploaded. Build a cover instead takes you back to the designs. Remove takes the picture off.
Where you are now
The article keeps its cover from now on. It shows at the top of the article in Read and goes out with the article when it is published. If you publish with no cover, Munshi draws one from your brand kit on the way out.
If something goes wrong
Show your logo is greyed out
Add a logo in Settings, under Brand, and the box can be ticked. The box is grey when the design has no place for a logo, or your brand kit has no logo yet. The line under the box says which.
“Munshi built the cover but could not store it. Try again.”
Click Use this cover again in a moment. The cover was drawn but not stored, so nothing was attached.
“Munshi could not build that cover. Change the headline or pick another design.”
Shorten the headline or pick another design. That combination did not draw, so Munshi clears the preview instead of showing an older cover.
“The upload didn't go through. Try again.”
Upload the picture again in a moment. It was not stored, so the article keeps the cover it had.
“Cover designs are unavailable right now. Upload an image to use as the cover.”
Click Upload image to attach a picture of your own. The designs could not load, so the step offers an upload instead.
Try it on your own brand this week.
Munshi Social, the AI content marketing engine for small teams, plans, writes, publishes, and tracks your blog and socials. The guide above shows the real app, not a mock-up.
Start your workspace