How to fill in your Brief
Your Brief tells Munshi about your business. Fill it in under Settings > Brief: the basics, your audience (Munshi can research it) and your voice.
Before you start
- A workspace that has been set up. Setup fills in part of the Brief from your website.
-
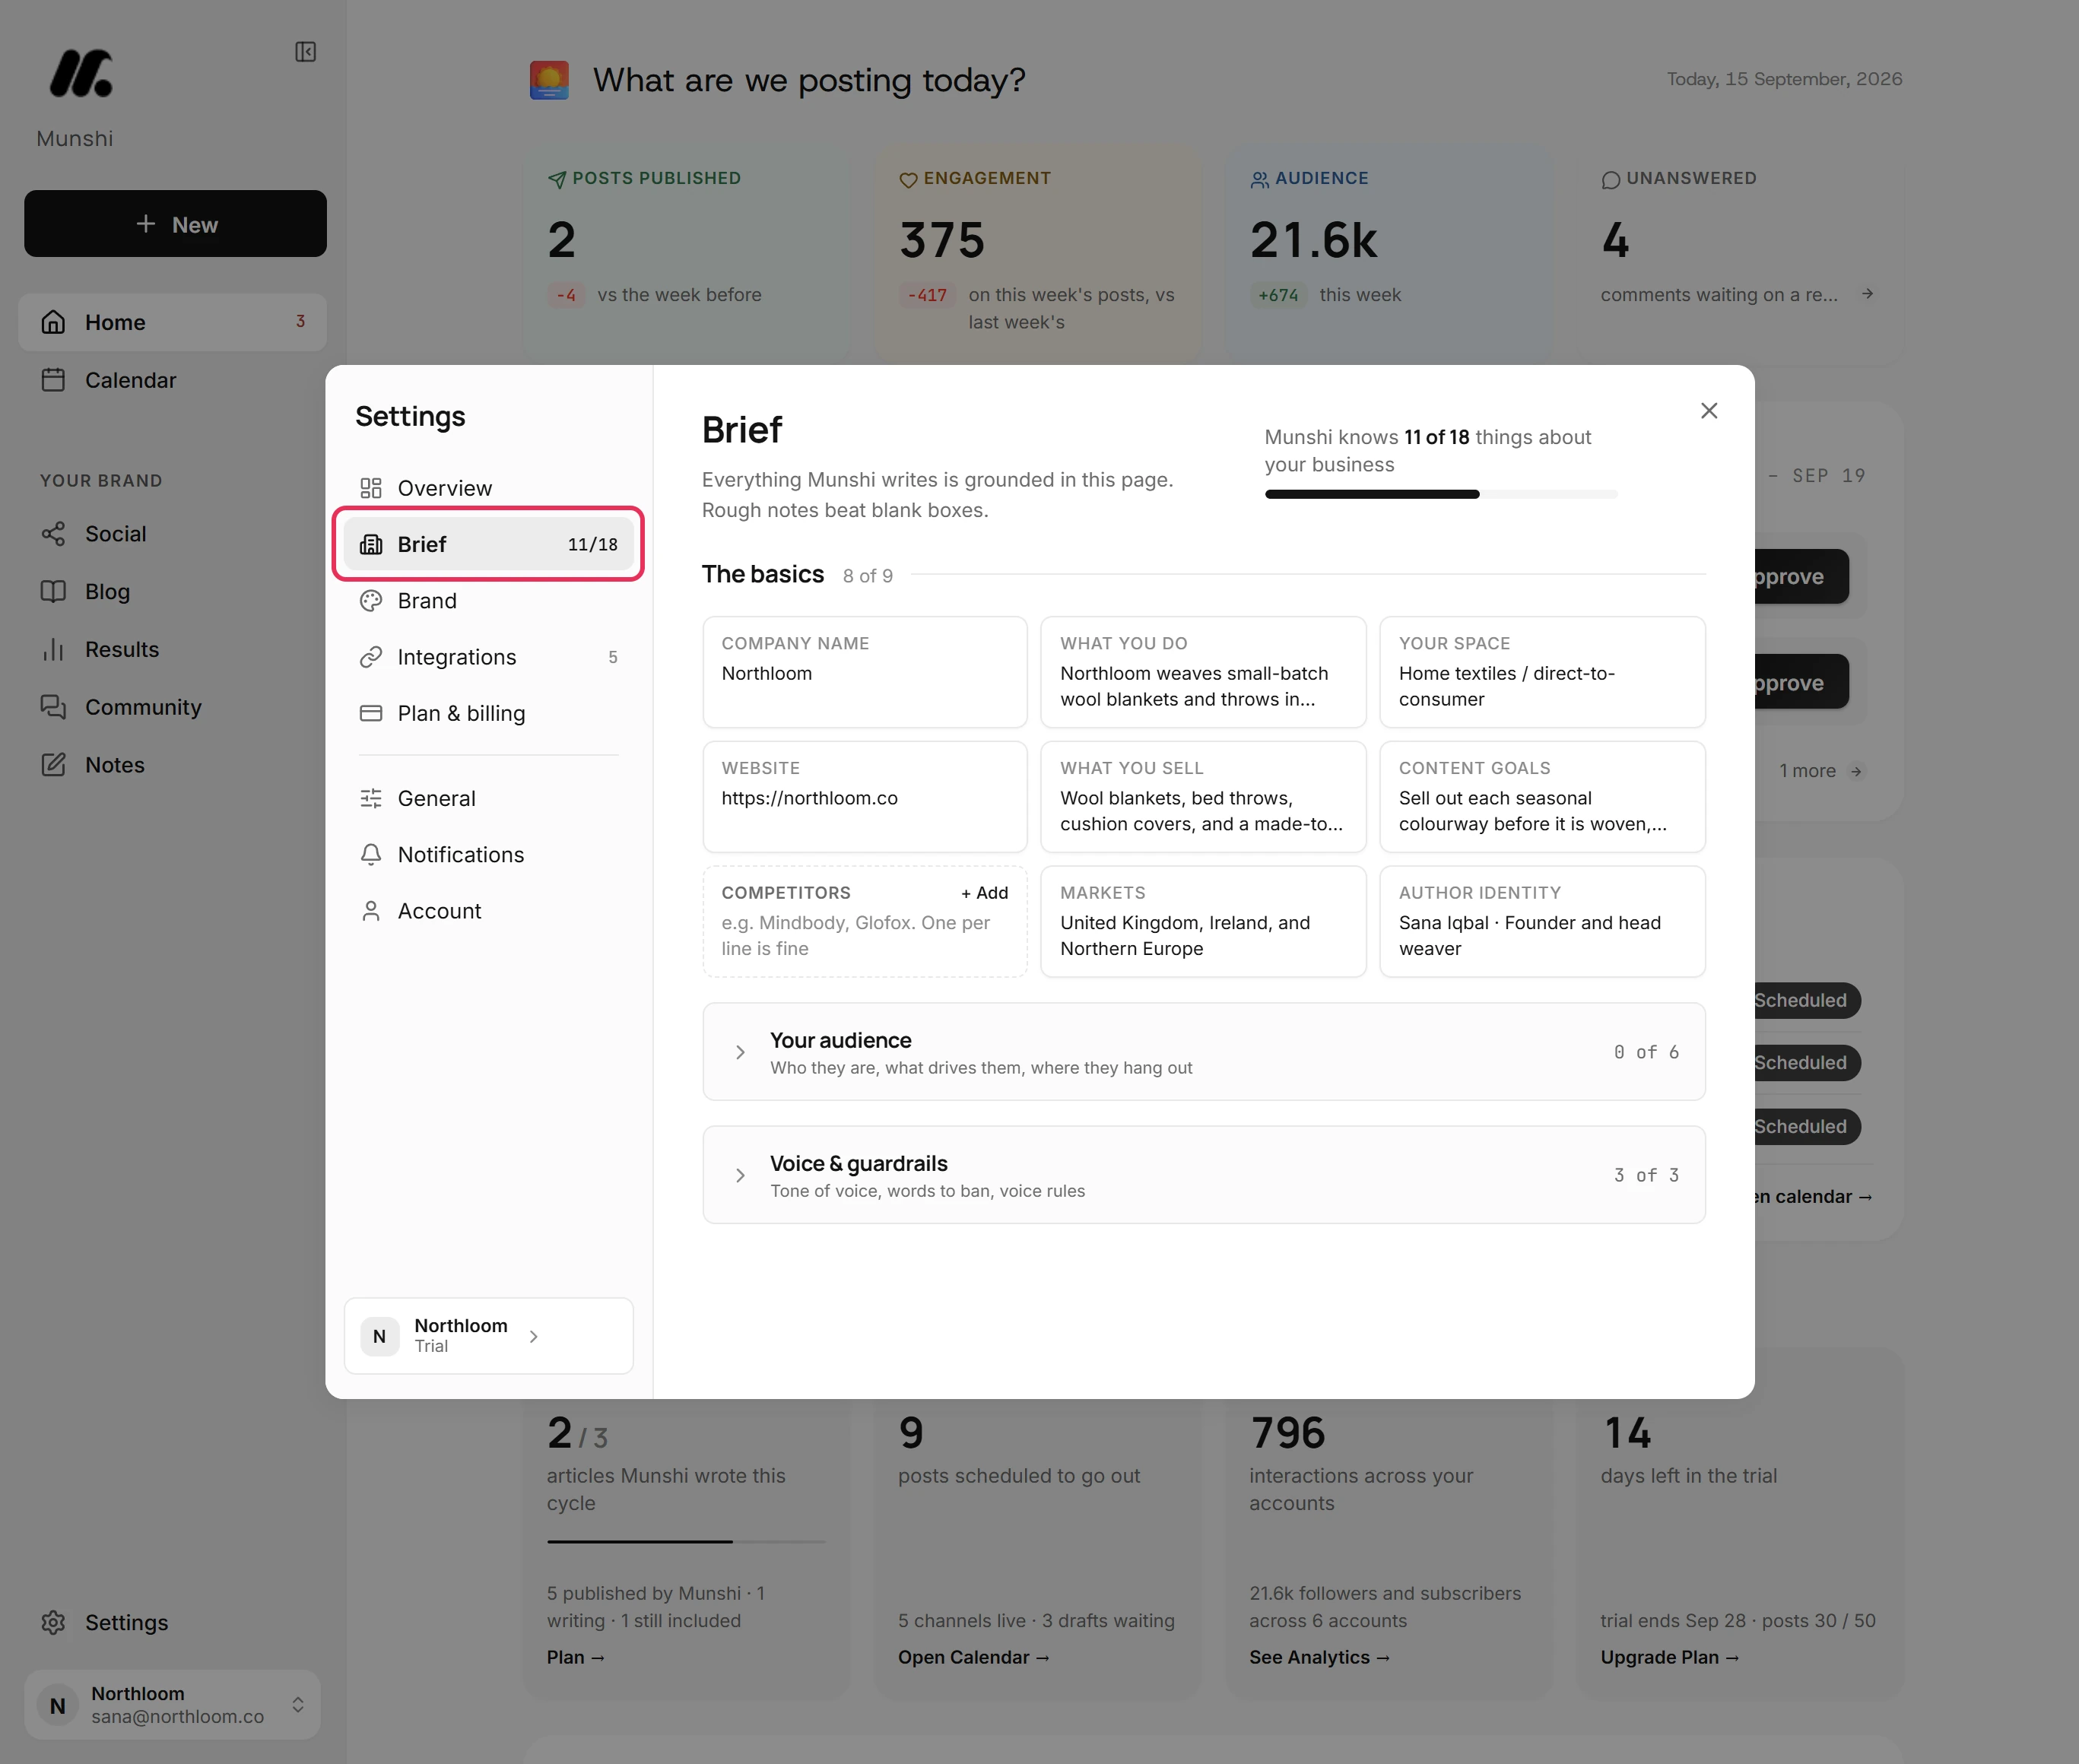
Click Settings at the bottom of the sidebar, then Brief. The count beside Brief is how many answers it holds.
-
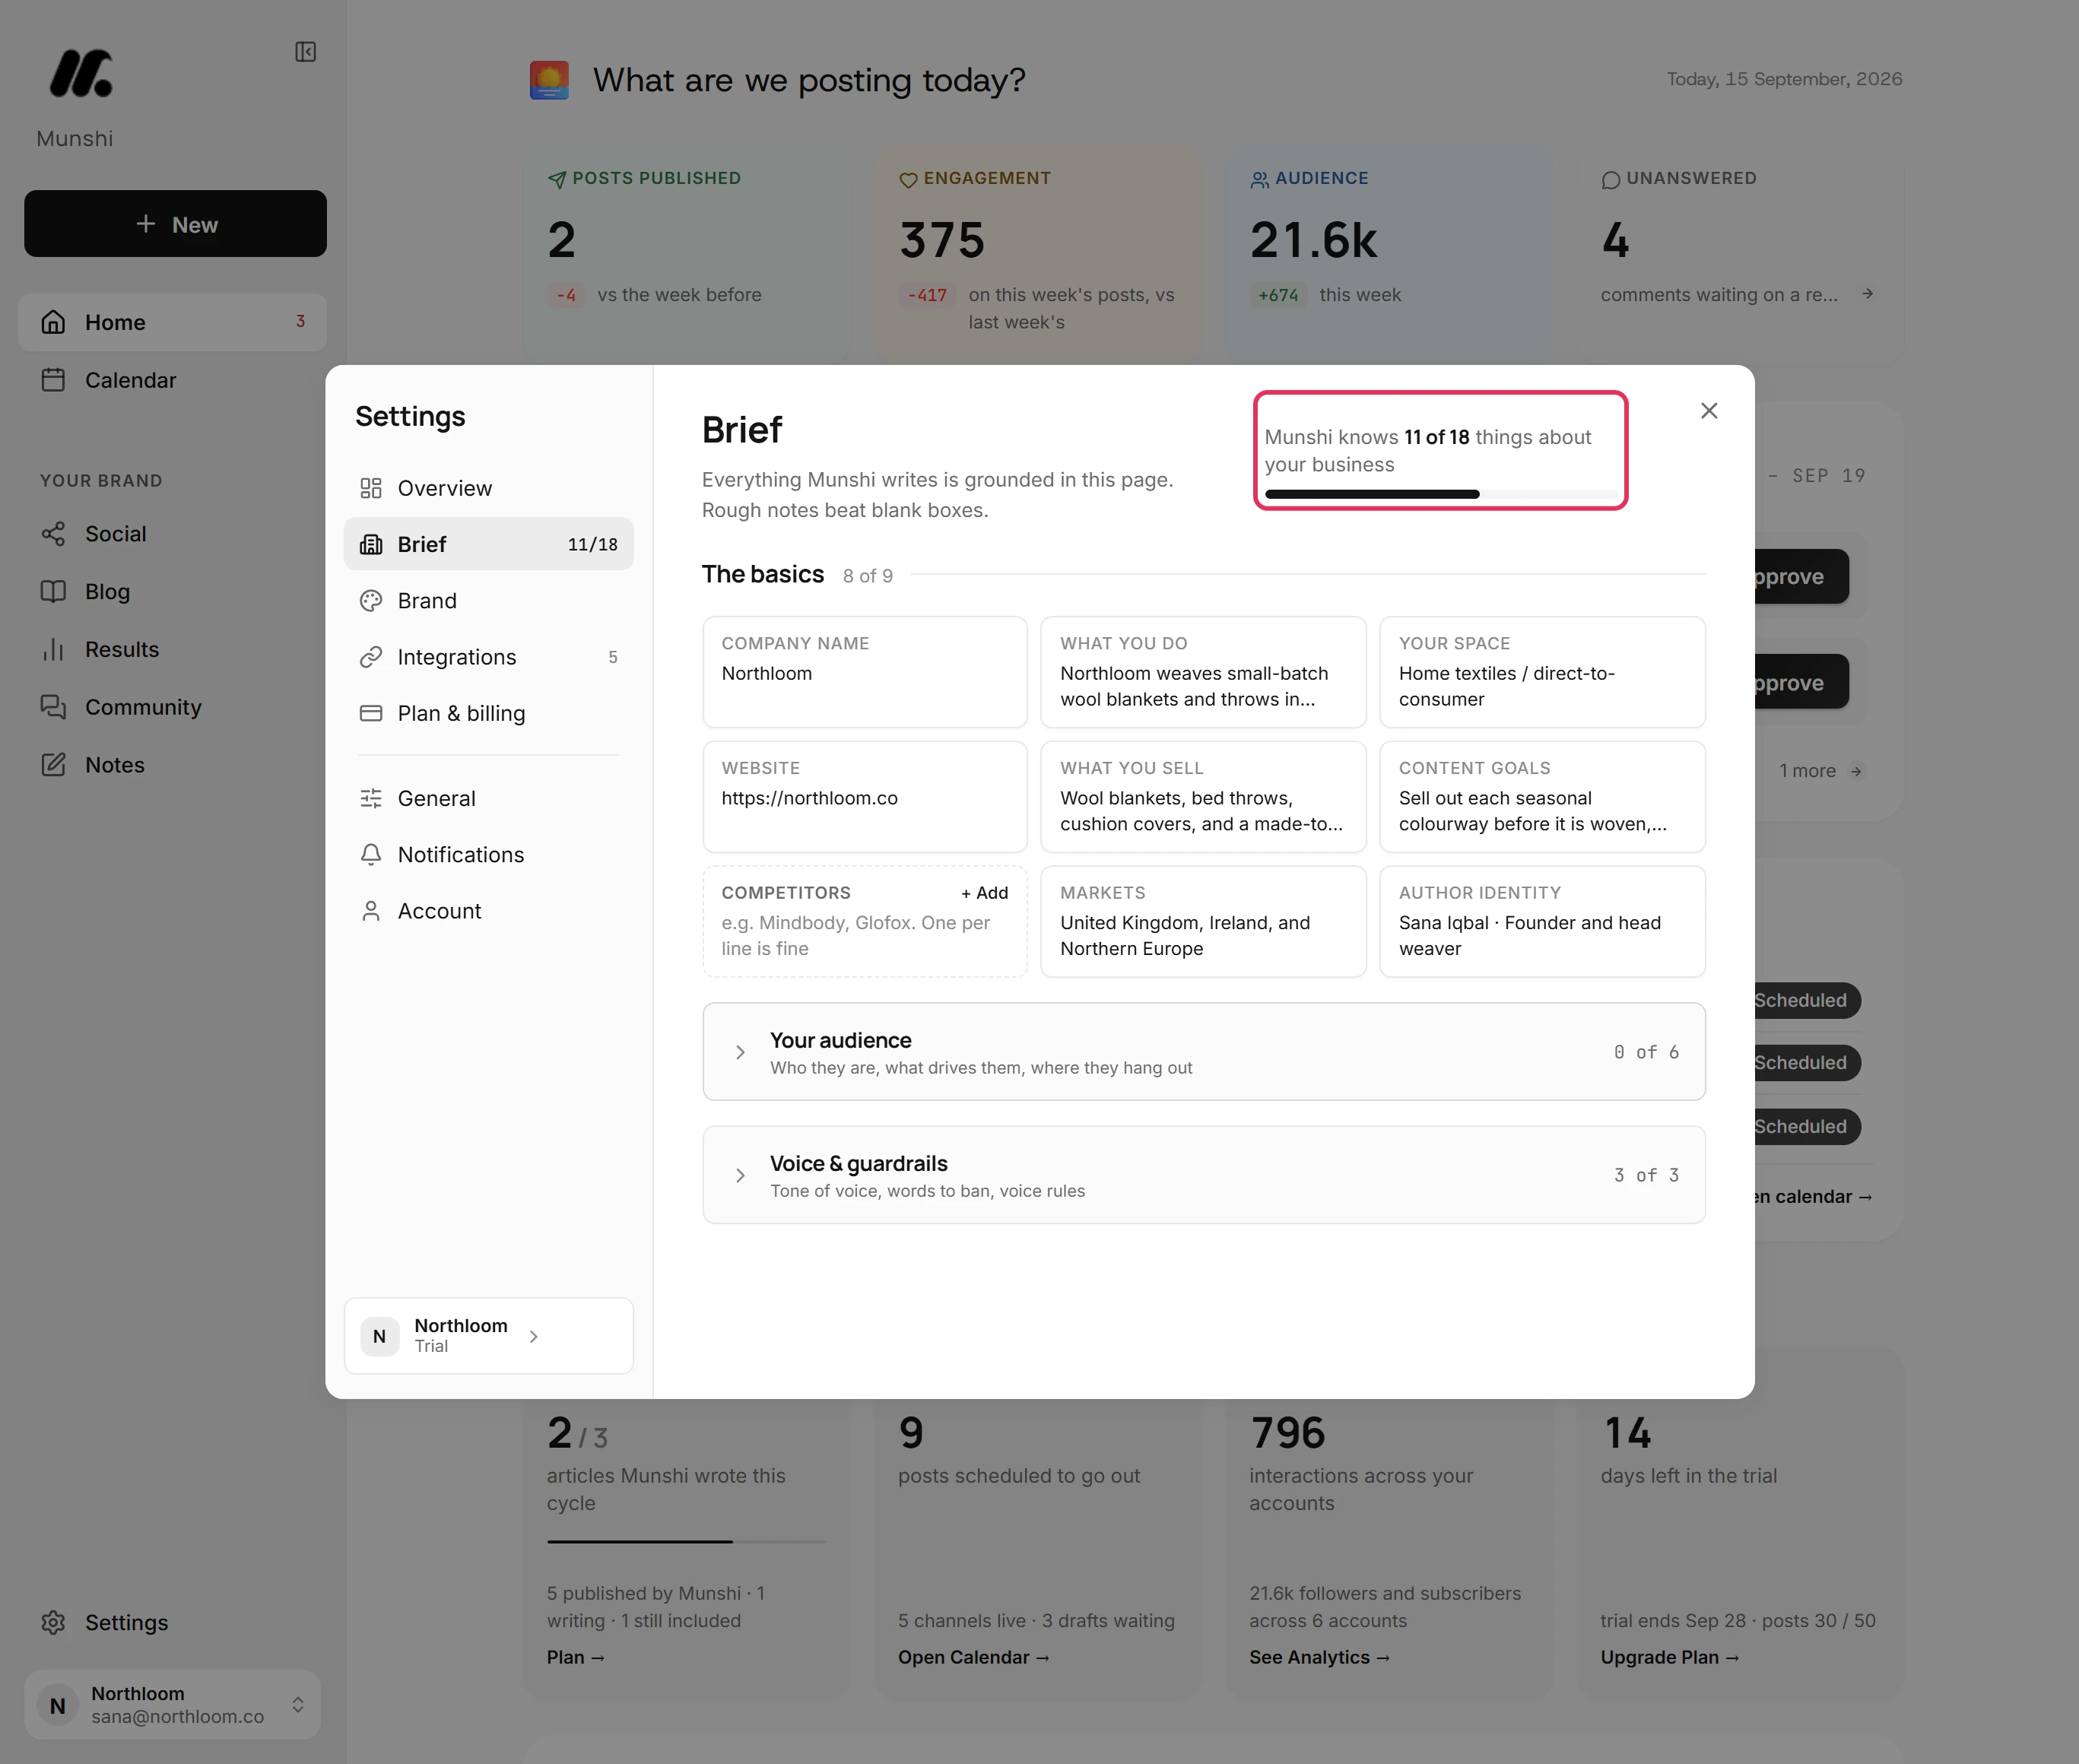
The meter counts your answers, here Munshi knows 11 of 18 things about your business. The answers sit in three sections: The basics, Your audience and Voice & guardrails. Munshi writes everything from this page, so each answer shows up in what it writes.
-
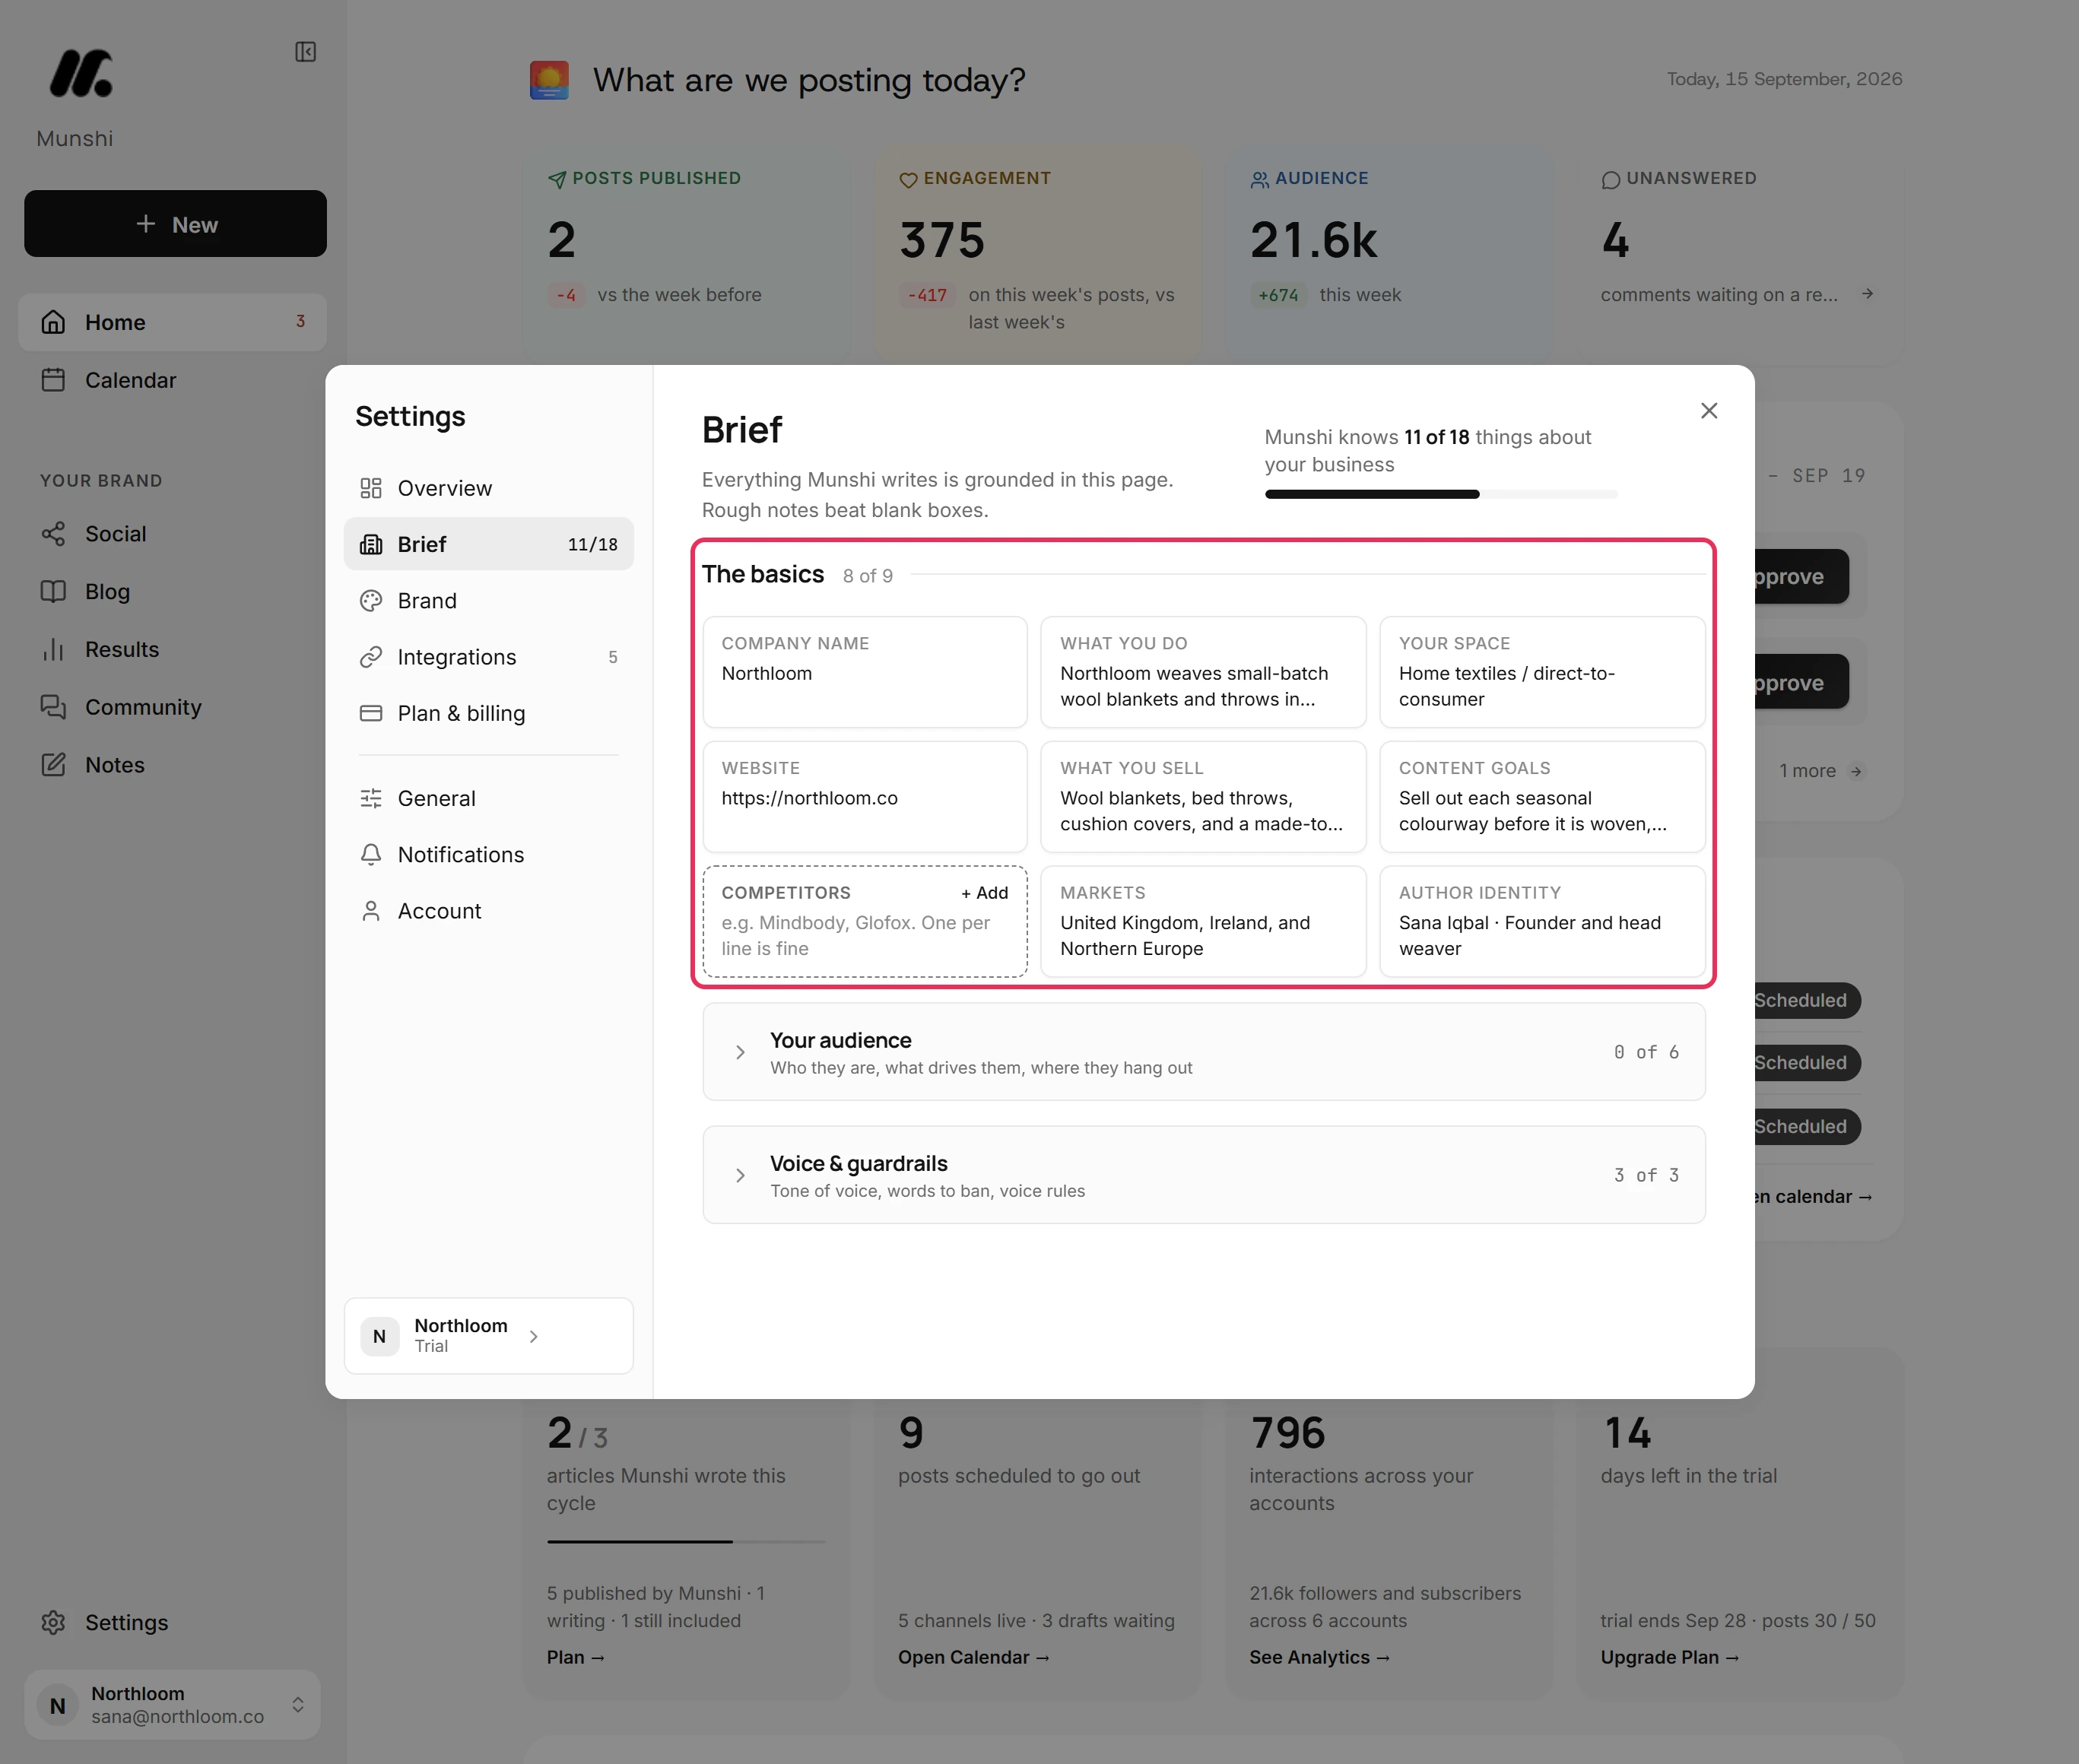
The basics holds nine answers: your company name, what you do, your space (the industry you work in), your website and what you sell. It also holds your content goals, your competitors, your markets and the author who signs your articles. A dashed tile marked + Add has no answer yet.
-
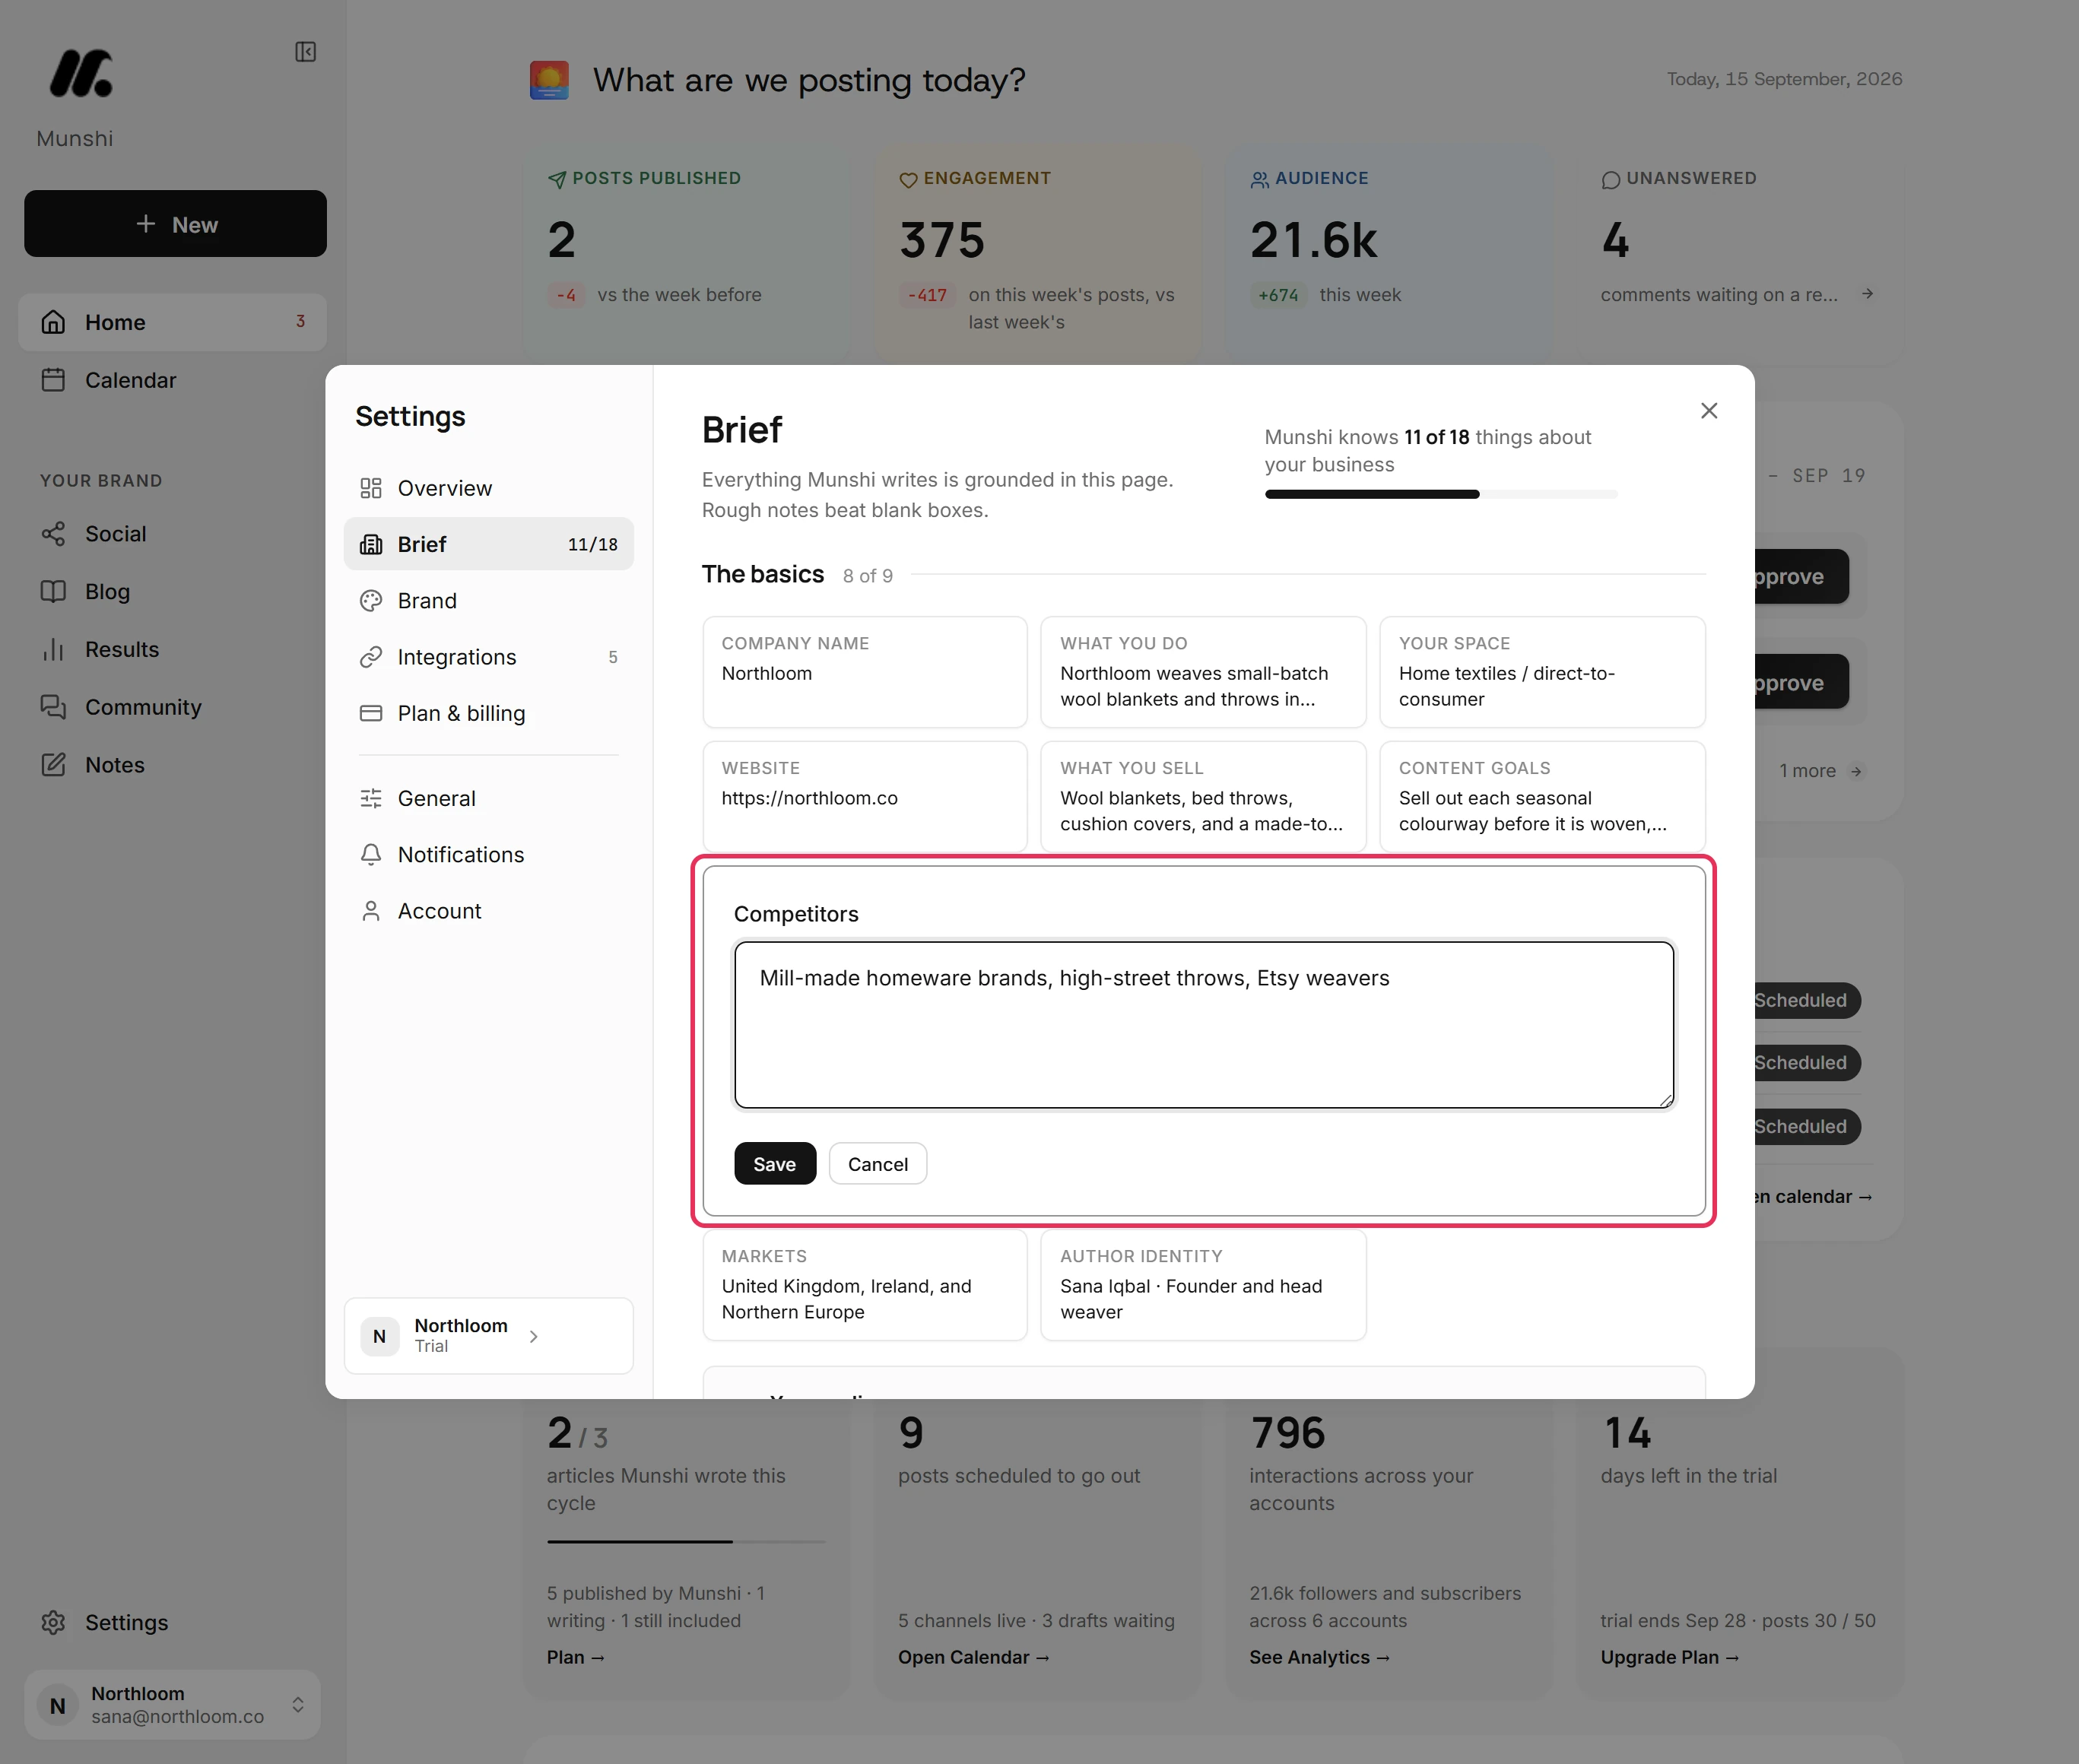
Click a tile, write your answer and click Save. Rough notes are fine. The meter counts the answer as soon as it is saved.
-
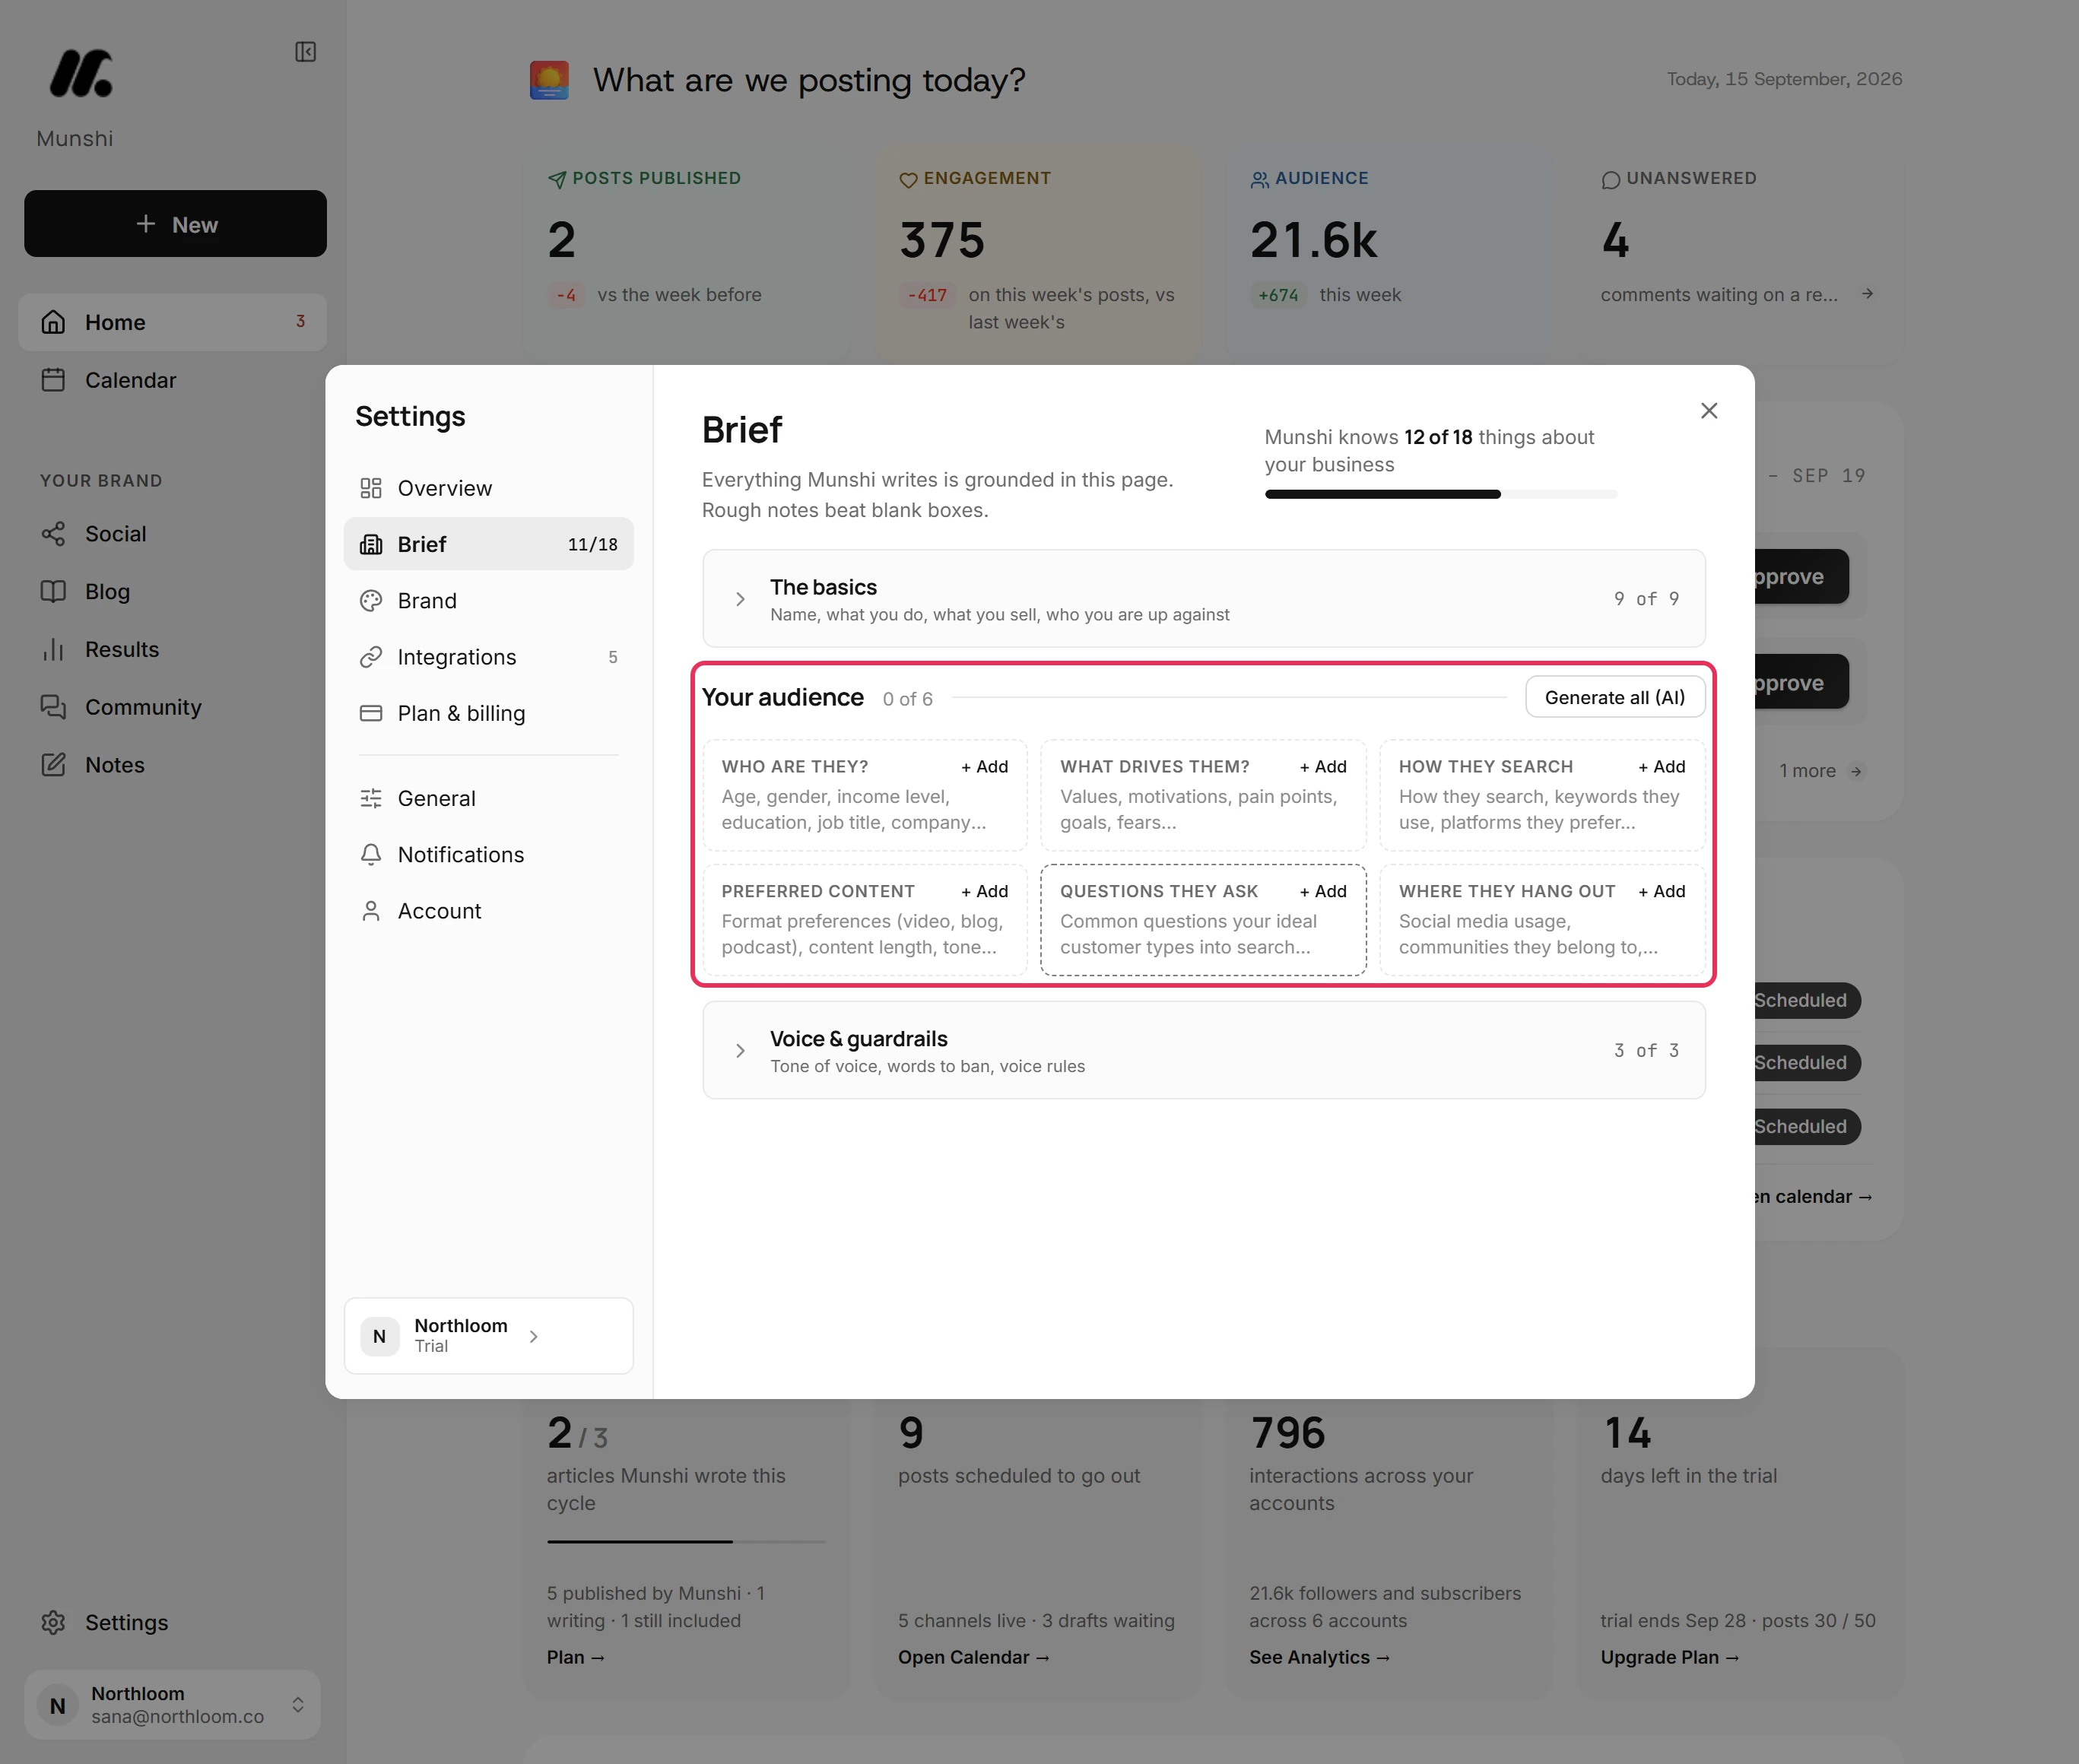
Click Your audience. Its six tiles describe who you write for: Who are they?, What drives them?, How they search, Preferred content, Questions they ask and Where they hang out.
-
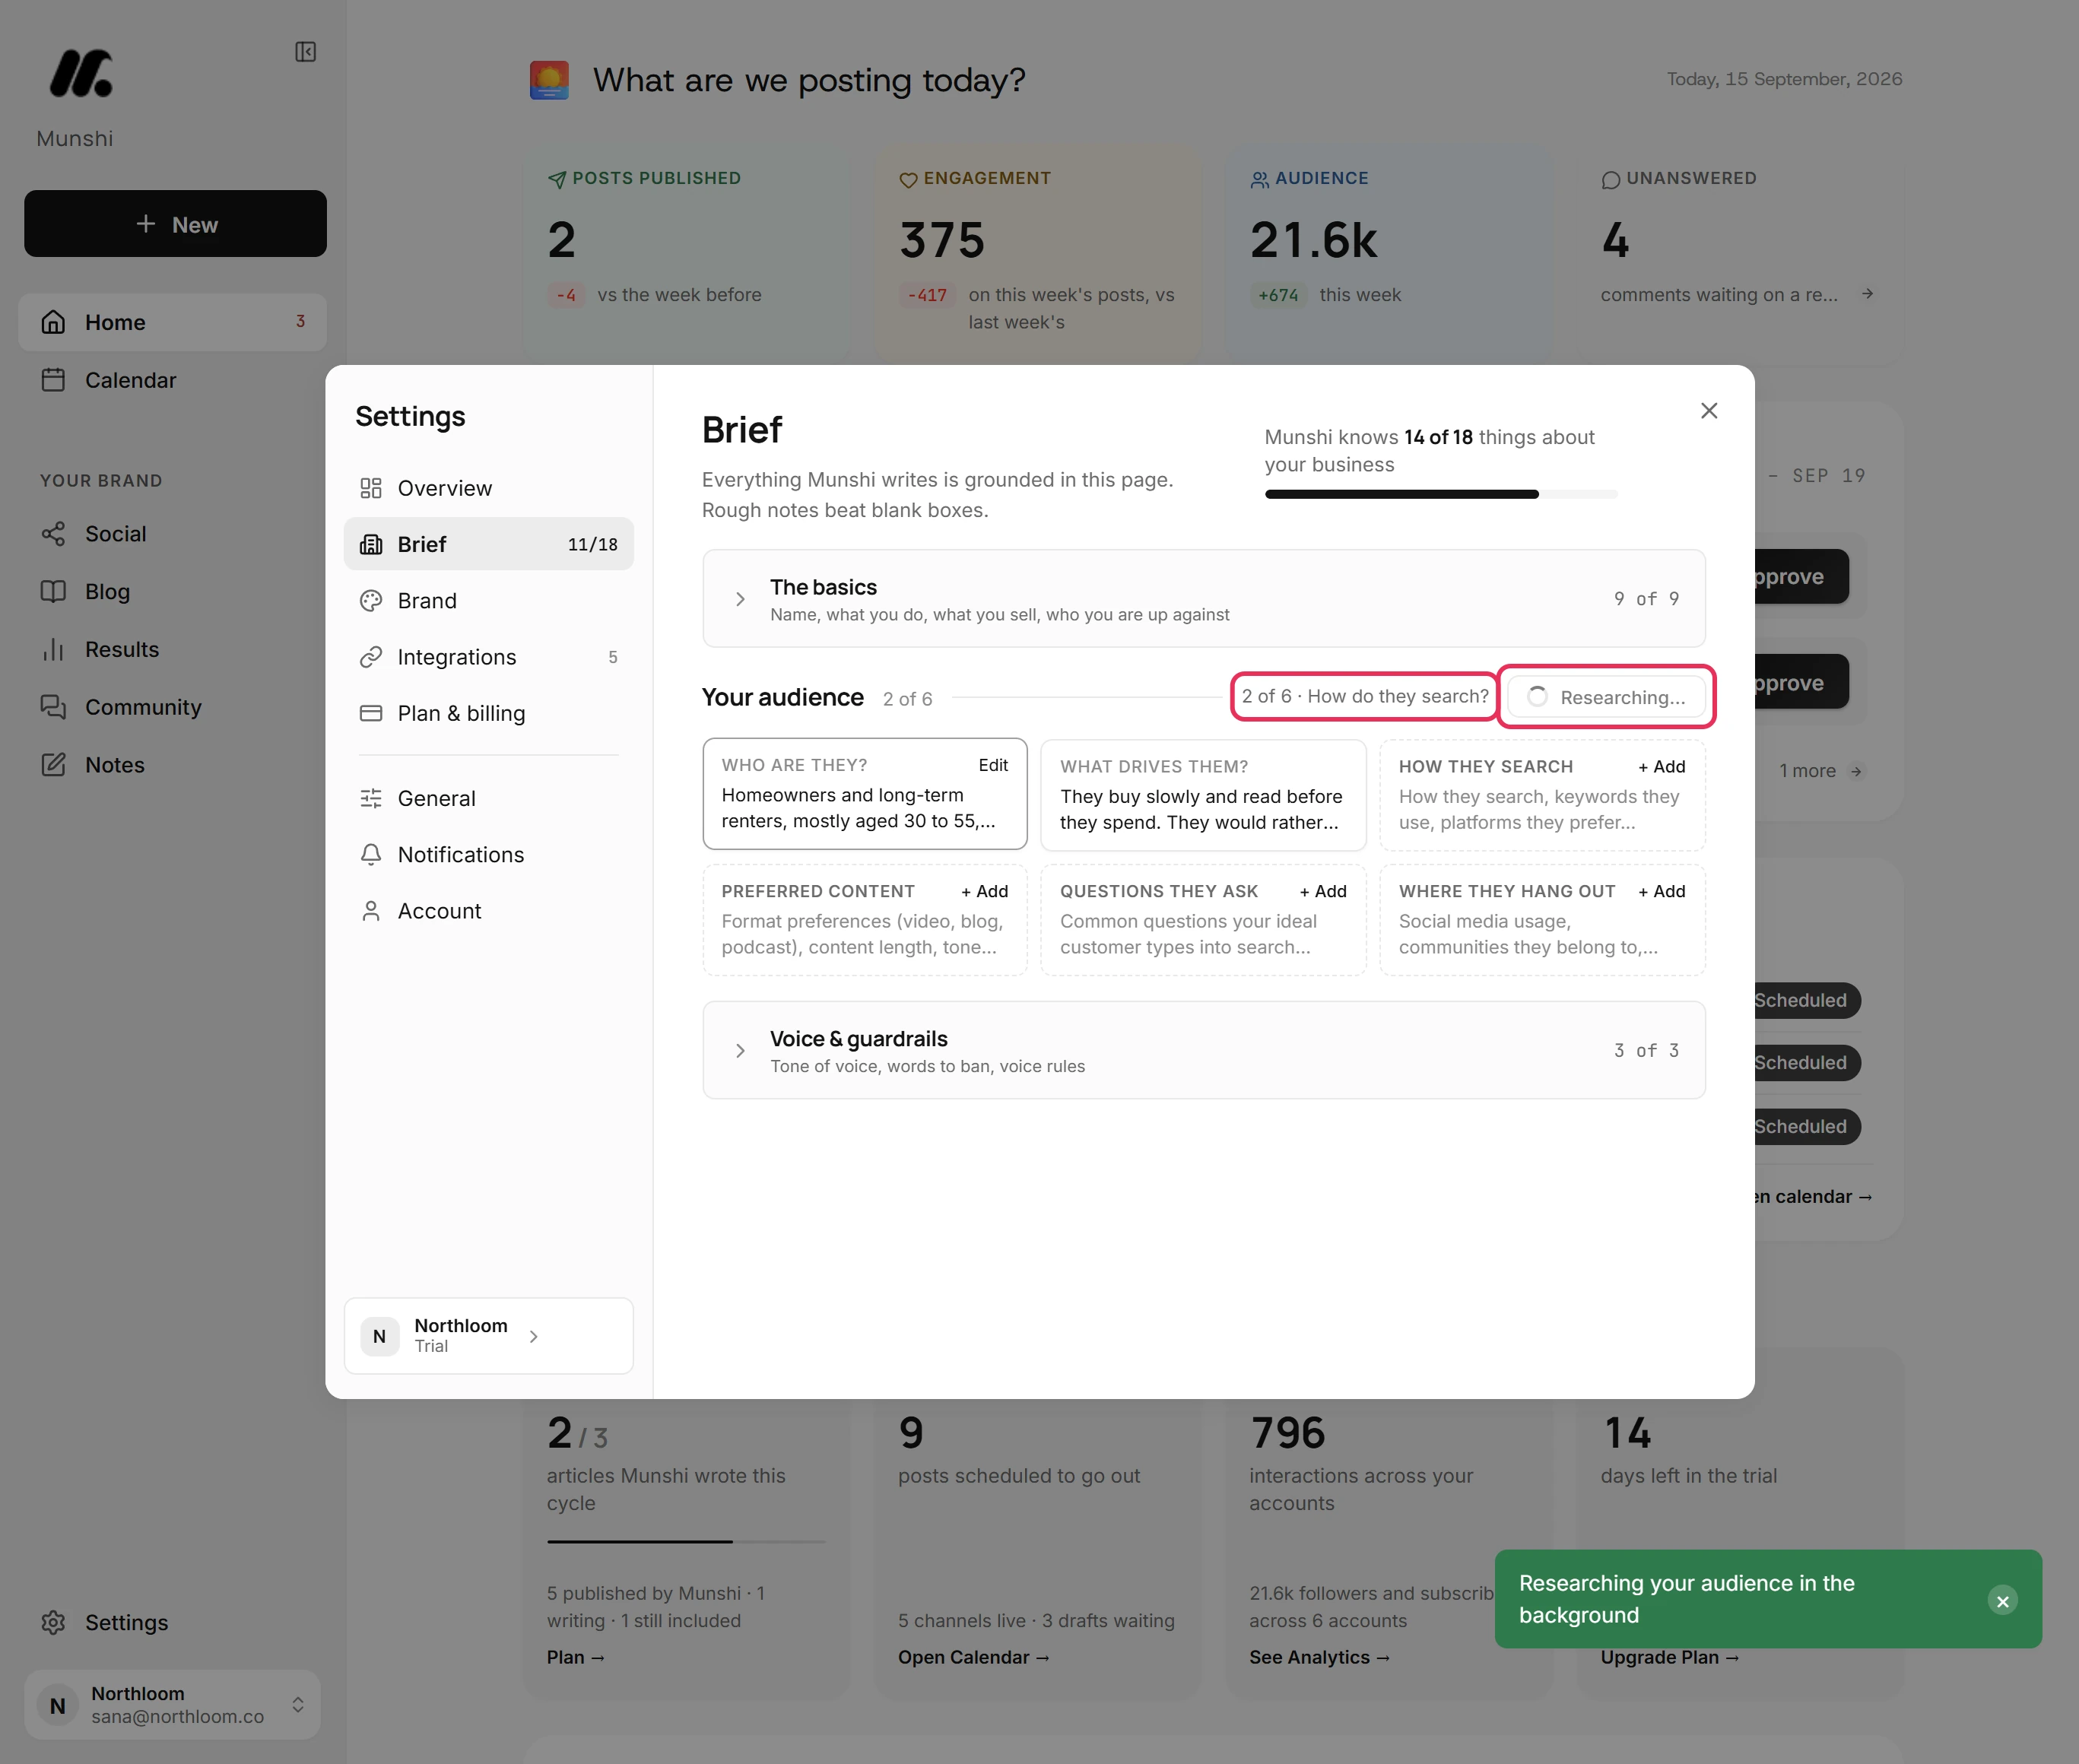
Click Generate all (AI). Munshi researches your audience from the rest of your Brief, one field at a time. Meanwhile the button reads Researching… and says which field it is on.
-
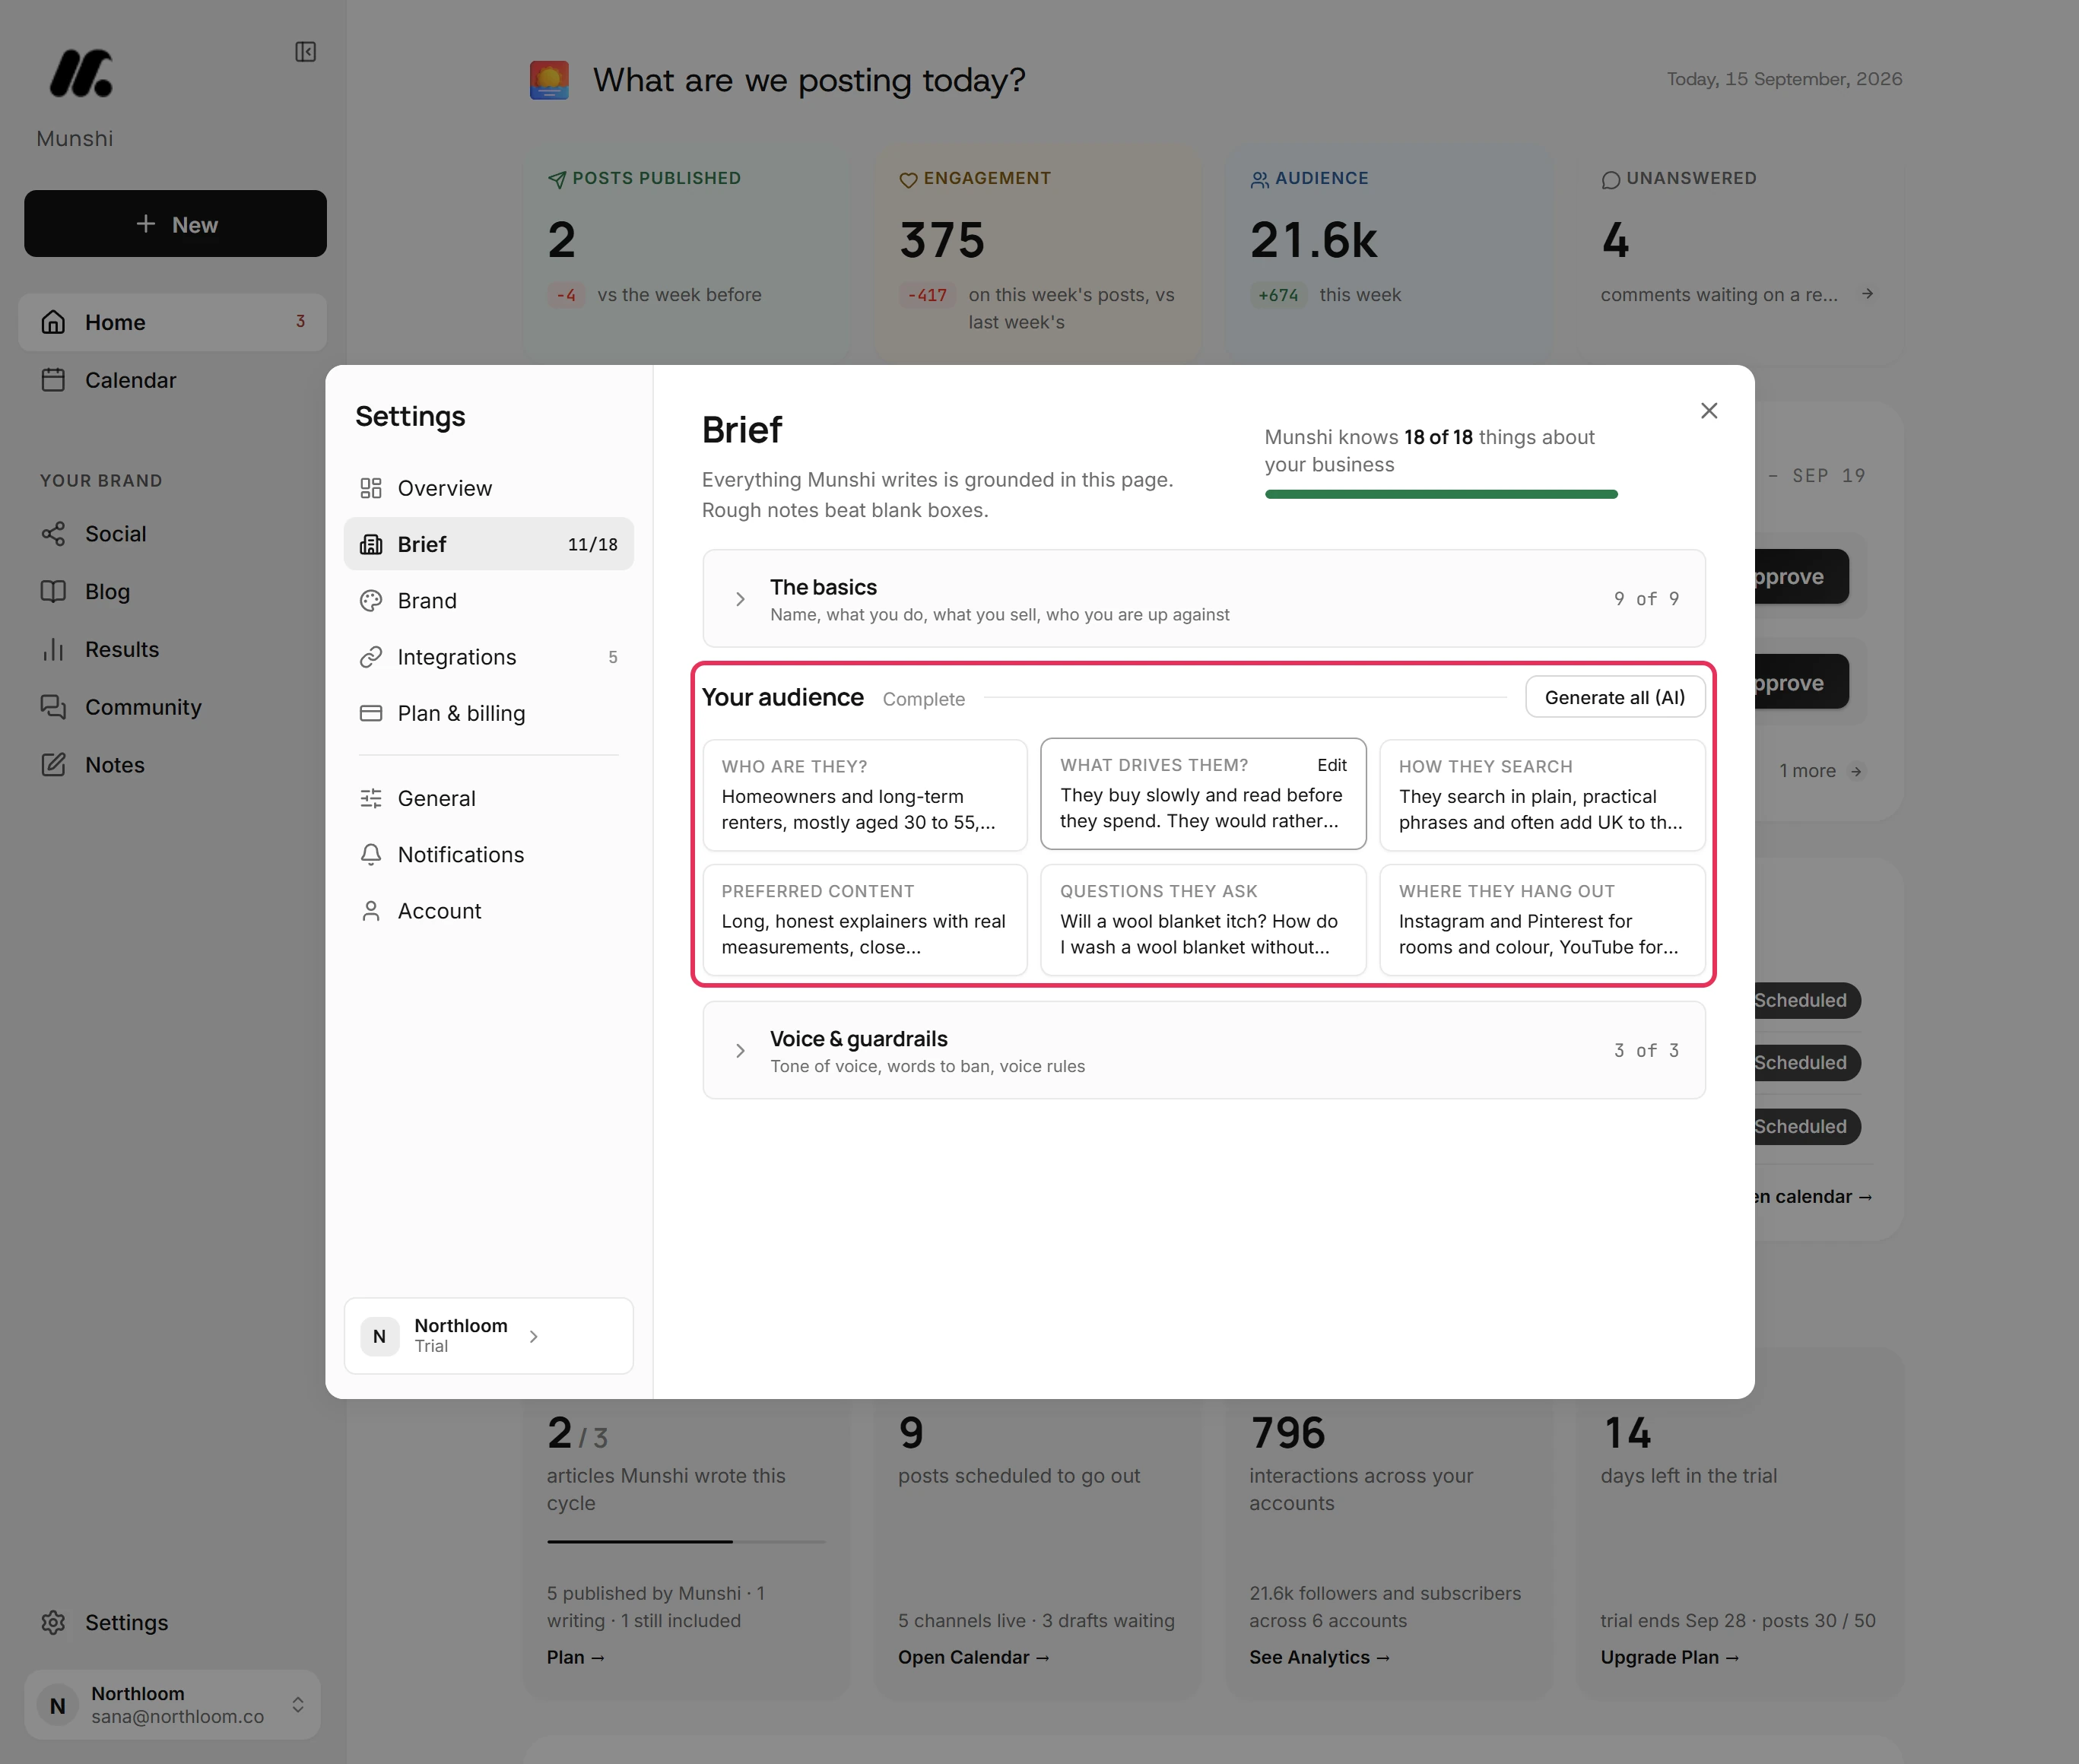
Each answer appears in its tile as it is written, and a message confirms when the research is done. Click a tile to read the whole answer or change it. Generate with AI writes that field again.
-
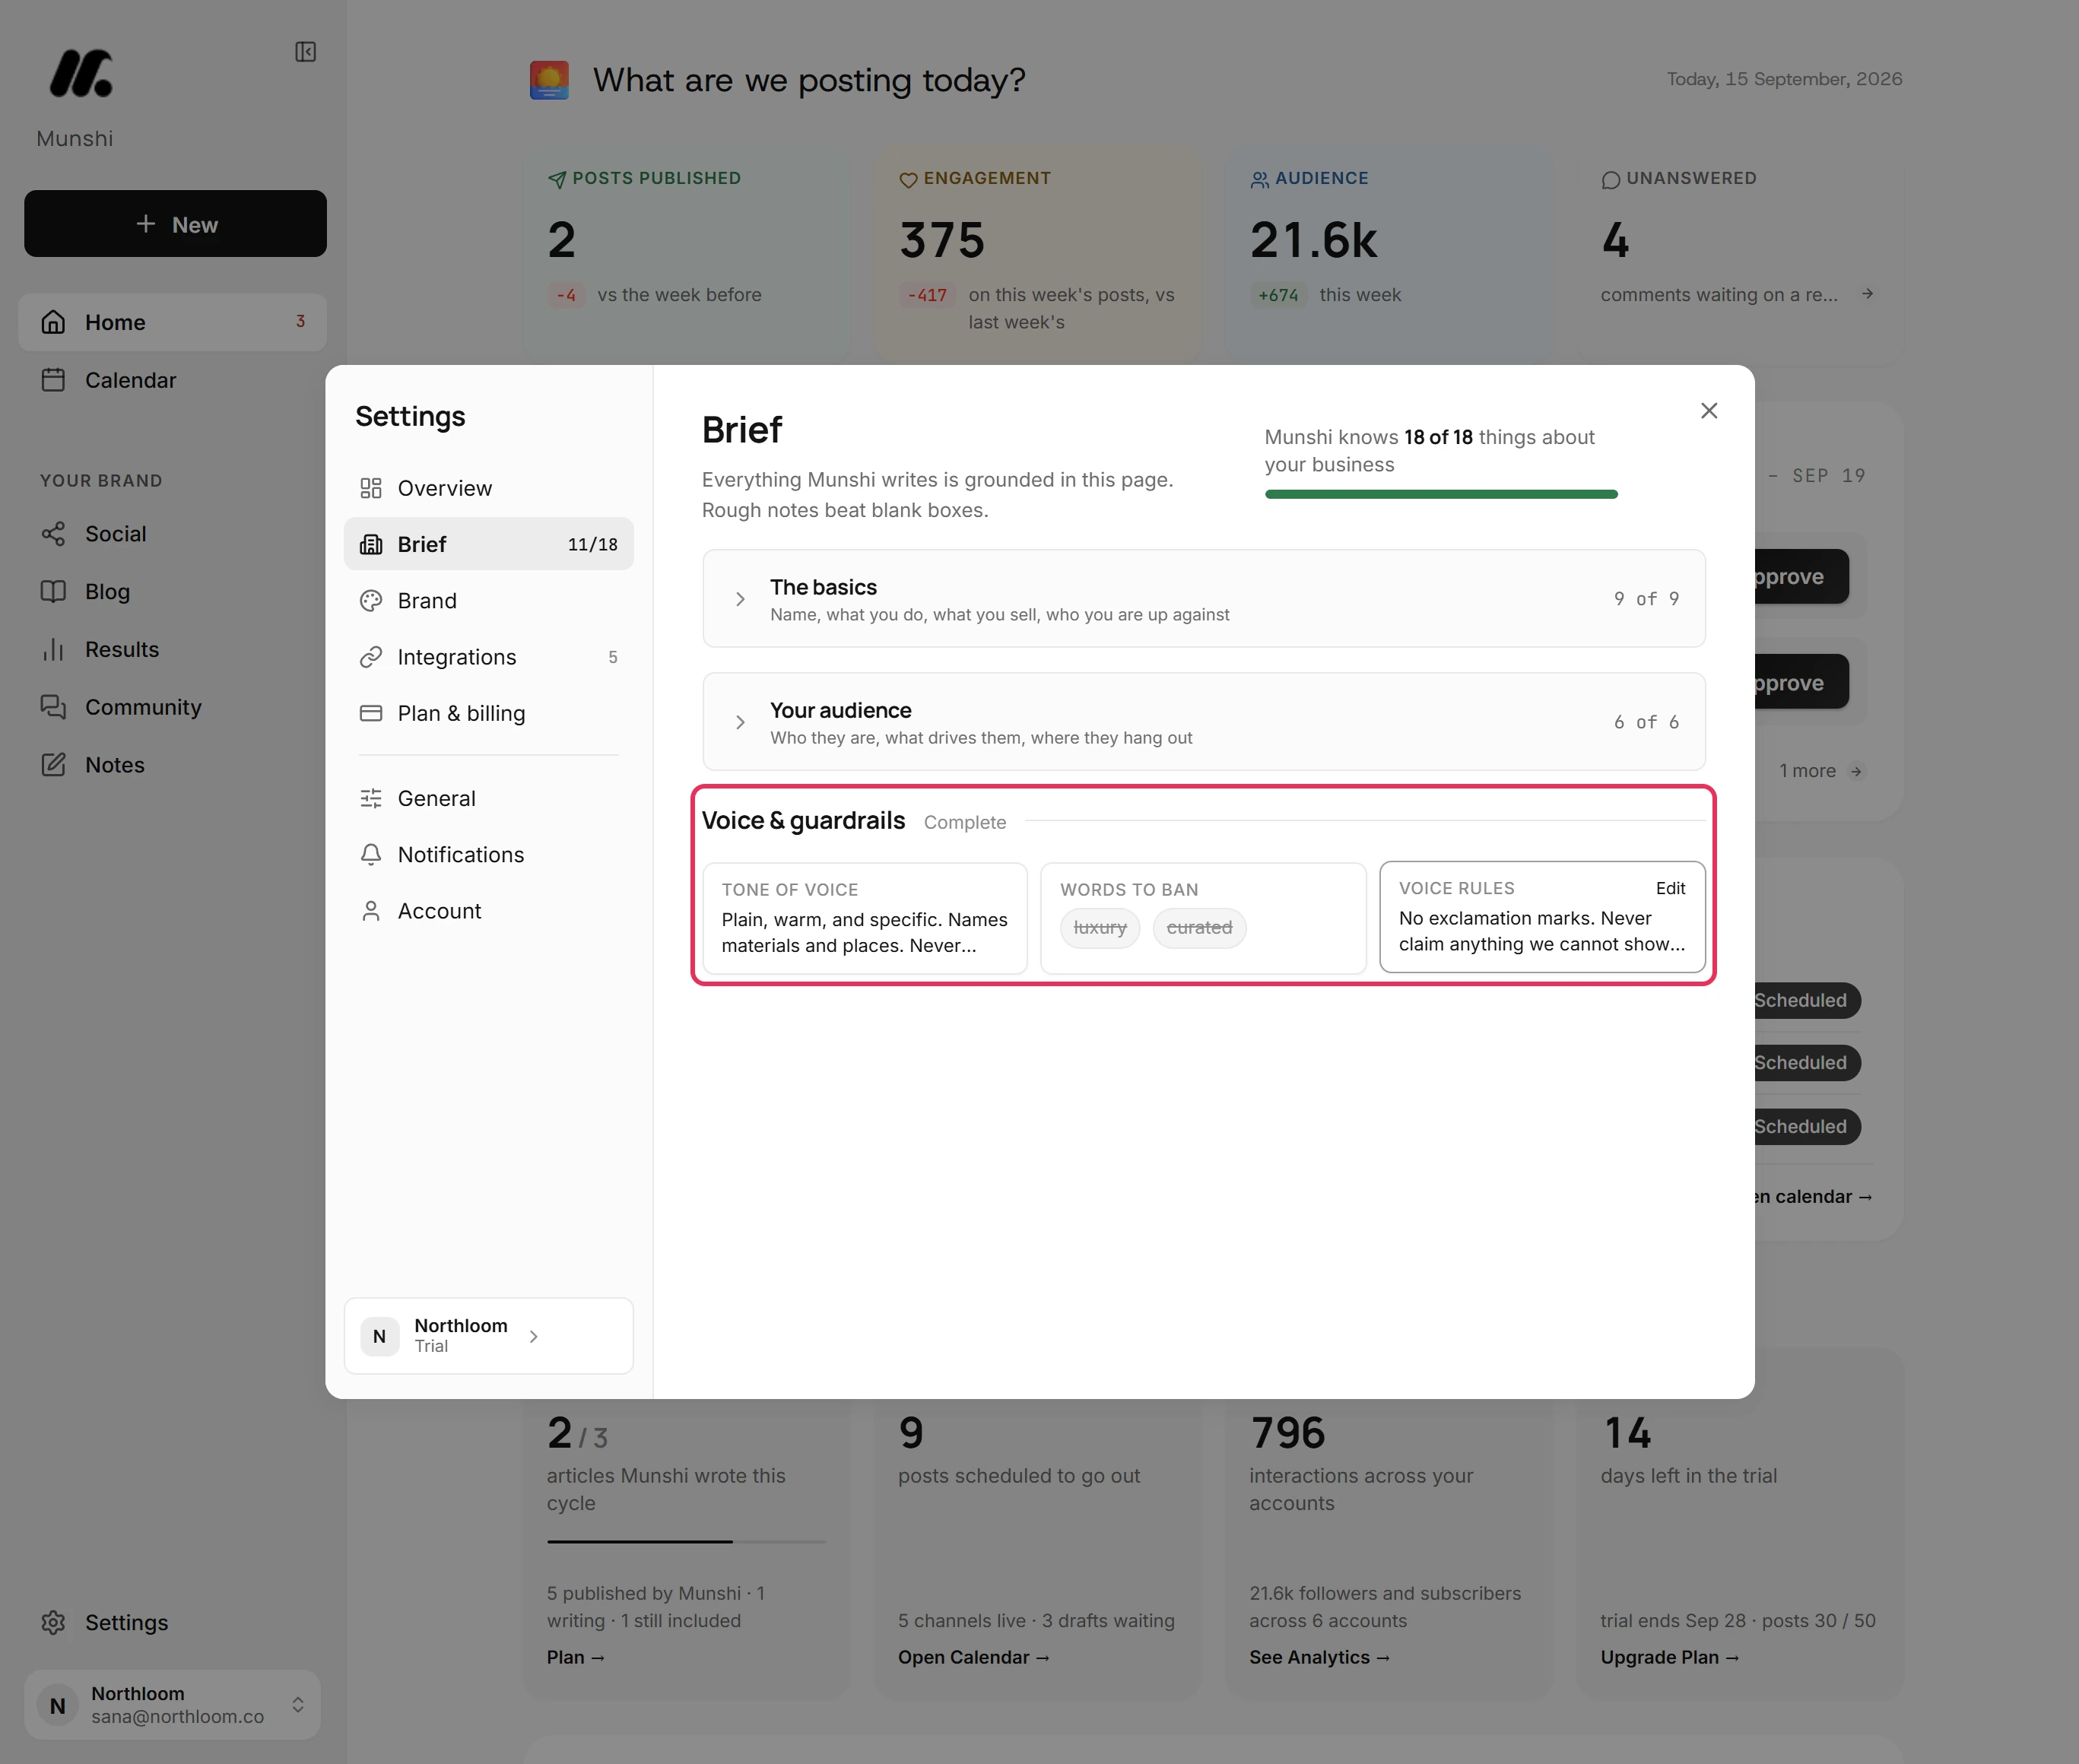
Click Voice & guardrails. Tone of voice is how Munshi sounds, and Words to ban lists words it must not use. Voice rules holds your own rules, such as short sentences or no exclamation marks.
-
Click Words to ban and type the word into Word or phrase to avoid. Click Add, then Save. From then on, every piece Munshi writes is told to leave it out.
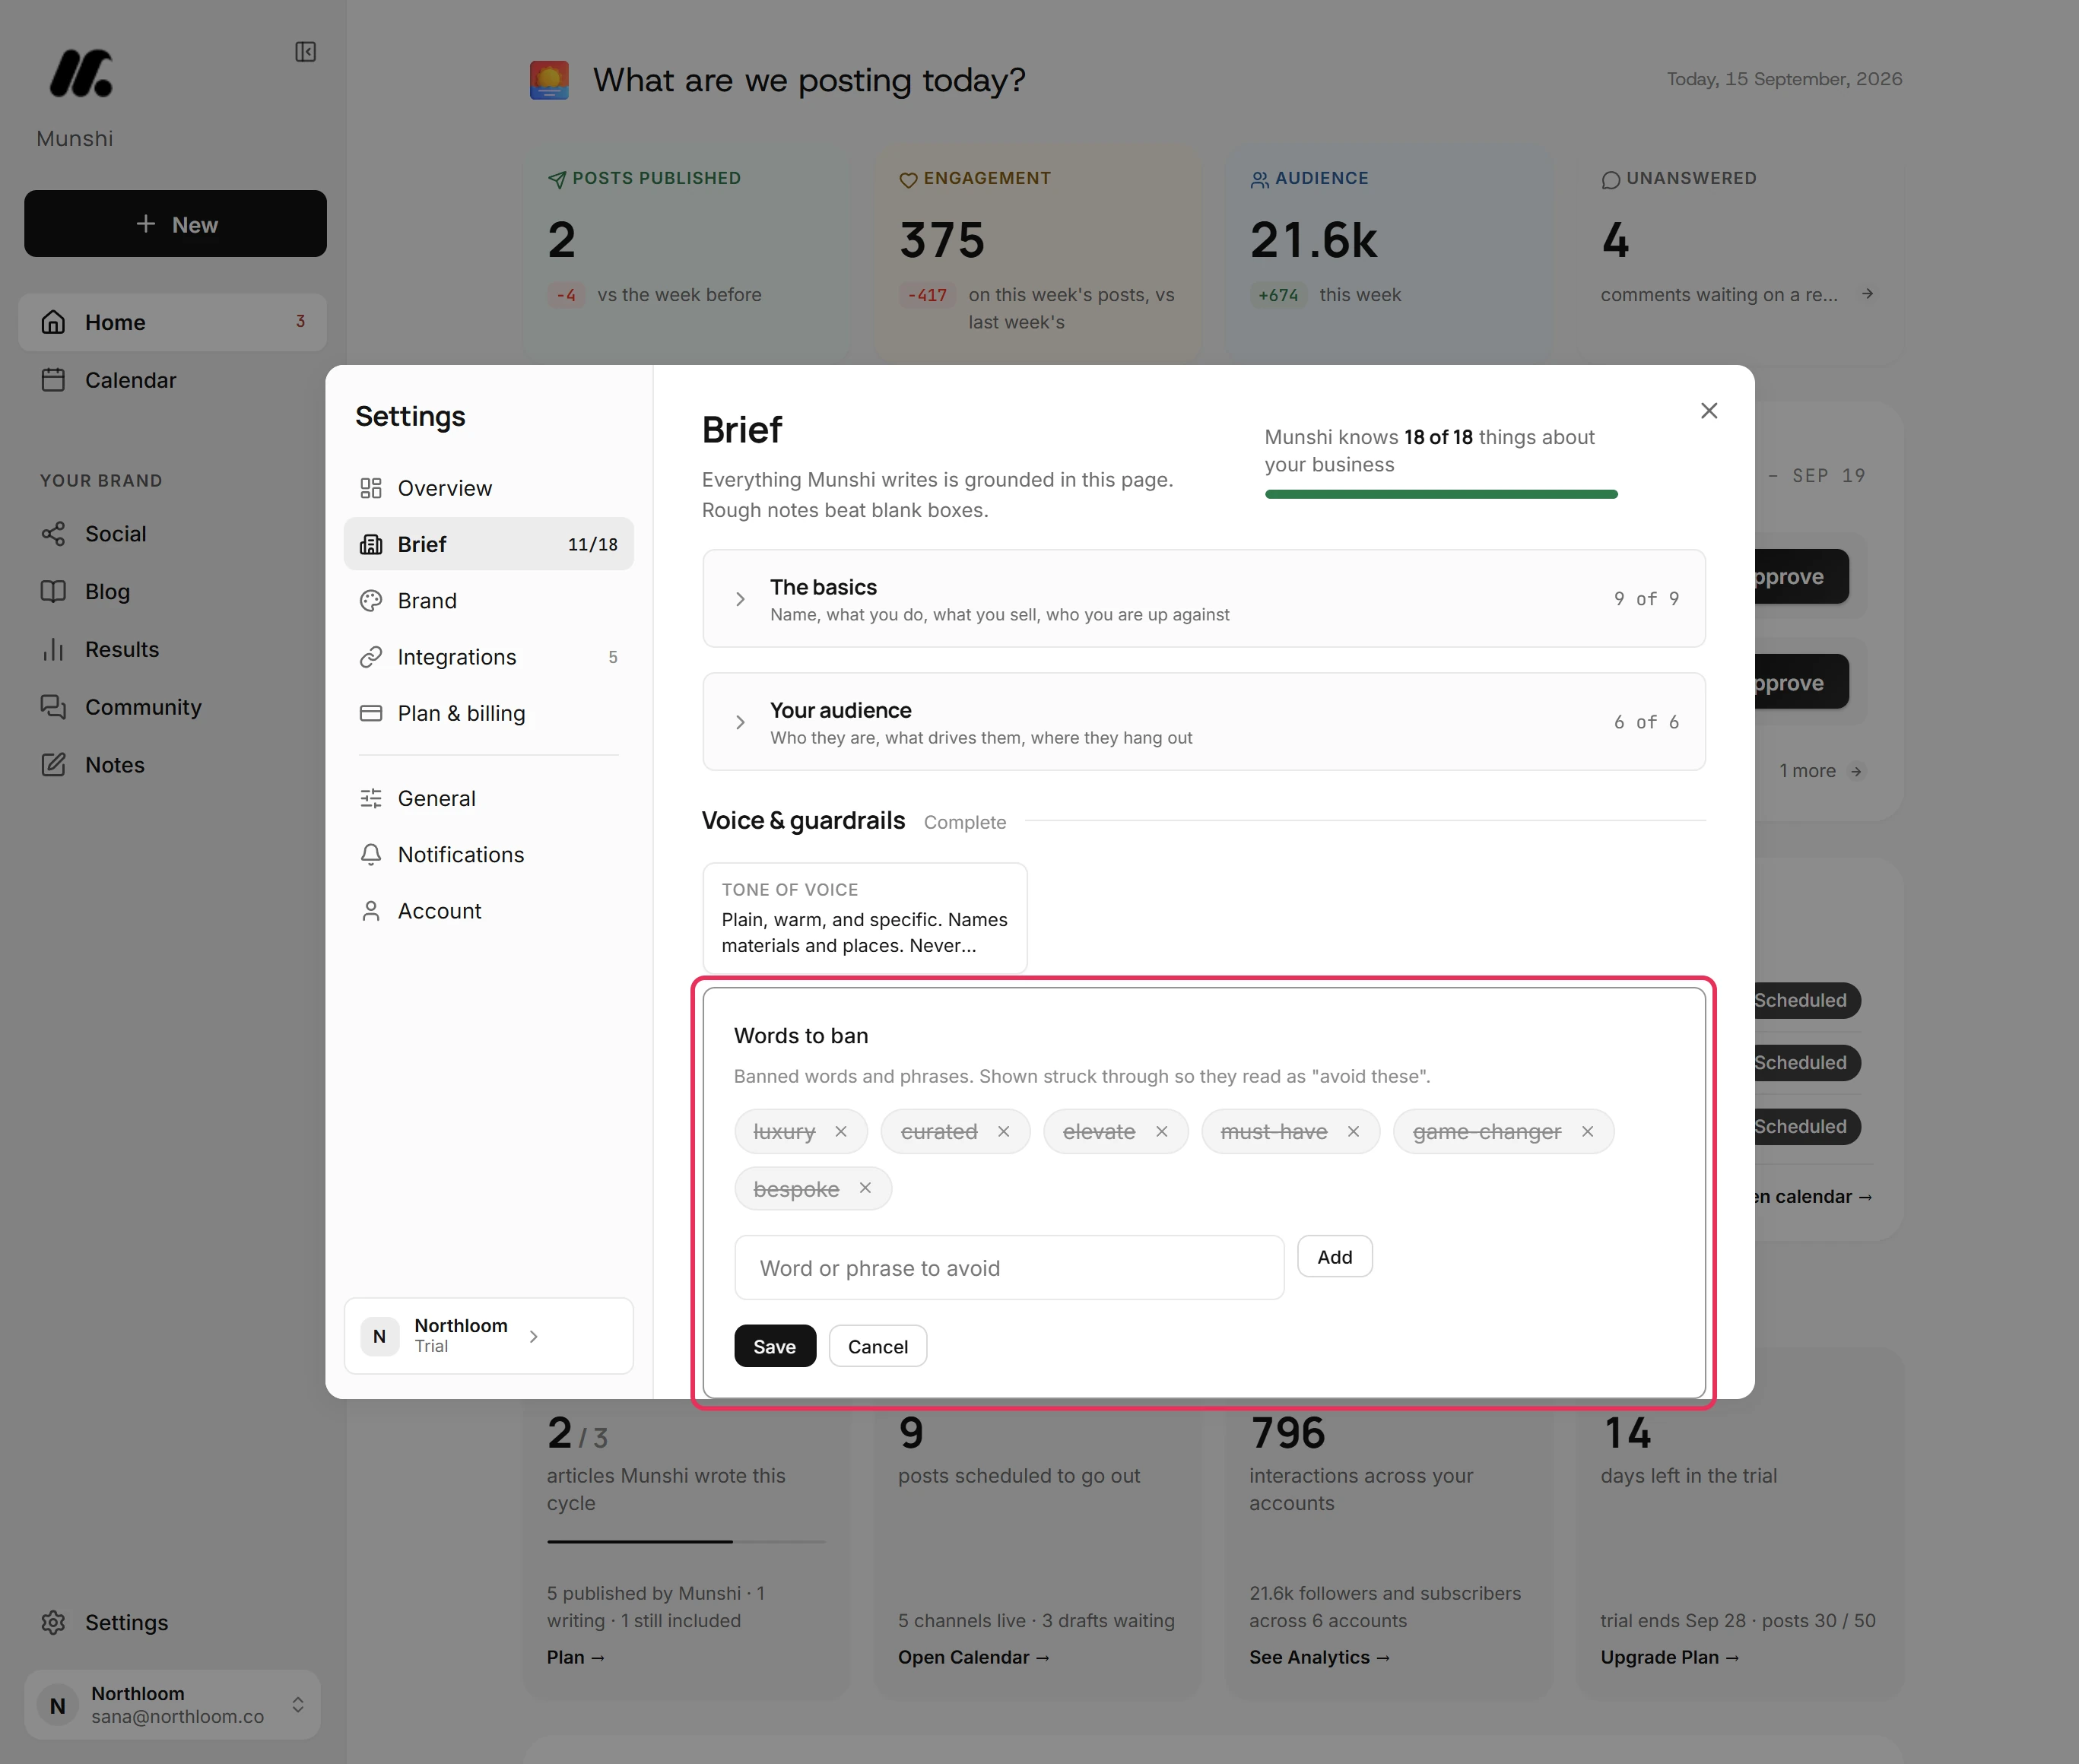
Where you are now
Your Brief holds all 18 answers and the meter is full. The focus areas, articles and captions Munshi writes from now on start from what you gave it here.
If something goes wrong
“Every audience field already has content.”
Open the tile you want to change, click Generate with AI, then click Save if you prefer the new answer. Generate all only fills empty fields.
“Enter a valid website (https://…) or leave it blank”
Type the full address, including the https:// part, or clear the field and save. The Website tile only takes a full address.
“Saved locally. Backend is offline.”
Check your connection, then open the tile and click Save again. The change is kept in this browser but did not reach Munshi.
“Could not check progress.”
Click Retry to follow the research again. Munshi lost touch with it after several tries, but it may still be running. Each field is saved as it lands.
Try it on your own brand this week.
Munshi Social, the AI content marketing engine for small teams, plans, writes, publishes, and tracks your blog and socials. The guide above shows the real app, not a mock-up.
Start your workspace