How to connect Webflow and choose your blog collection
Connect Webflow through Webflow's own sign-in, then pick the site and CMS collection your articles go to. There is no token to generate or paste, and you can disconnect at any time.
Before you start
- A Webflow site with a CMS collection for your blog posts, and a Webflow account that can manage that site.
- You own the Munshi workspace. Only an owner can connect or disconnect a blog.
-
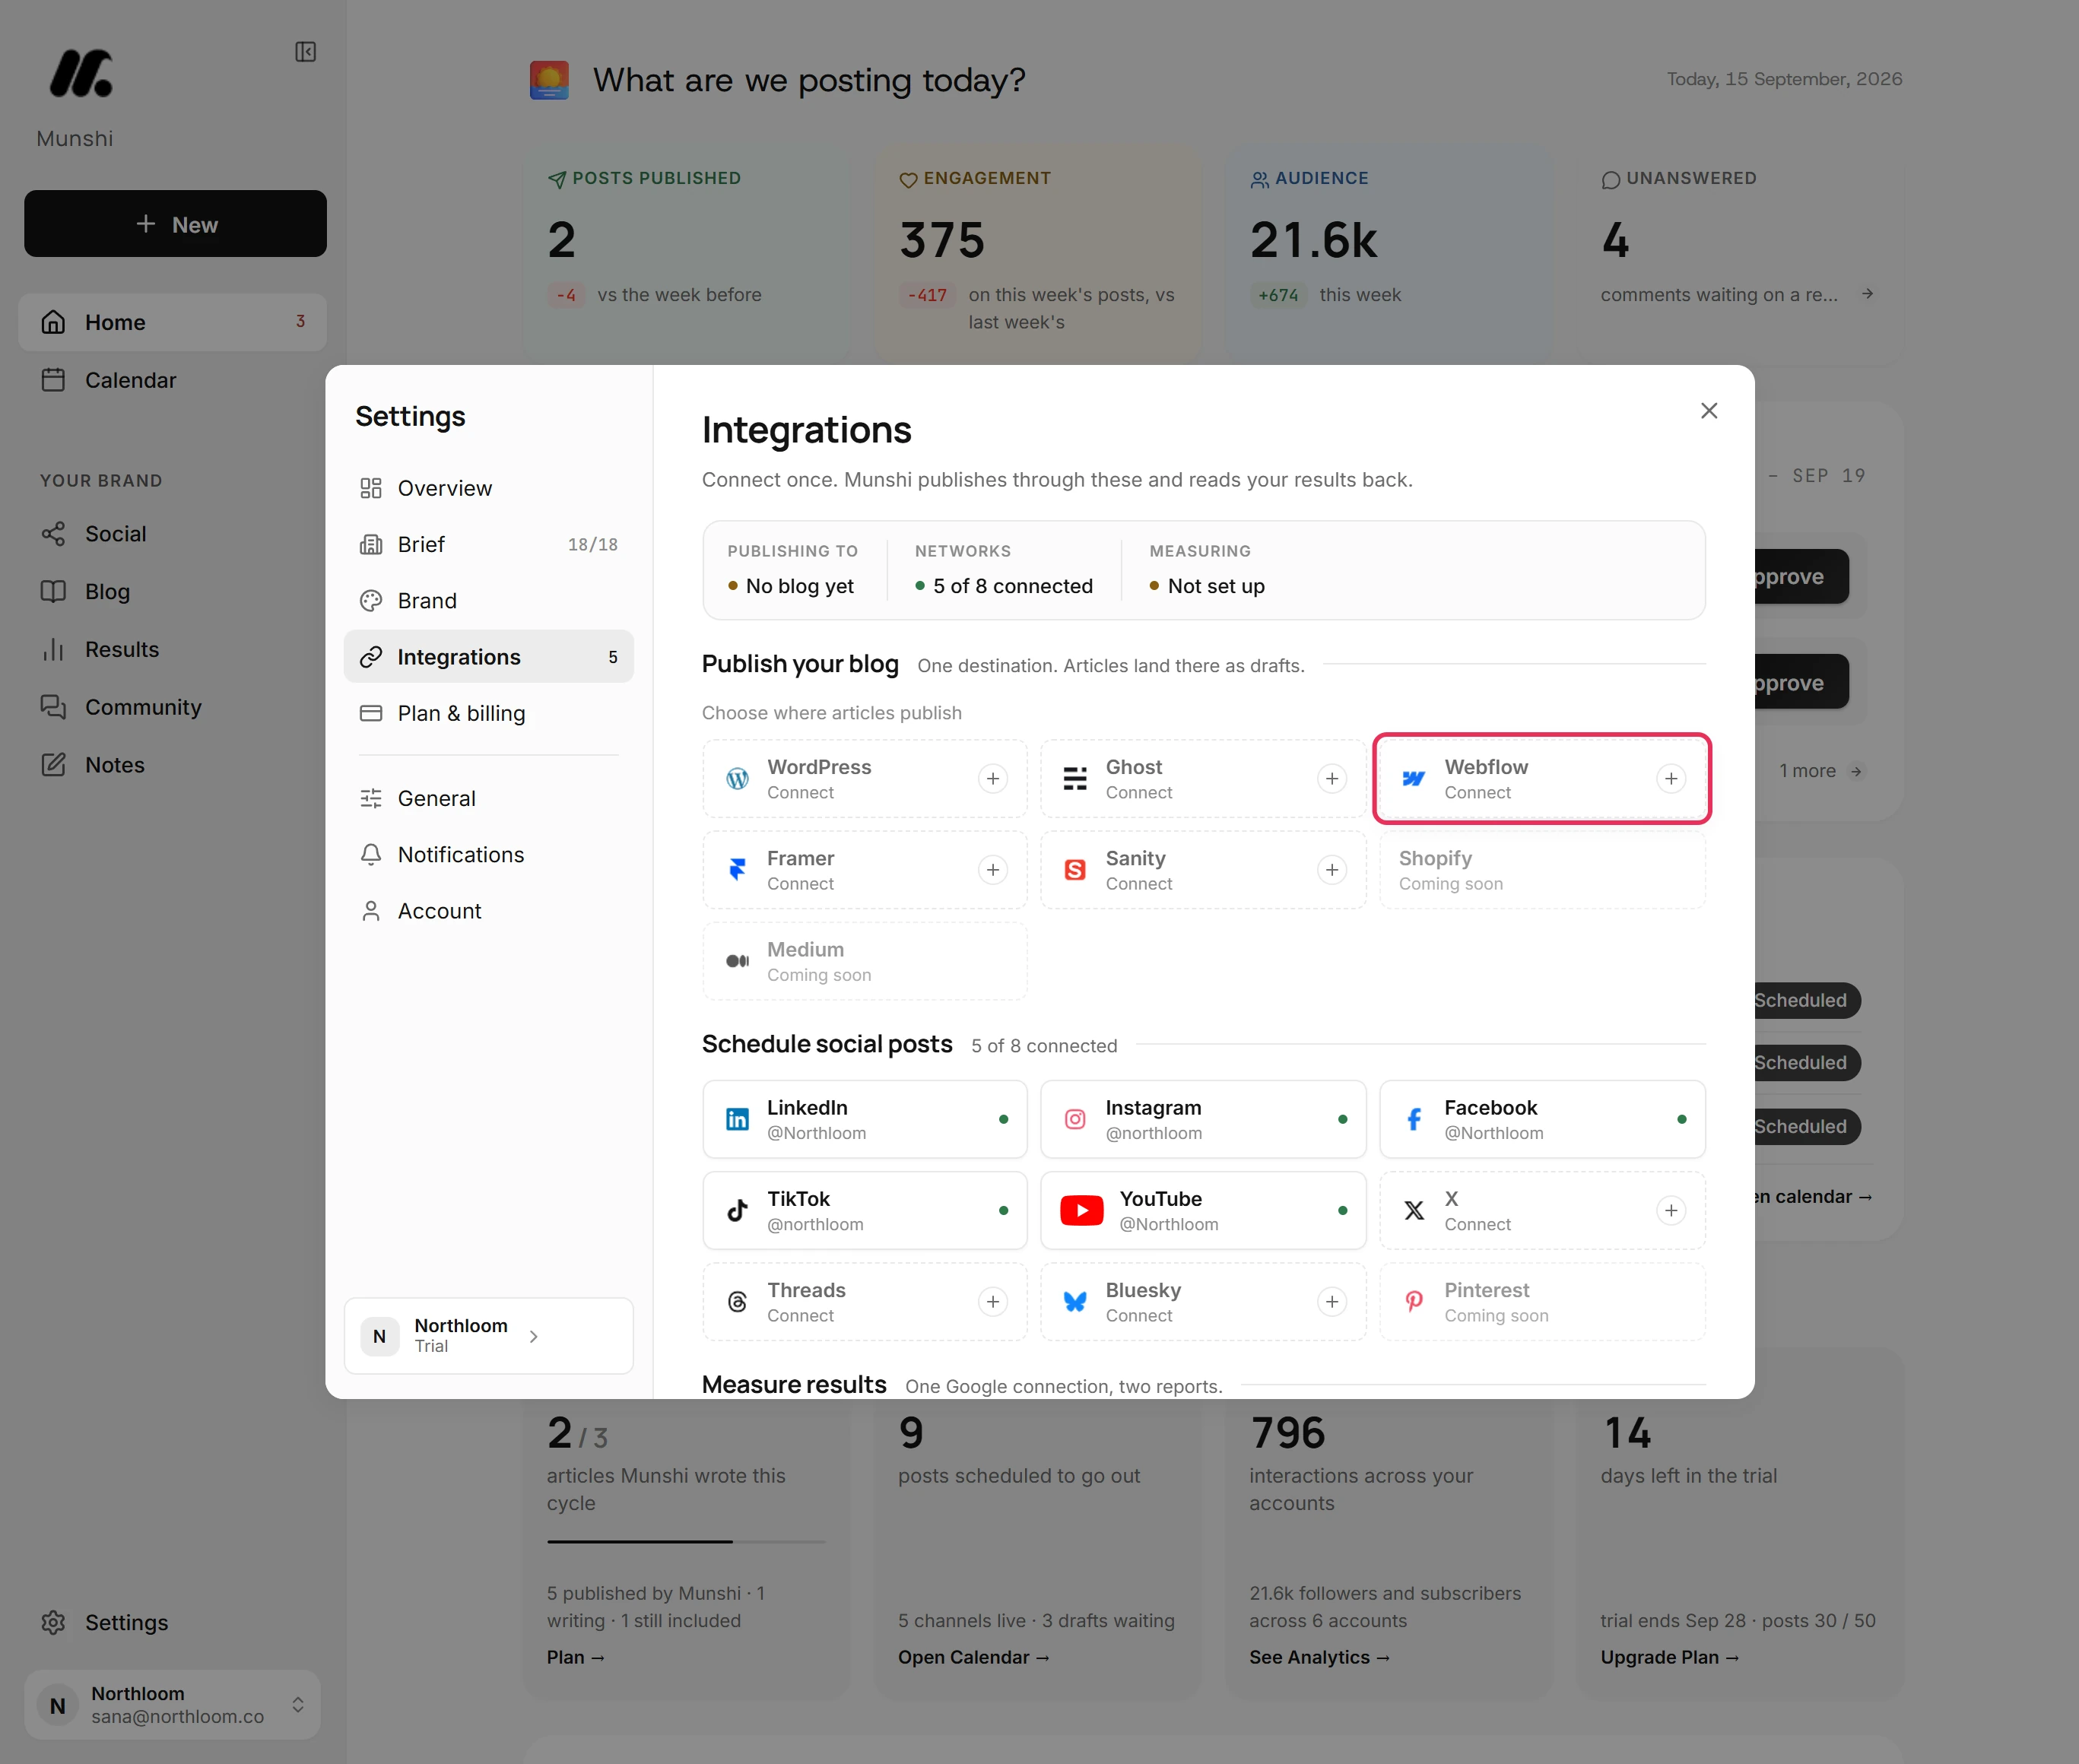
Click Settings at the bottom of the sidebar, then Integrations. Webflow is one of the blogs under Publish your blog.
-
Click Webflow, then Connect Webflow. A Webflow window opens on top of Munshi. If the card asks for a Site API token instead, follow Connect with a site token instead.
-
Sign in to Webflow if it asks. Webflow shows the access Munshi is requesting, which is read and write access to your CMS and nothing outside it. Approve it, and the window hands you back to Munshi.
-
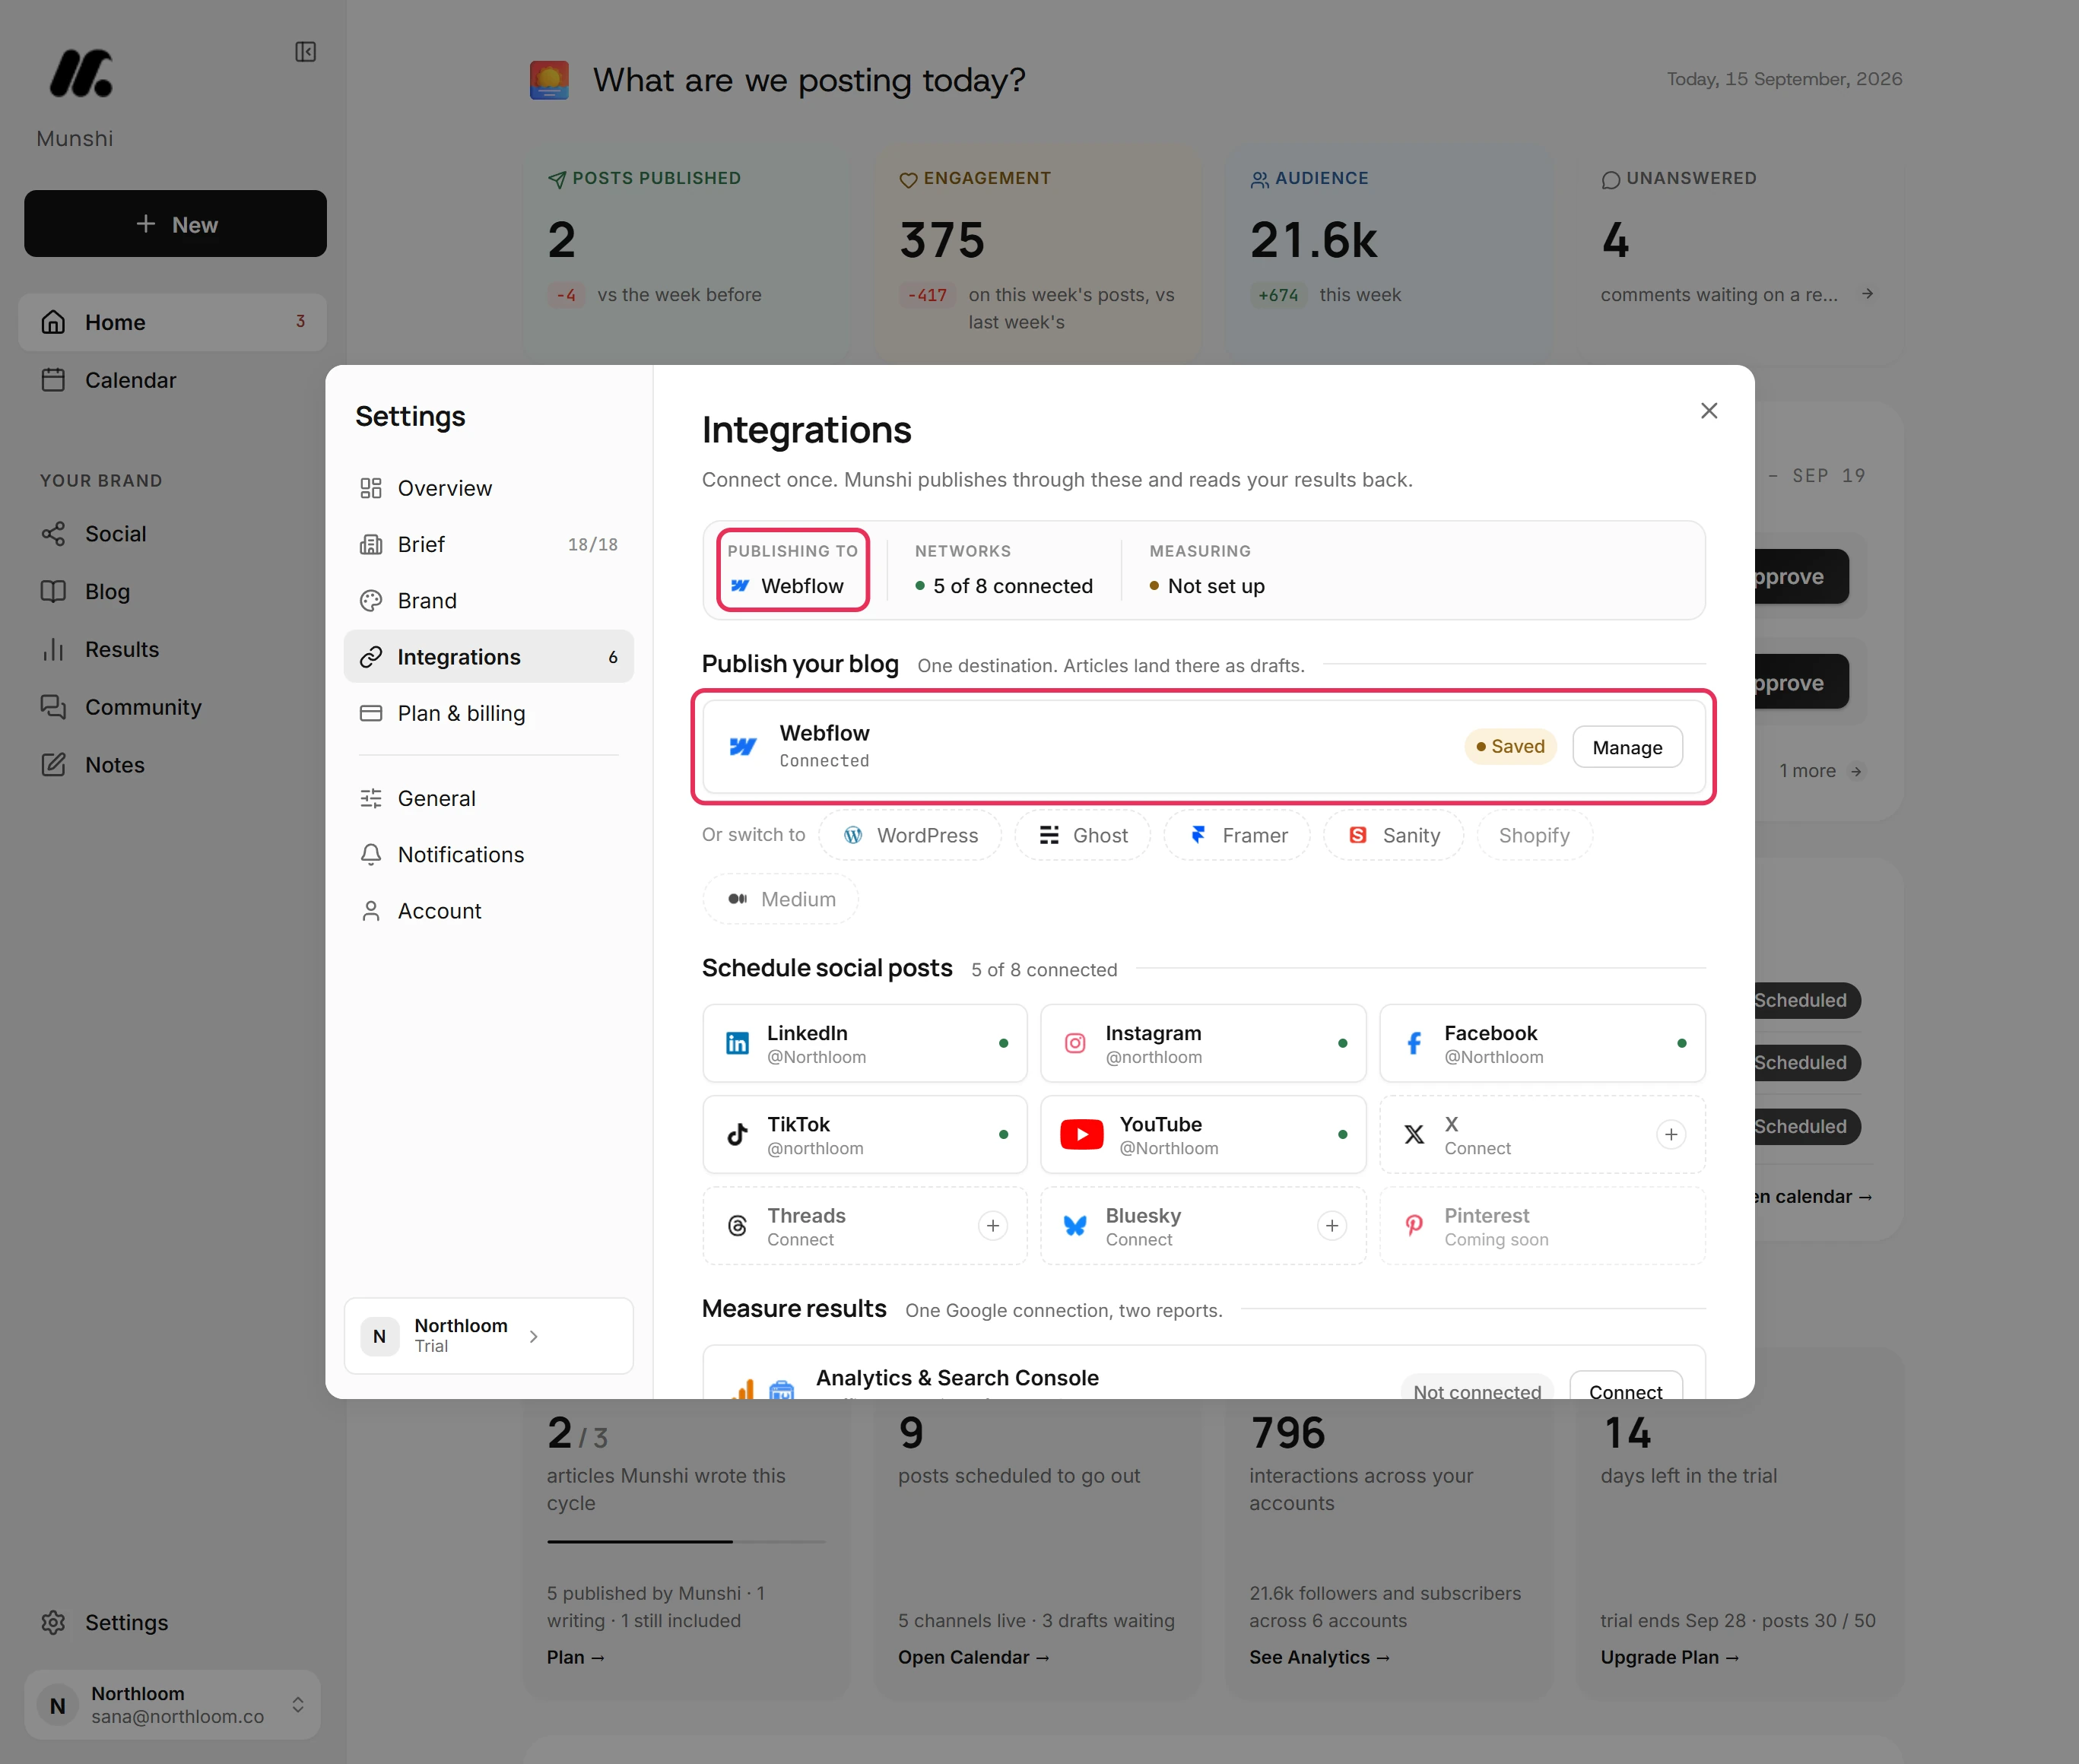
The card now reads Connected. Pick your site under Site, then your blog's collection, such as Blog Posts, under Collection. The card confirms the collection is set and ready to publish.
-
Close Settings. The next time you open Integrations, Publishing to reads Webflow, and Webflow is the destination under Publish your blog.
Where you are now
Webflow is connected. Articles you publish go into the collection you chose as draft items, and you publish them from Webflow. Munshi remembers the site and collection, so you only choose again if you reconnect.
What Munshi asks Webflow for
Munshi requests four permissions, and each one has a single job:
- Read your CMS content, so Munshi can list your collections and match an article to their fields.
- Write your CMS content, so Munshi can add each article to the collection you chose.
- Read your sites, so Munshi can show the sites you can connect.
- Read your account details, so Munshi knows which Webflow account approved the connection.
That is the whole list. Munshi has no access to the Designer, your assets, forms, pages, ecommerce or anything else outside the CMS.
Disconnect Webflow
Open Settings, then Integrations, click Webflow and click Disconnect. Two things happen at once:
- Munshi asks Webflow to cancel its access, so the connection ends on Webflow's side and not only in Munshi.
- Munshi deletes the saved connection, including the site and collection you chose.
Items already in your Webflow CMS stay exactly as they are. Disconnecting only stops future articles. To connect again, follow the steps above.
Connect with a site token instead
If your Webflow card asks for a Site API token and a Collection ID rather than showing Connect Webflow, your workspace connects with a site token. Use these steps:
- In Webflow, open the site's Site settings, then Apps & integrations, and generate a site token with CMS read and write access. Copy it.
- Paste it into Site API token and click Save. Munshi stores it encrypted and checks it with Webflow. The card answers Token works. Paste the Collection ID of your blog and lists every collection the token reaches, with its ID in brackets.
- Copy the ID after your blog's collection, paste it into Collection ID and click Save again. The card reads Connected: publishing to with the site and the collection.
To disconnect a token connection, revoke the token in Webflow under Site settings, then Apps & integrations. Munshi can no longer reach the site from that moment.
If something goes wrong
“The connection was declined or cancelled. Nothing was saved.”
The Webflow window was closed, or access was not approved. Click Connect Webflow again and approve Munshi in Webflow.
“That connection attempt has expired.”
The Webflow window stayed open too long, or was opened from an older tab. Start again from Integrations with Connect Webflow.
“Your Munshi session expired while you were signing in.”
Munshi signed you out while the Webflow window was open. Sign in to Munshi, then click Connect Webflow again.
My collection is not in the list
The list shows the collections of the site chosen under Site. Pick the site that holds your blog, and check in Webflow that the collection exists on that site.
“Webflow refused the token.” (site token connection)
Webflow did not accept the token, or it has no access to the CMS. Generate a new site token in Site settings, Apps & integrations, with CMS read and write access, then paste it and click Save.
“Token works. Paste the Collection ID of your blog” (site token connection)
The token is fine, but no collection is chosen, or the saved ID is not one this token reaches. Copy an ID from the list in the message into Collection ID and click Save.
The article's cover is not in Webflow
Munshi writes the cover into the collection's Image fields. If the item has no cover, the collection has no Image field: add one in Webflow, then publish the article again.
Try it on your own brand this week.
Munshi Social, the AI content marketing engine for small teams, plans, writes, publishes, and tracks your blog and socials. The guide above shows the real app, not a mock-up.
Start your workspace