How to connect Framer with a Server API key
Paste your Framer project URL and a Server API key into Munshi. Munshi connects to the project, finds its CMS collections and picks the one for your blog.
Before you start
- A Framer project with a CMS collection for your blog posts. A CMS collection is the list in Framer that holds your posts. You also need access to the project's site settings in Framer.
- You own the Munshi workspace. Only an owner can save a blog connection.
-
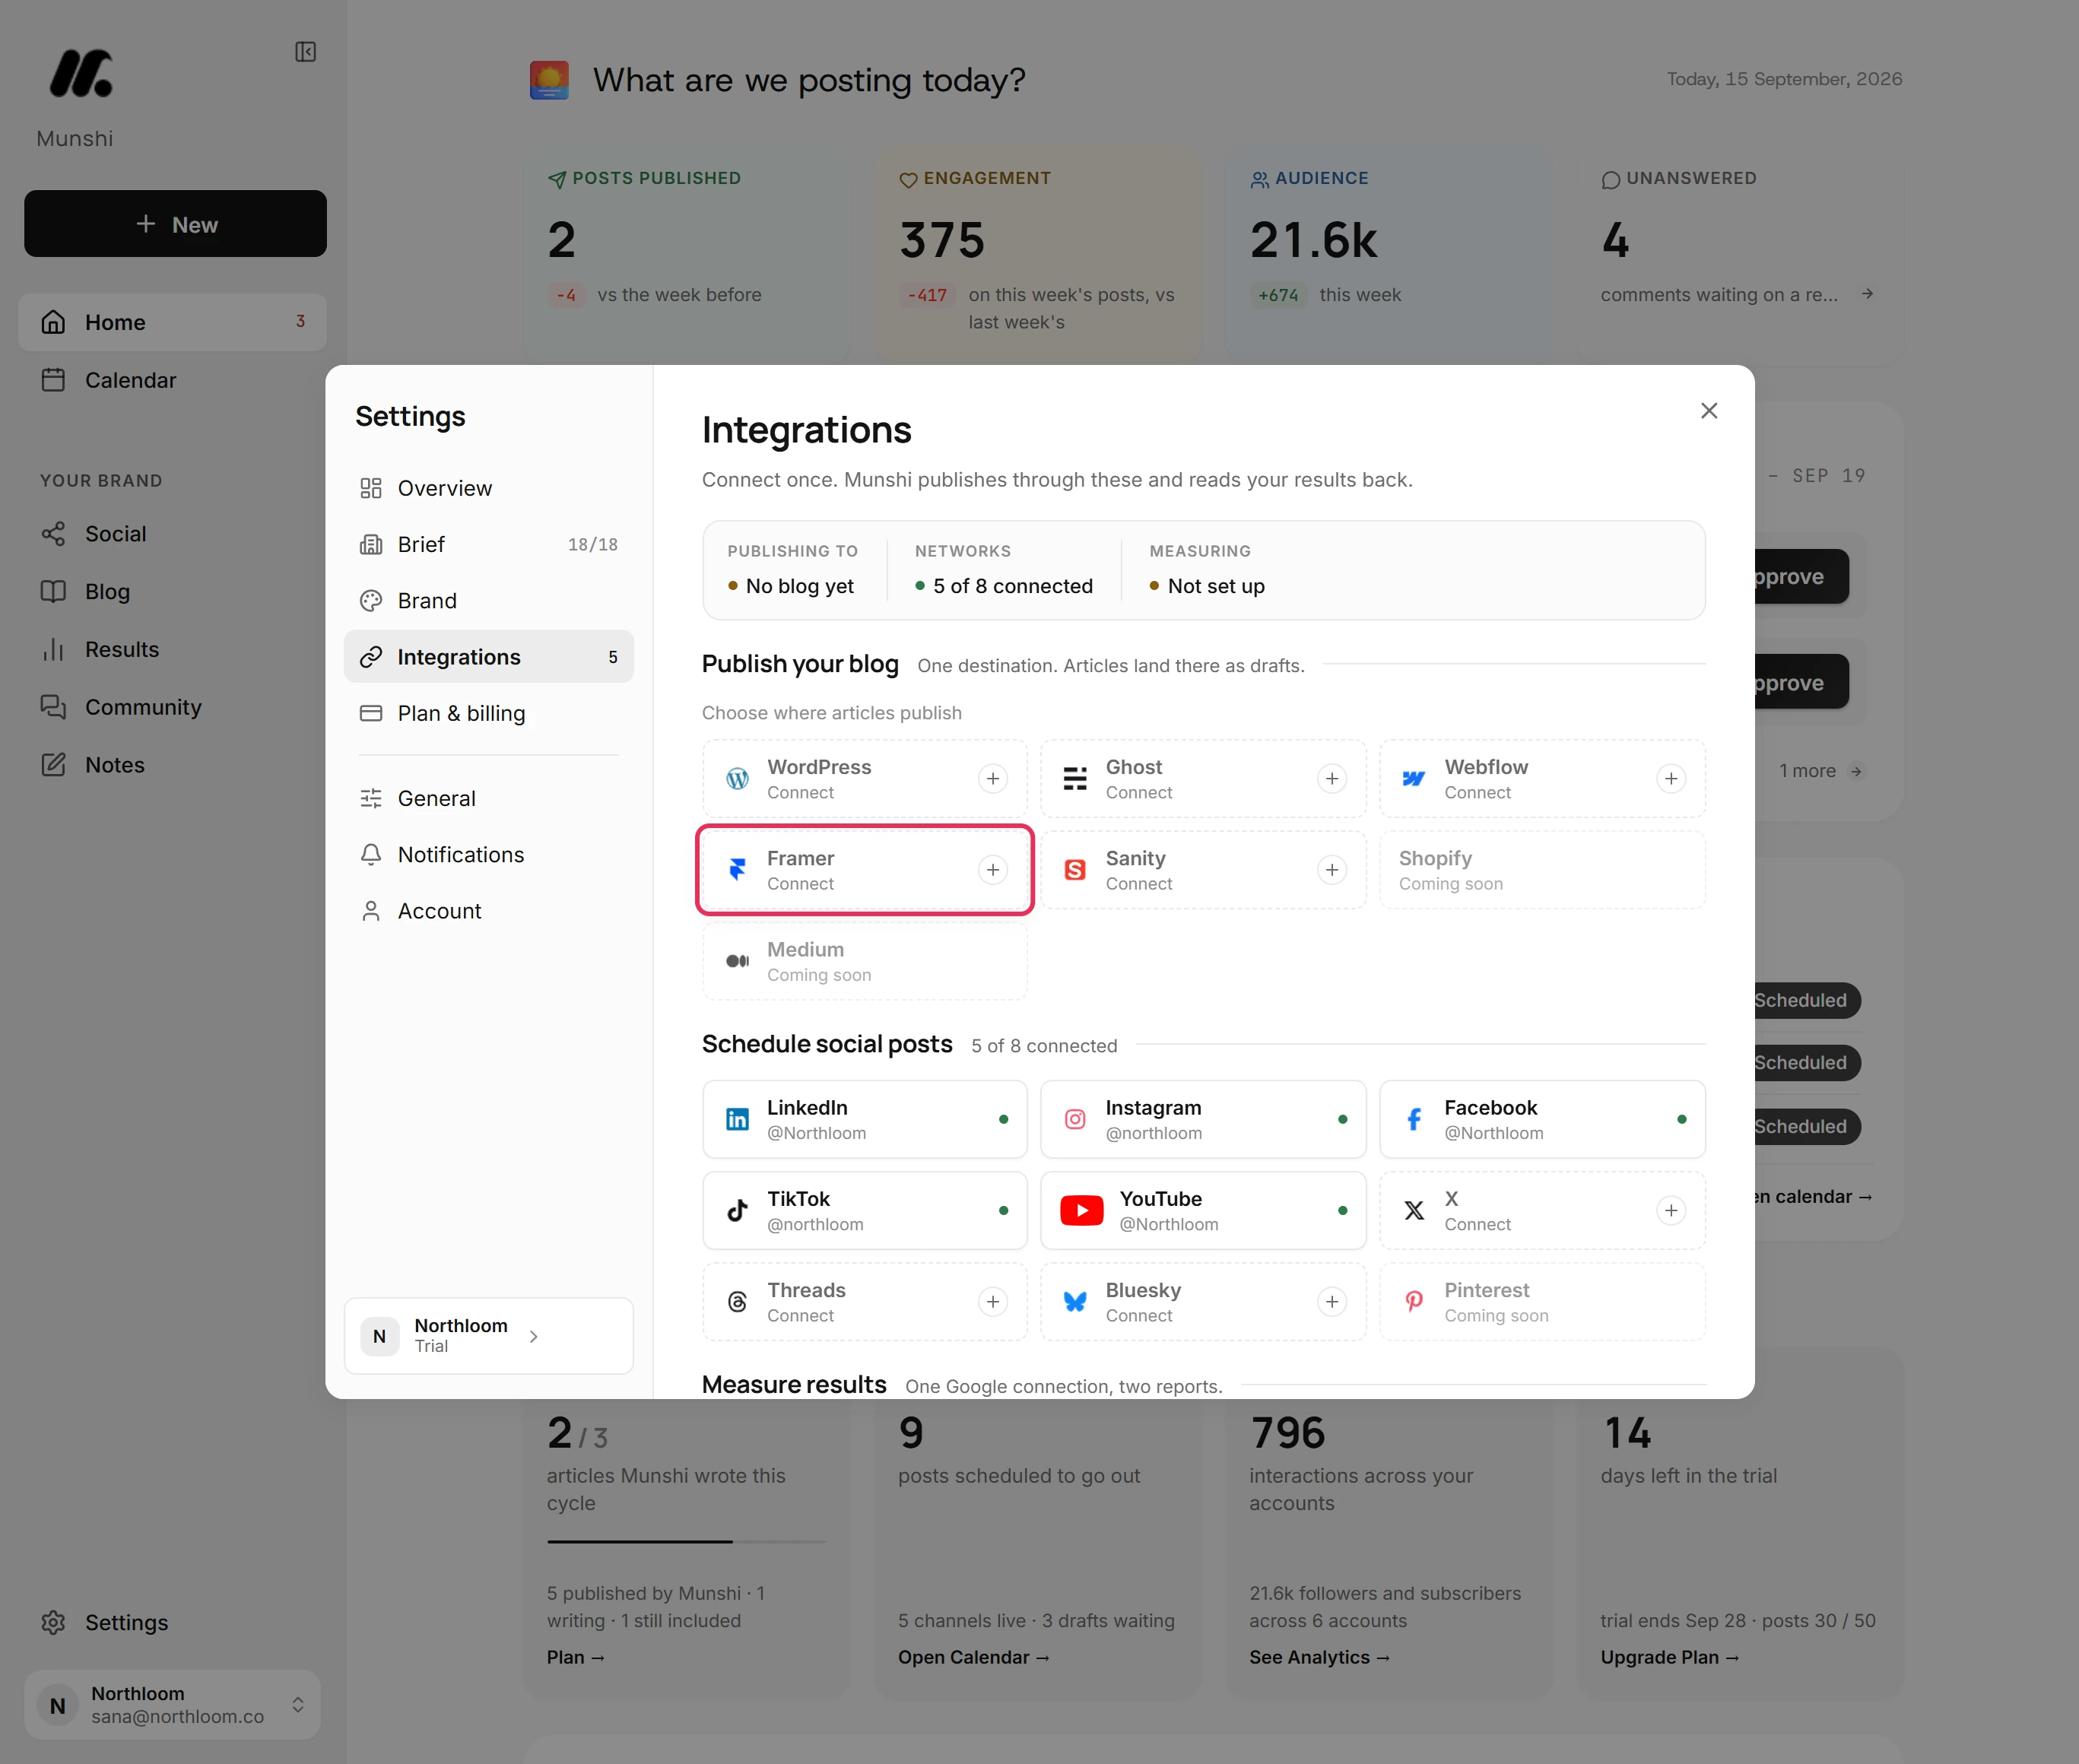
Click Settings at the bottom of the sidebar, then Integrations. Framer is one of the blogs under Publish your blog.
-
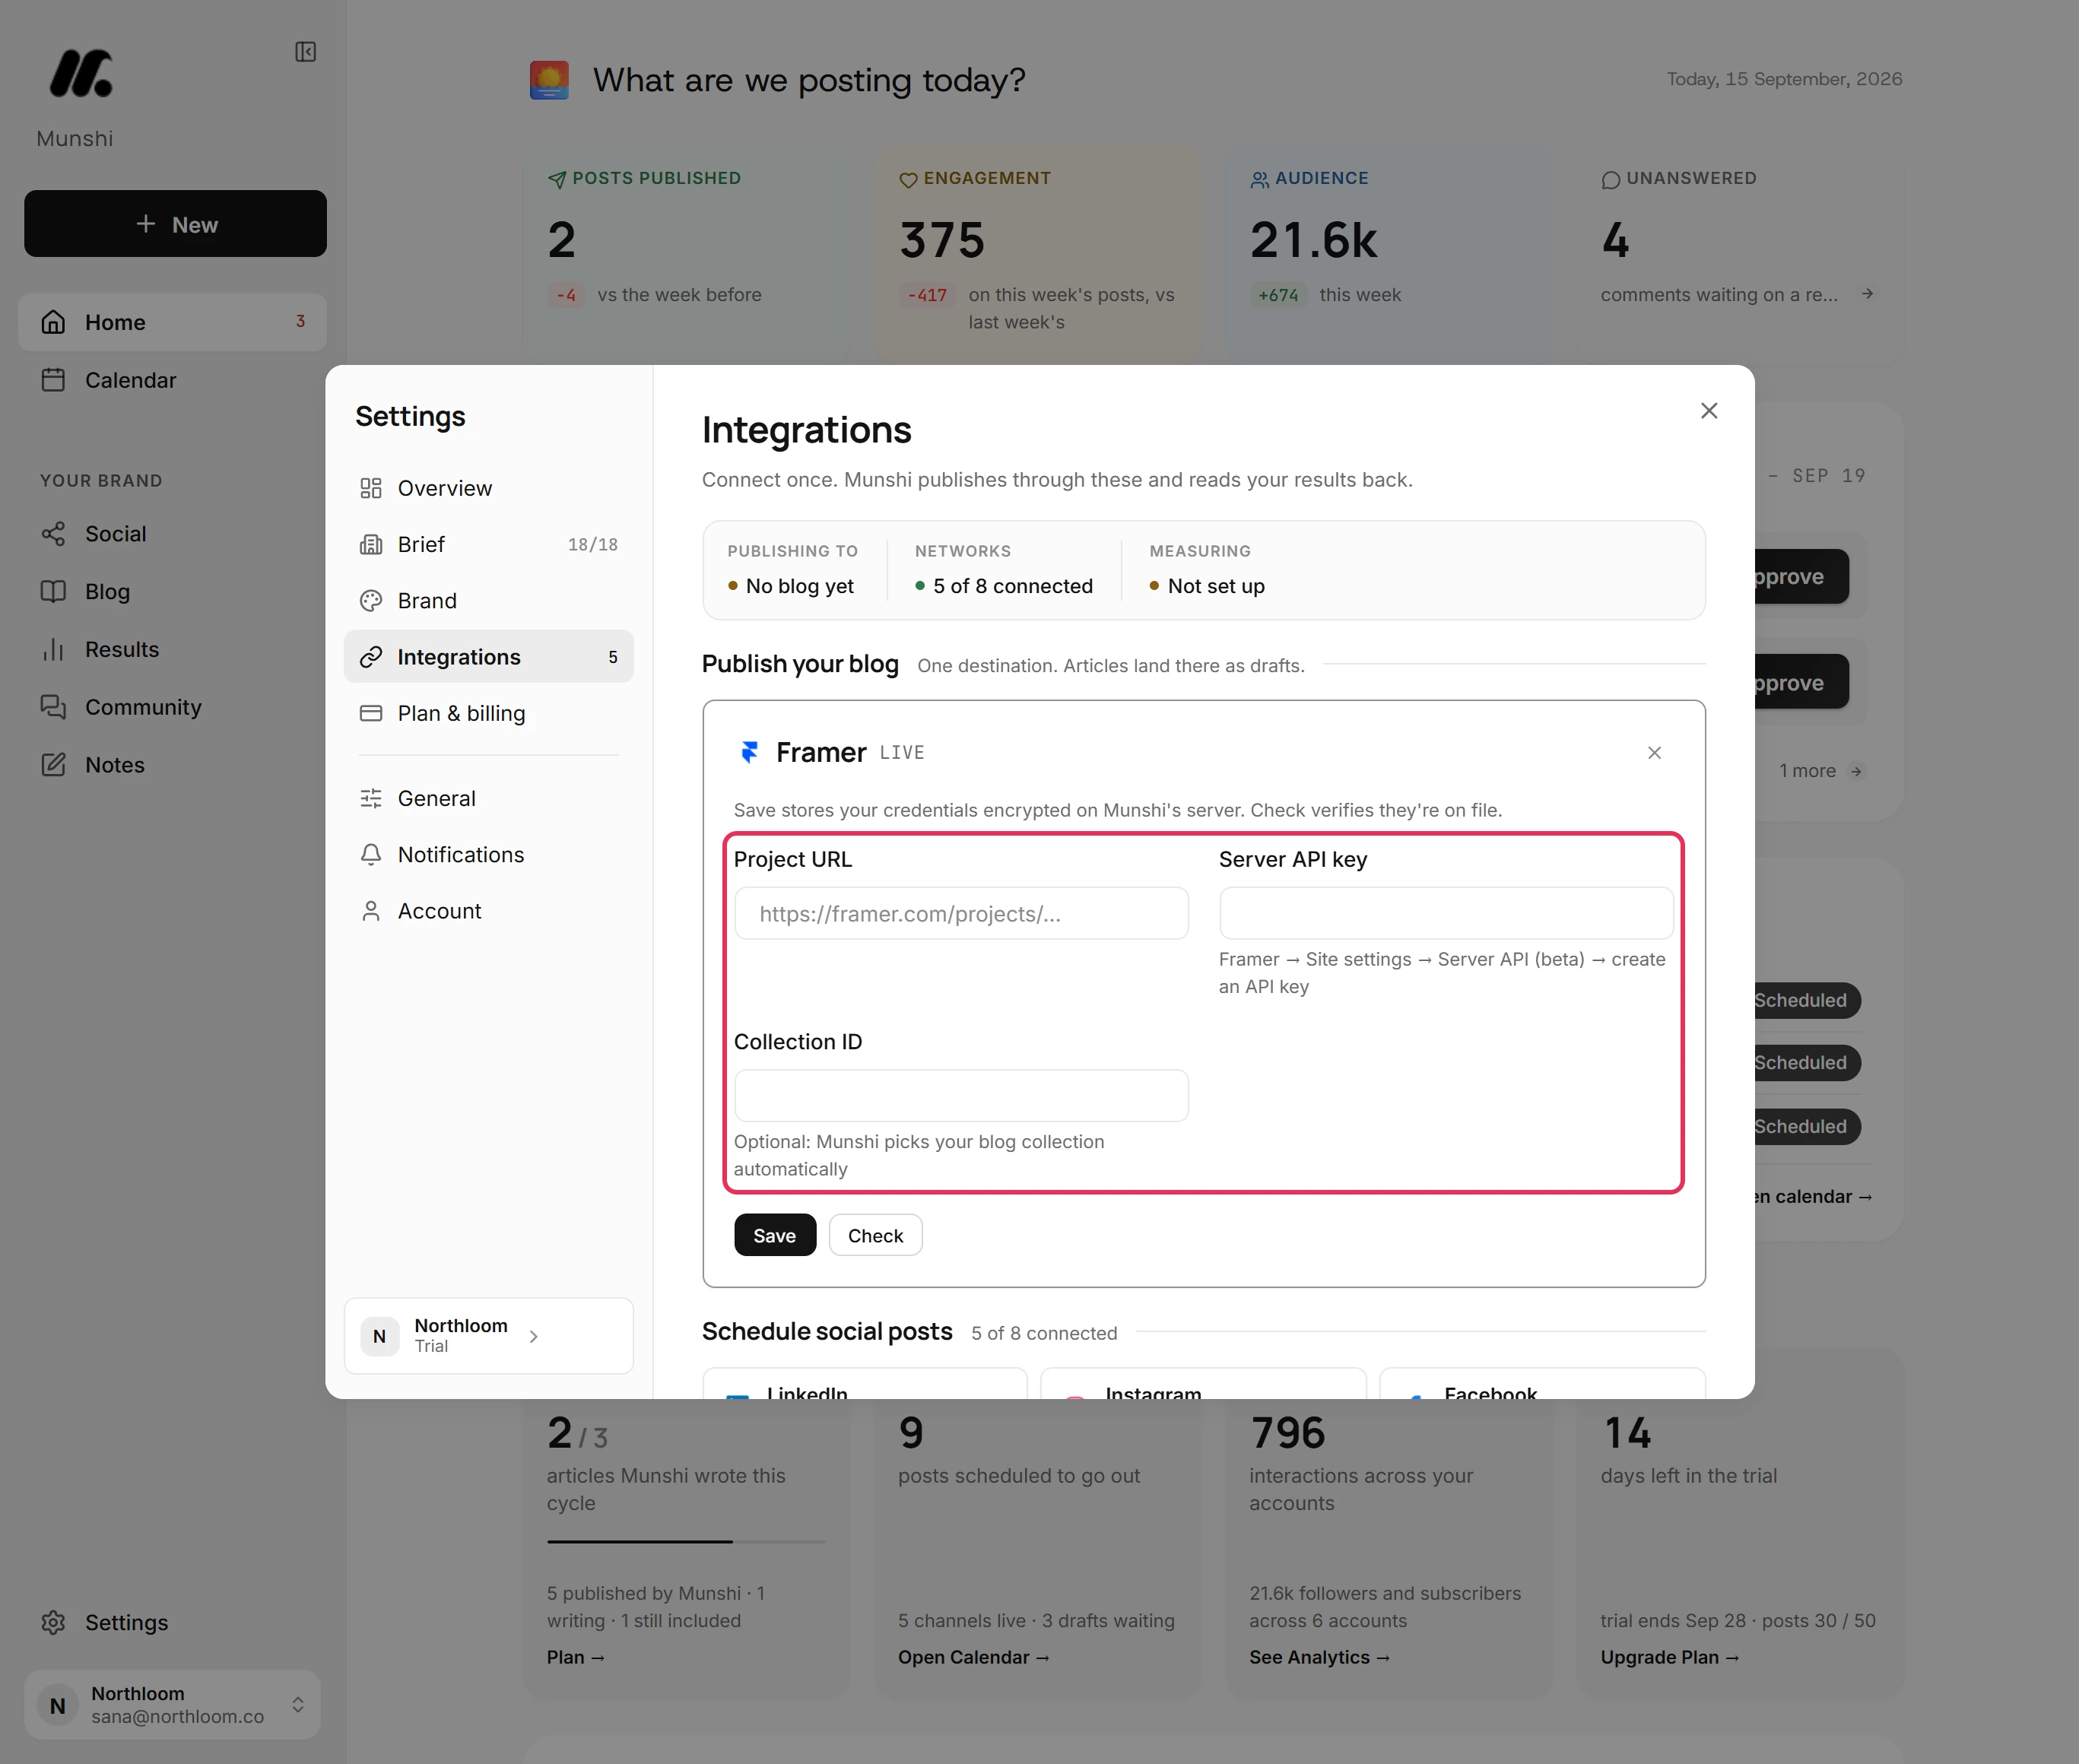
Click Framer. Its card asks for a Project URL and a Server API key. It also has an optional Collection ID.
-
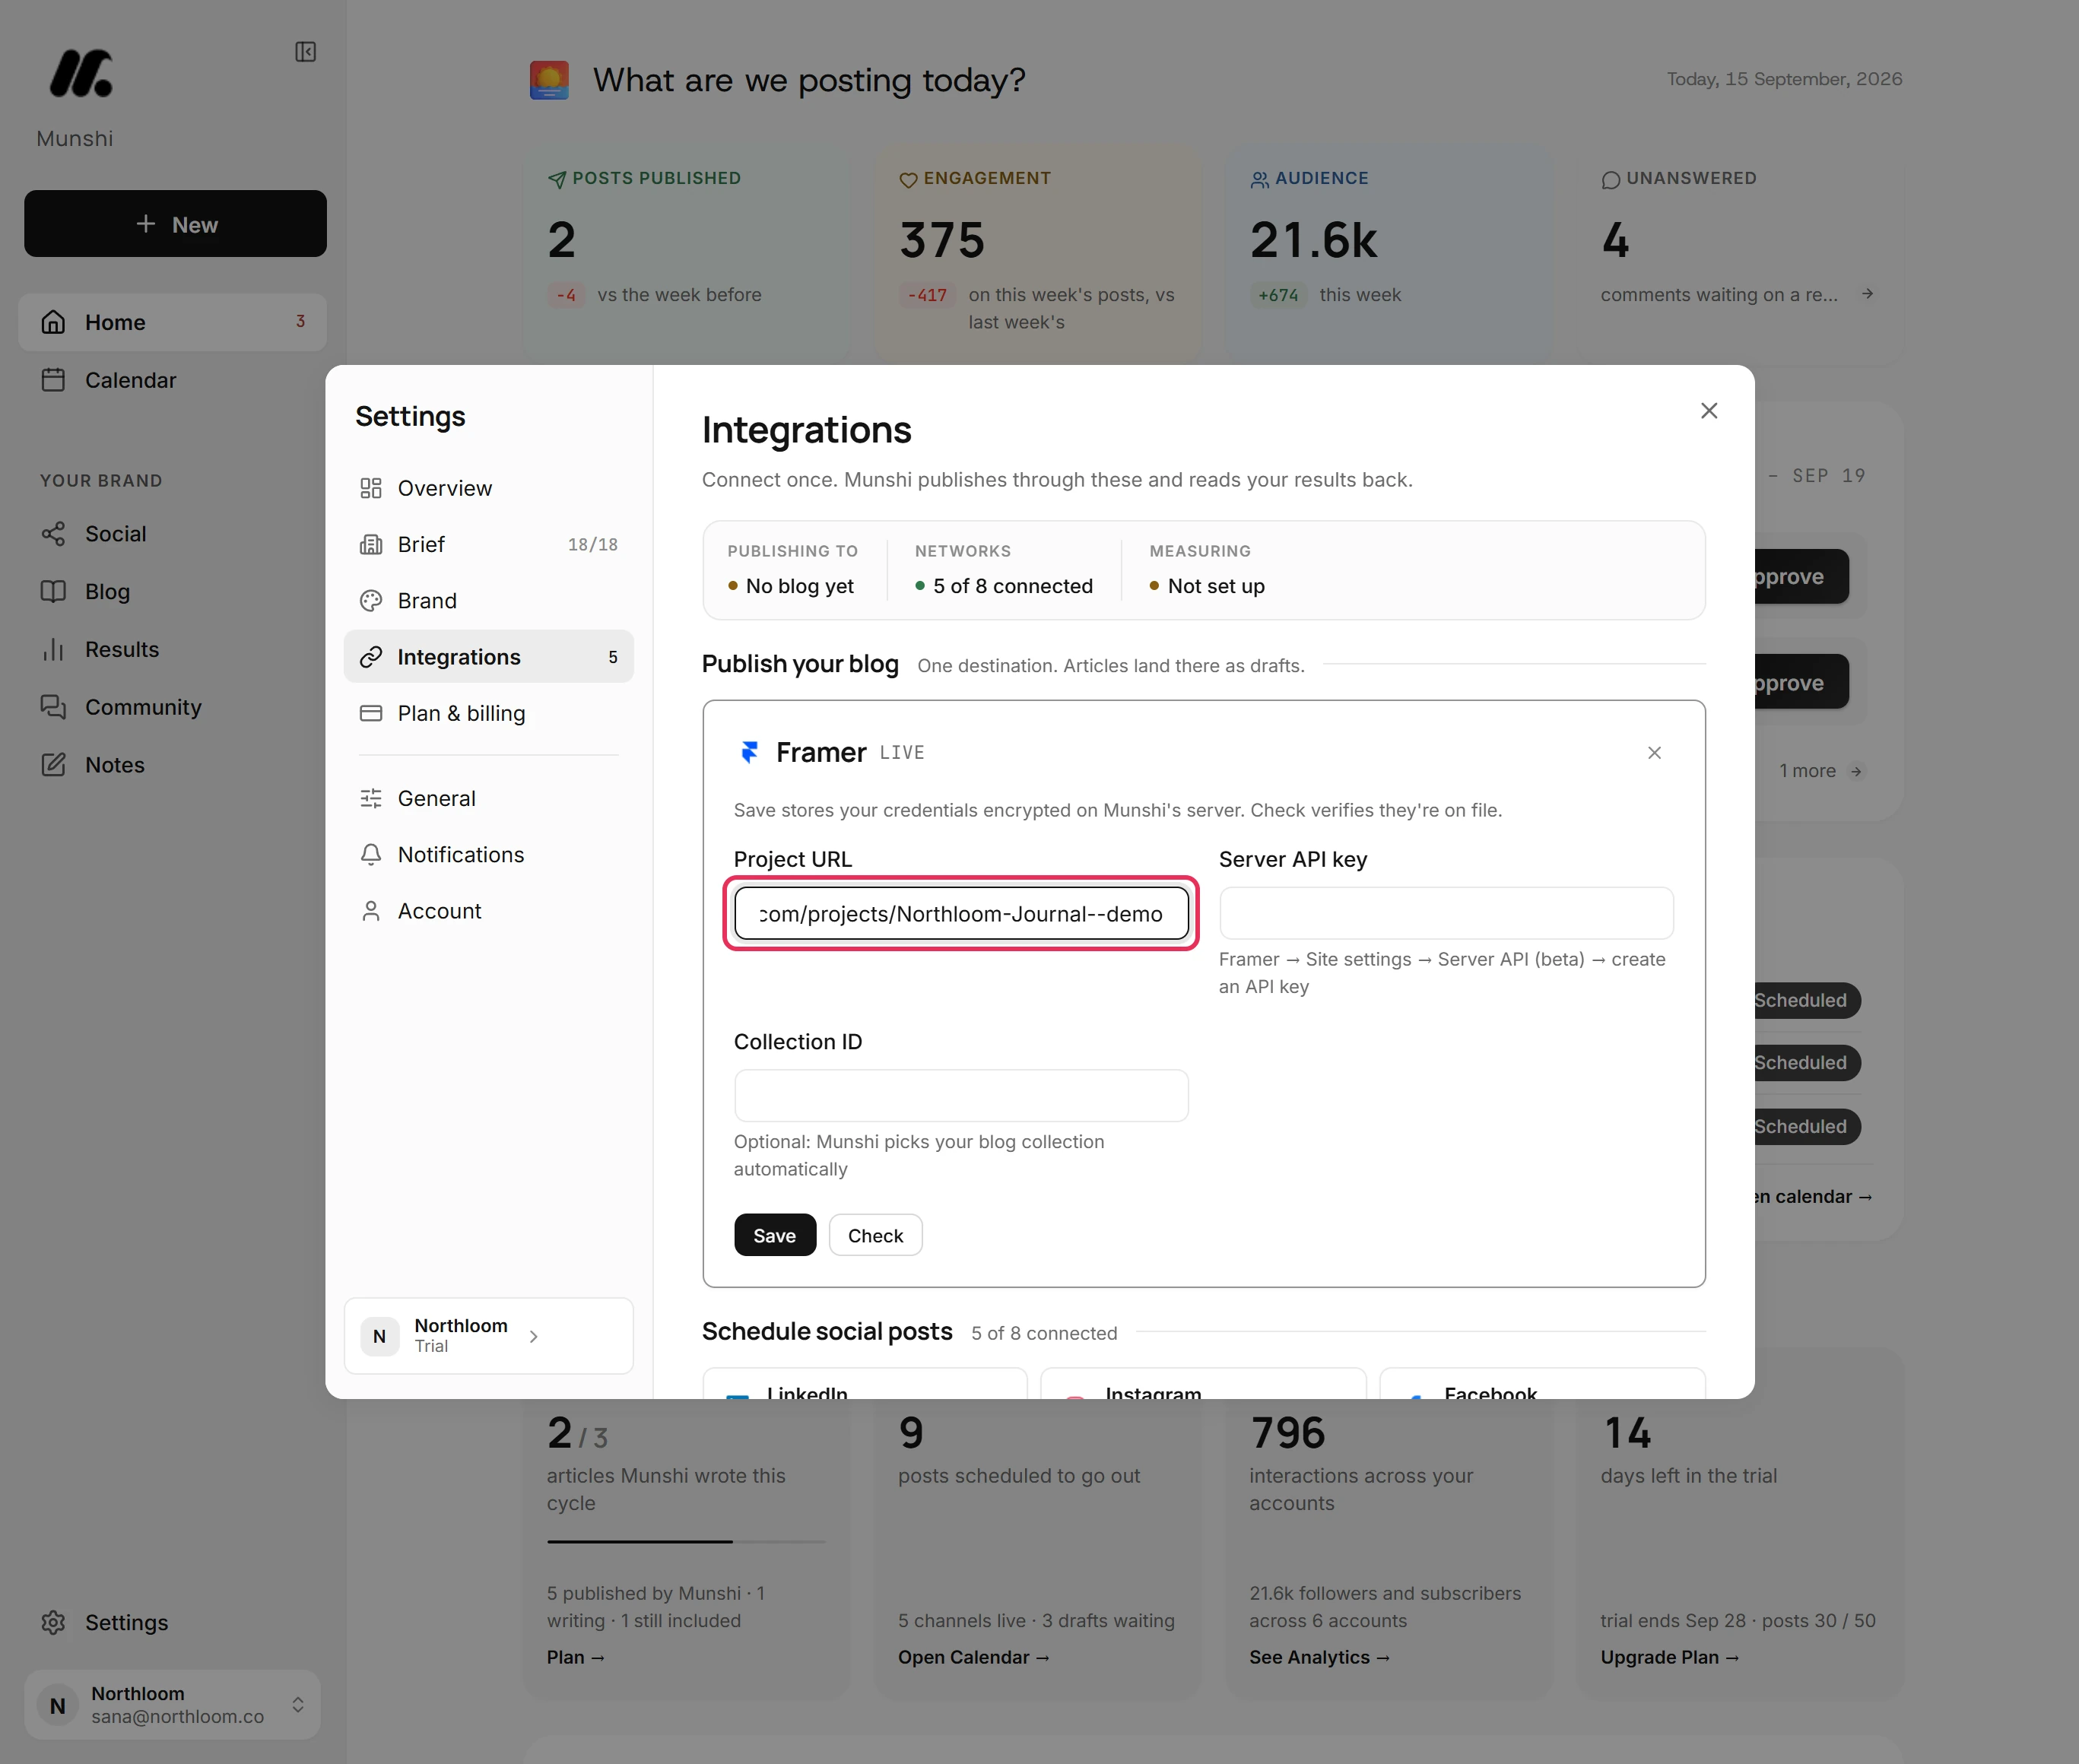
Paste your project's URL into Project URL. It starts with https://framer.com/projects/ and ends with the project's own part.
-
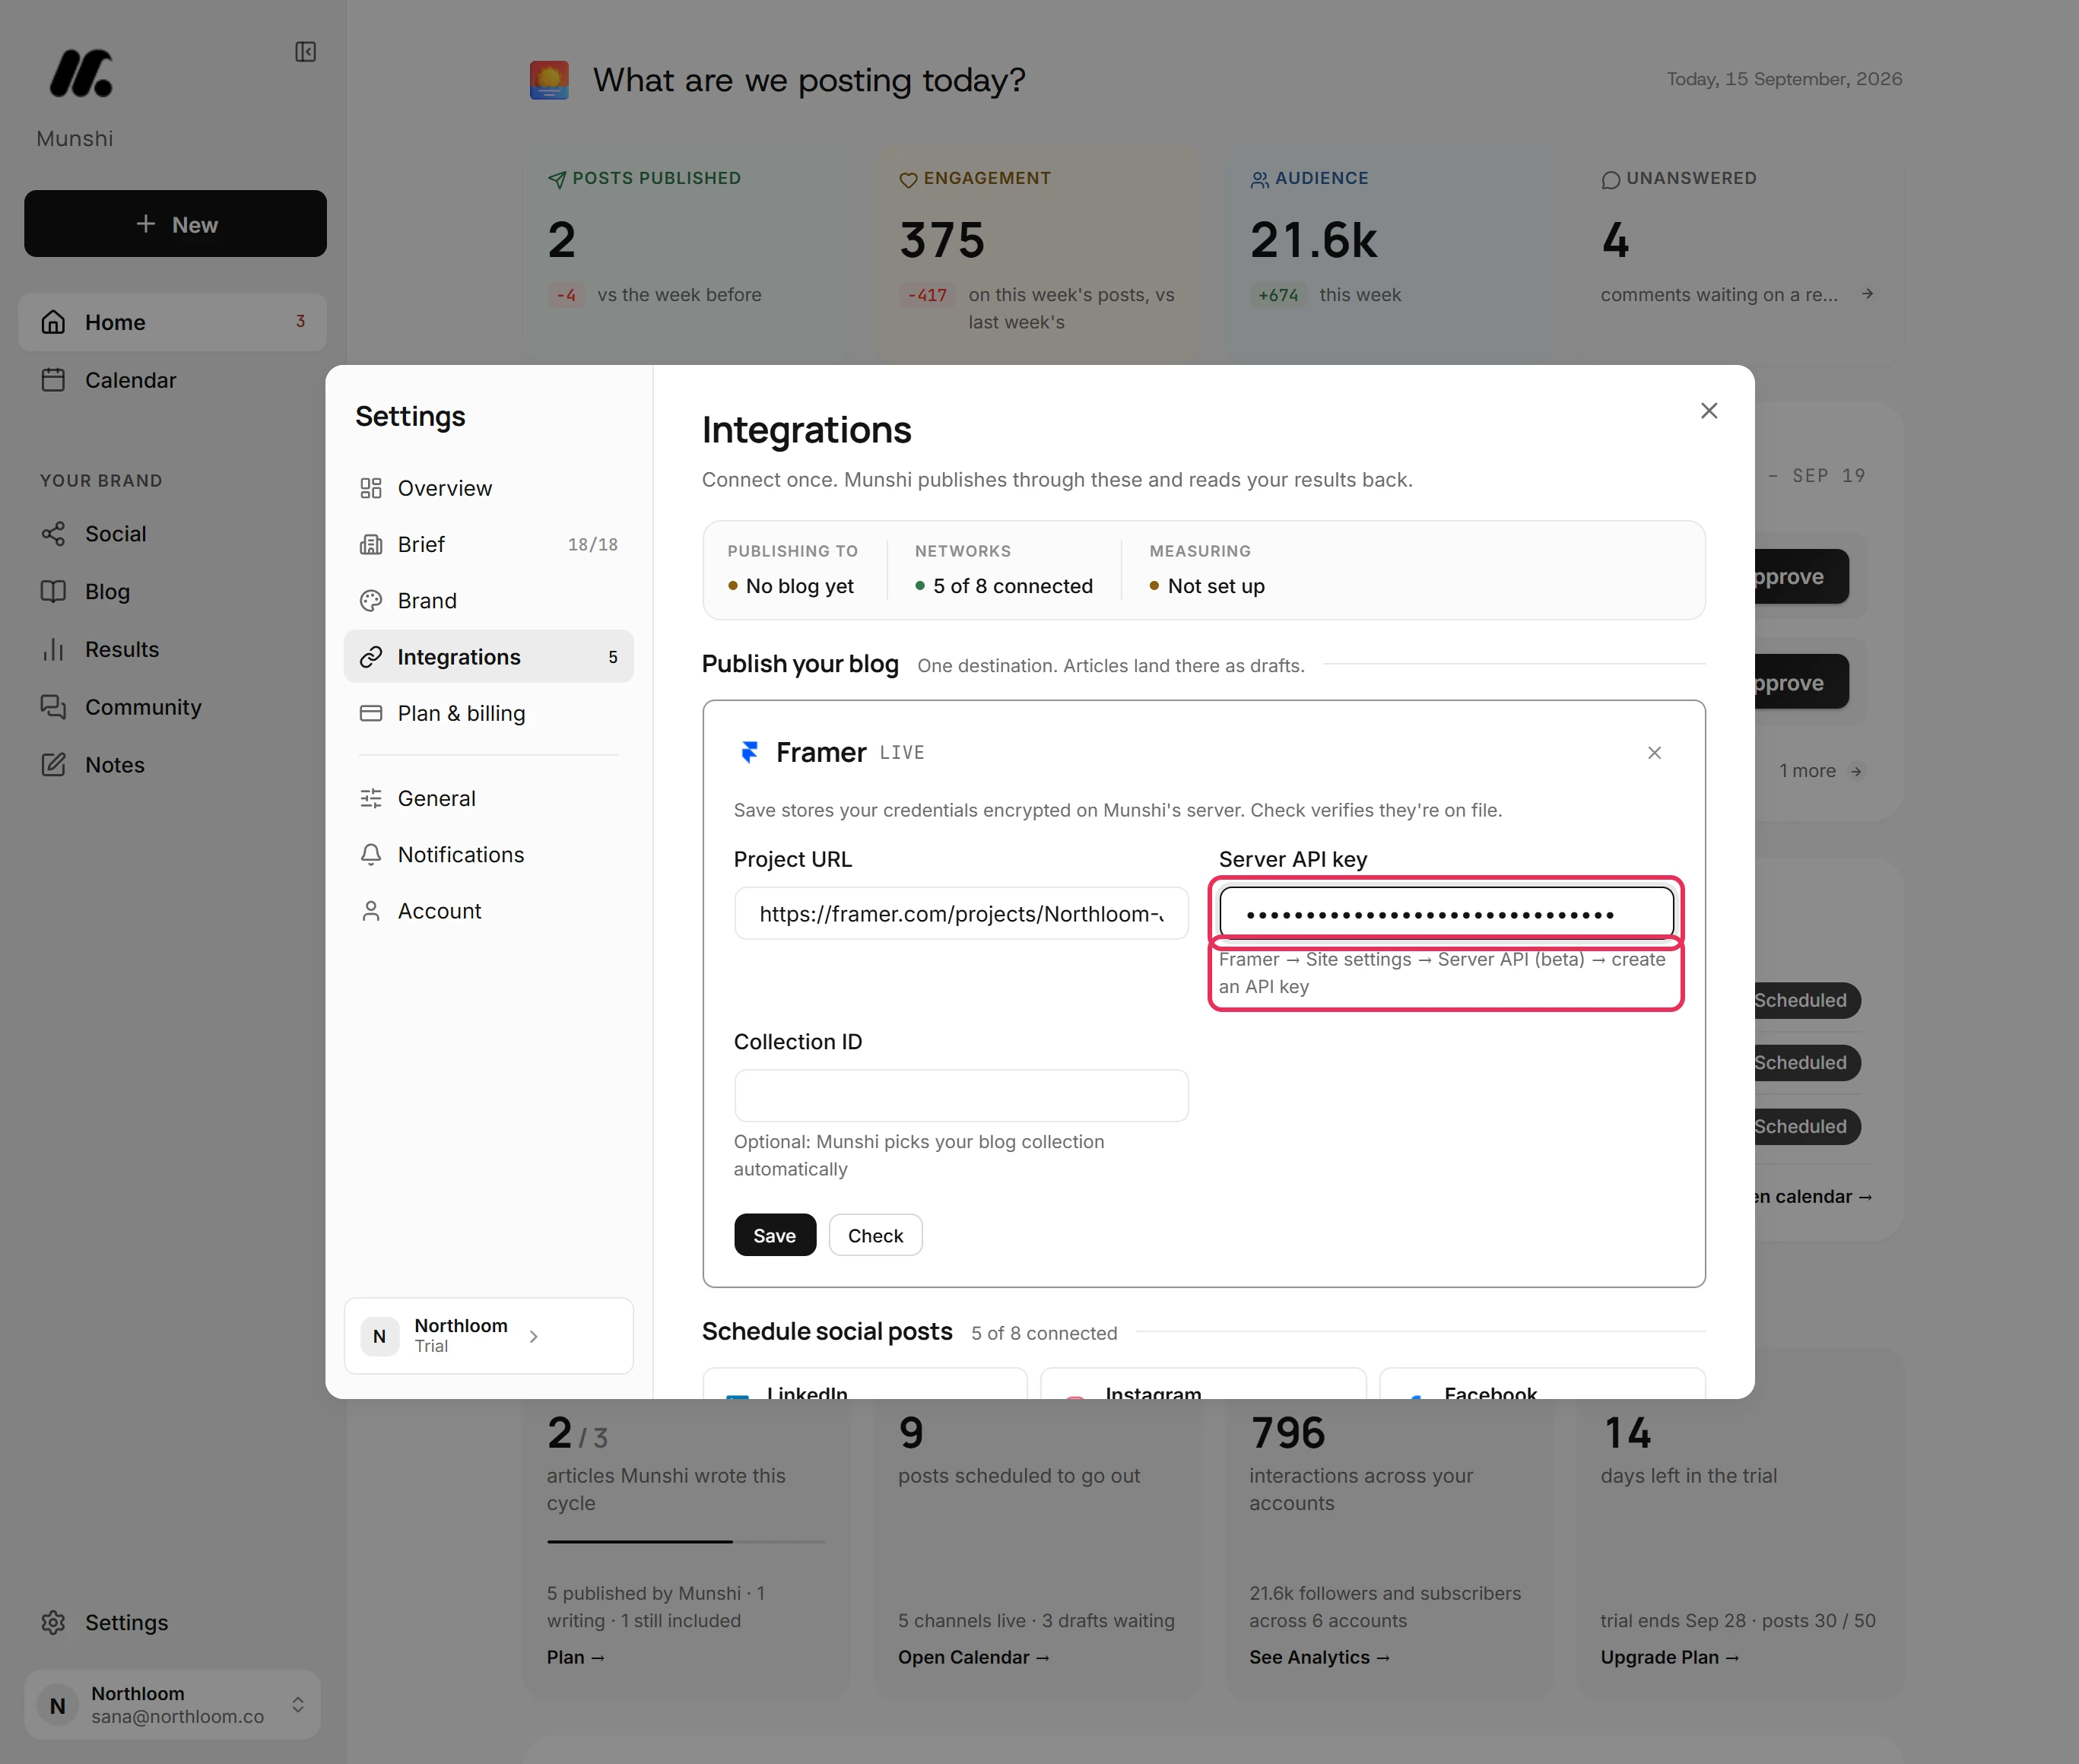
A Server API key is a secret code that lets Munshi reach your project. In Framer, open the project's Site settings, then Server API, and create an API key. Paste it into Server API key, where it shows as dots.
-
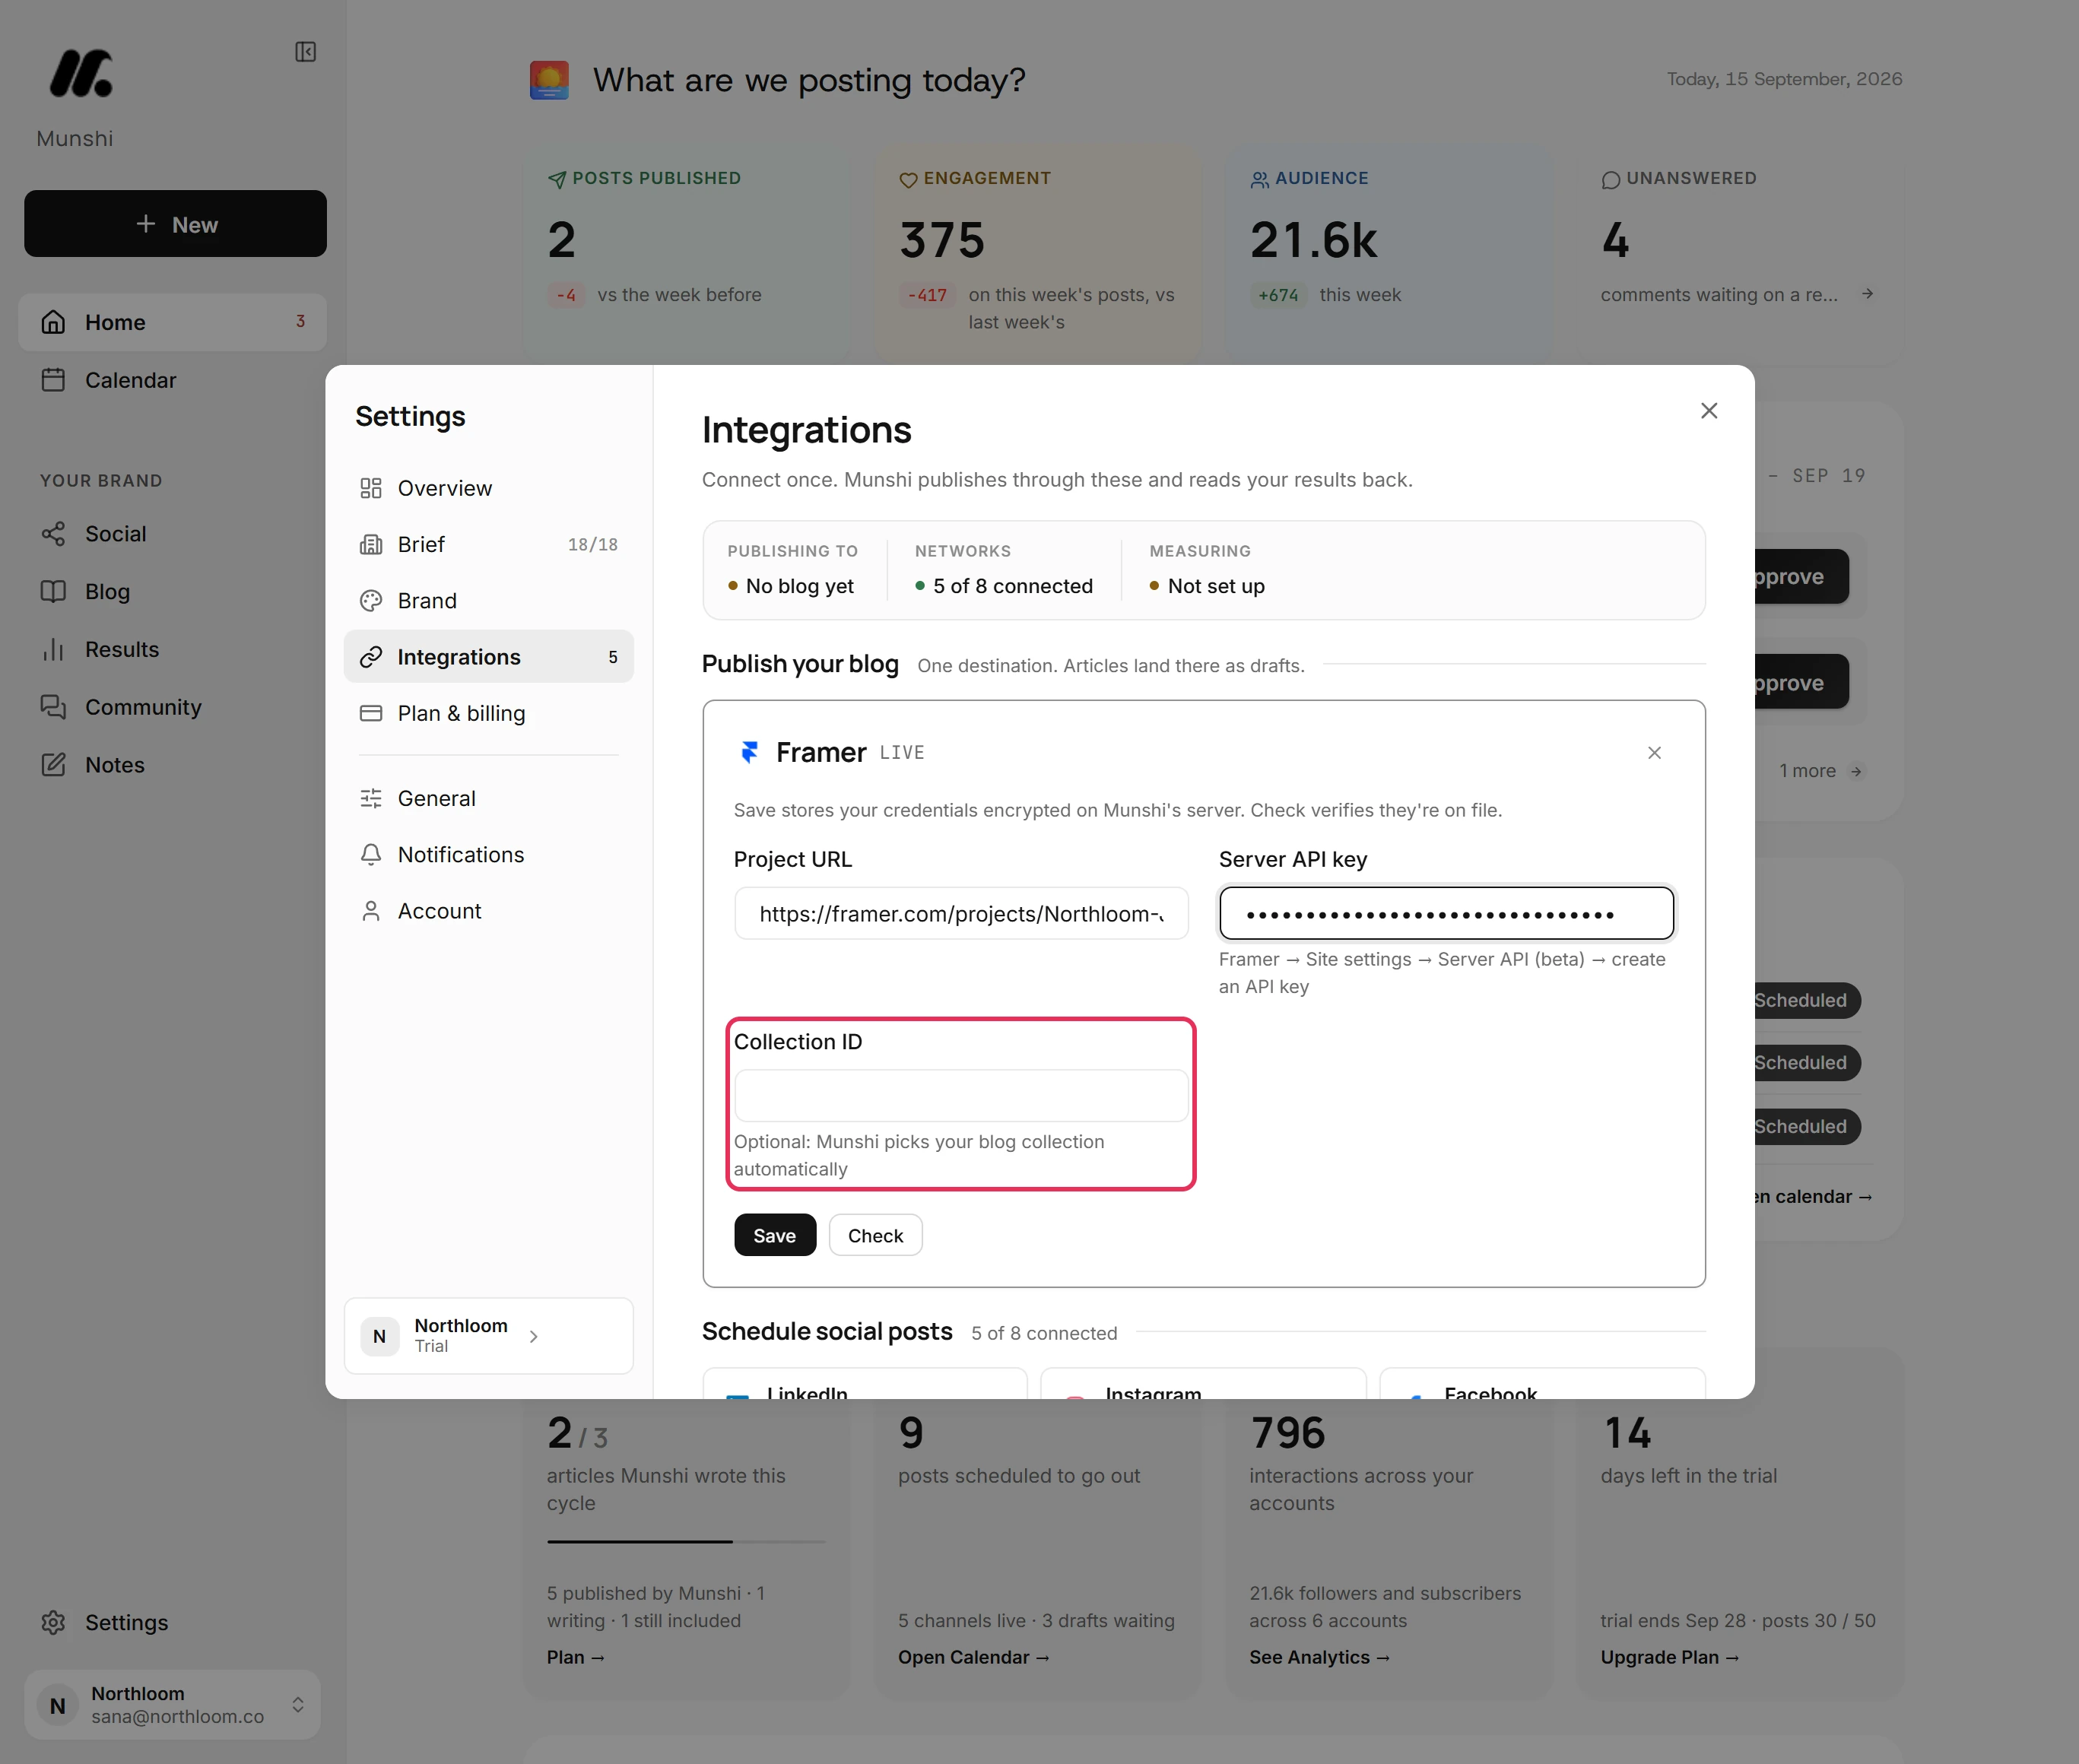
Munshi picks your blog collection itself. It takes the first whose name contains blog, post, article or news. If none does, it takes the first with a formatted text field, and otherwise the first collection. Paste a collection's ID only to choose a different one.
-
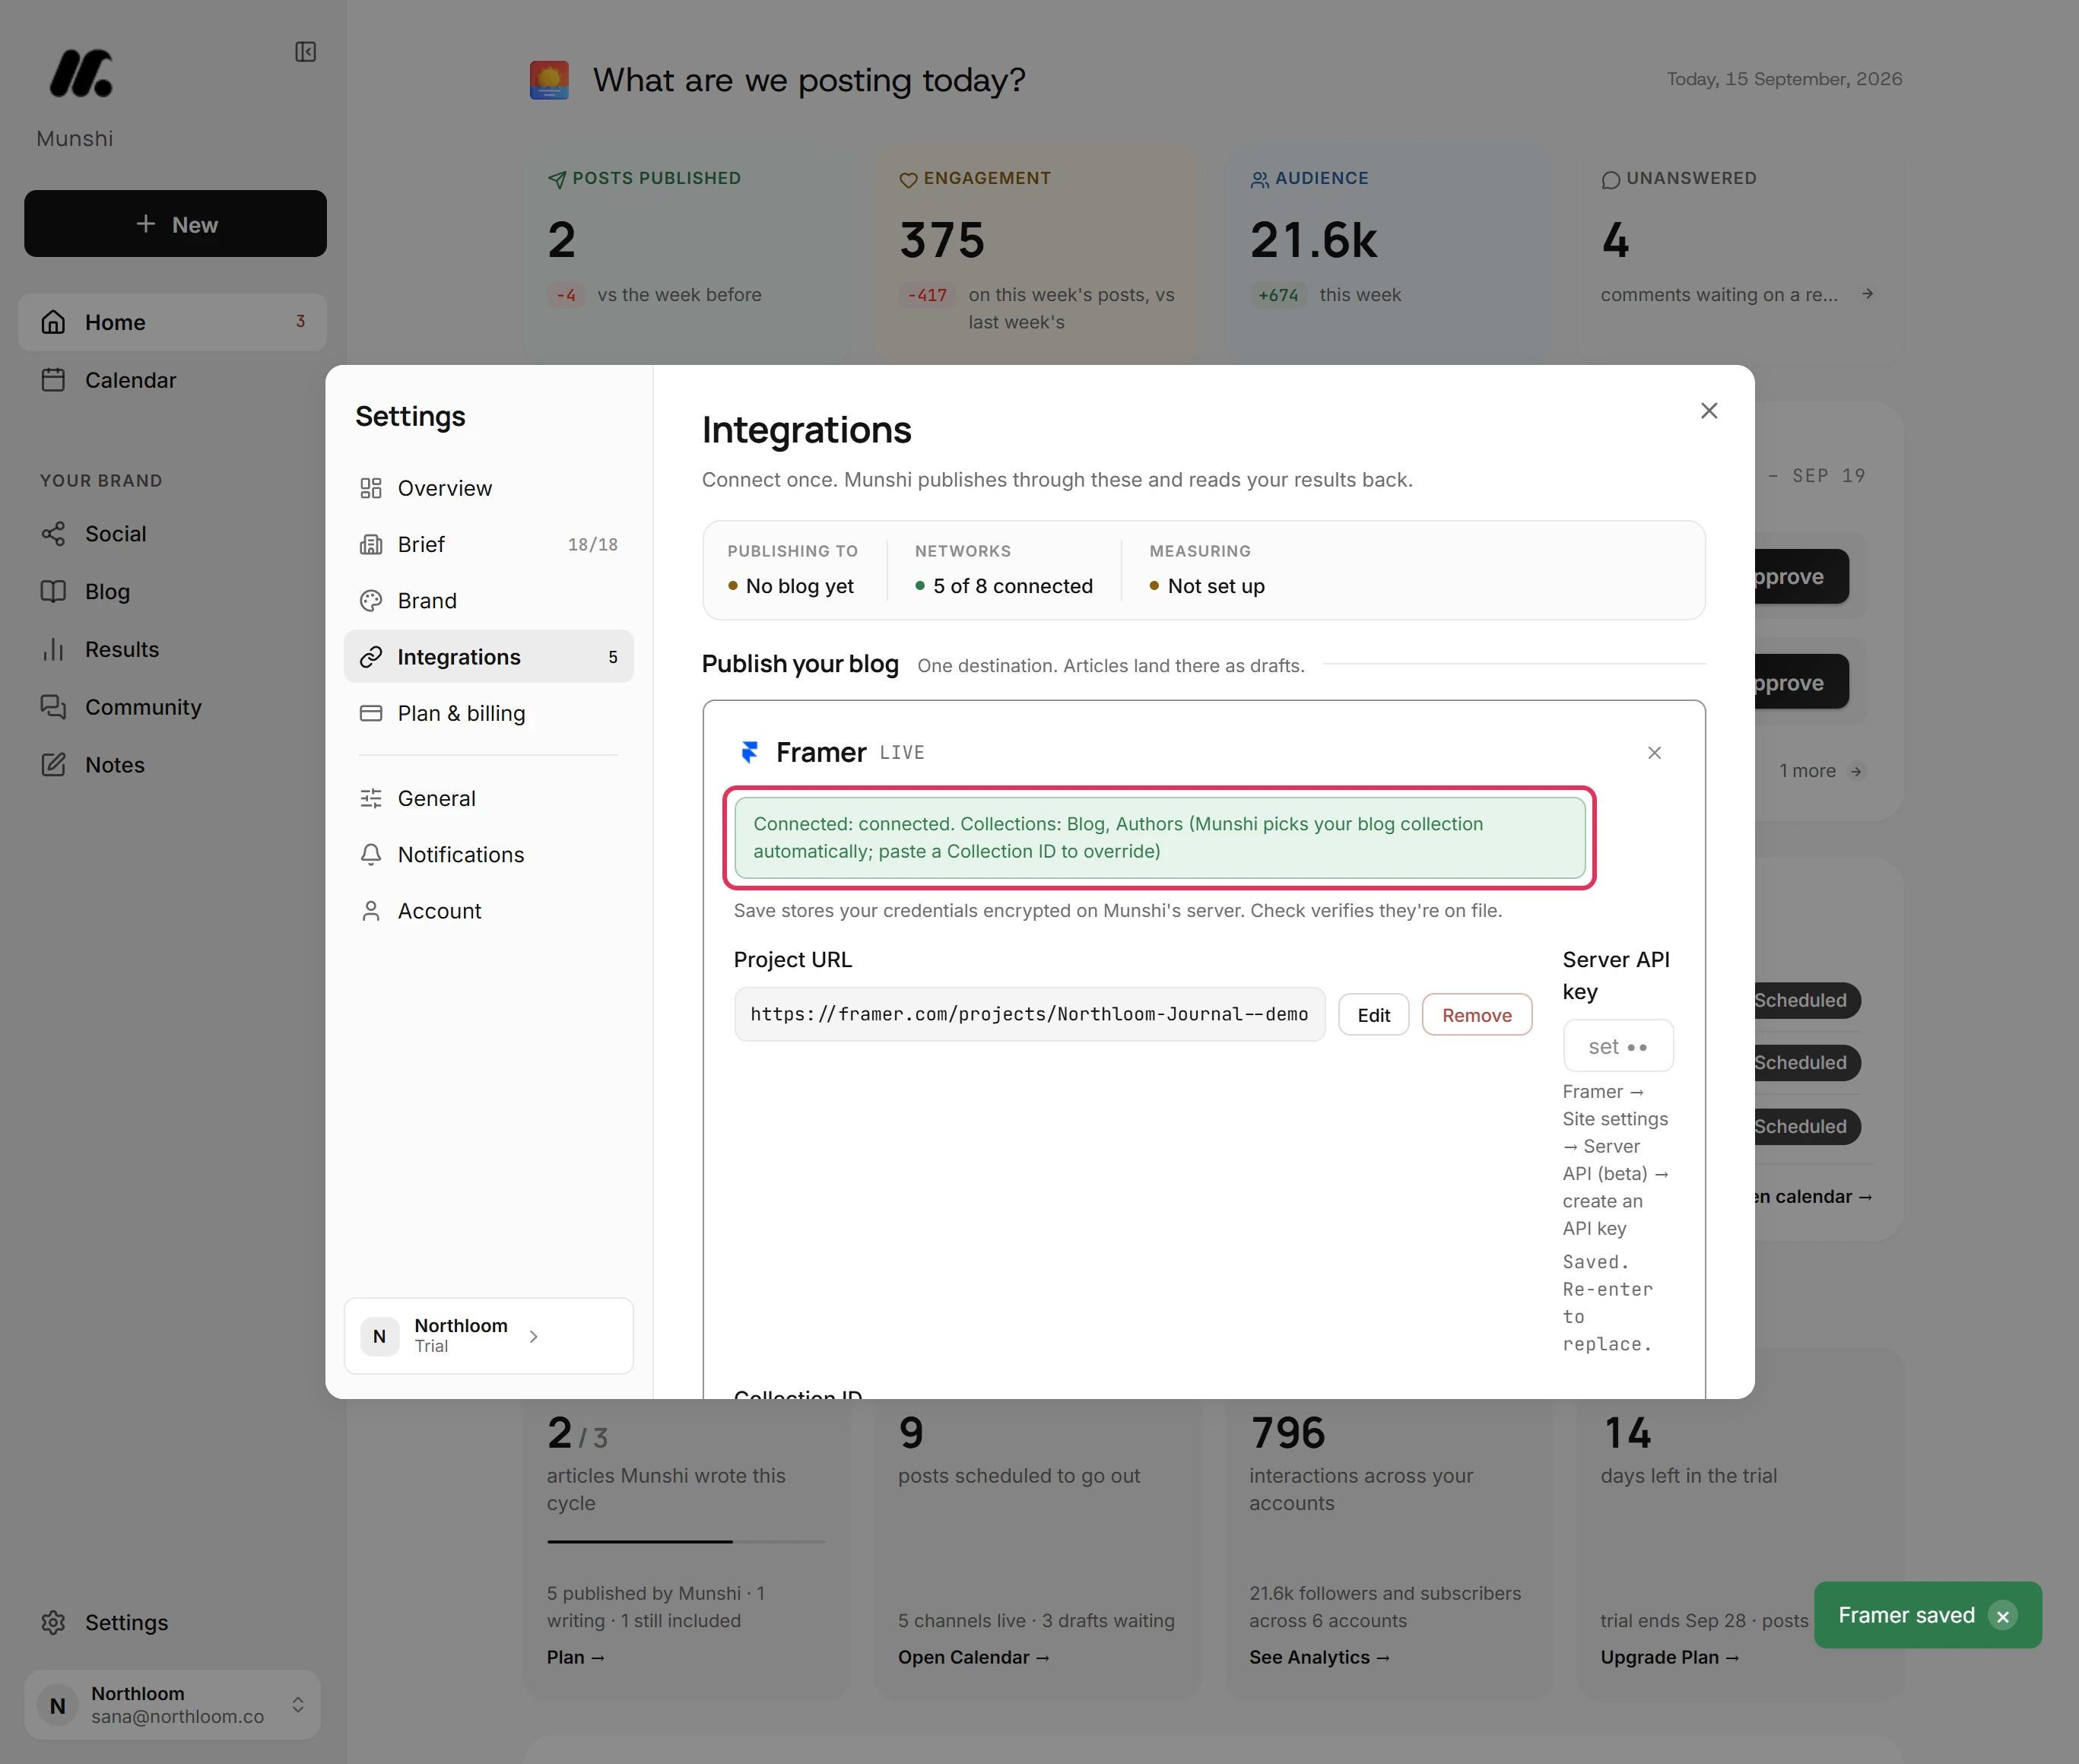
Click Save. Munshi connects to the project with the key. When Framer accepts it, Munshi says Connected and names the project's collections.
-
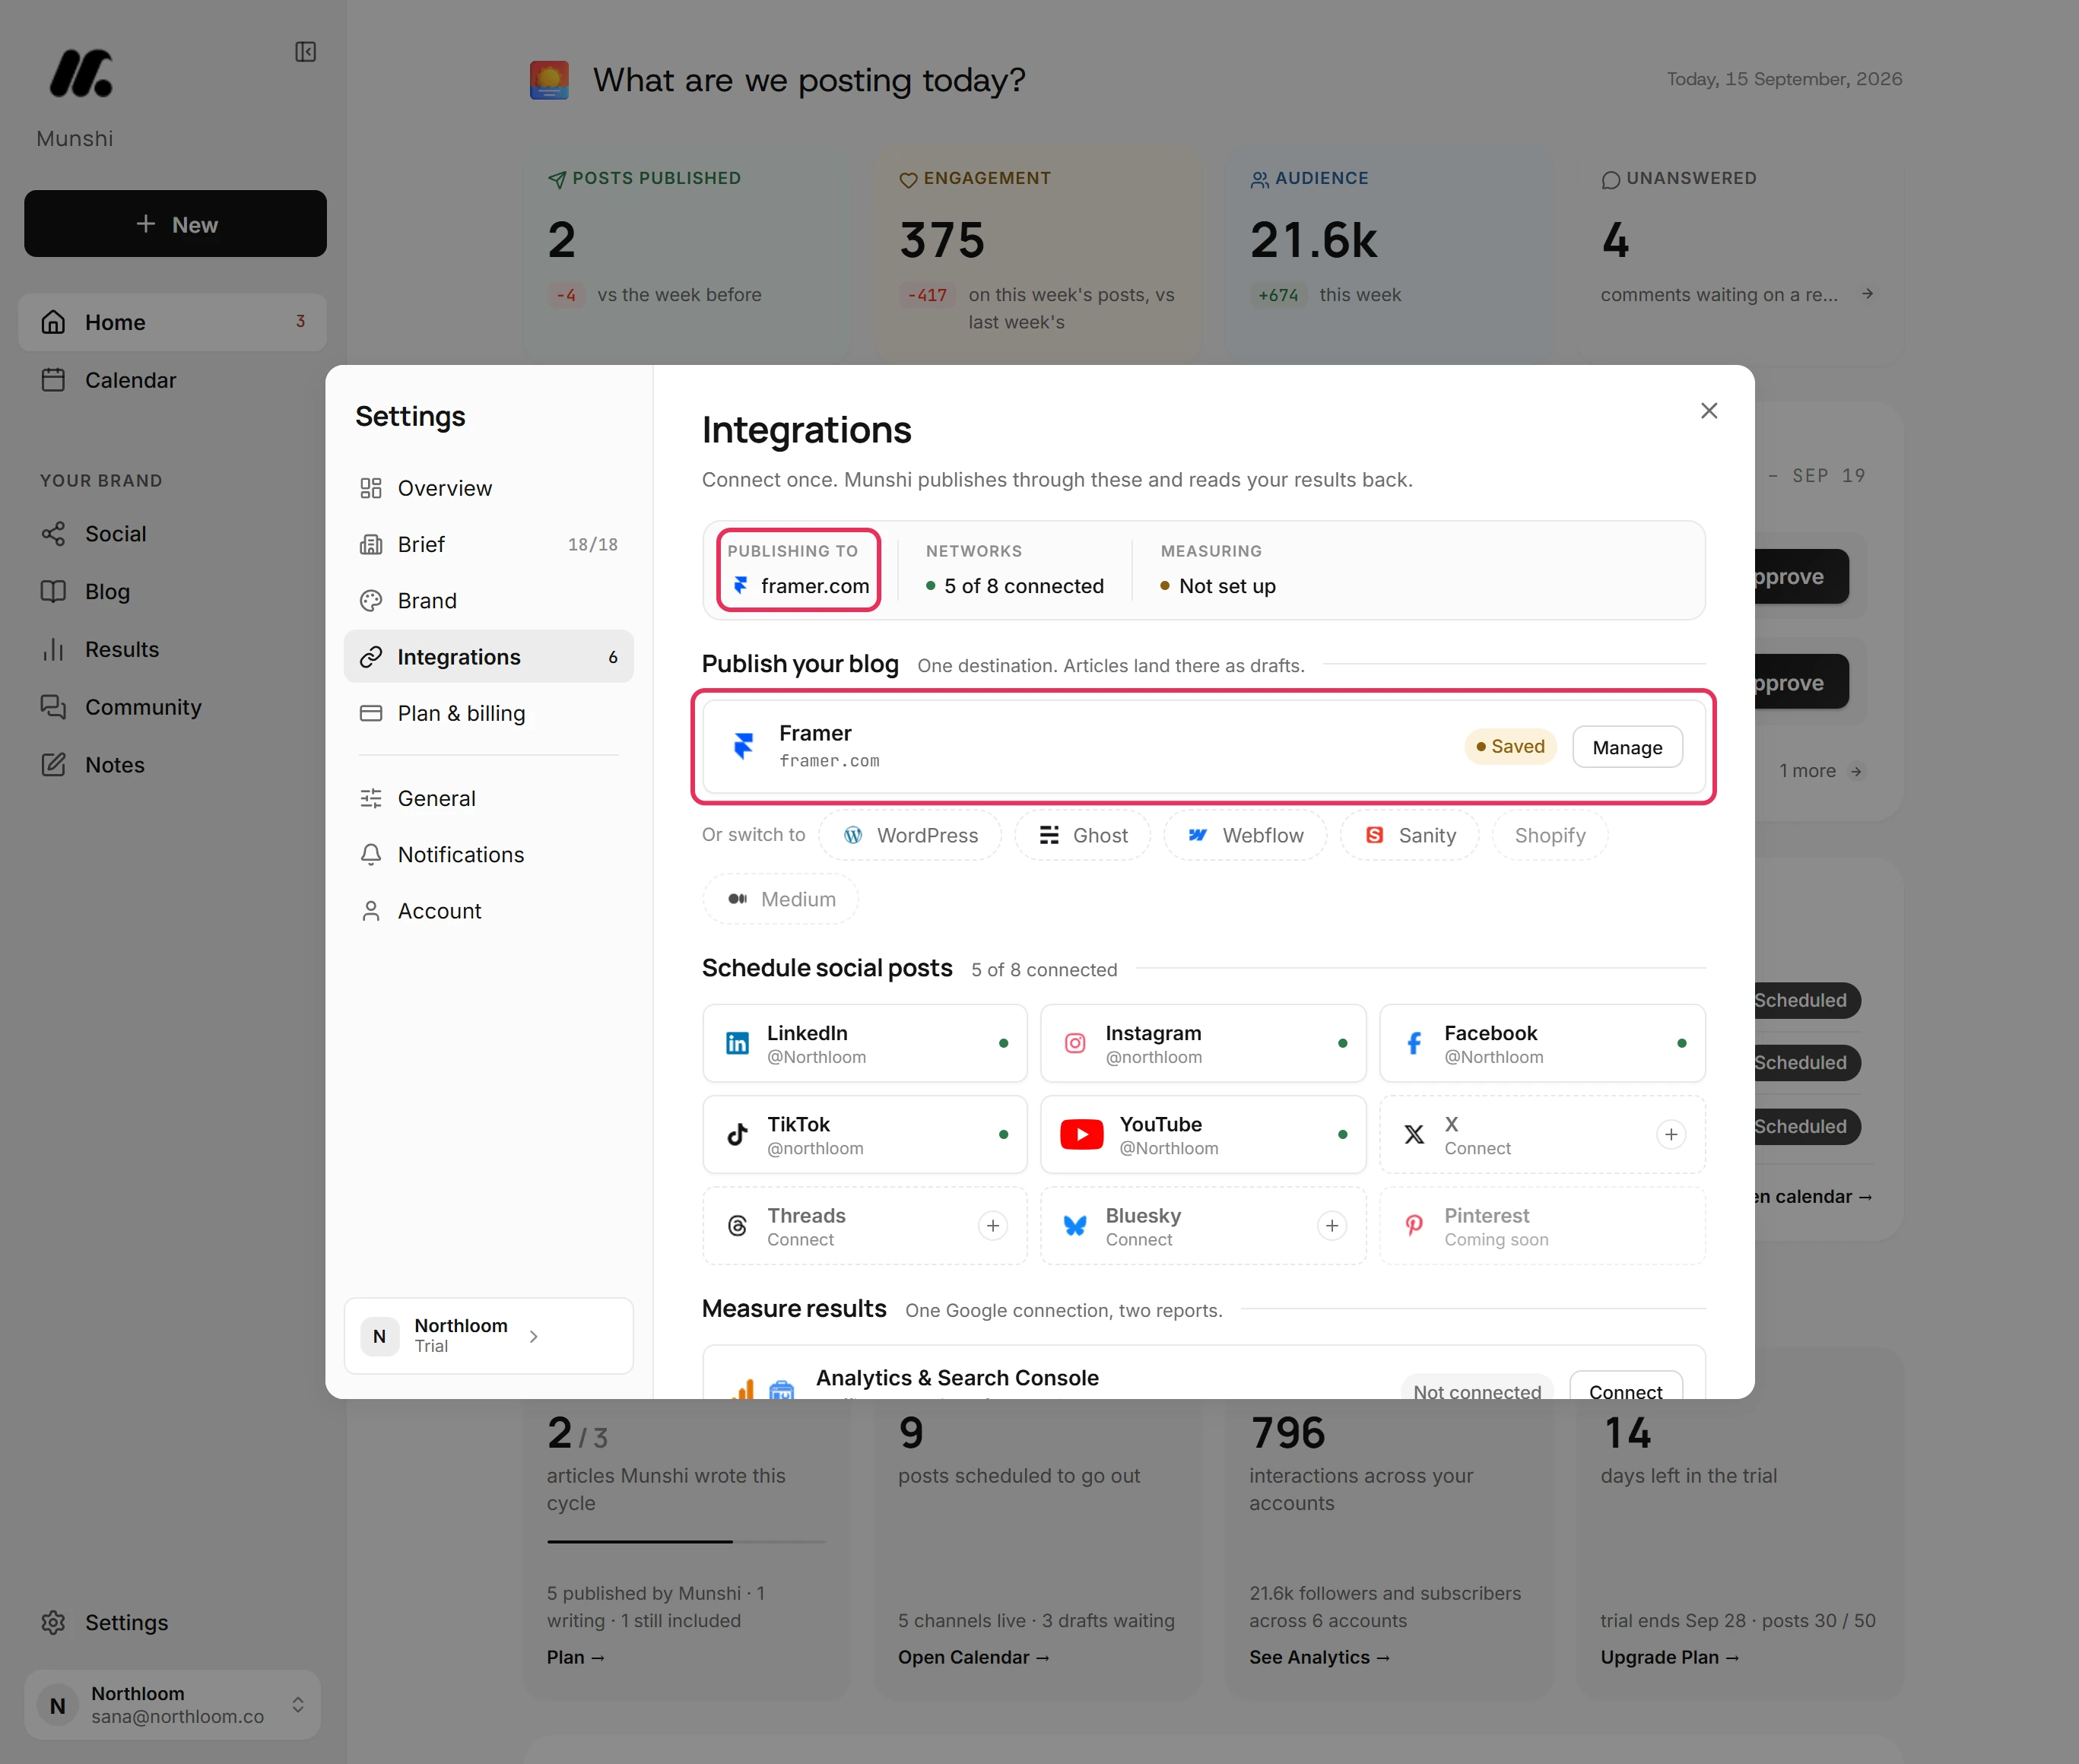
Close Settings. Next time you open Integrations, Framer is the destination under Publish your blog. Publishing to names it by the address in your project URL.
Where you are now
Framer is connected. Articles you publish land in your blog collection as drafts, and you publish them from Framer.
If something goes wrong
“Framer refused the connection”
Check that the URL is the project's own and that the key was made in that project's site settings. Then click Save again. Framer did not accept that project URL and key together.
“Connected, but this Framer project has no CMS collections yet.”
Add a CMS collection for your blog in Framer, then click Check. The key works, but the project has no collection to put articles in.
“Framer did not answer in time. Try again in a minute.”
Click Check again shortly. Framer took too long to answer the check.
“Add your Framer project URL and API key first.”
Fill in Project URL and Server API key, then click Save. Check ran before both were saved.
Try it on your own brand this week.
Munshi Social, the AI content marketing engine for small teams, plans, writes, publishes, and tracks your blog and socials. The guide above shows the real app, not a mock-up.
Start your workspace