How to set the SEO fields and publish, now or on a schedule
Fill in an article's SEO fields until its score reaches 60. Then publish it to your blog now, or schedule it and cancel later if plans change.
Before you start
- A finished article. Until every writing step is done and the article is marked completed, its panel says Finish writing first.
- A blog connected in Integrations, such as WordPress. With none, the panel says Connect a website first. With two or more, choose where articles publish first.
-
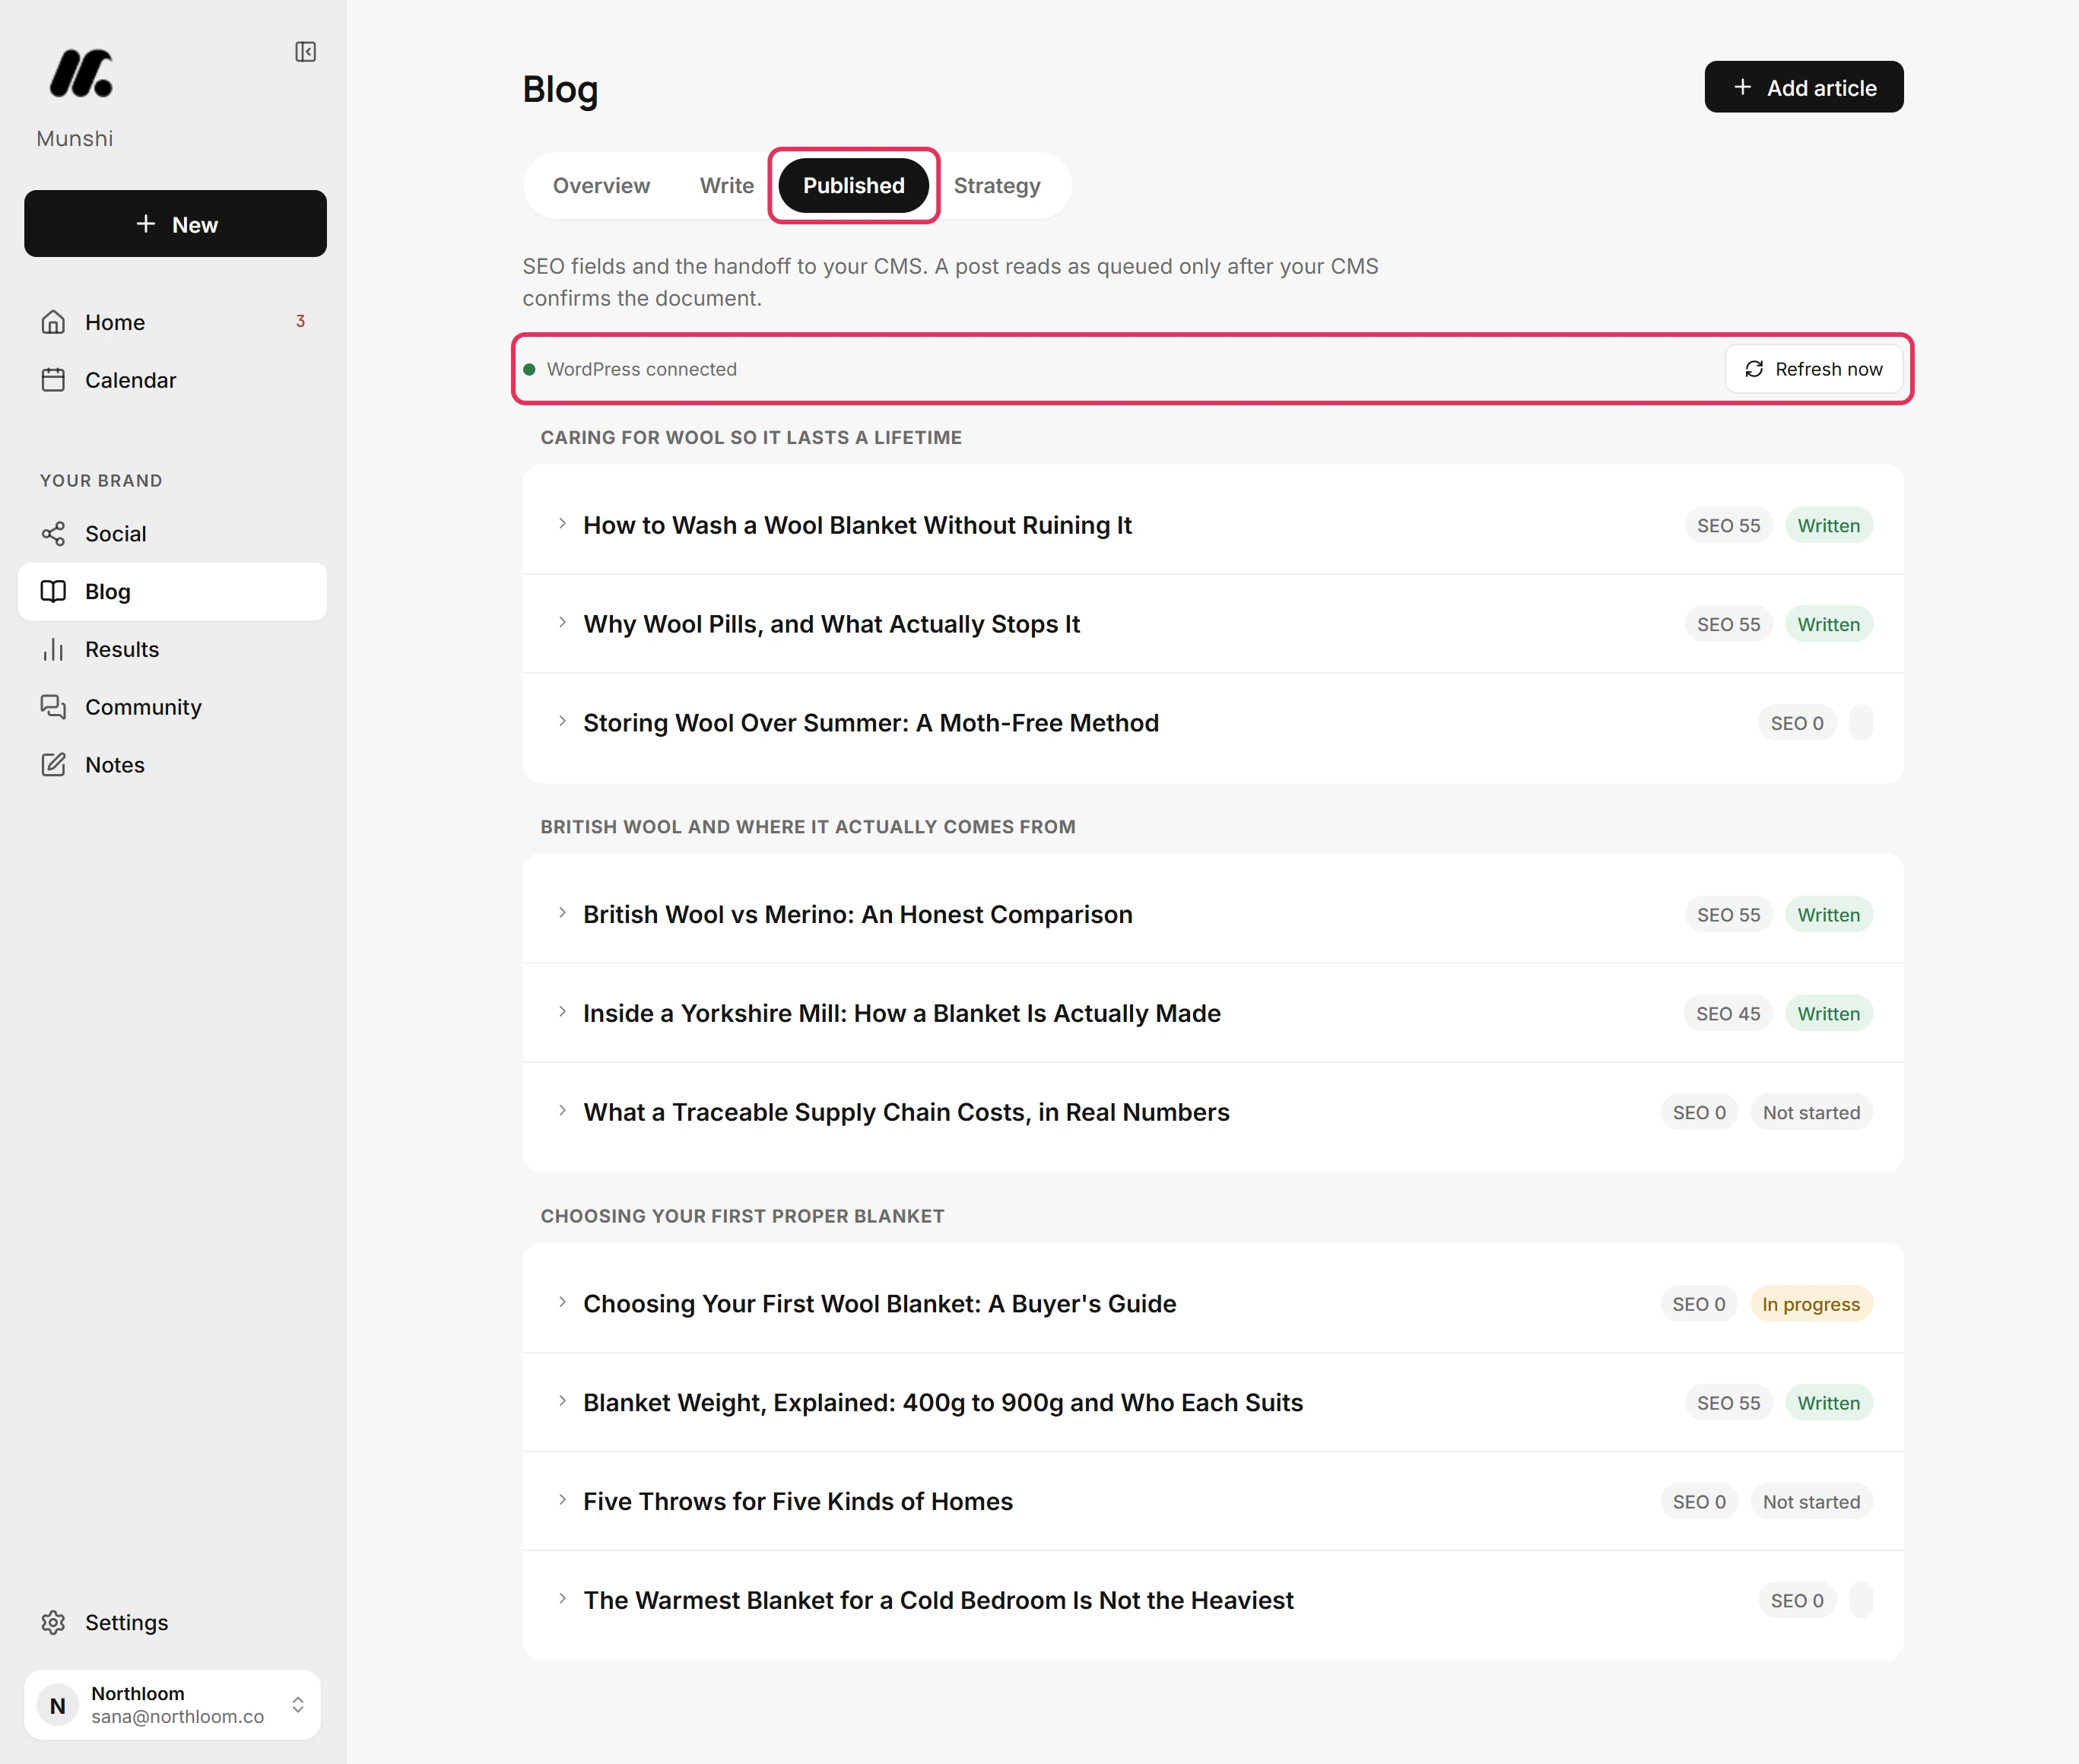
Click Blog in the sidebar, then Published. The line at the top names the blog your articles go to, here WordPress connected.
-
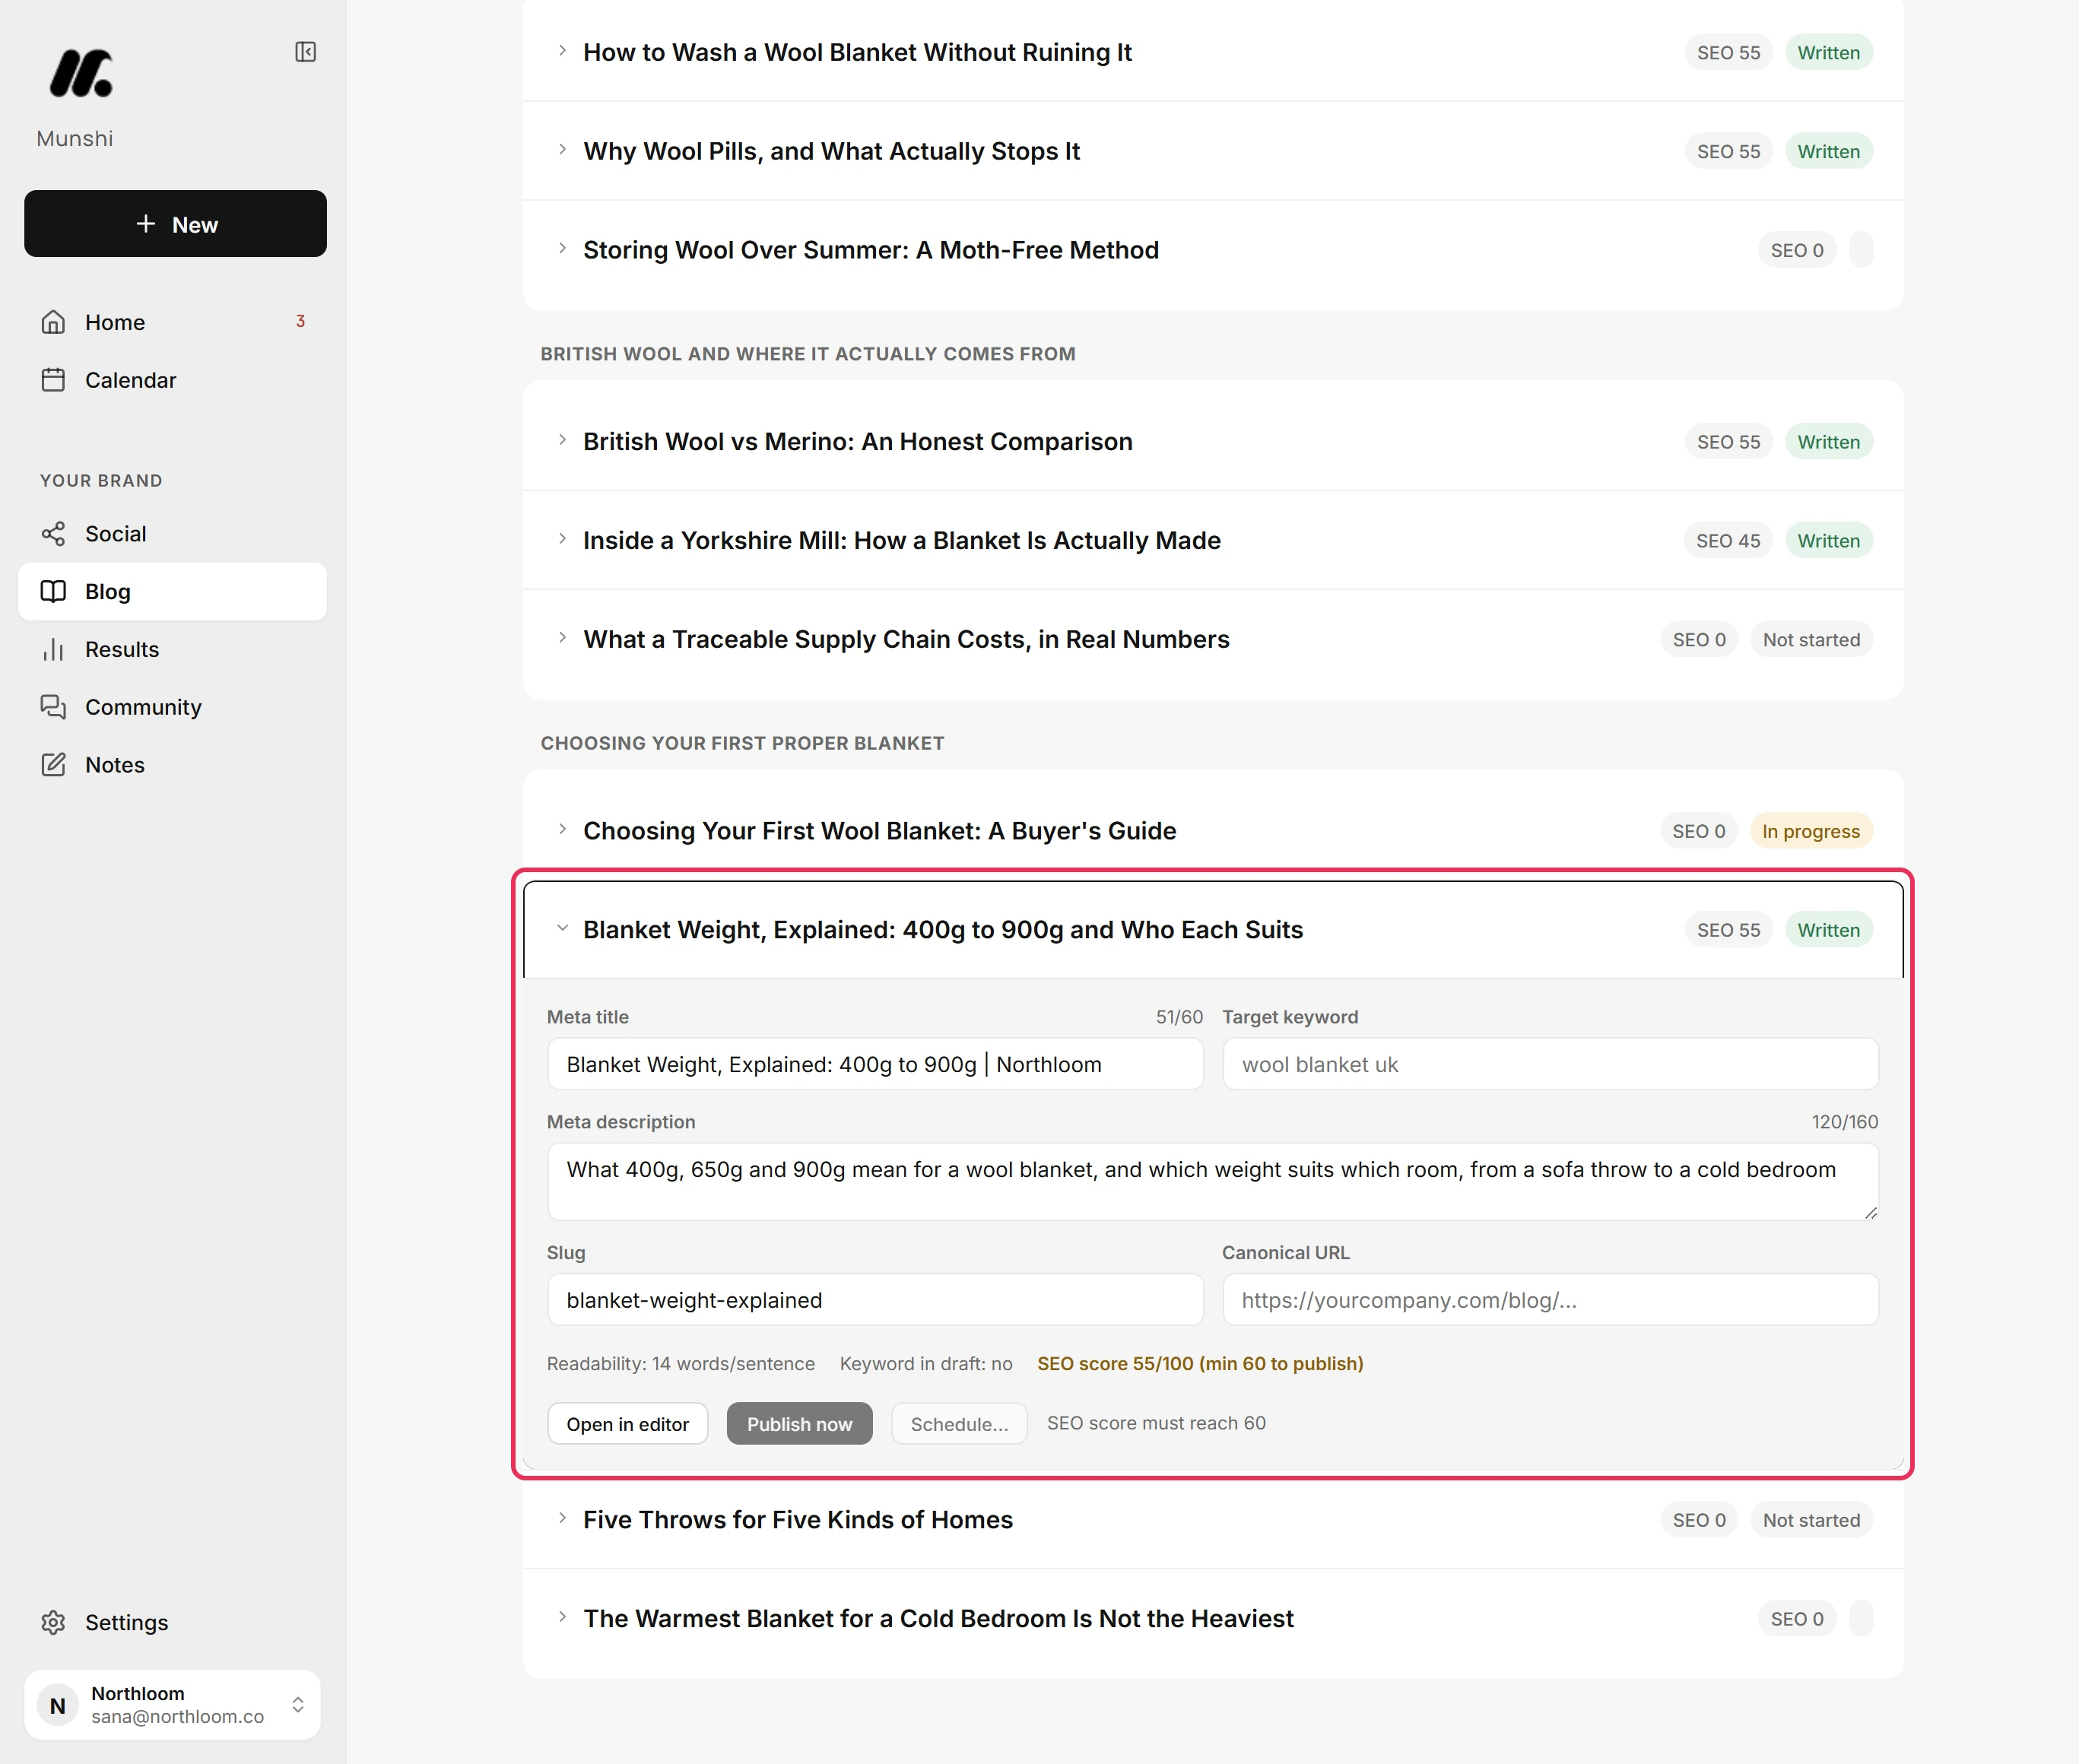
Click the article's row. Its panel opens under the title with the SEO fields. The row shows the score as SEO and a number.
-
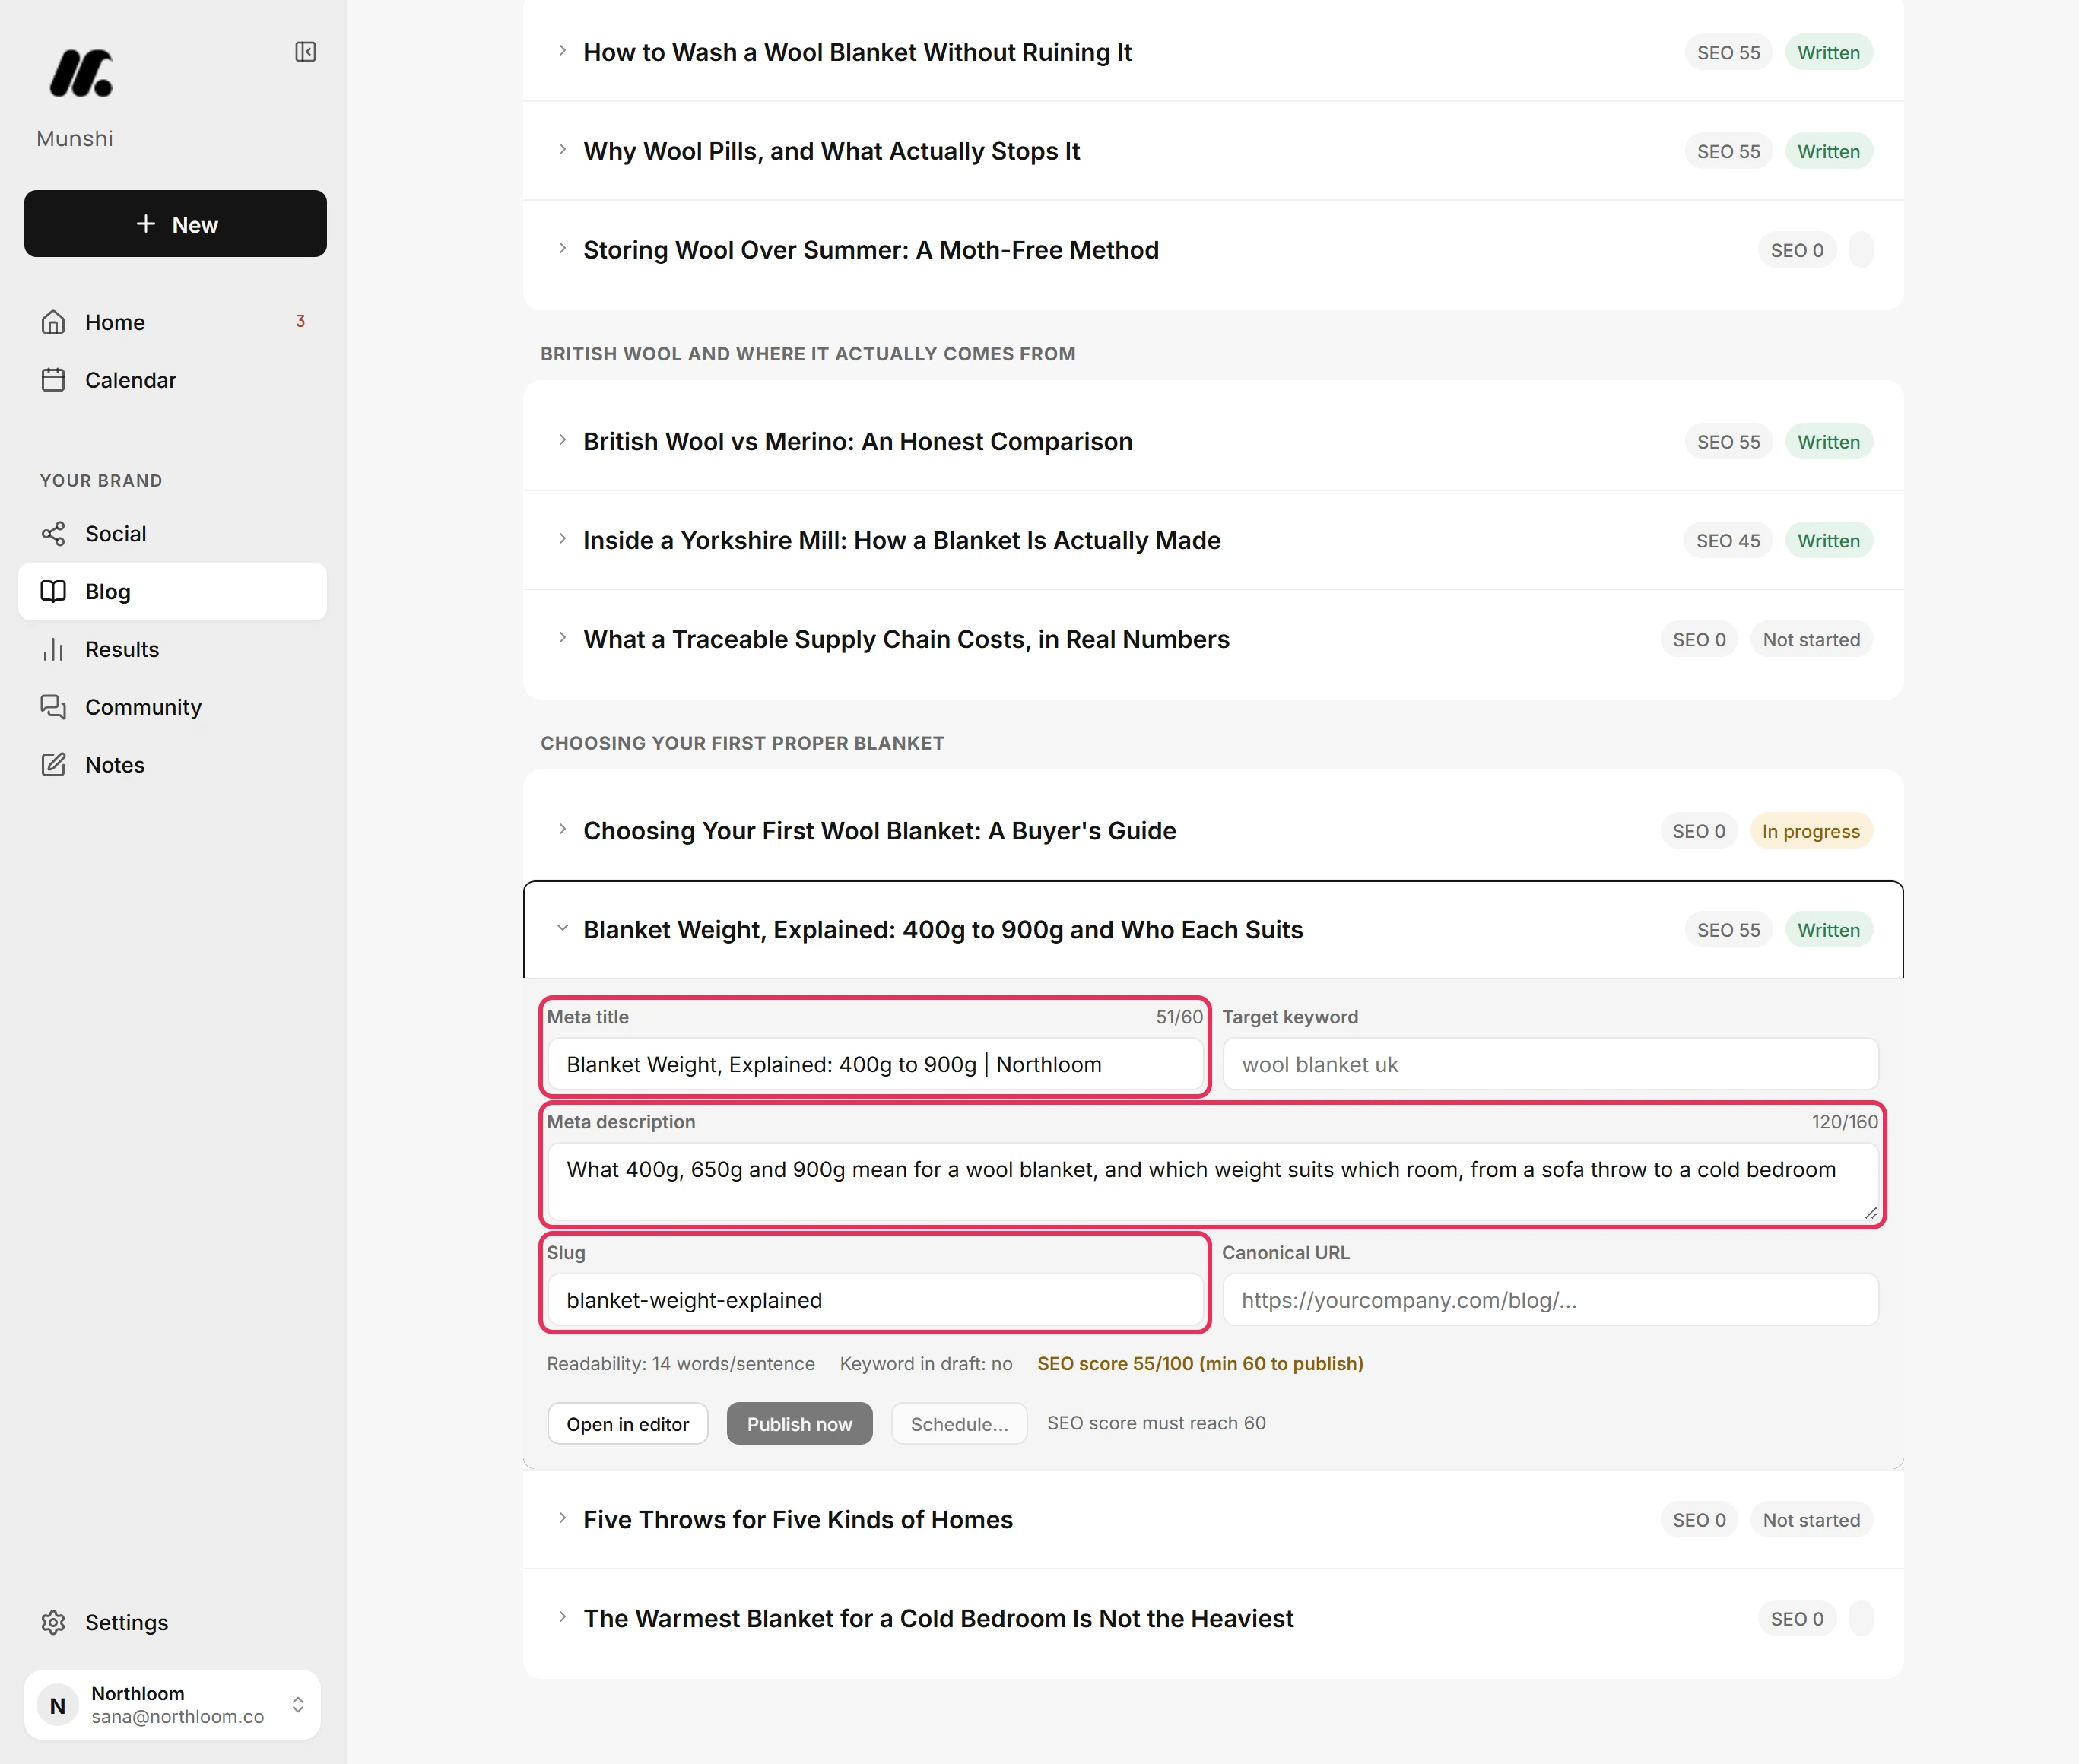
Once the article's Meta, Title Tag & Schema step is done, Munshi fills in any blank Meta title, Meta description and Slug from it. Counters show each one's length. The meta description is the short summary under your link in search results, and your blog also uses it as the excerpt. The slug becomes the end of the article's web address.
-
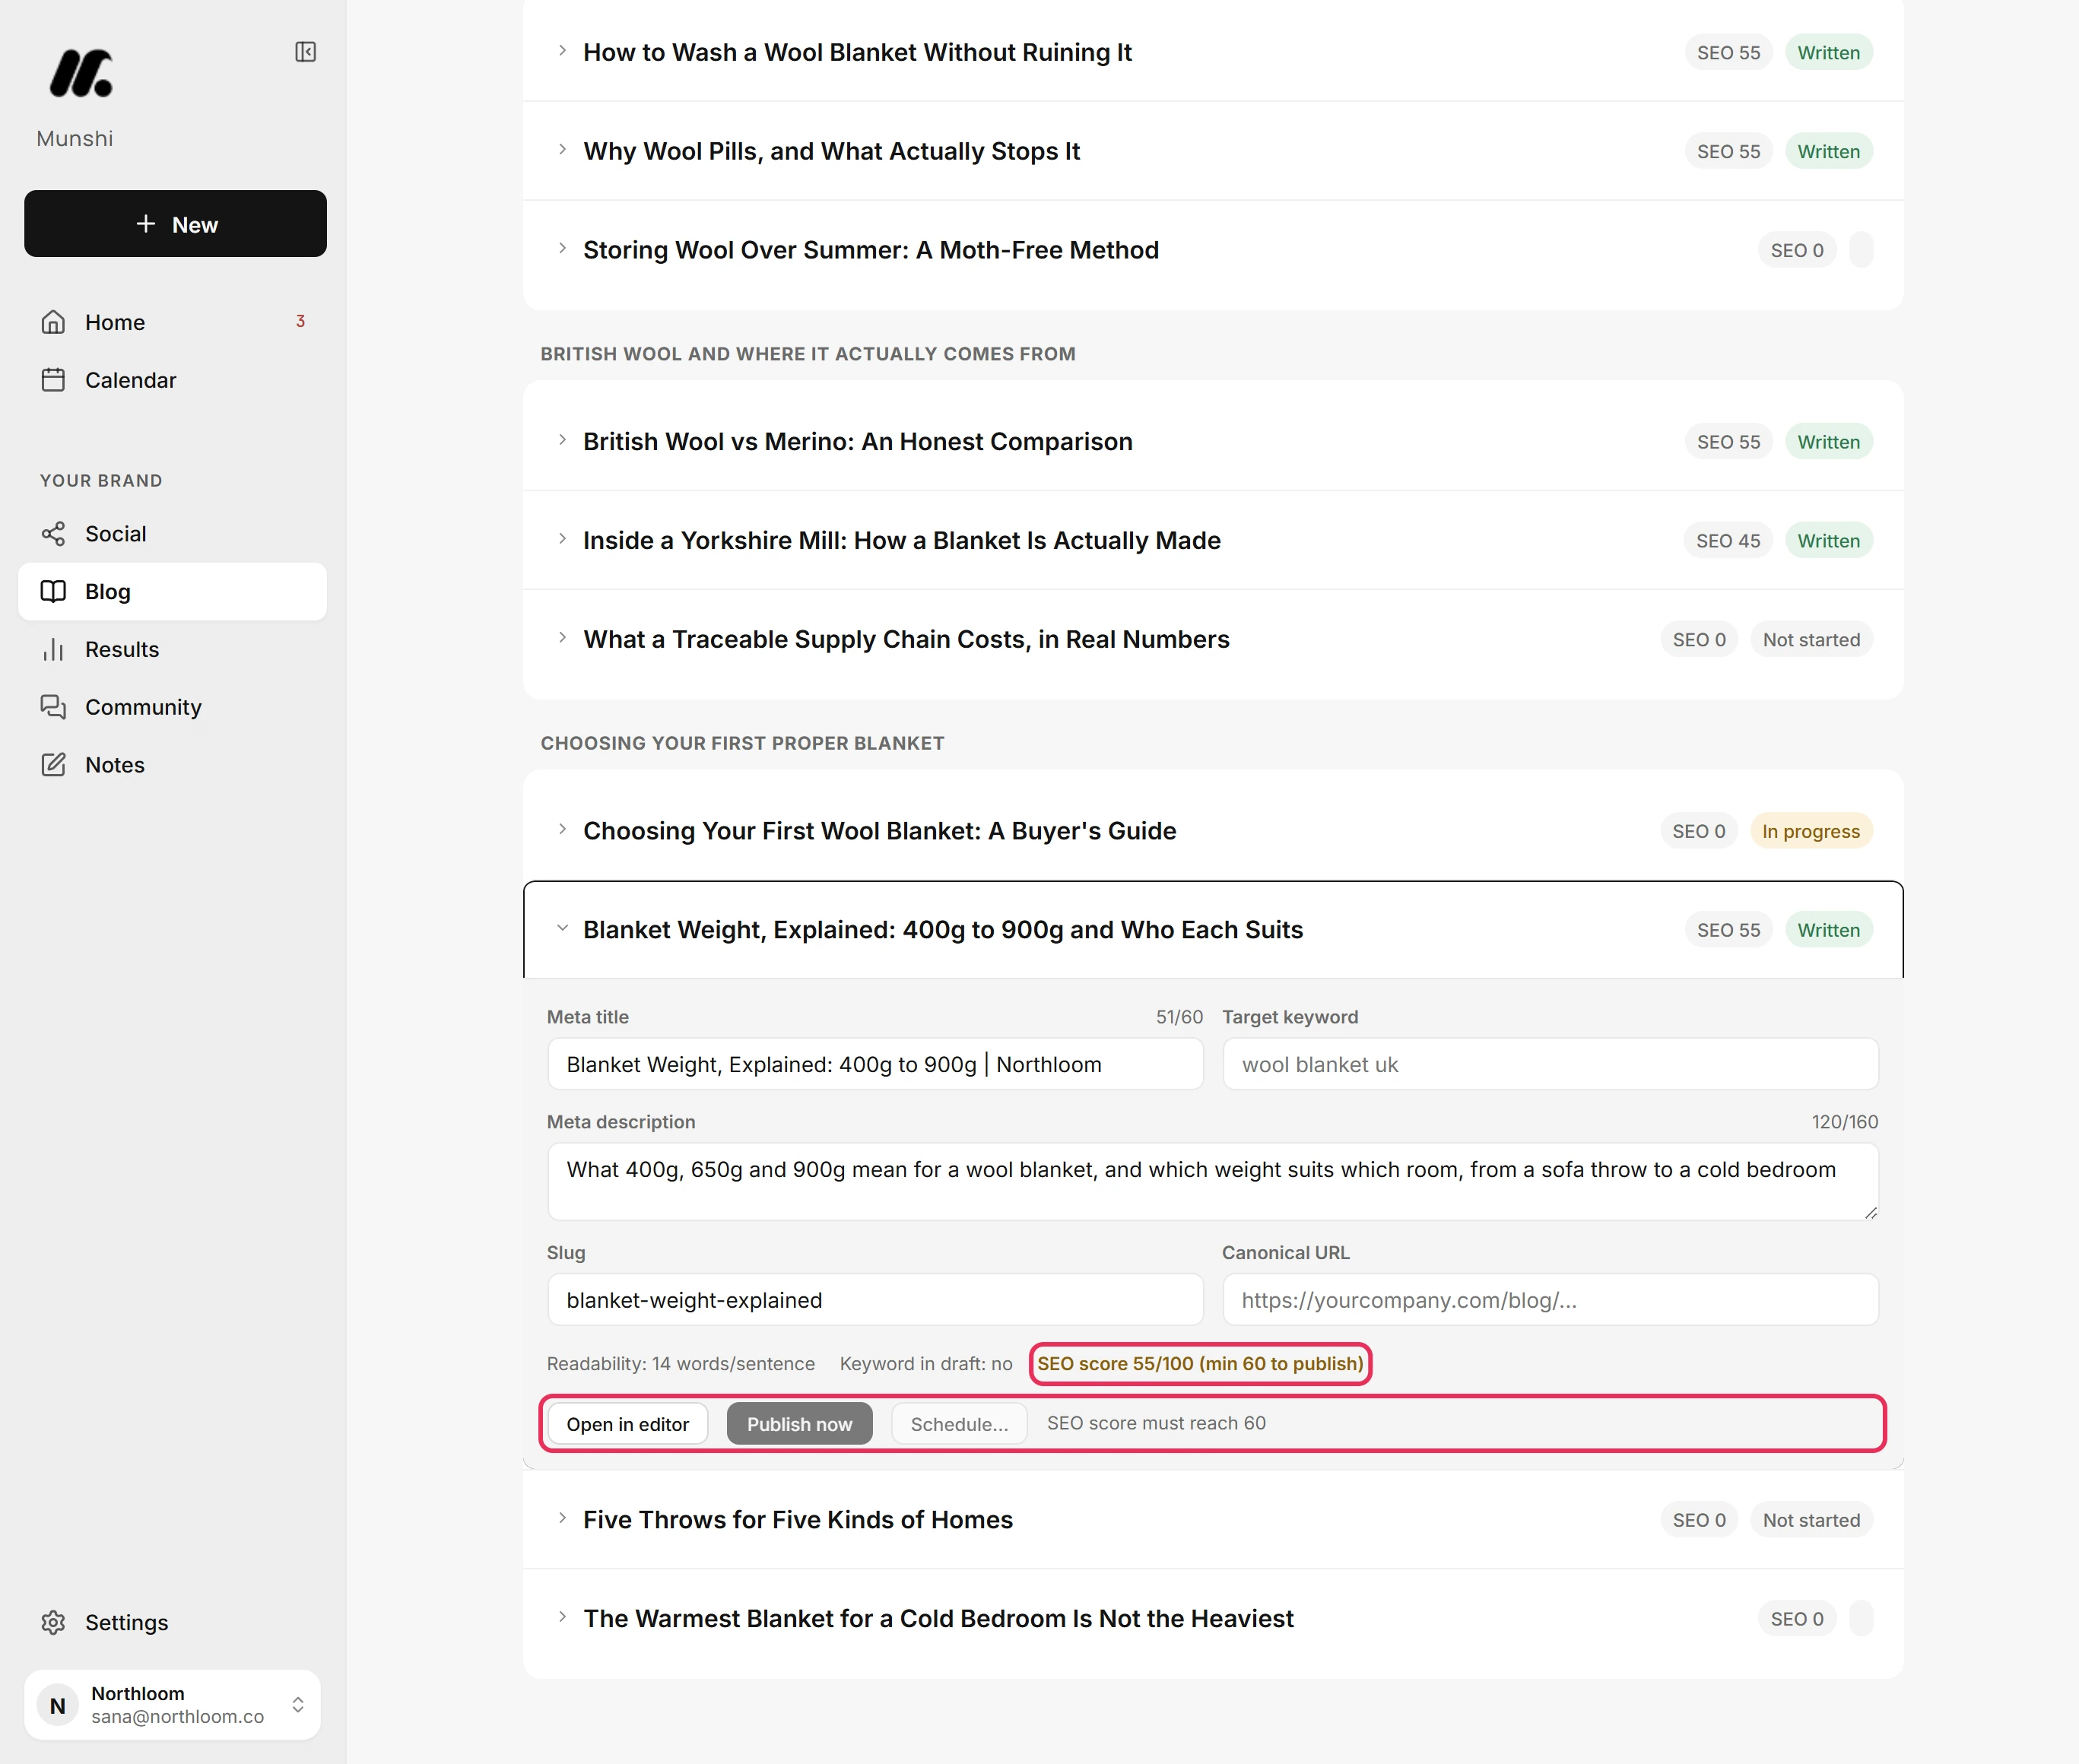
Under the fields, SEO score shows the score out of 100 and (min 60 to publish). Below 60, Publish now and Schedule… stay greyed out. SEO score must reach 60 shows beside them.
-
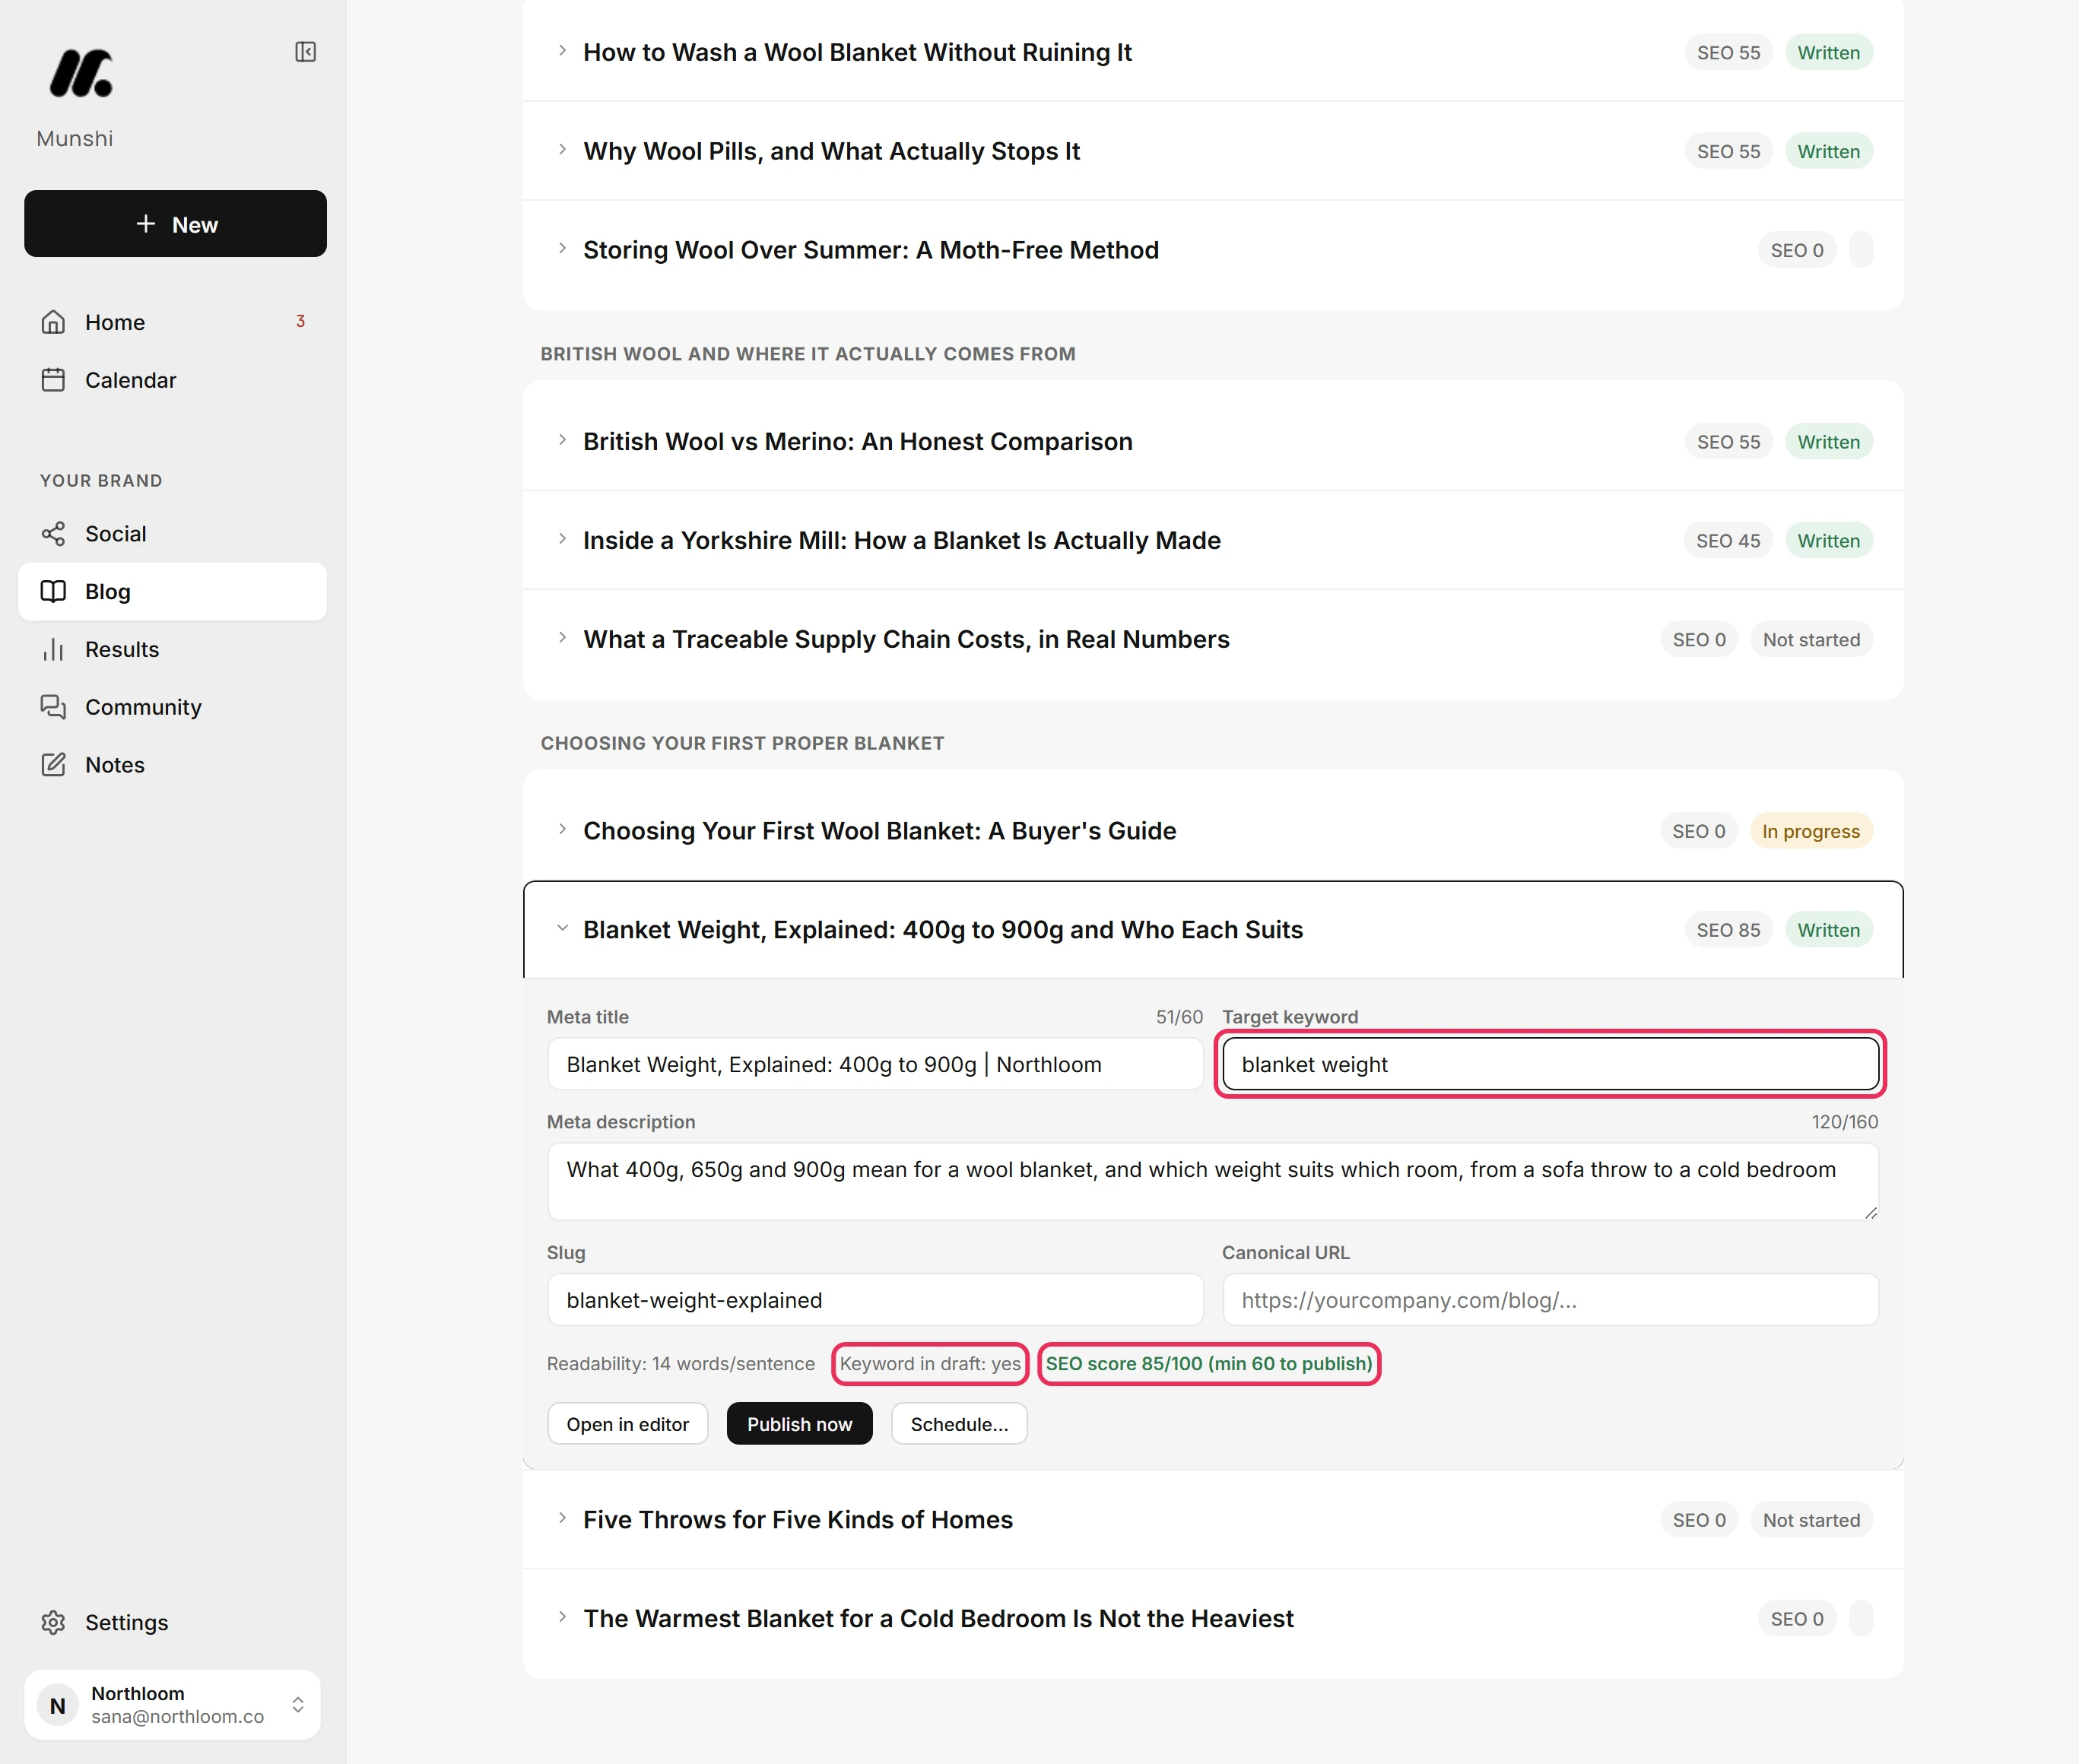
Type the phrase the article should be found for into Target keyword. When the article's text contains it, Keyword in draft reads yes and the score climbs. Here it goes from 55 to 85.
-
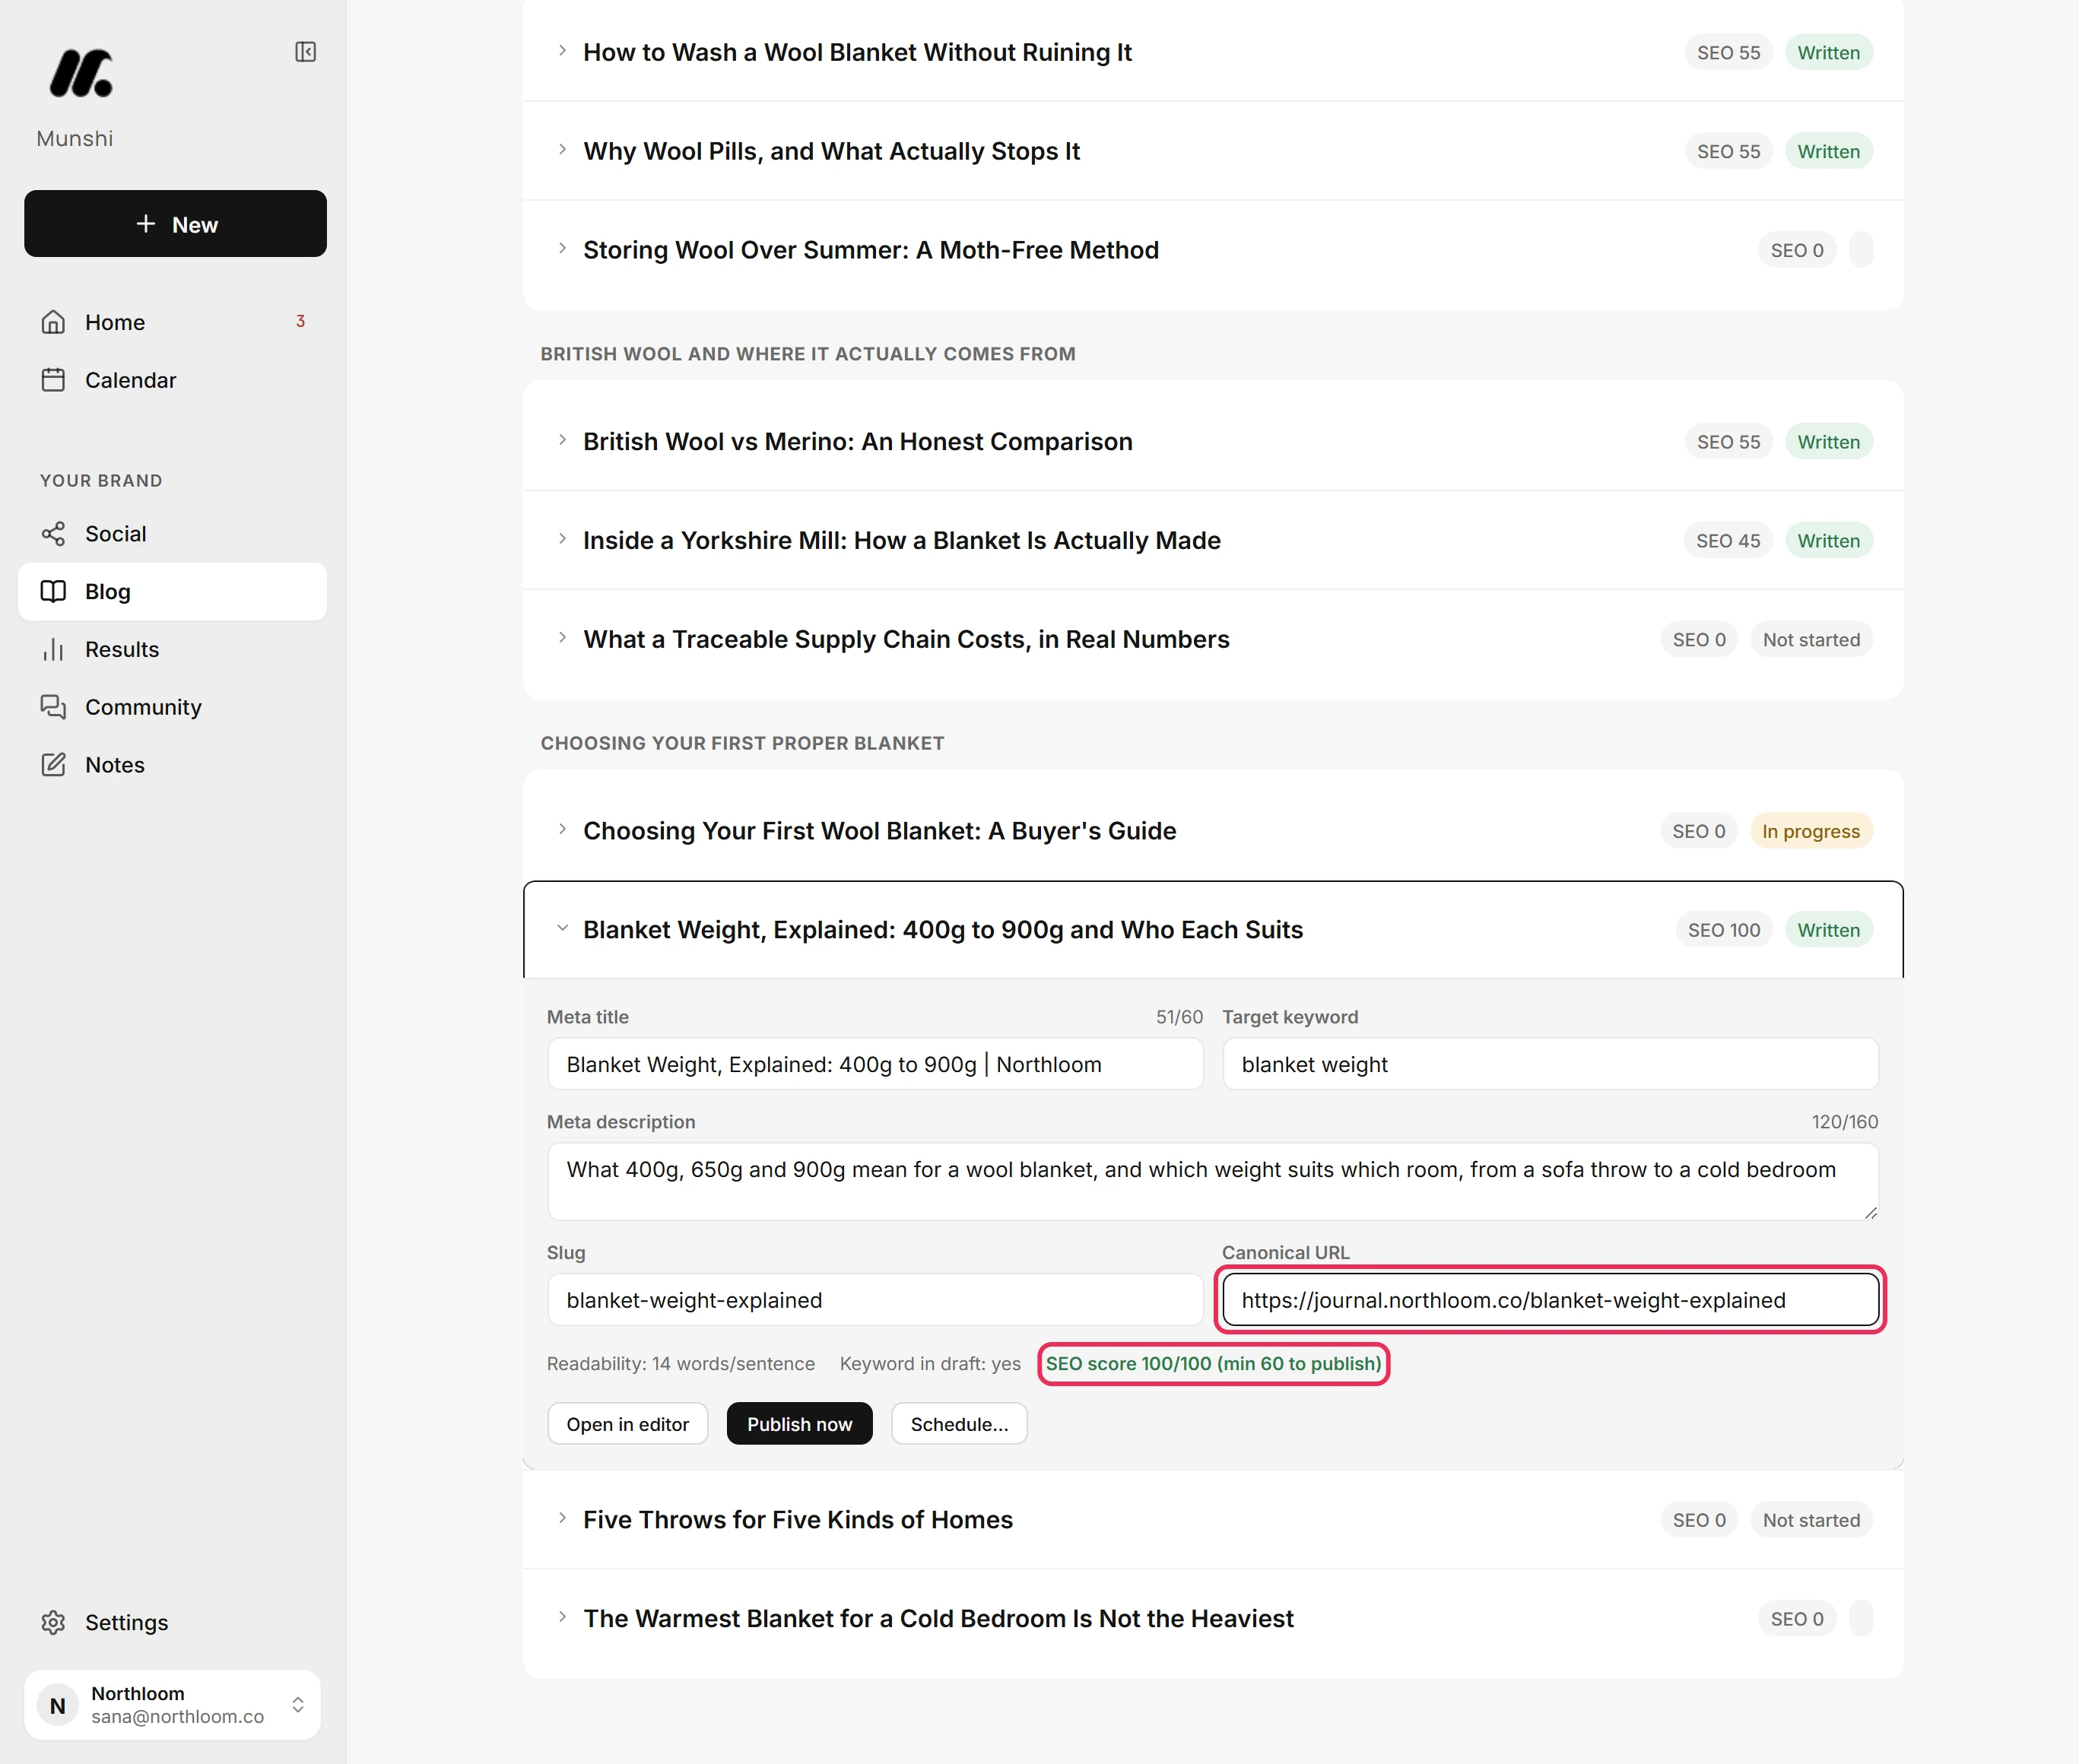
Paste the article's web address into Canonical URL. This is the main address search engines should use for the article. With every field filled in and the keyword in the article, the score reaches 100.
-
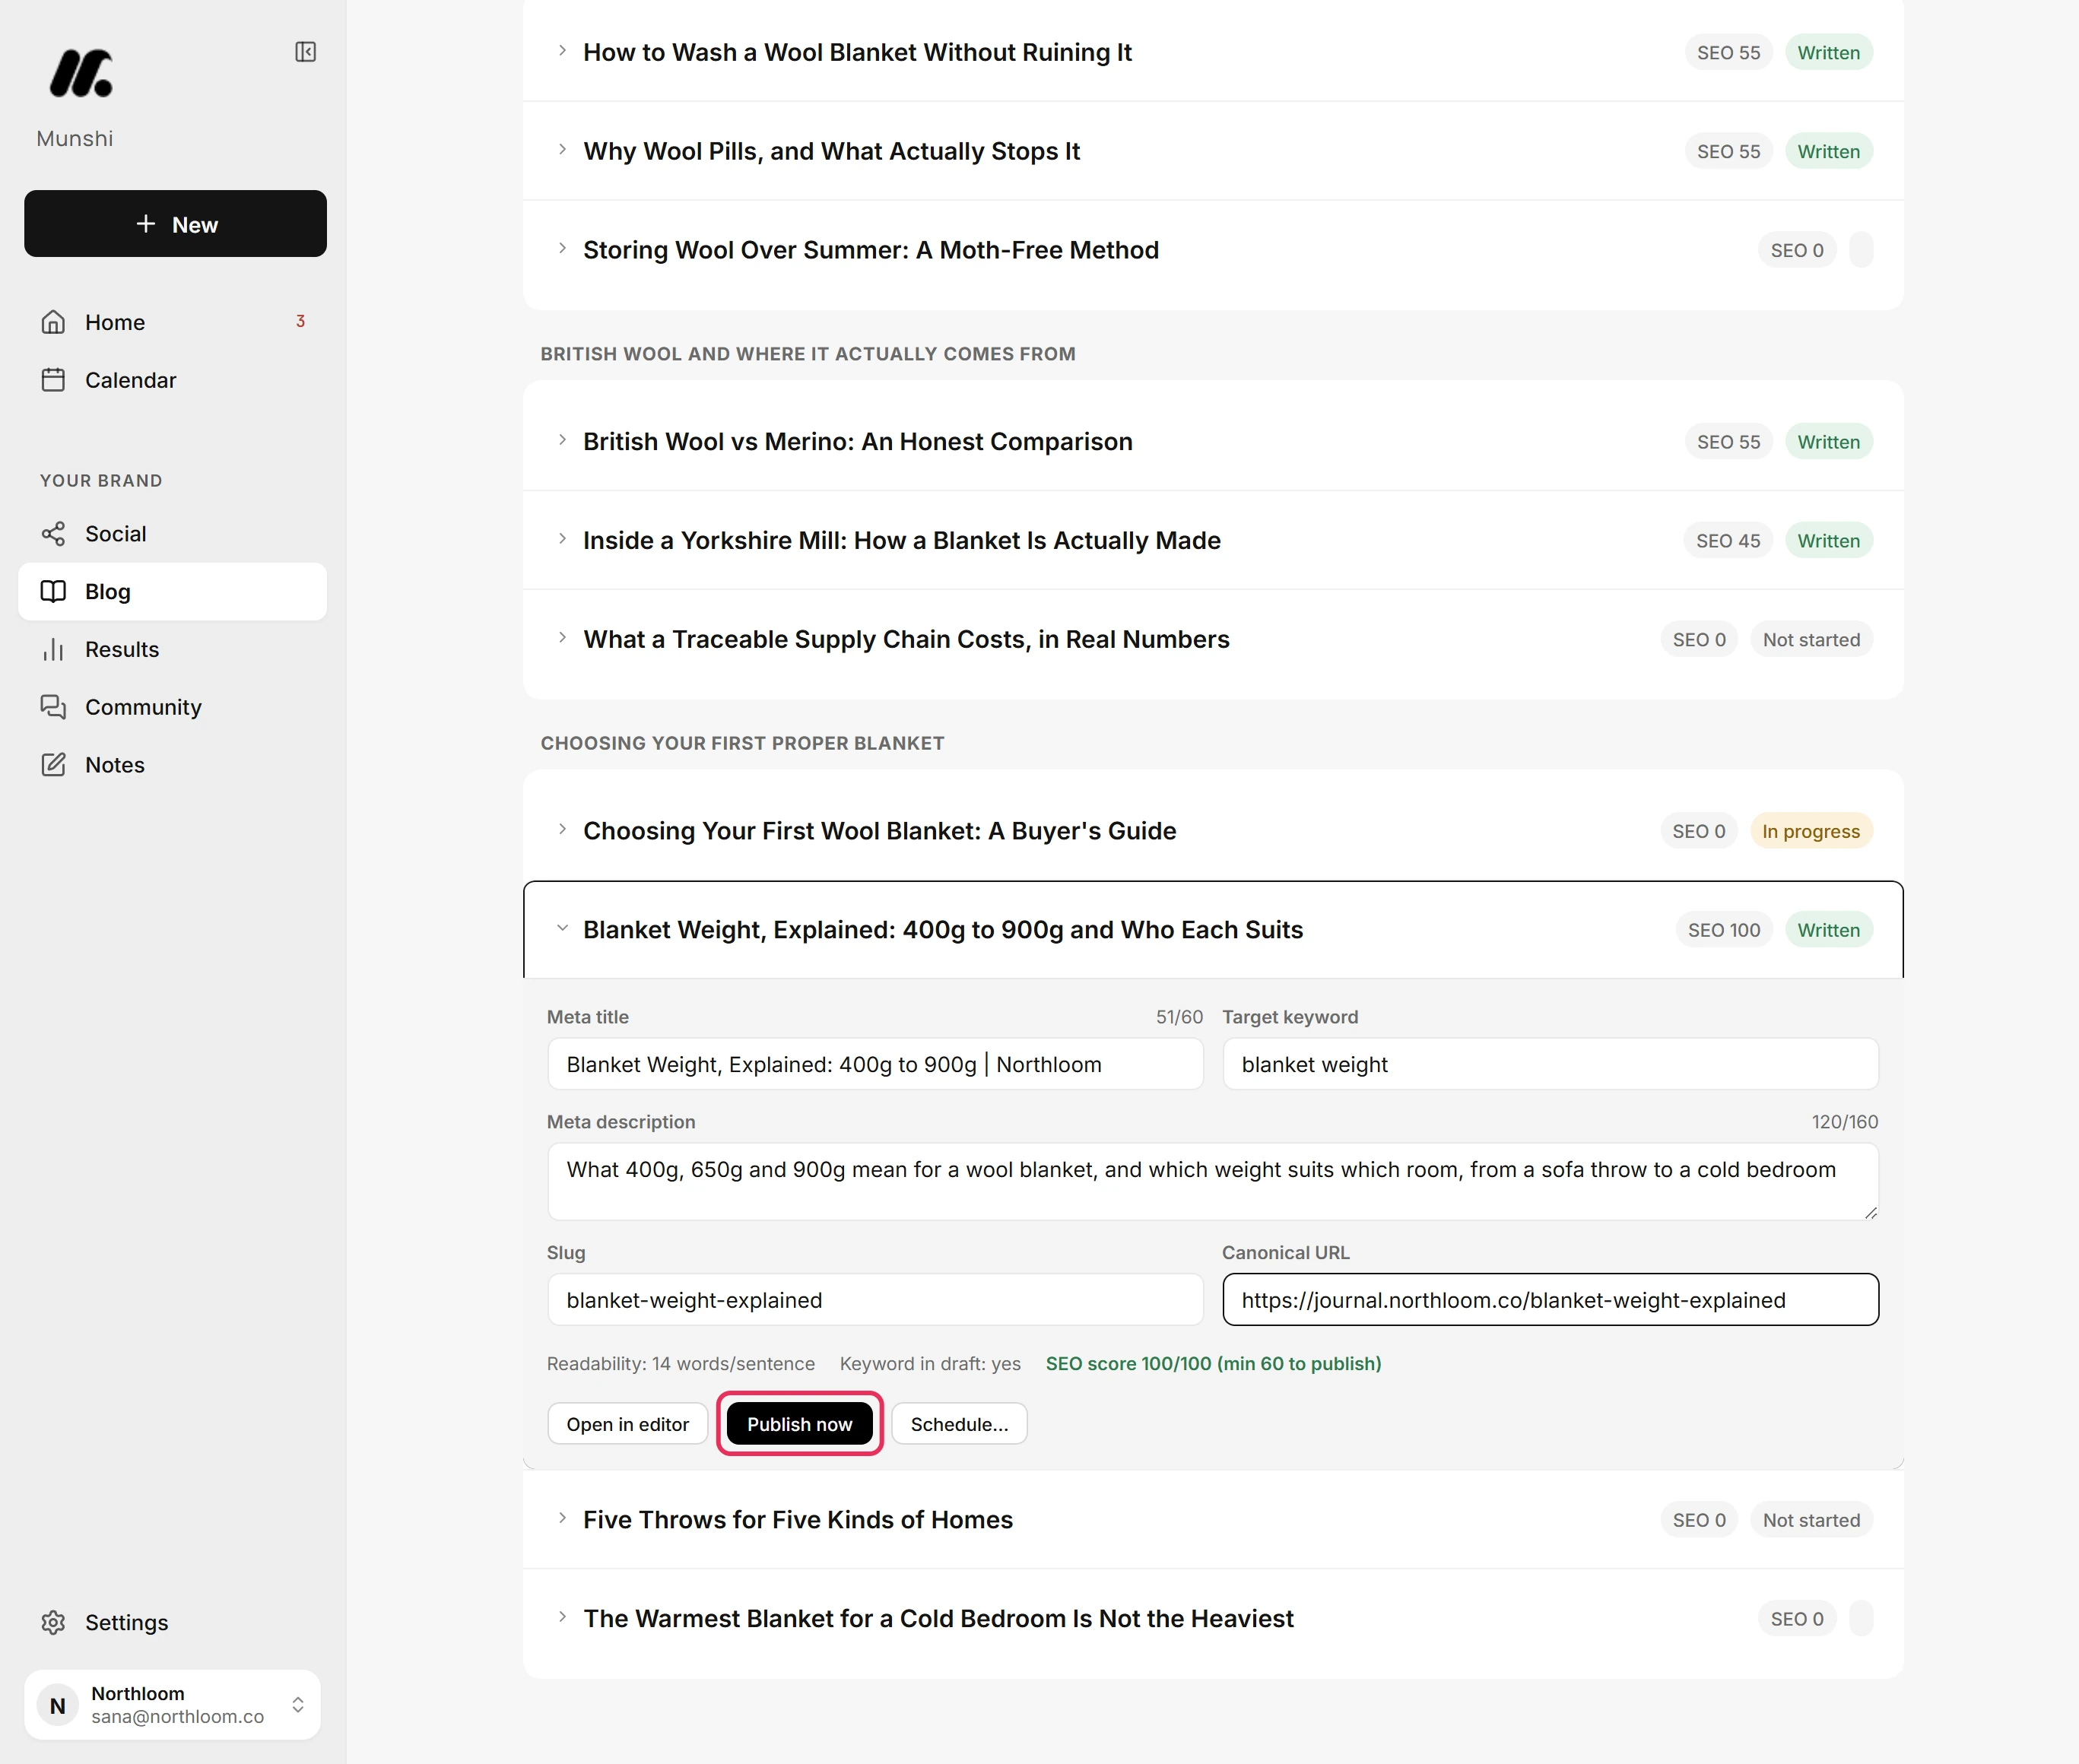
Click Publish now to send the article to WordPress right away. WordPress keeps it as a draft, so Munshi says Saved in WordPress as a draft. Review and publish it from your WordPress dashboard. The row reads Landed as a draft in WordPress.
-
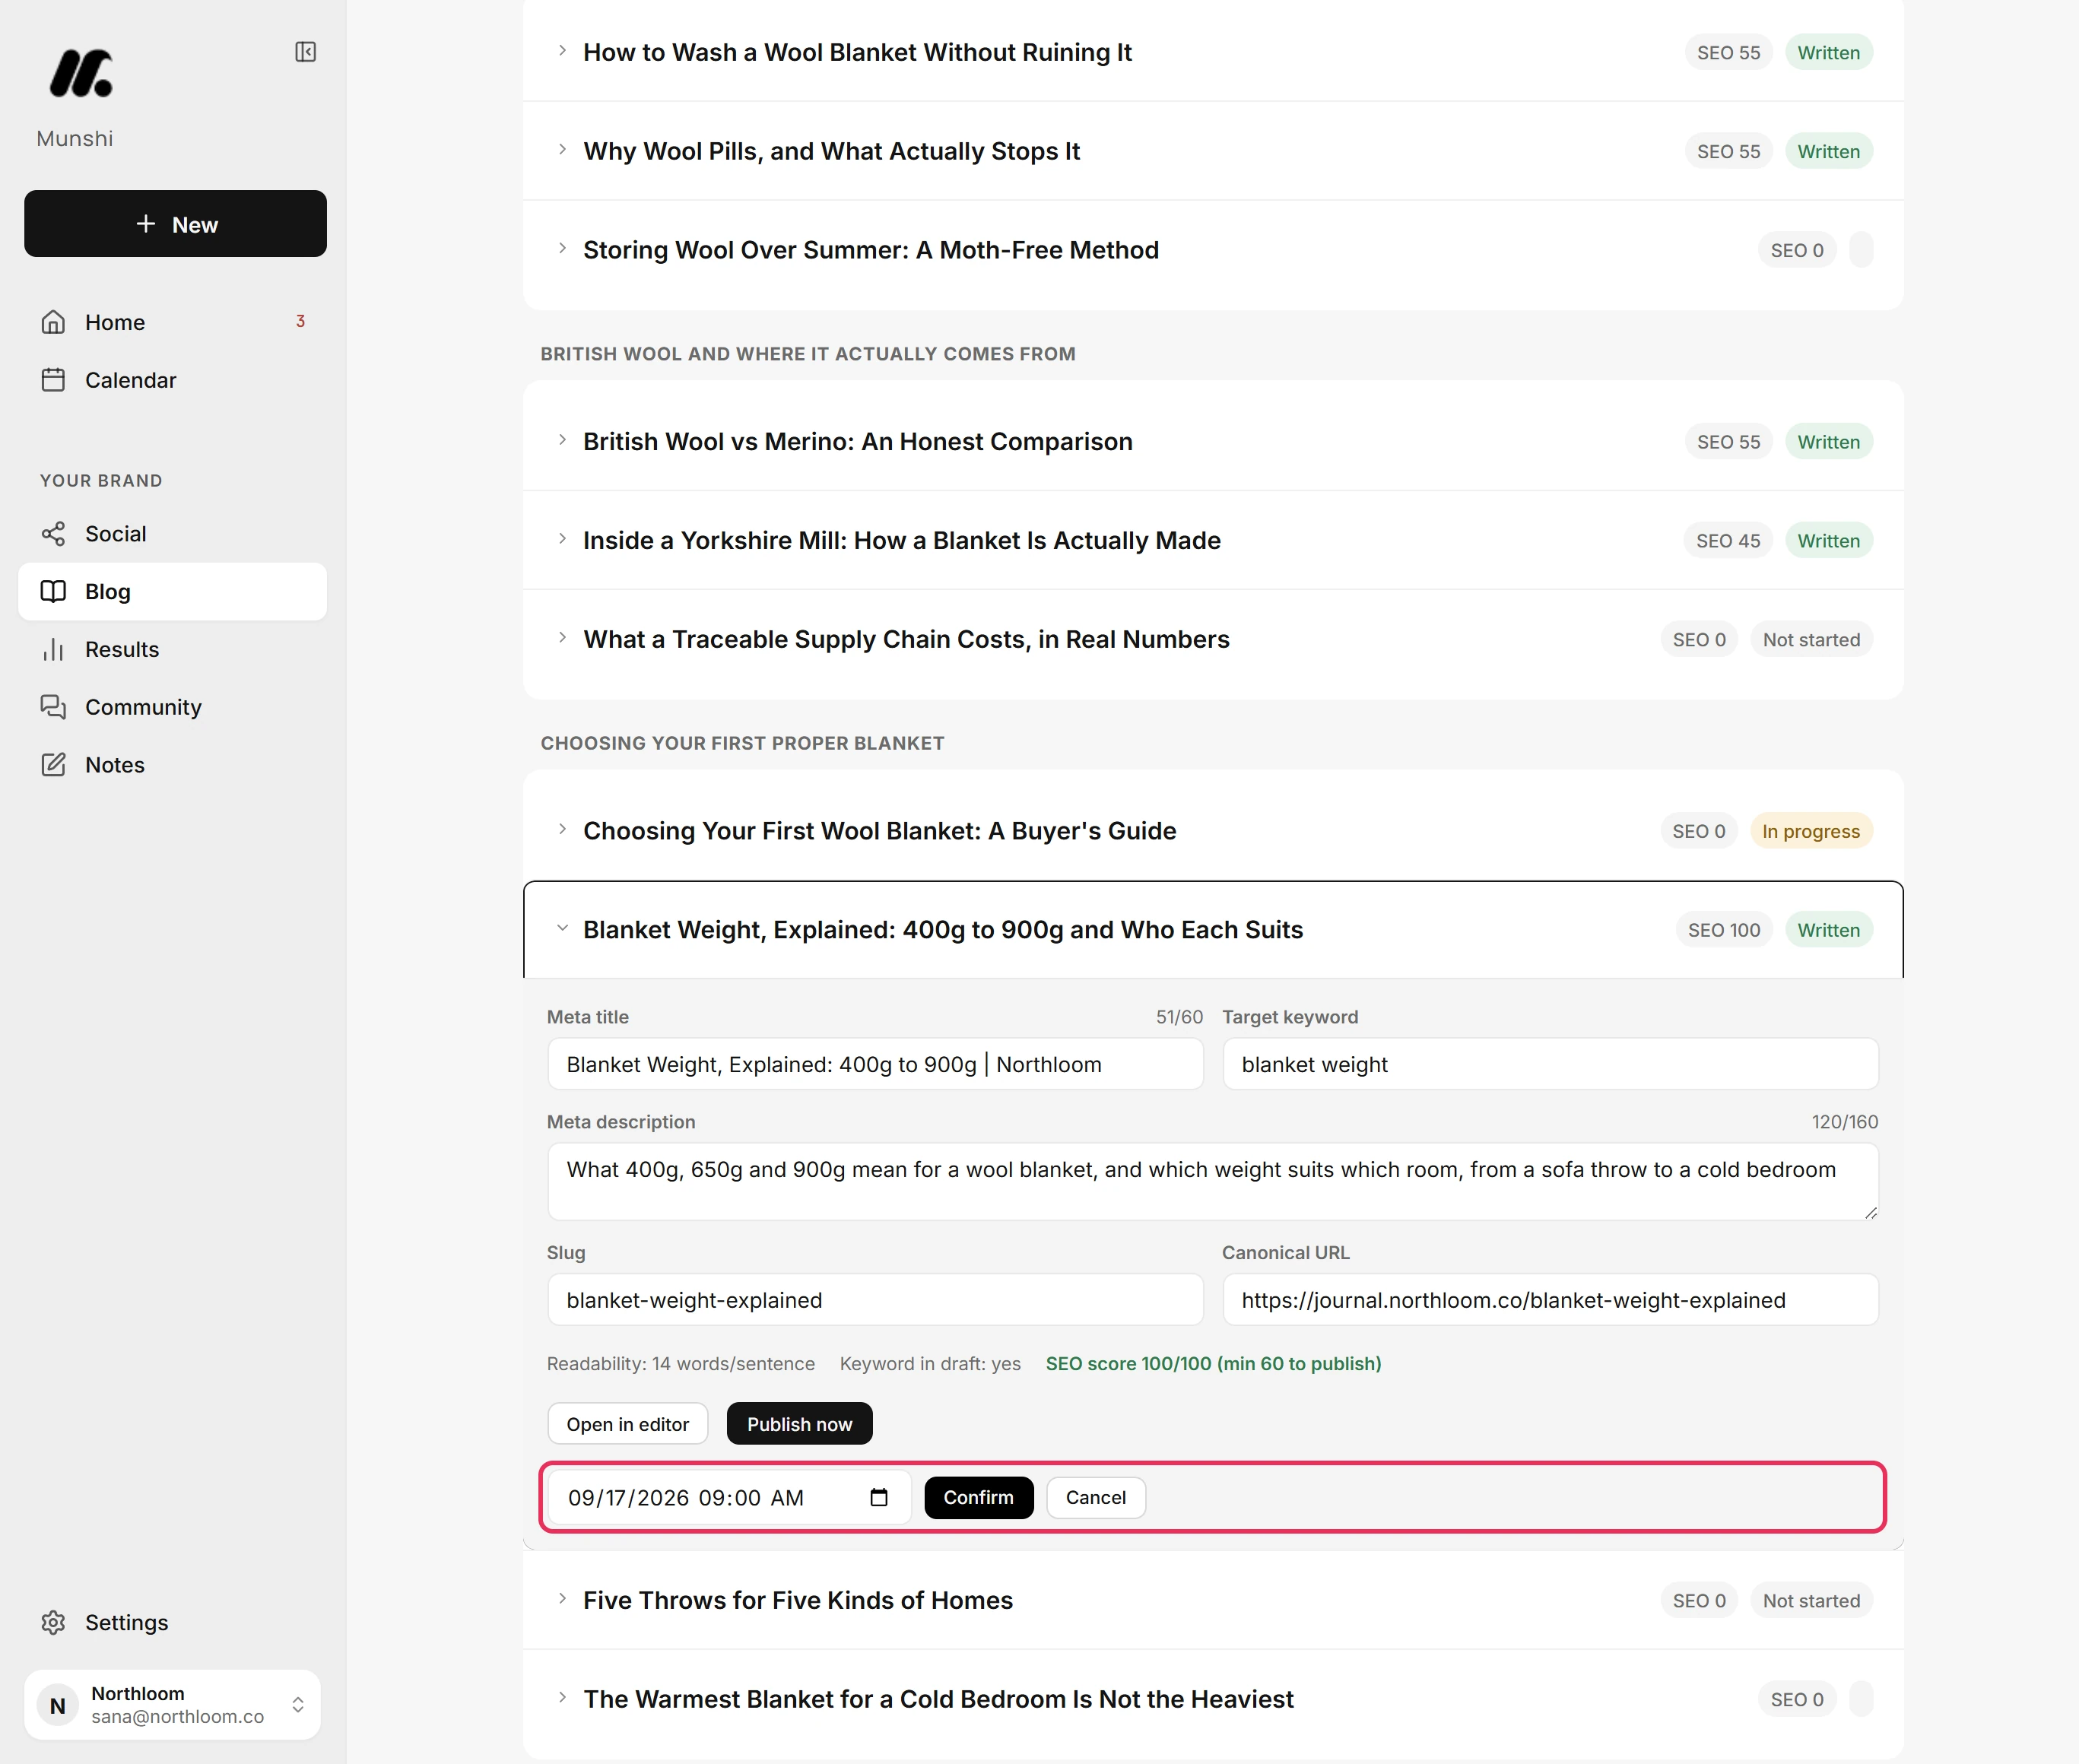
Click Schedule…, set the date and time, and click Confirm. The time follows your workspace clock. It has to be at least 10 minutes away.
-
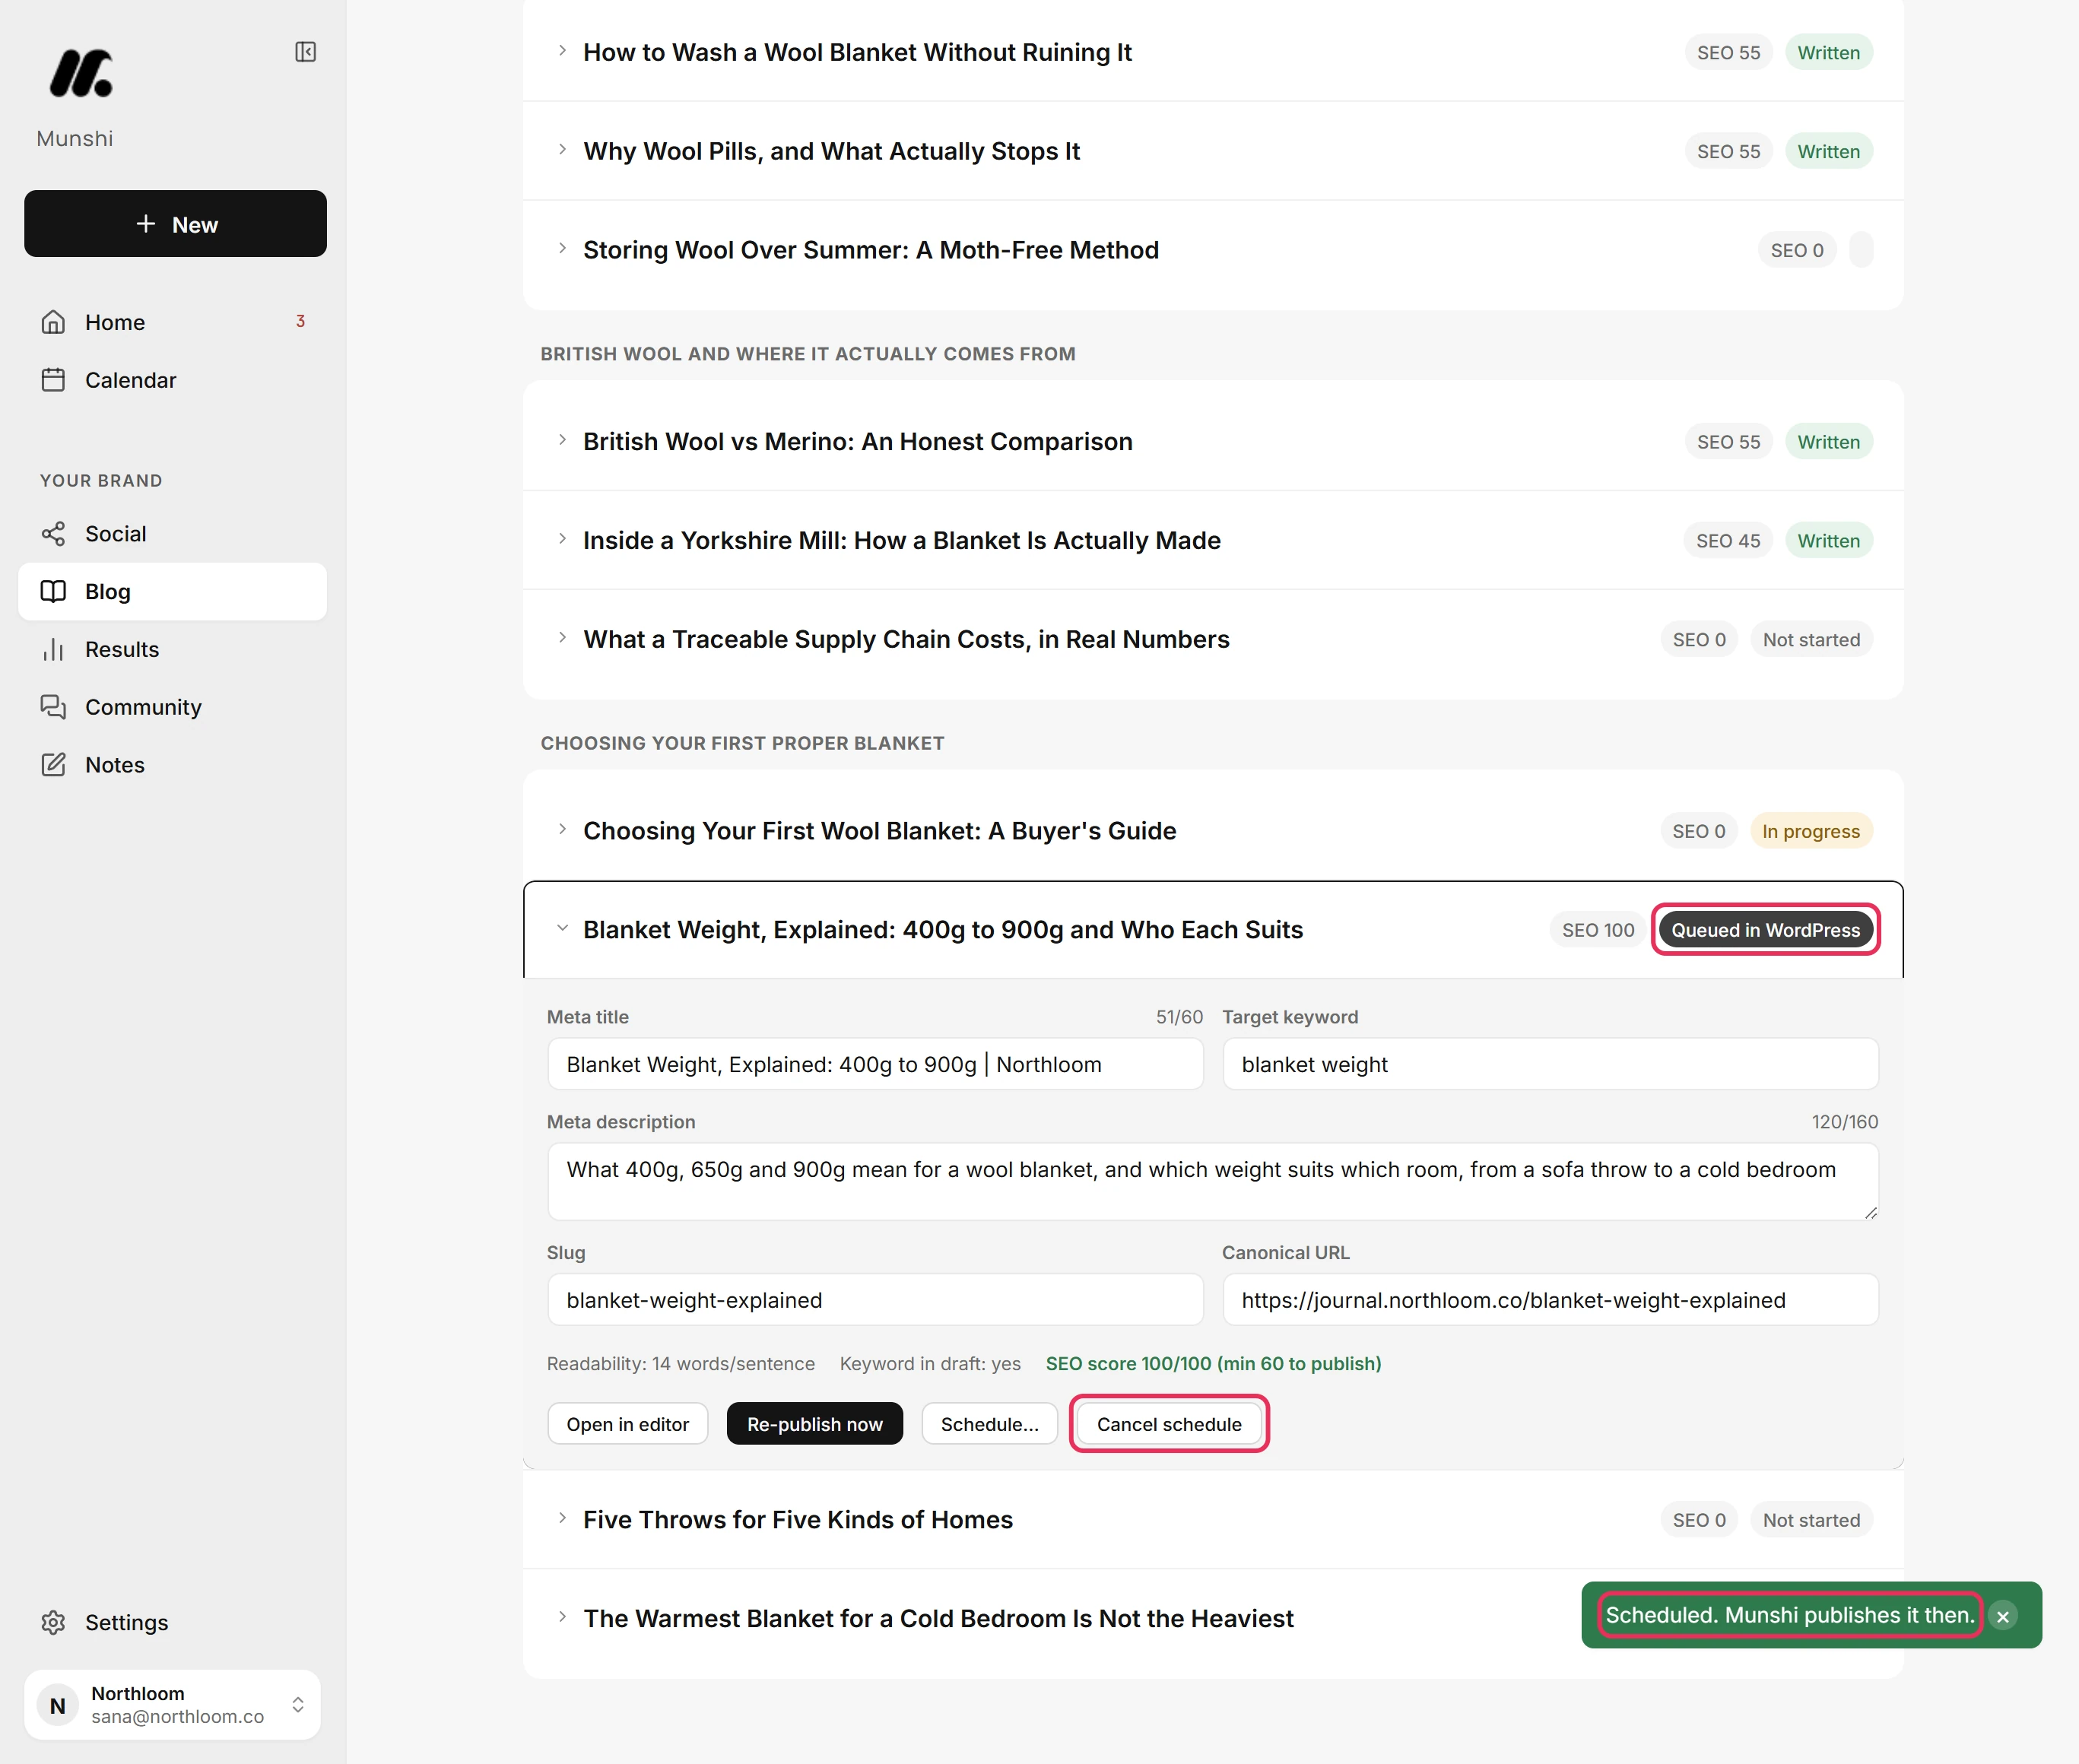
Munshi confirms with Scheduled. Munshi publishes it then. The row reads Queued in WordPress. WordPress holds the article with its date and puts it live at that time by itself.
-
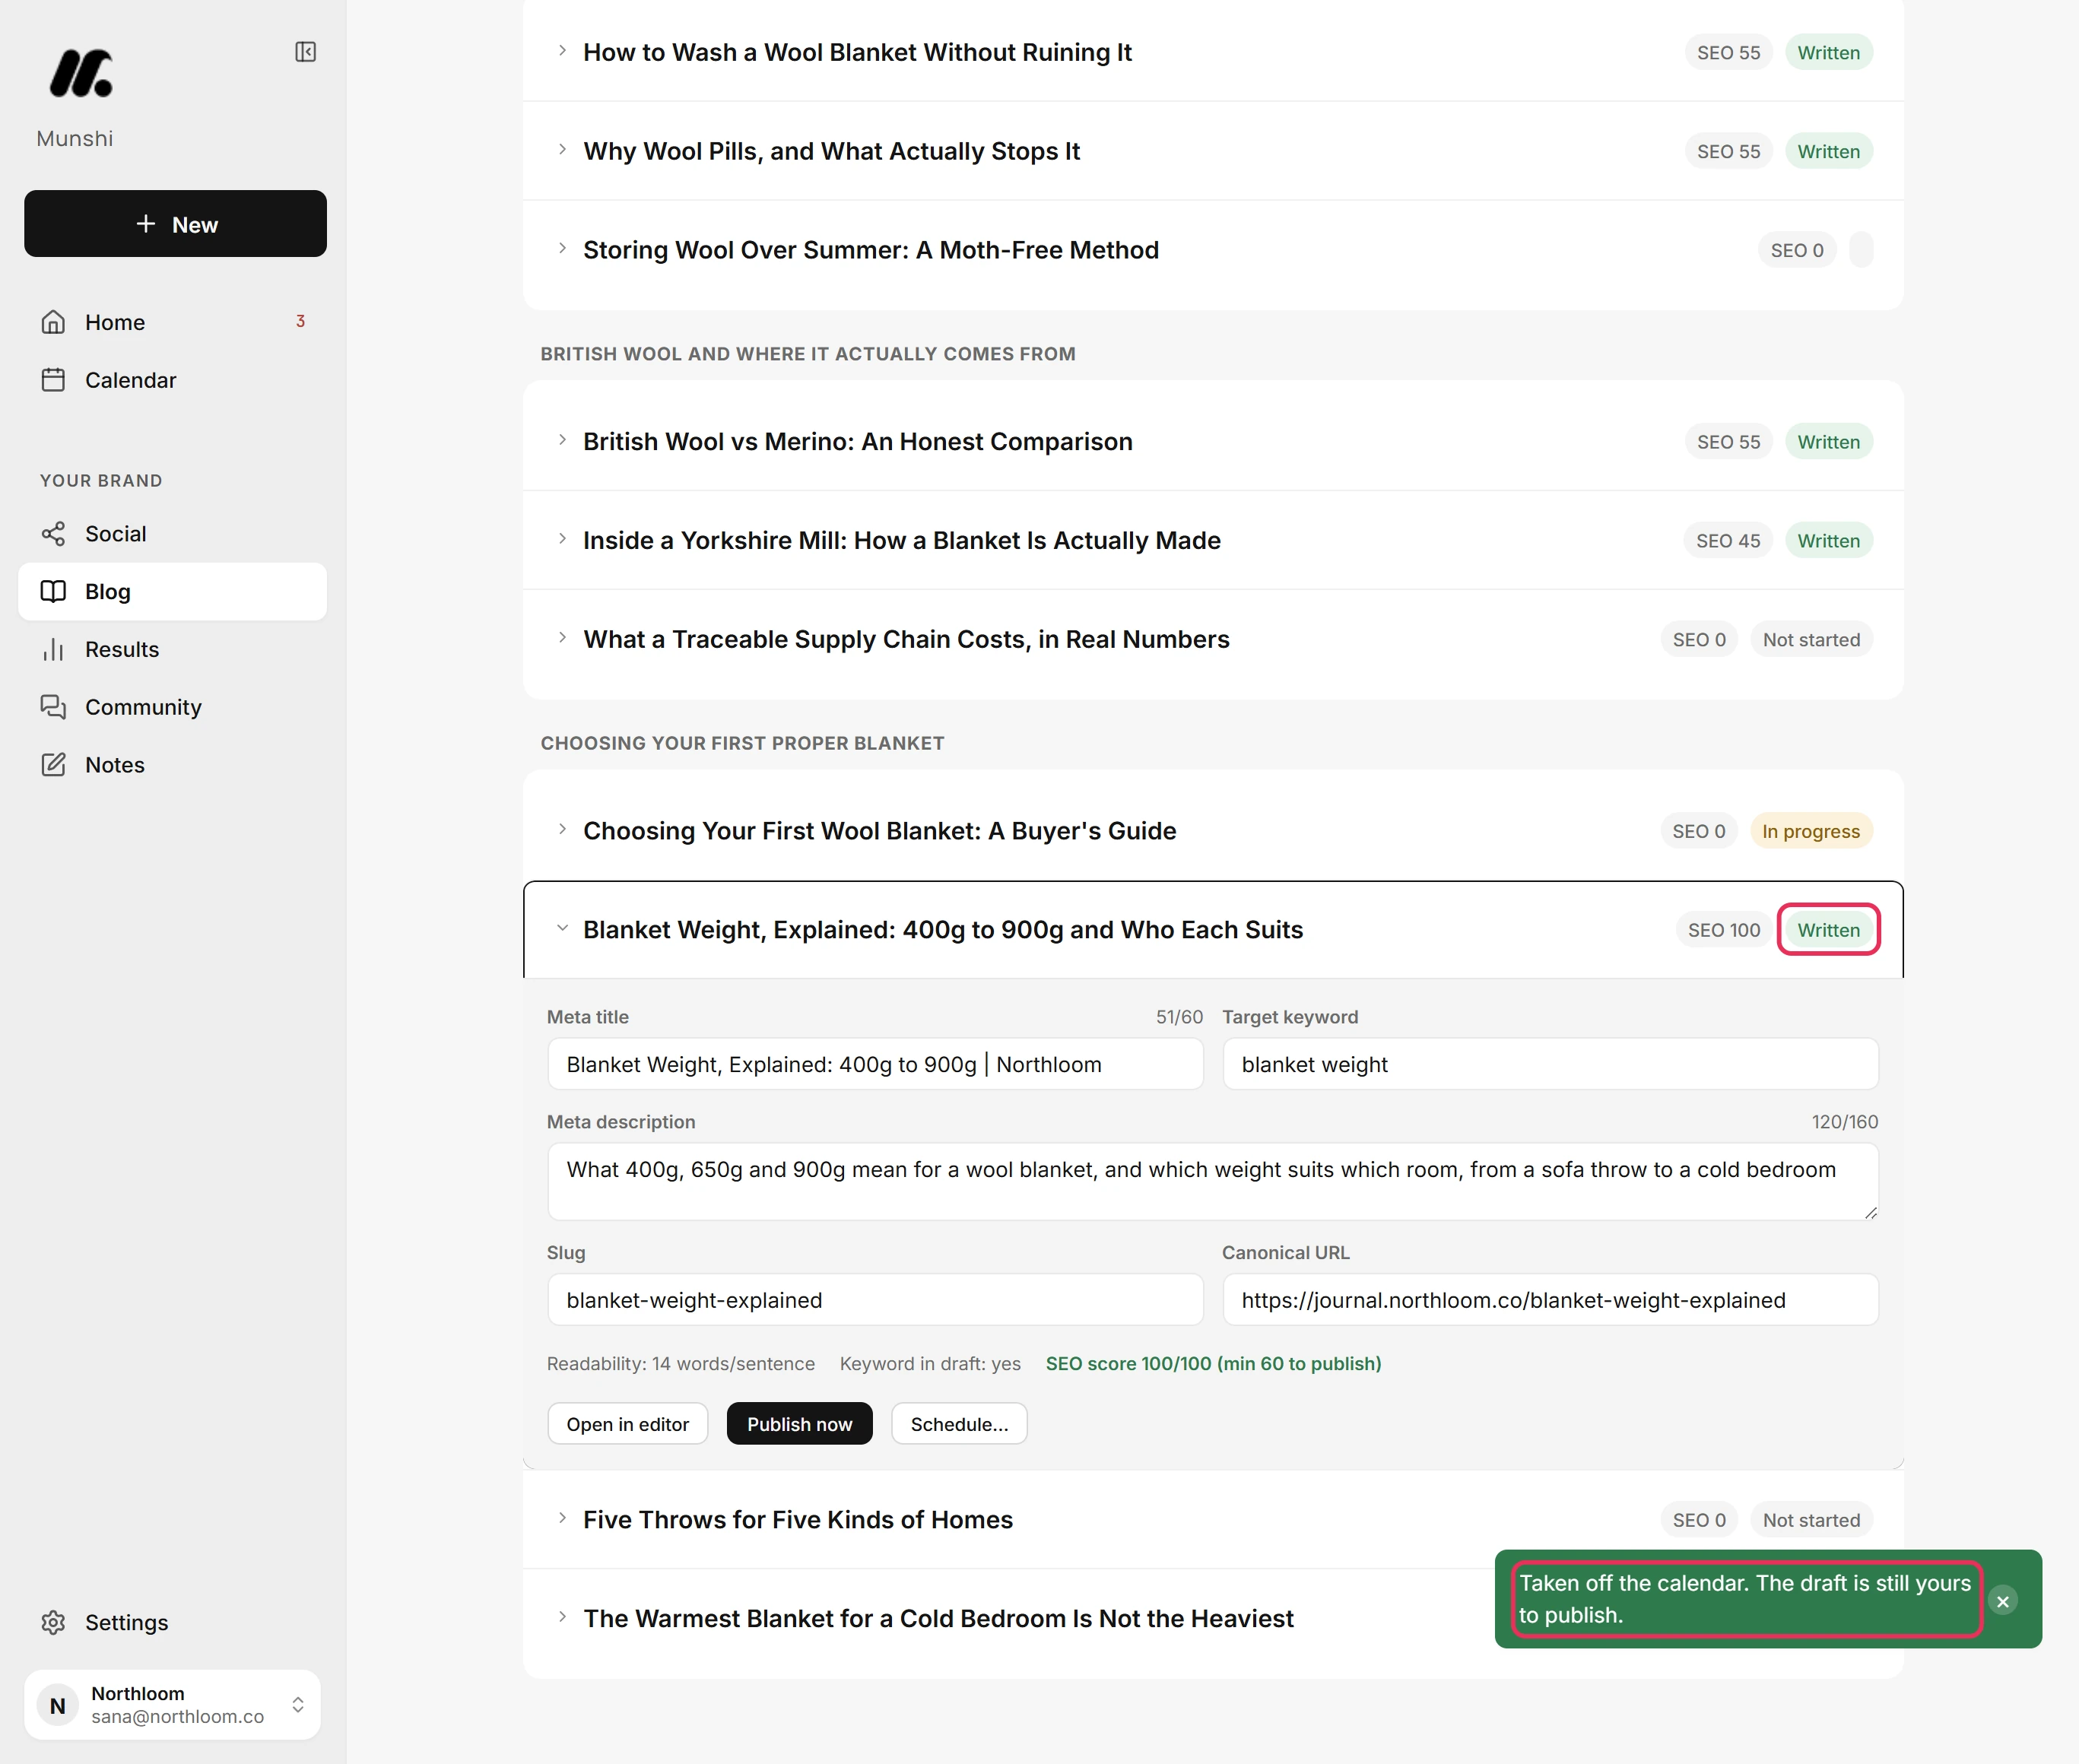
Click Cancel schedule. Munshi confirms with Taken off the calendar. The draft is still yours to publish. The row reads Written again.
Where you are now
The article's SEO fields are set and it is on its way. It is either a draft in WordPress for you to publish there, or queued in WordPress for its time.
If something goes wrong
“SEO score must reach 60”
Fill in the empty fields until the score reaches 60. Start with Target keyword, Slug and Canonical URL, and check that Keyword in draft reads yes. How the score adds up lists every point.
“Finish writing first”
Open the article, finish its steps, and click Mark completed on the banner above it. The article is not marked completed yet.
“More than one blog is connected”
Choose where articles publish in Integrations, then publish again. Two or more blogs are connected and none is chosen, so Munshi stops instead of guessing. The other blog refusals are explained too.
“Pick a time at least 10 minutes from now.”
Set a later time and click Confirm again. The time you set is too close or already past.
Try it on your own brand this week.
Munshi Social, the AI content marketing engine for small teams, plans, writes, publishes, and tracks your blog and socials. The guide above shows the real app, not a mock-up.
Start your workspace