How to read the calendar: day, week, month
The Munshi calendar shows what goes out today and what is planned. Switch between month, week and day, filter by channel, and open a day to act on it.
-
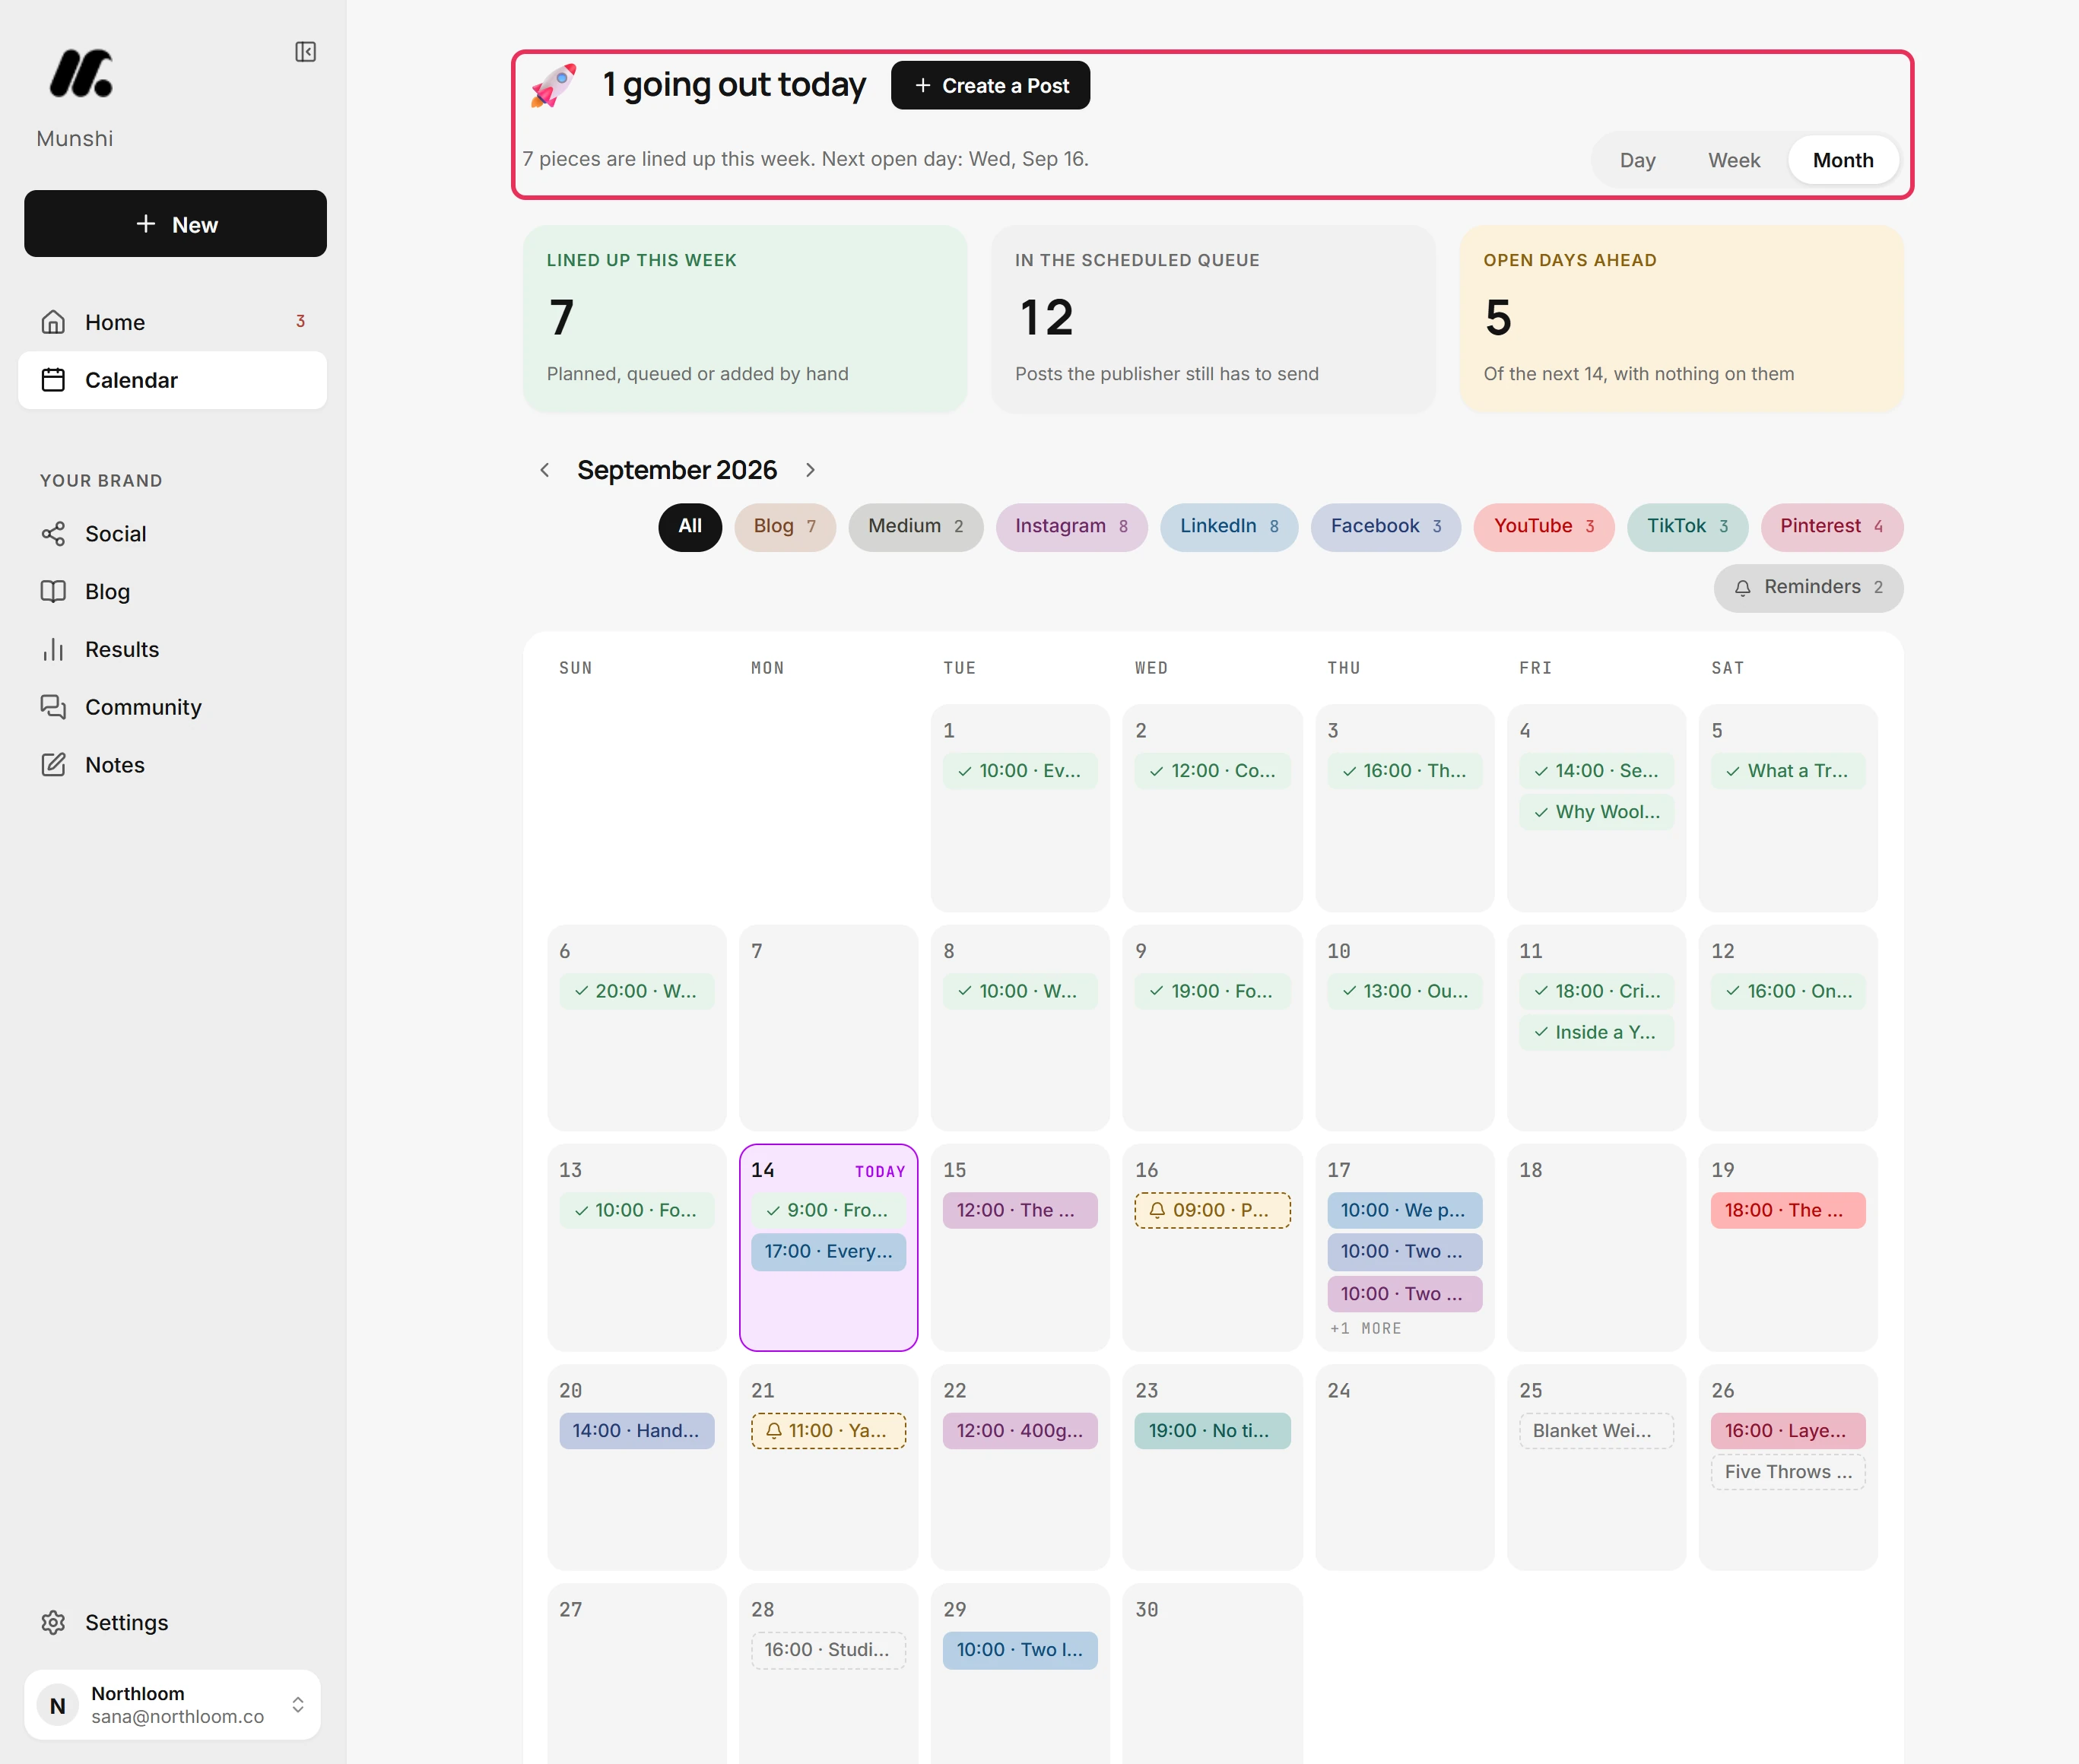
Click Calendar in the sidebar. The line at the top says how much goes out today and how many pieces are lined up this week. It also names the next day with nothing on it. Create a Post opens the composer.
-
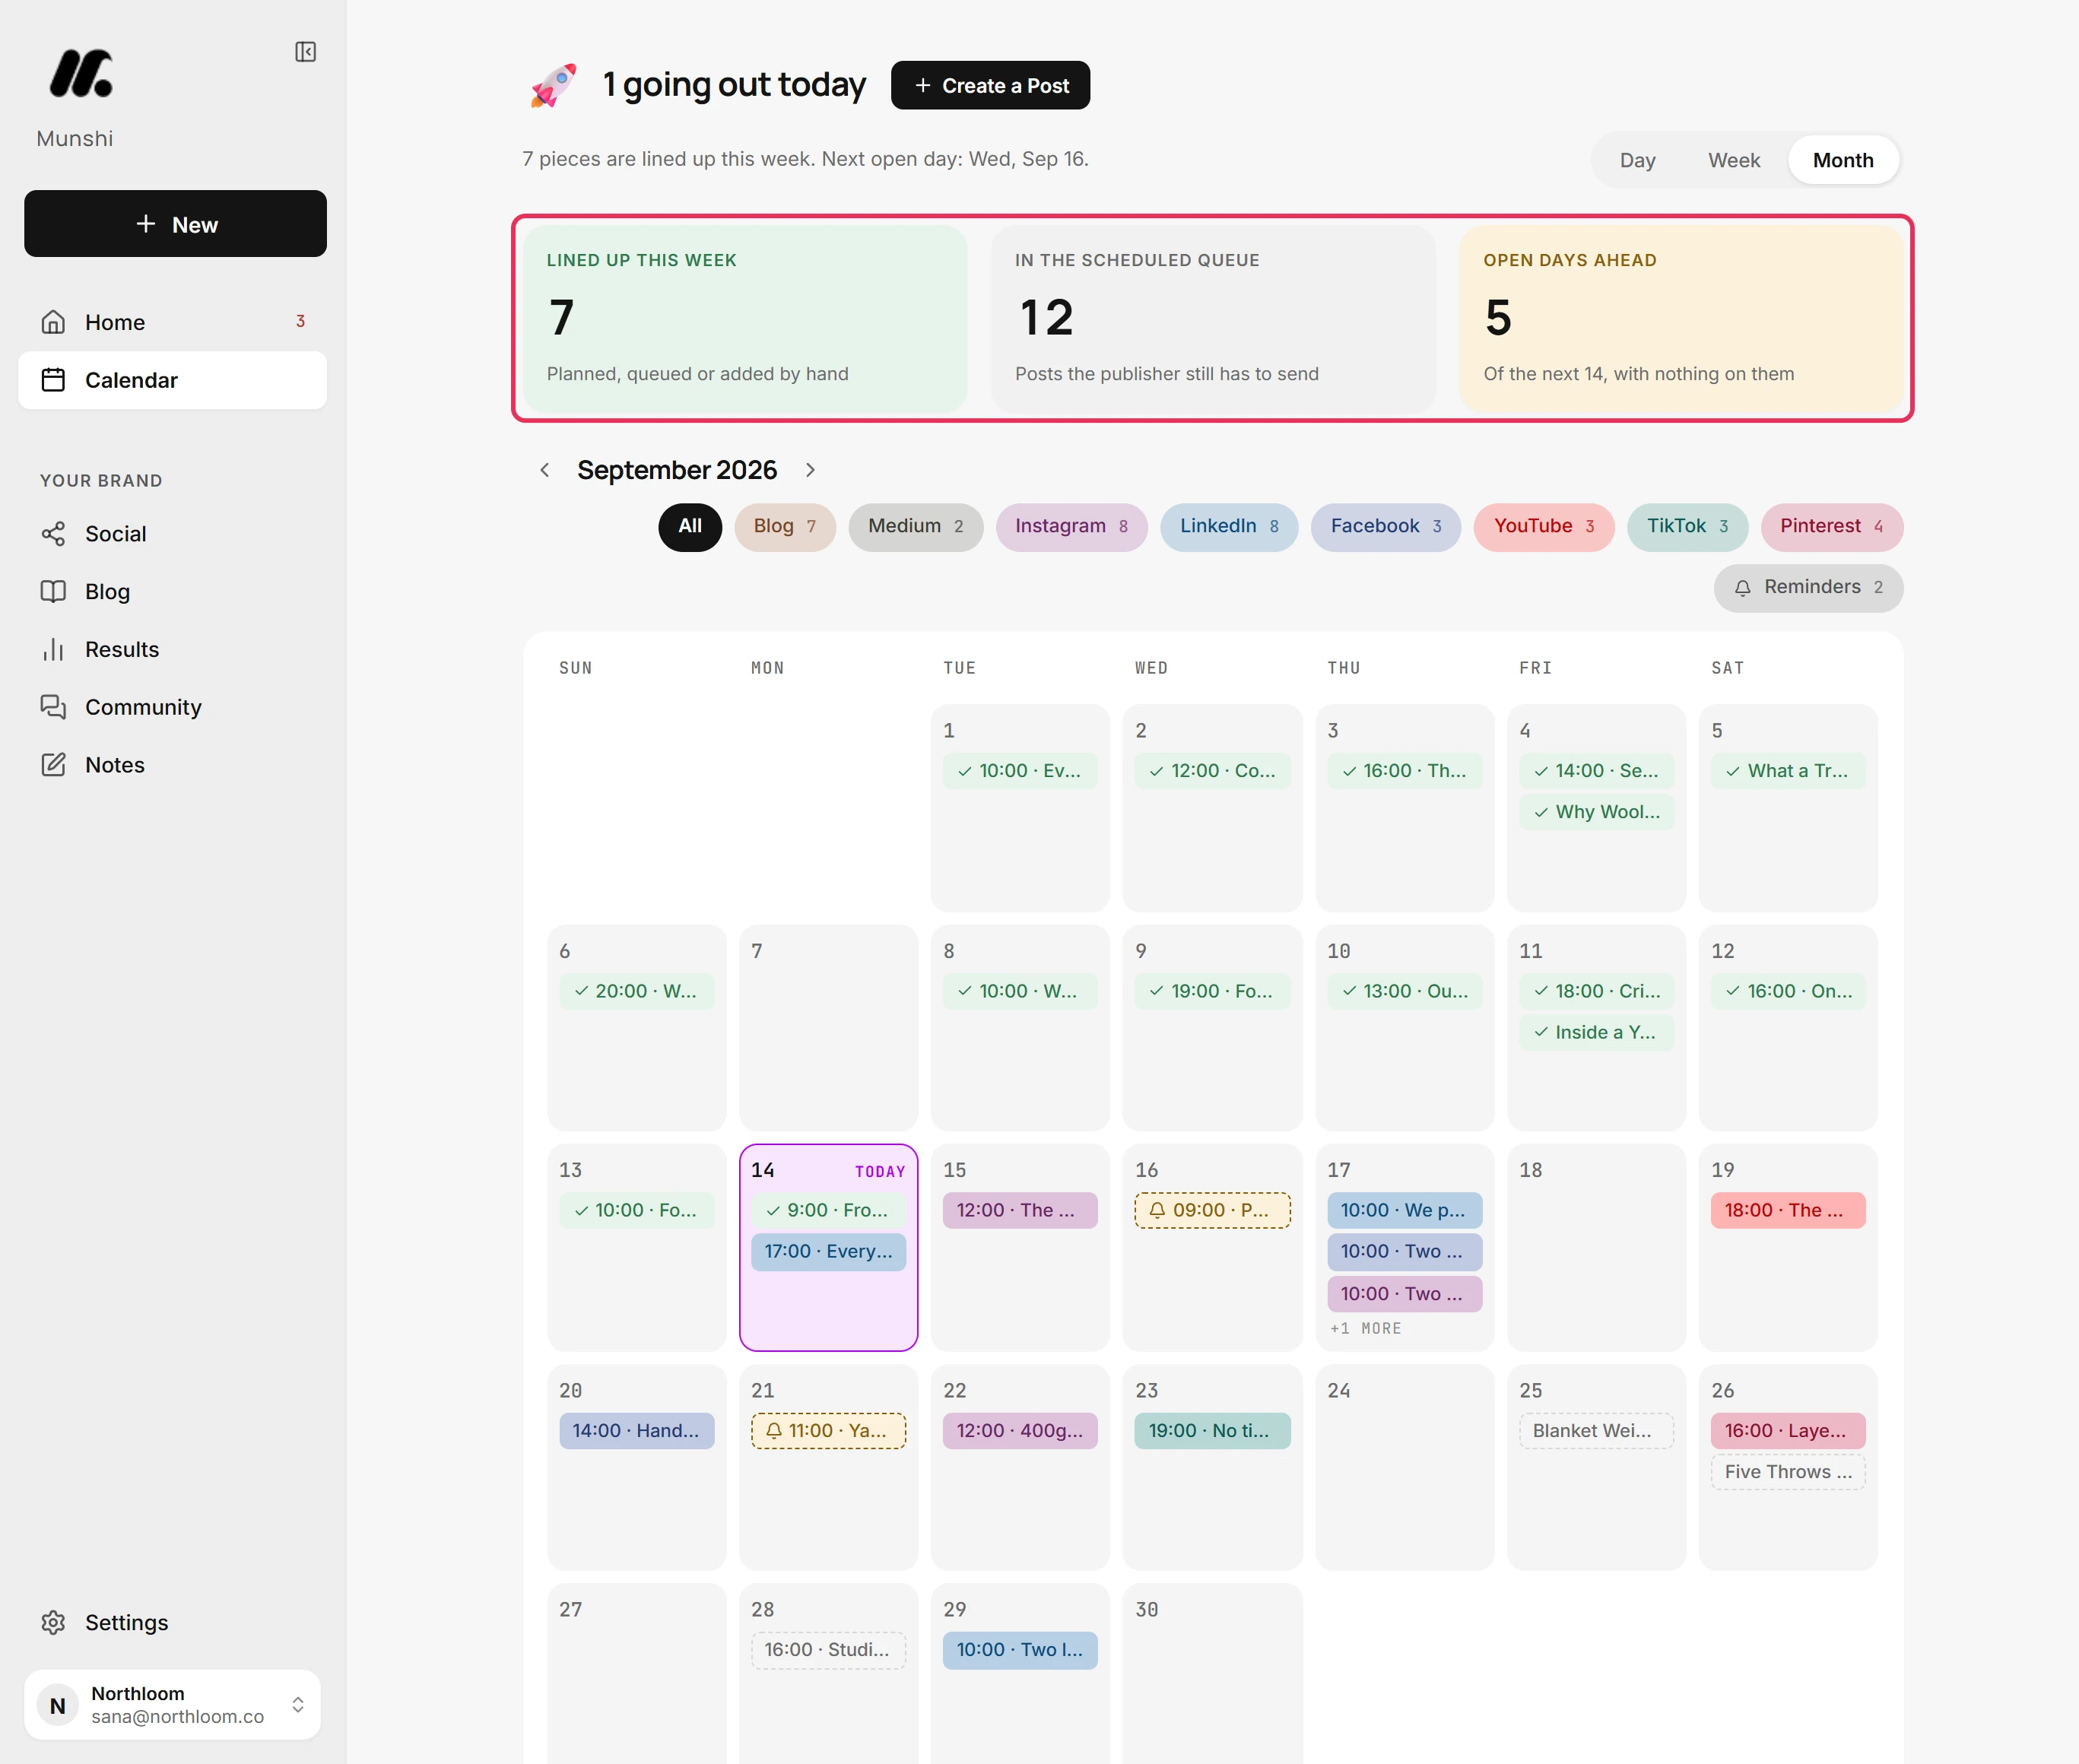
Lined up this week counts what is planned, queued or added by hand from Sunday to Saturday. In the scheduled queue counts the scheduled posts still waiting to go out. Open days ahead counts the days in the next 14 with nothing on them.
-
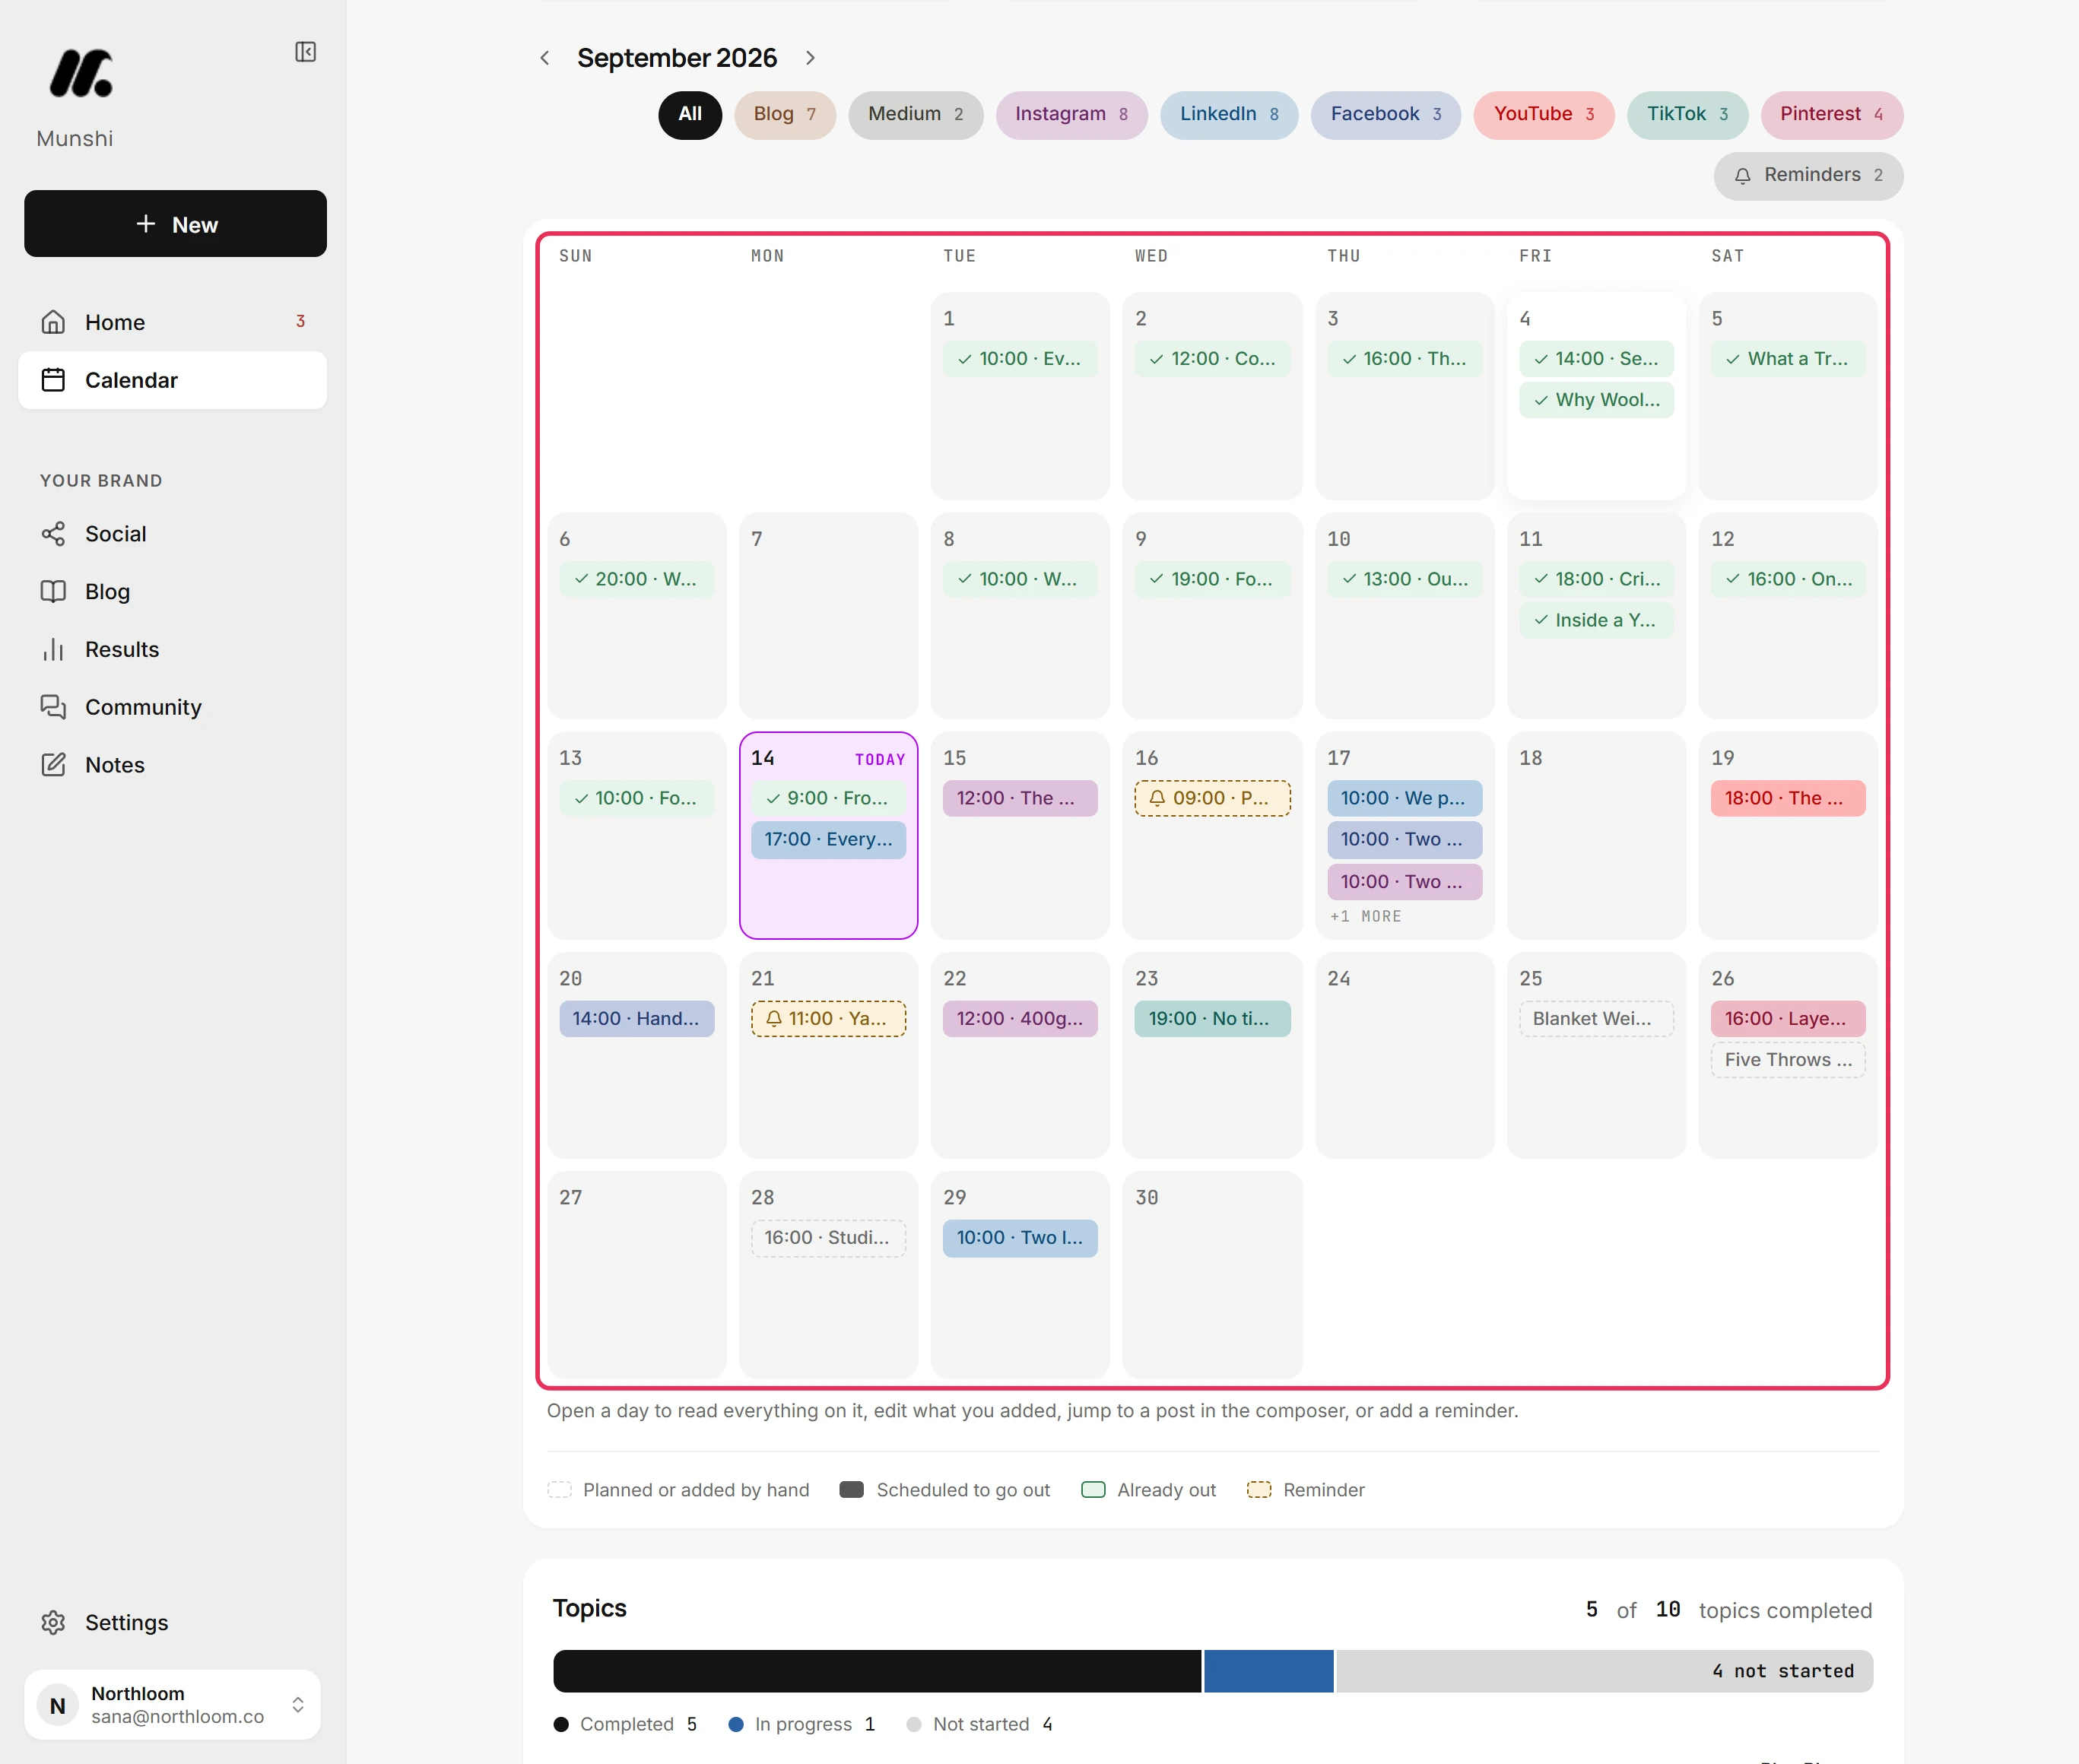
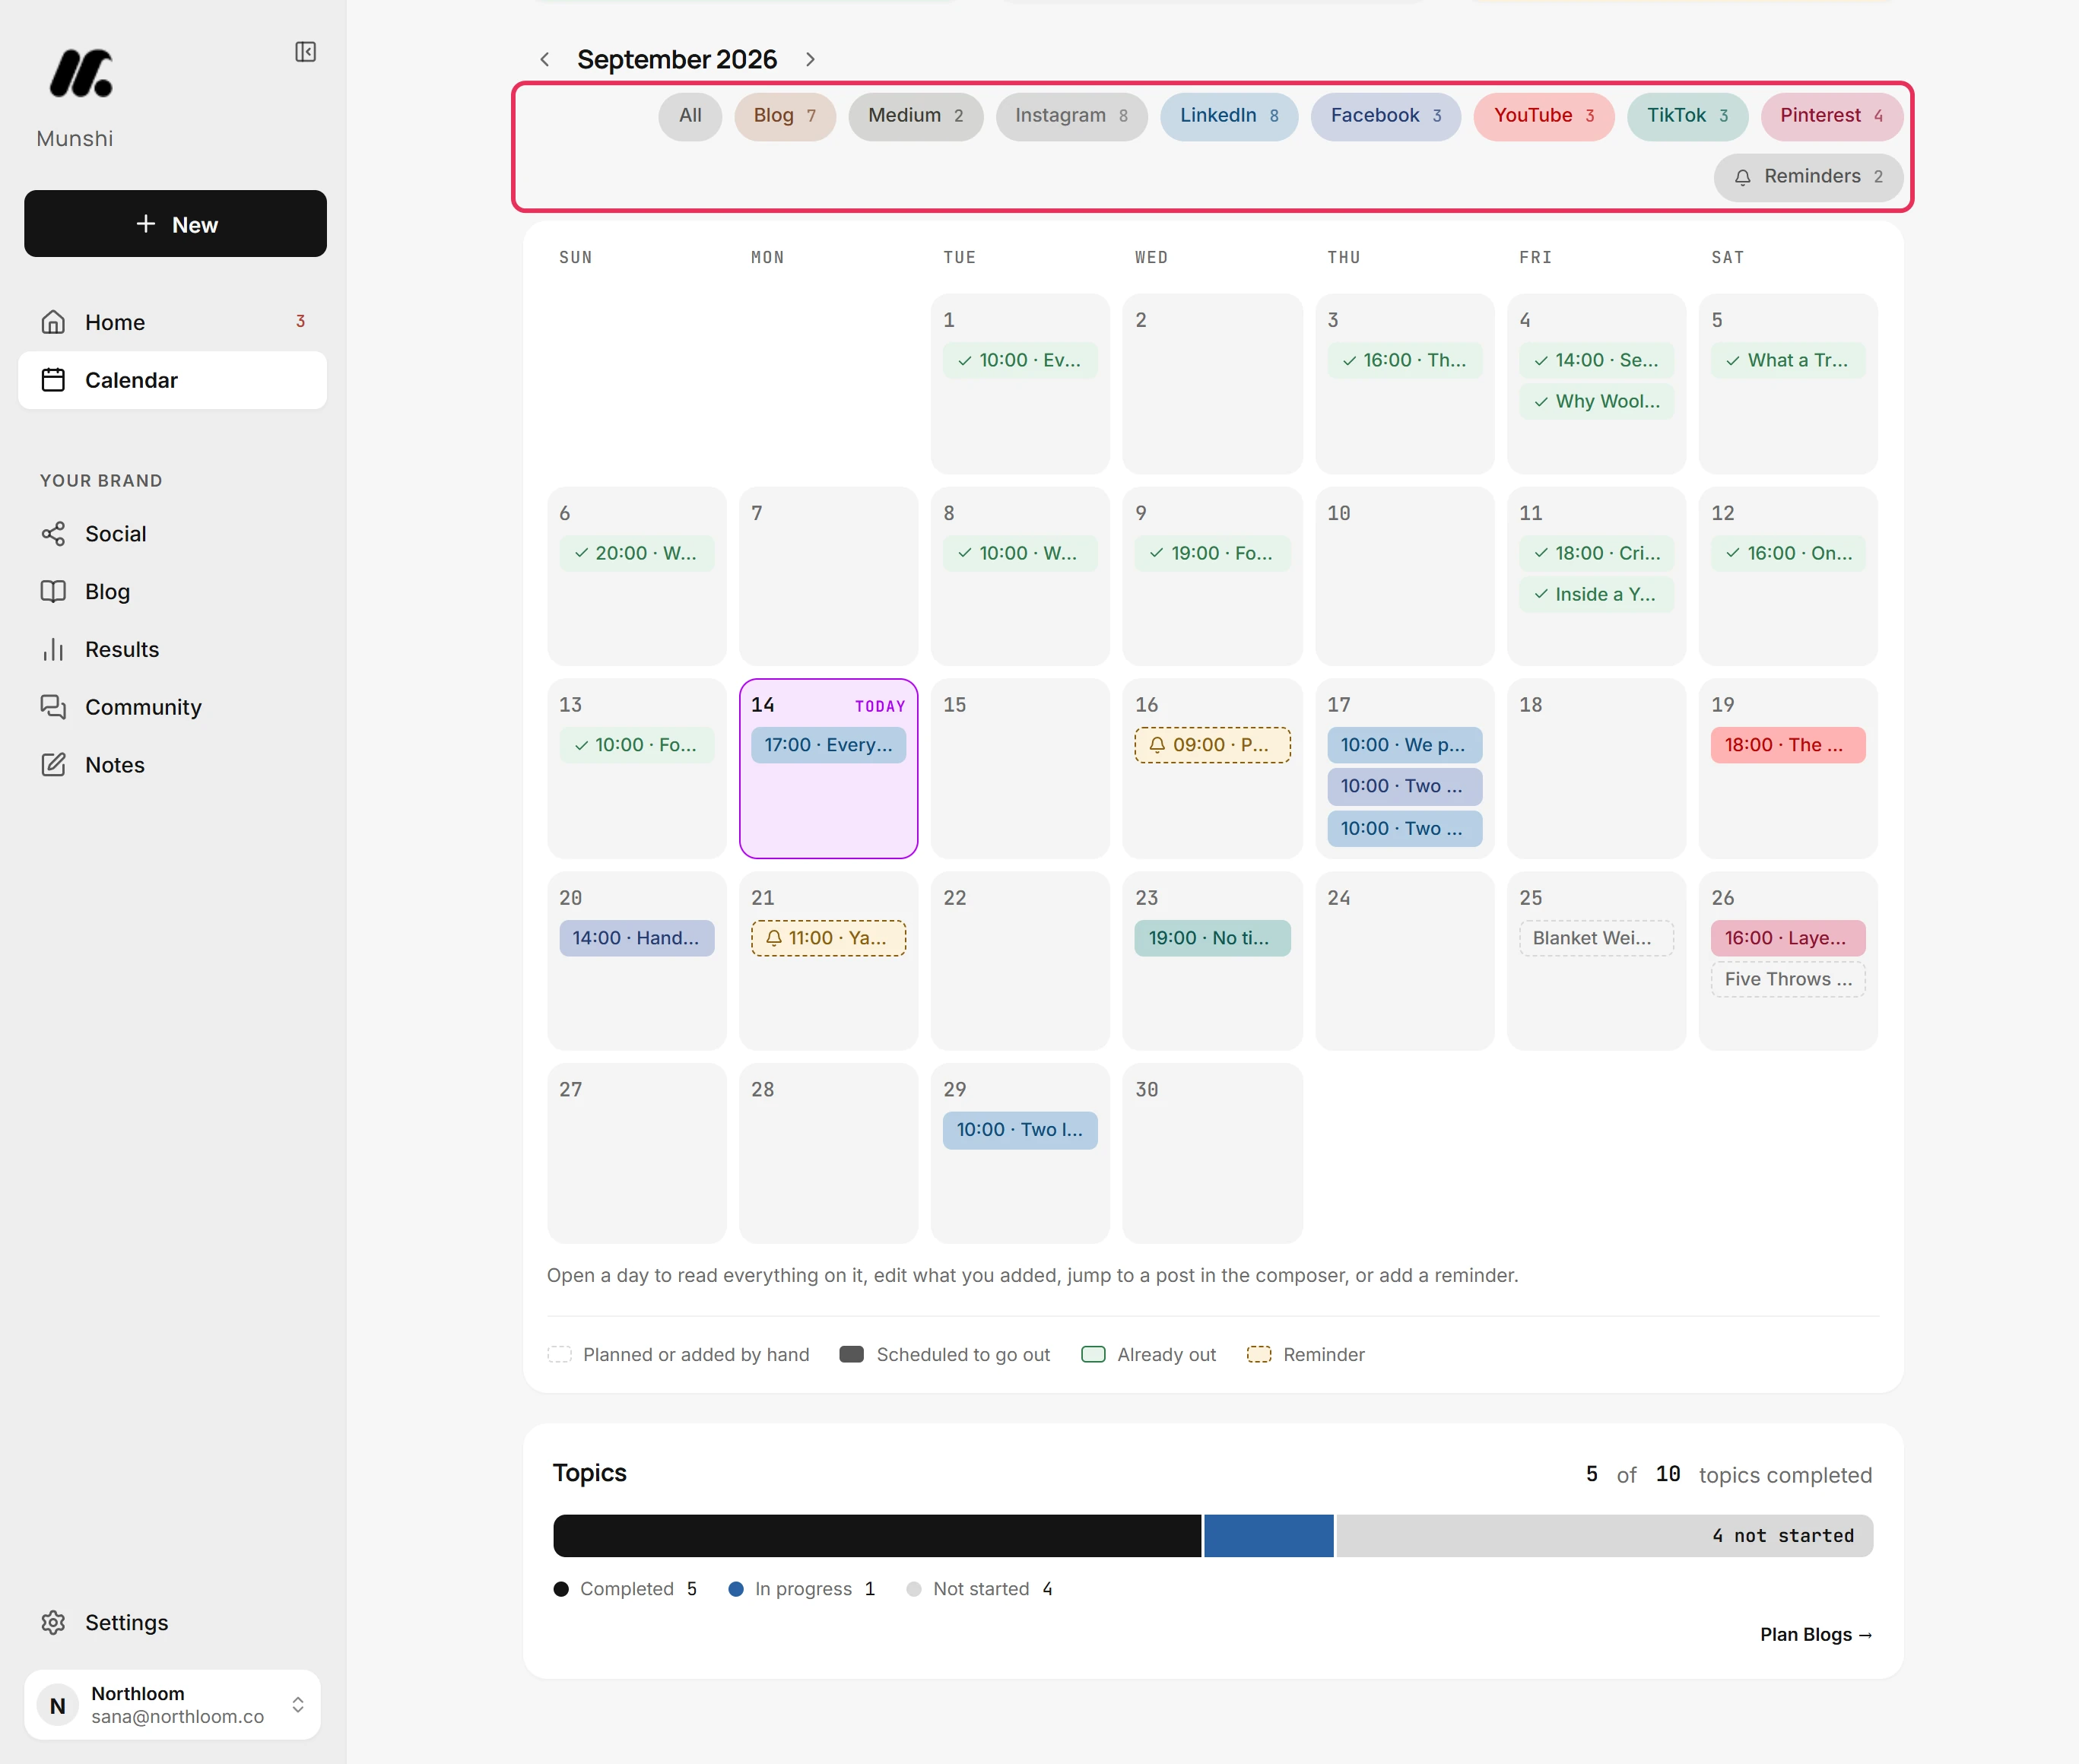
The calendar opens on Month. Each day shows up to three entries, and a busier day ends with a count of the rest. Today is outlined and marked Today. The arrows beside the month's name move a month at a time.
-
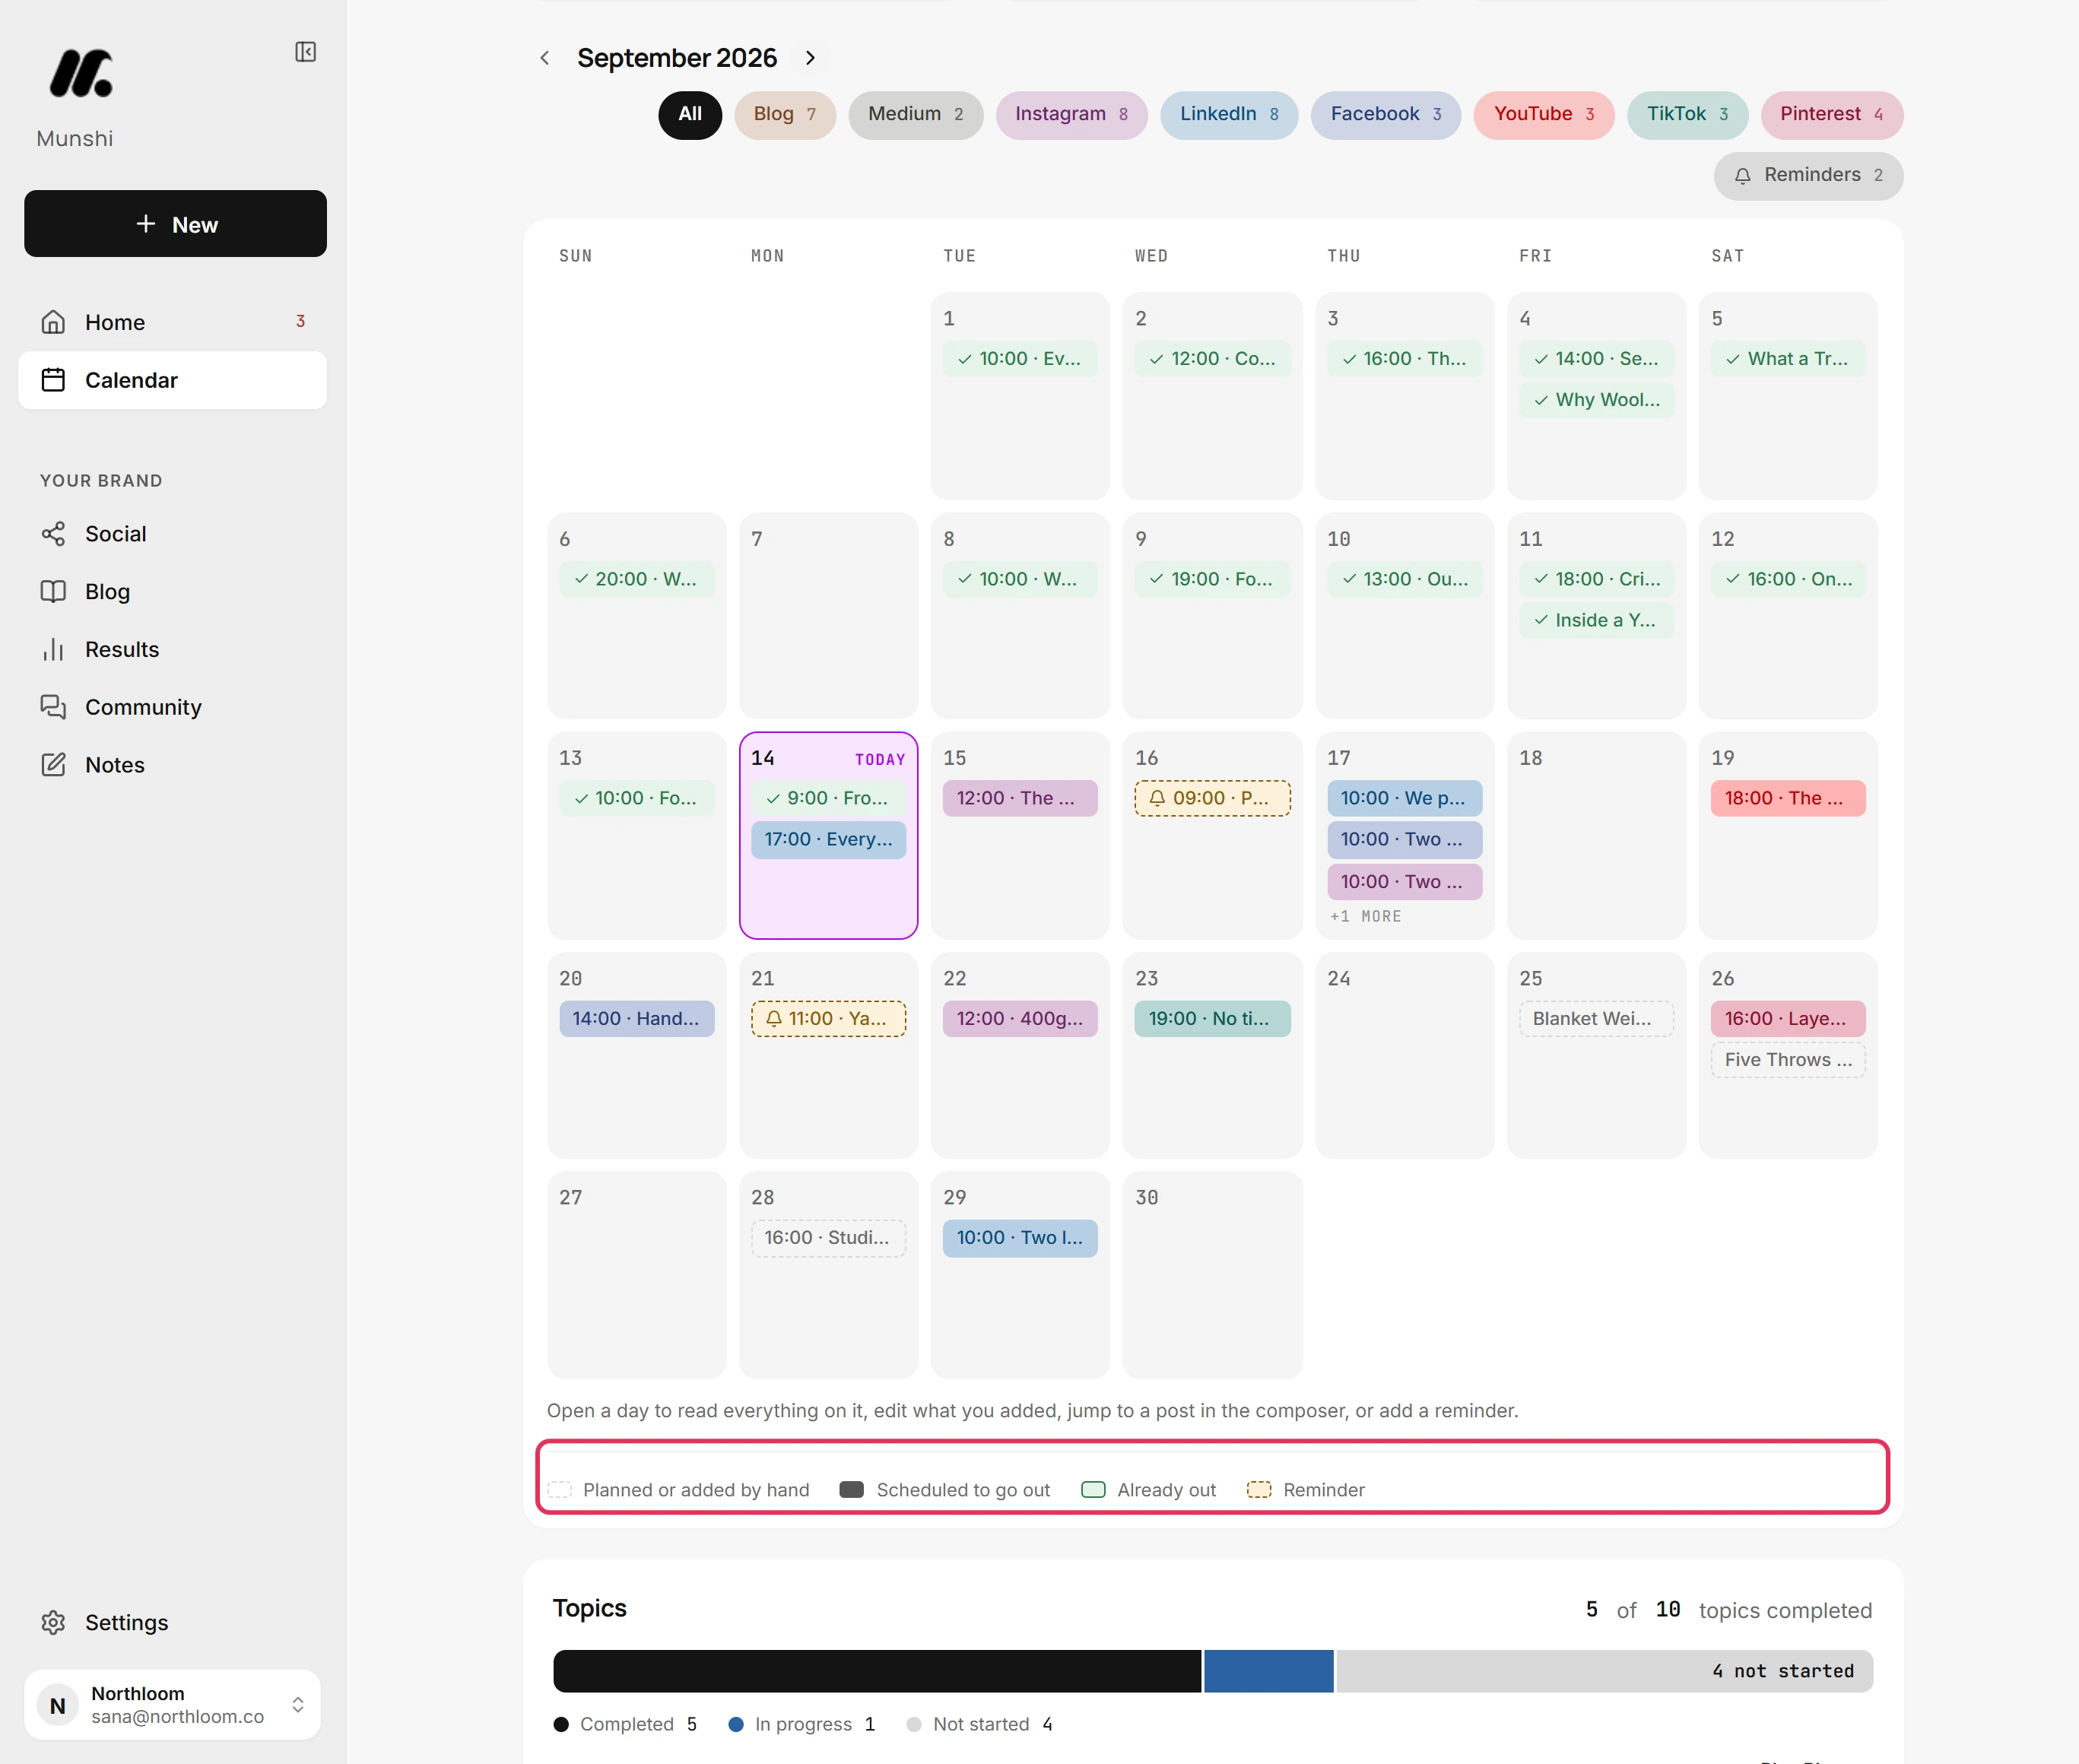
The key under the grid names each look. Planned or added by hand is a dashed outline. Scheduled to go out is a solid chip. Already out carries a tick, and a Reminder carries a bell. A failed post shows in red as Didn't go out, and the key lists that only when a post failed.
-
The pills above the grid name every channel with something on the calendar, with a count. Click one to hide that channel, and click it again to bring it back. Reminders hides your reminders the same way. All shows everything again.
-
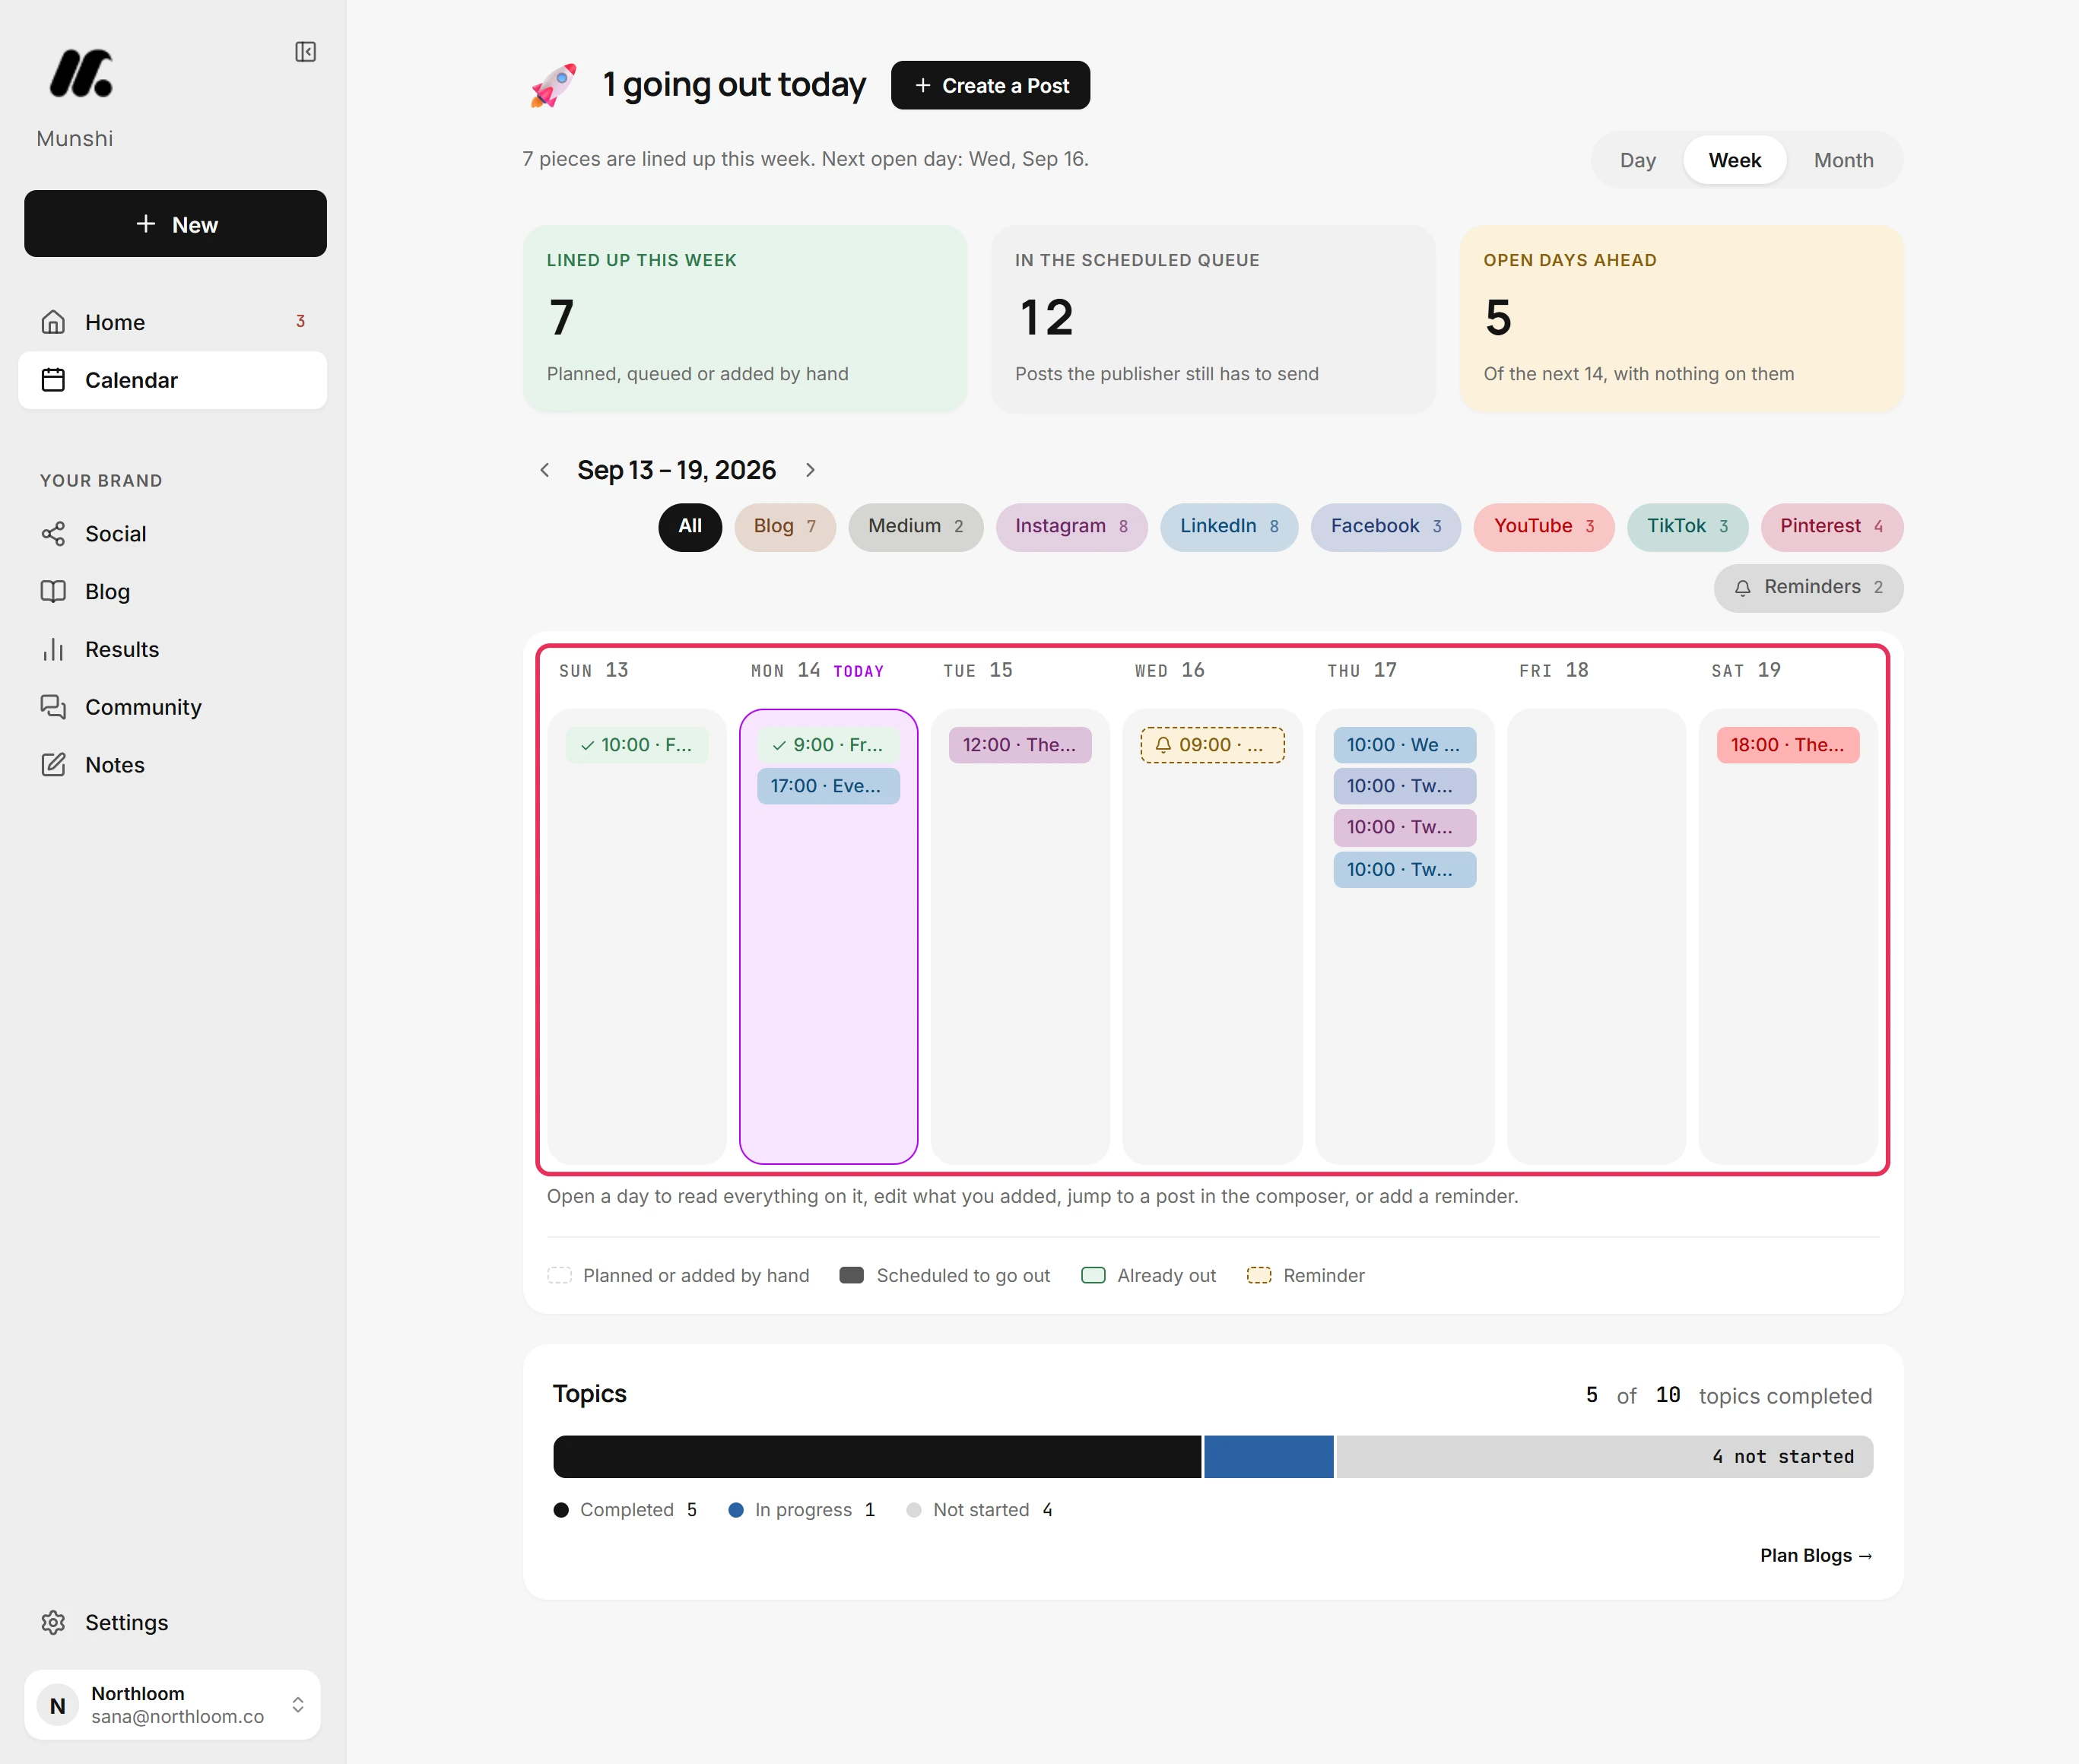
Click Week to see Sunday to Saturday in seven columns, with room for eight entries a day. The arrows now move a week at a time. Once you move away, Today appears to bring you back.
-
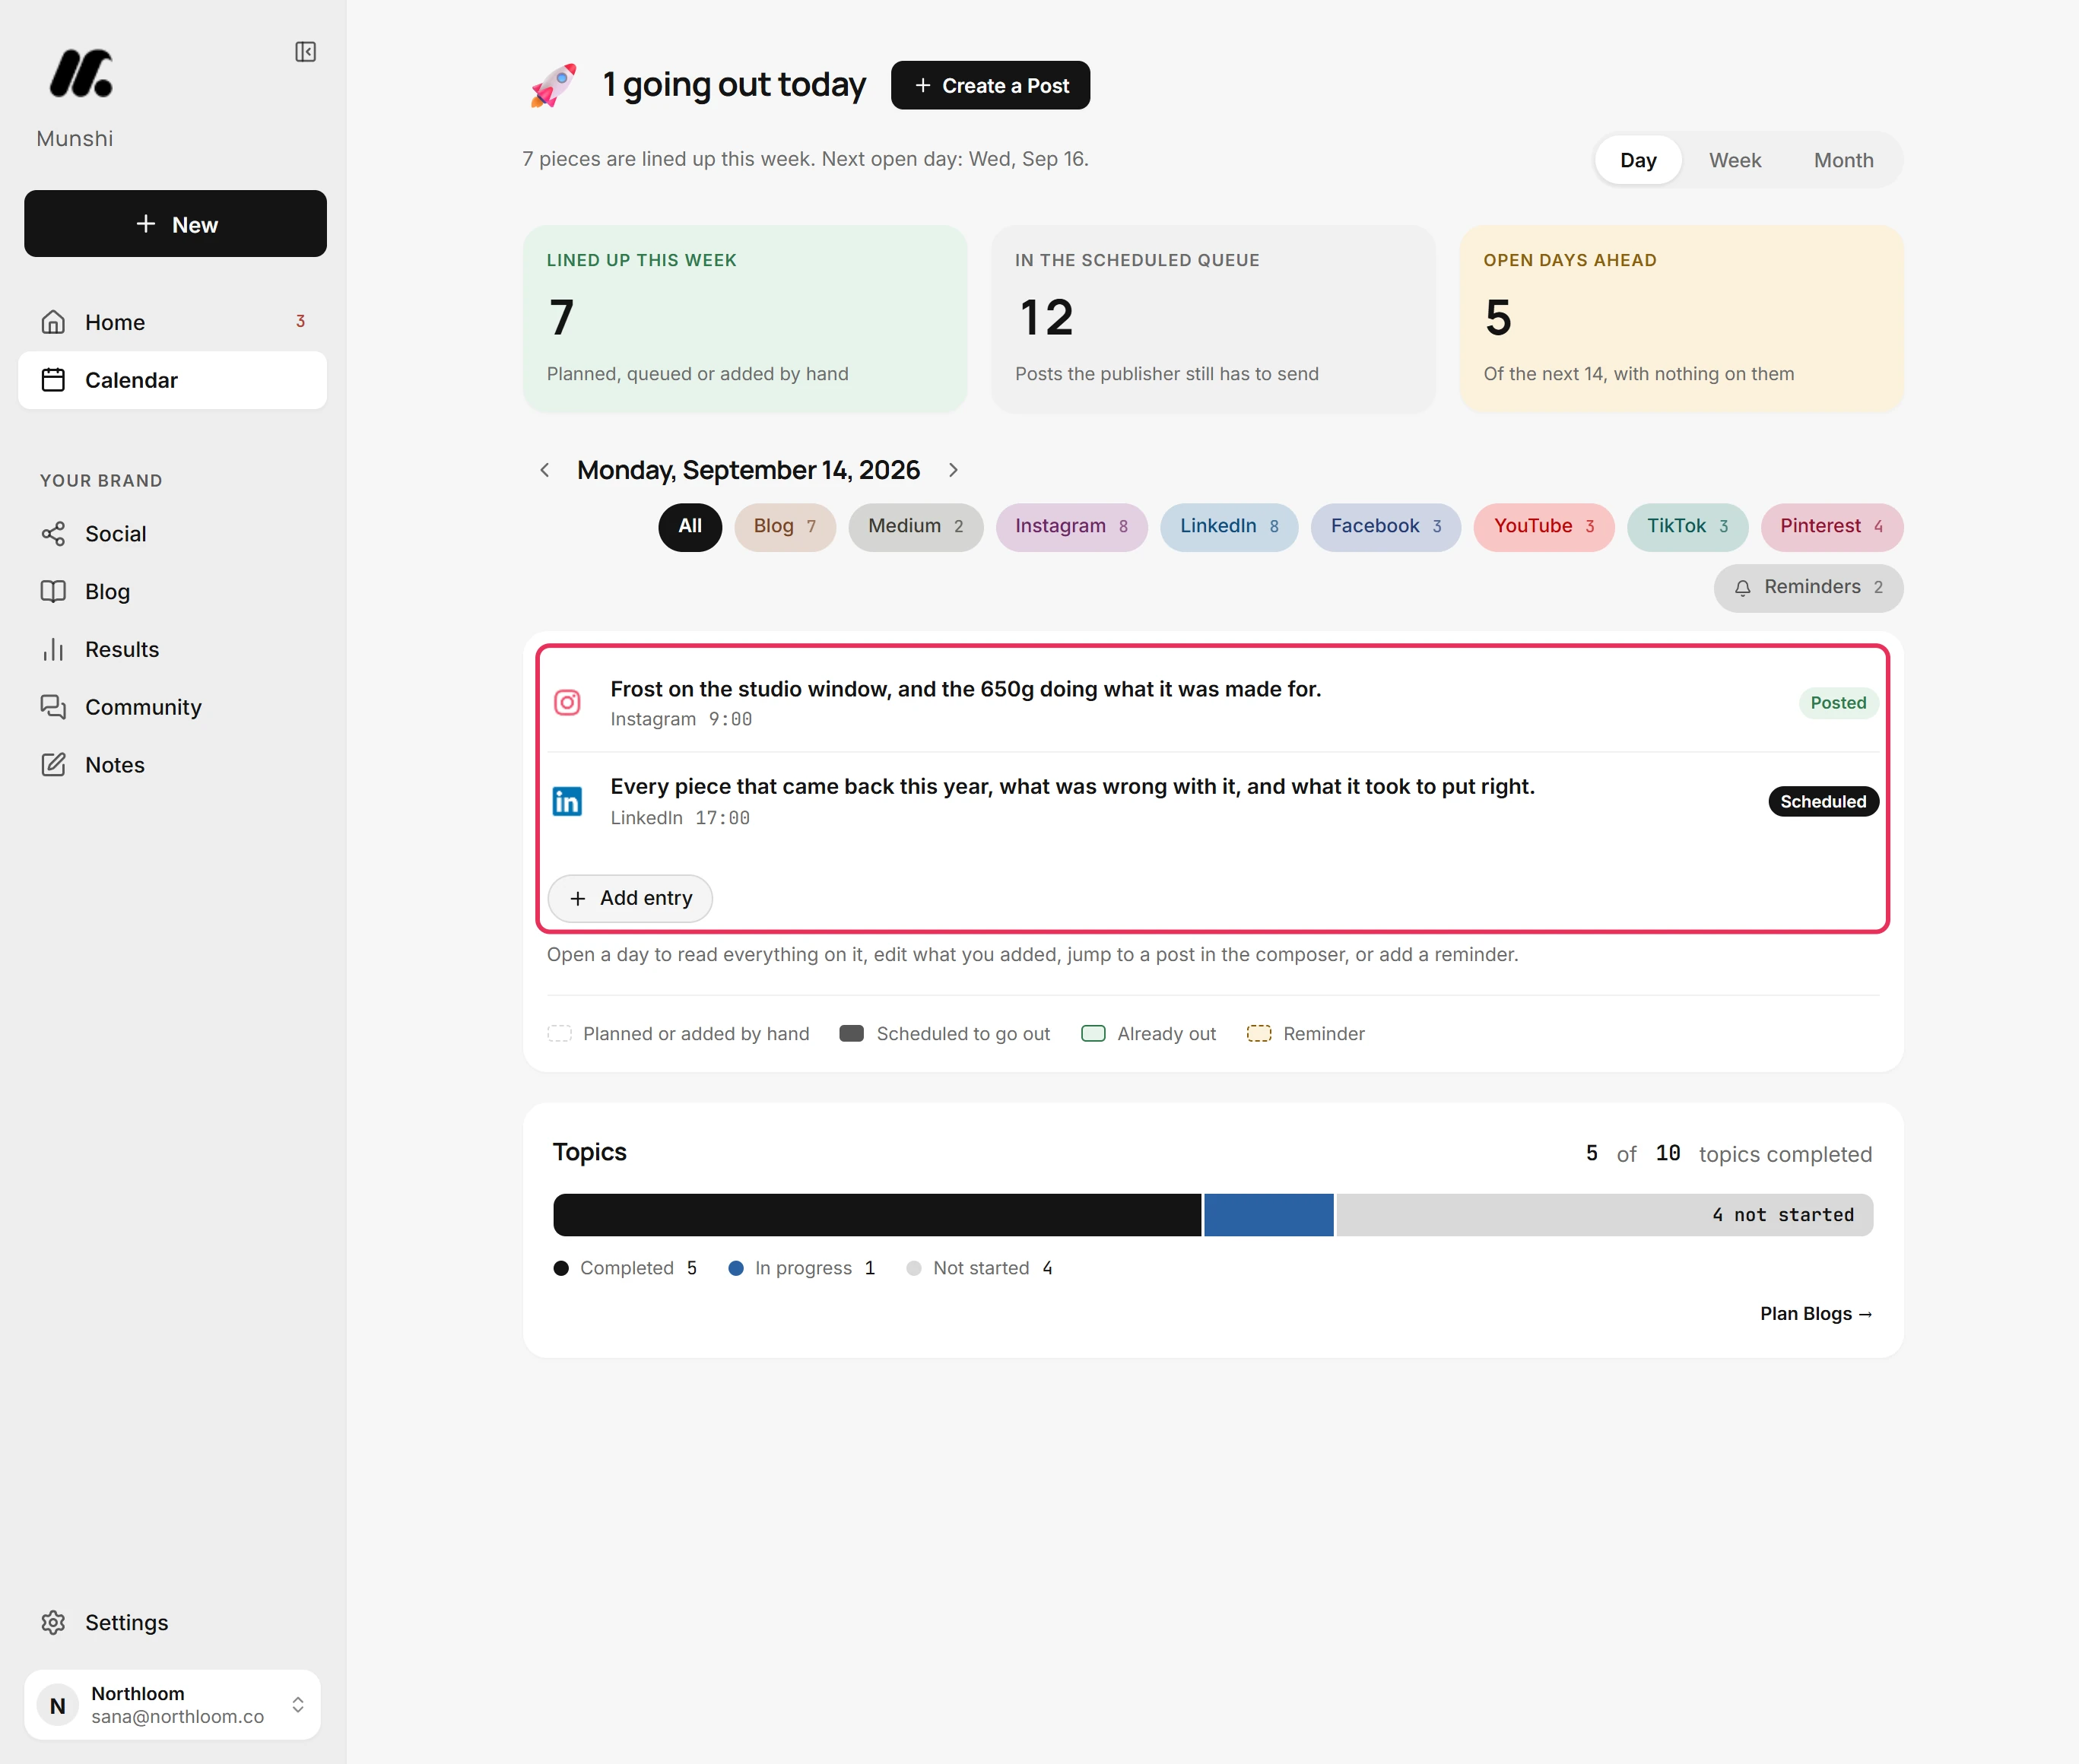
Click Day to list a single day as rows. Each row shows its network, time and state, such as Posted or Scheduled. Add entry under the rows opens the day so you can add to it.
-
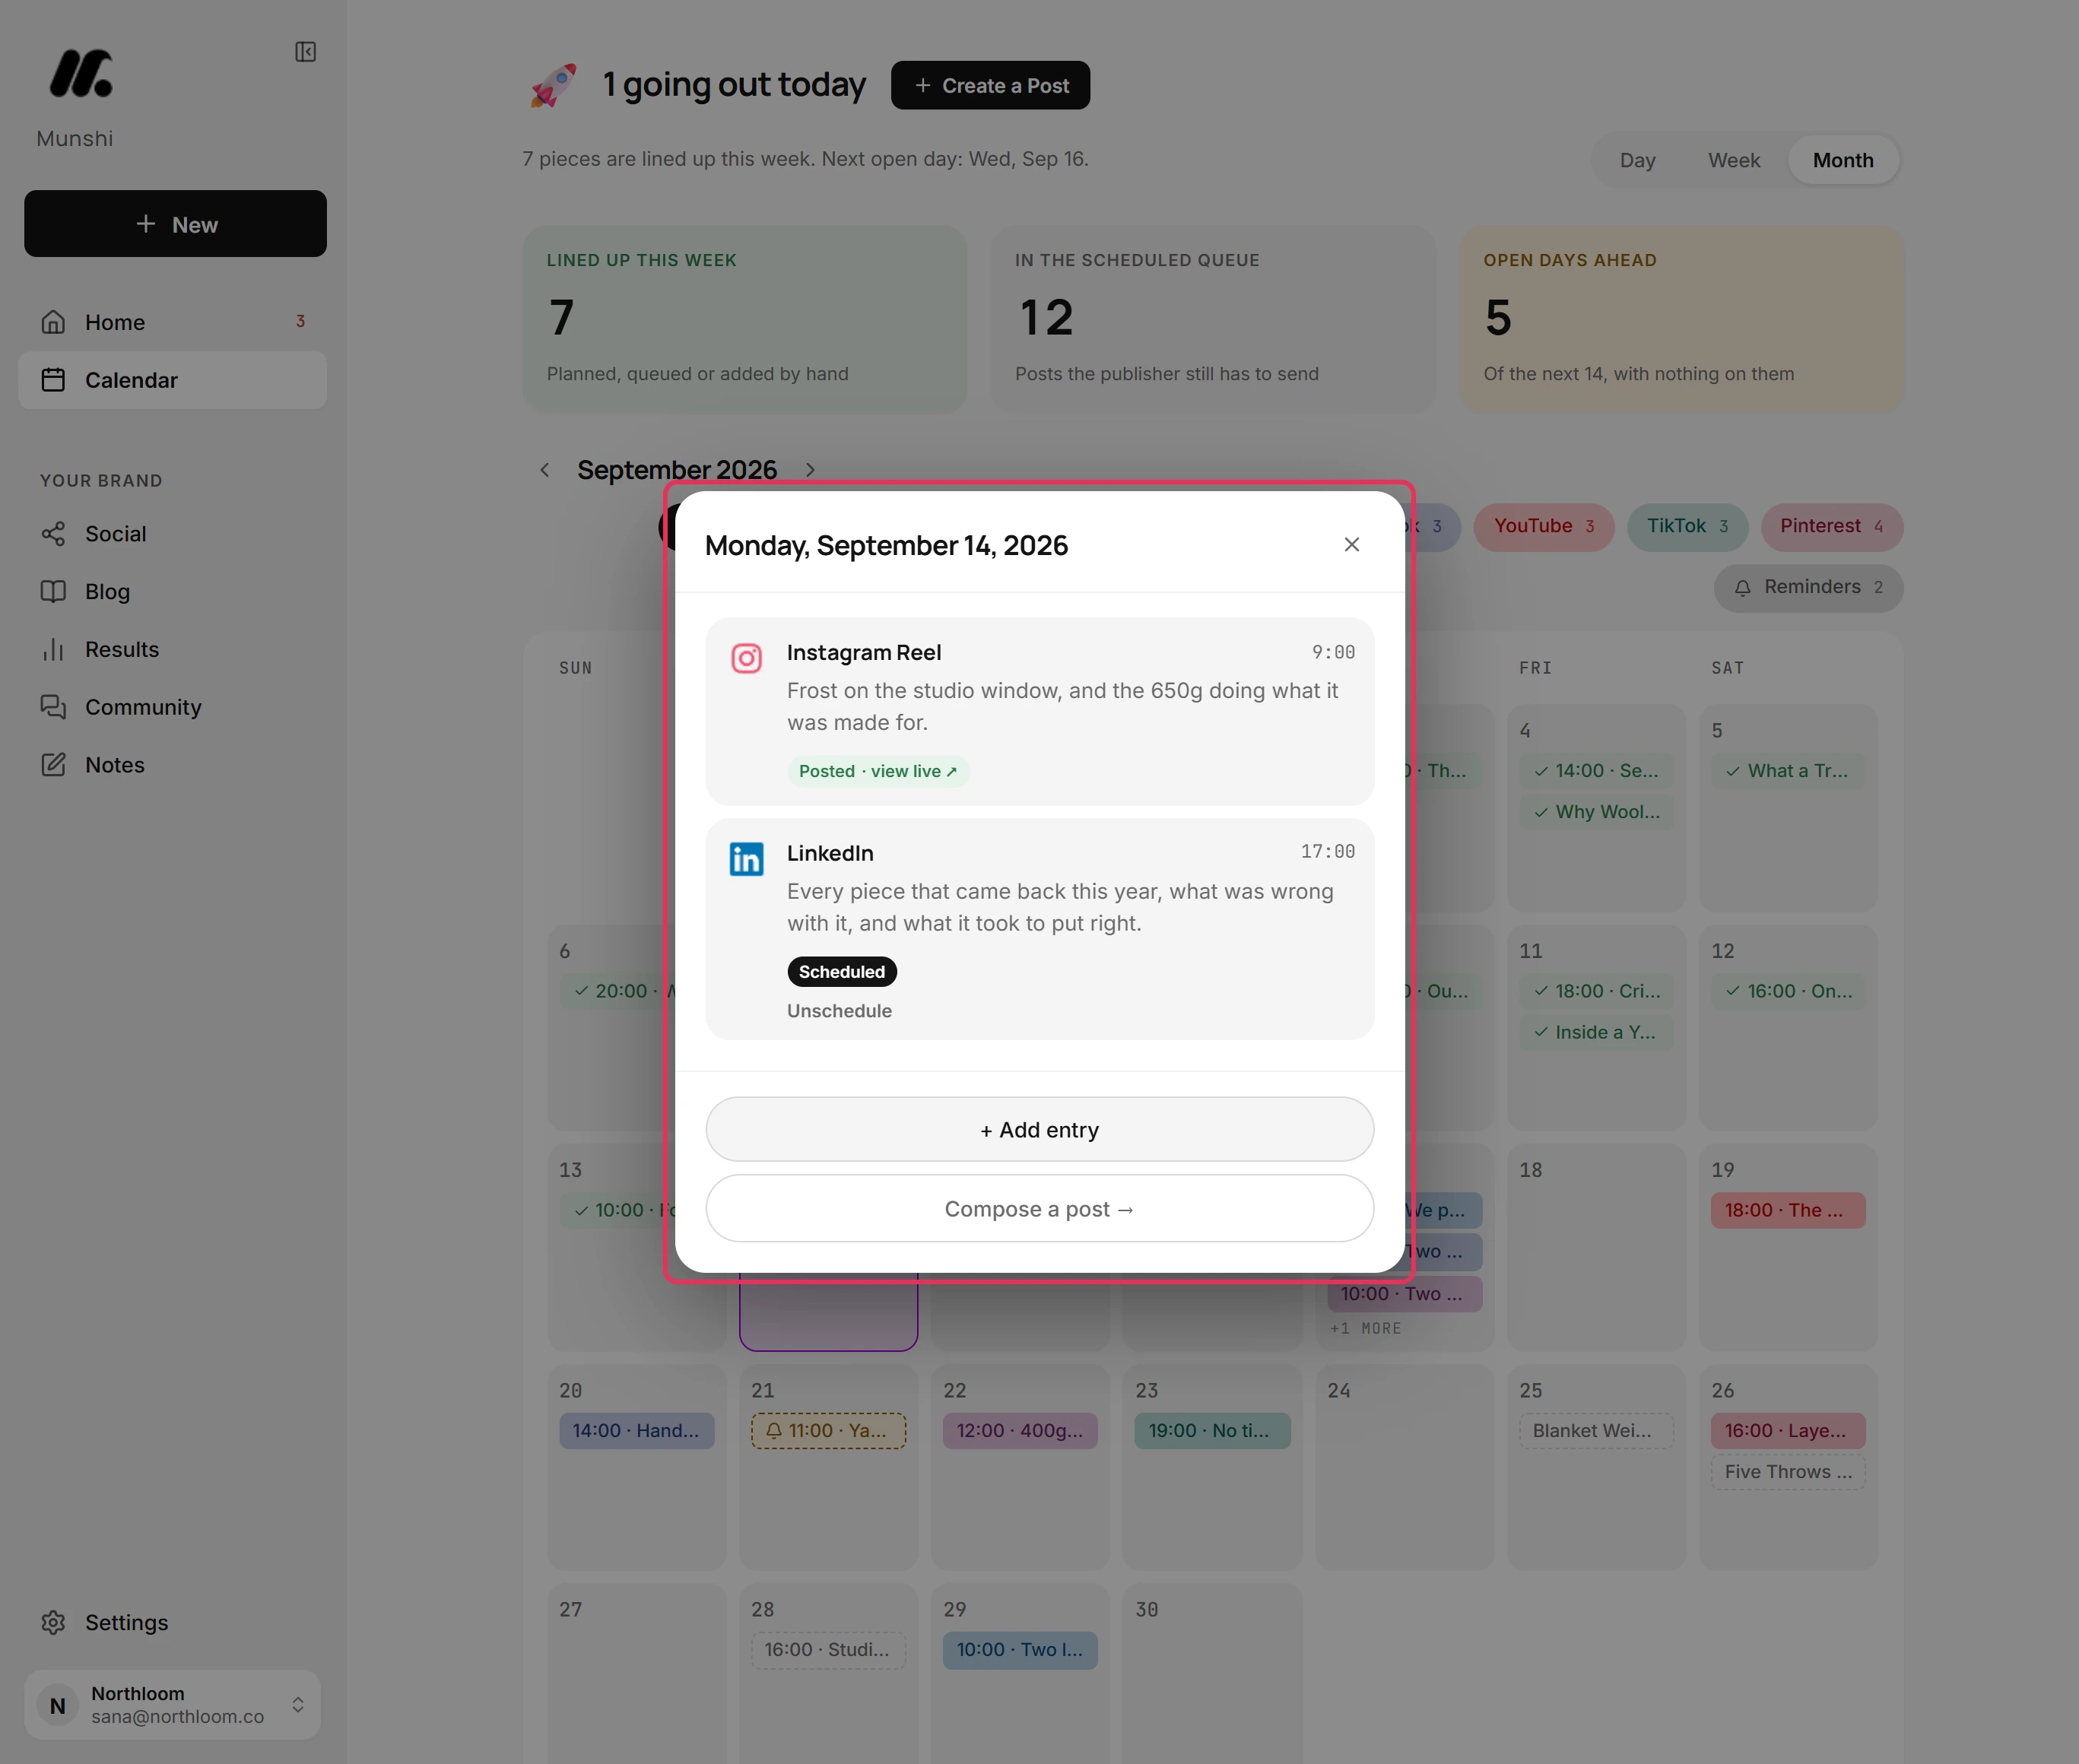
Click any day to open it. The panel lists everything on it. Unschedule takes a scheduled post back to drafts, and Edit post reopens a post made in the composer. A post already out links to where it went live. + Add entry and Compose a post add to the day.
Where you are now
You can read any month, week or day at a glance and open a day to act on it. To put something on a day, add a post or a reminder from its panel.
If something goes wrong
“Today's schedule didn't load”
Click Retry in the bar above the tiles. Part of the calendar's data did not load, so the tiles name what is missing instead of guessing a number.
A post I scheduled is not on the grid
Check the pills first. A channel that is switched off disappears from the grid, and All brings it back. Far from today, the calendar only shows scheduled posts from a window around today. It says so above the grid.
Can I drag a post to another day?
No. Open the day, then use Edit post to change the time in the composer. Or use Unschedule to take the post back to drafts.
“Not on the grid” under the calendar
Click Fix now to open the screen where you can give these entries a date. They have no date to sit on, such as a blog draft without a publish date or a failed post with no send time.
Try it on your own brand this week.
Munshi Social, the AI content marketing engine for small teams, plans, writes, publishes, and tracks your blog and socials. The guide above shows the real app, not a mock-up.
Start your workspace