How to copy or download an article for a platform Munshi does not connect to
Use Copy / Export to copy an article or download it as a Markdown file. Paste it into your platform, then mark it published in Munshi once it is live.
Before you start
- An article whose Section-by-Section Drafting step is done. The copy menu appears once there is article text to copy.
- To mark it published by hand, the article also needs to be approved.
-
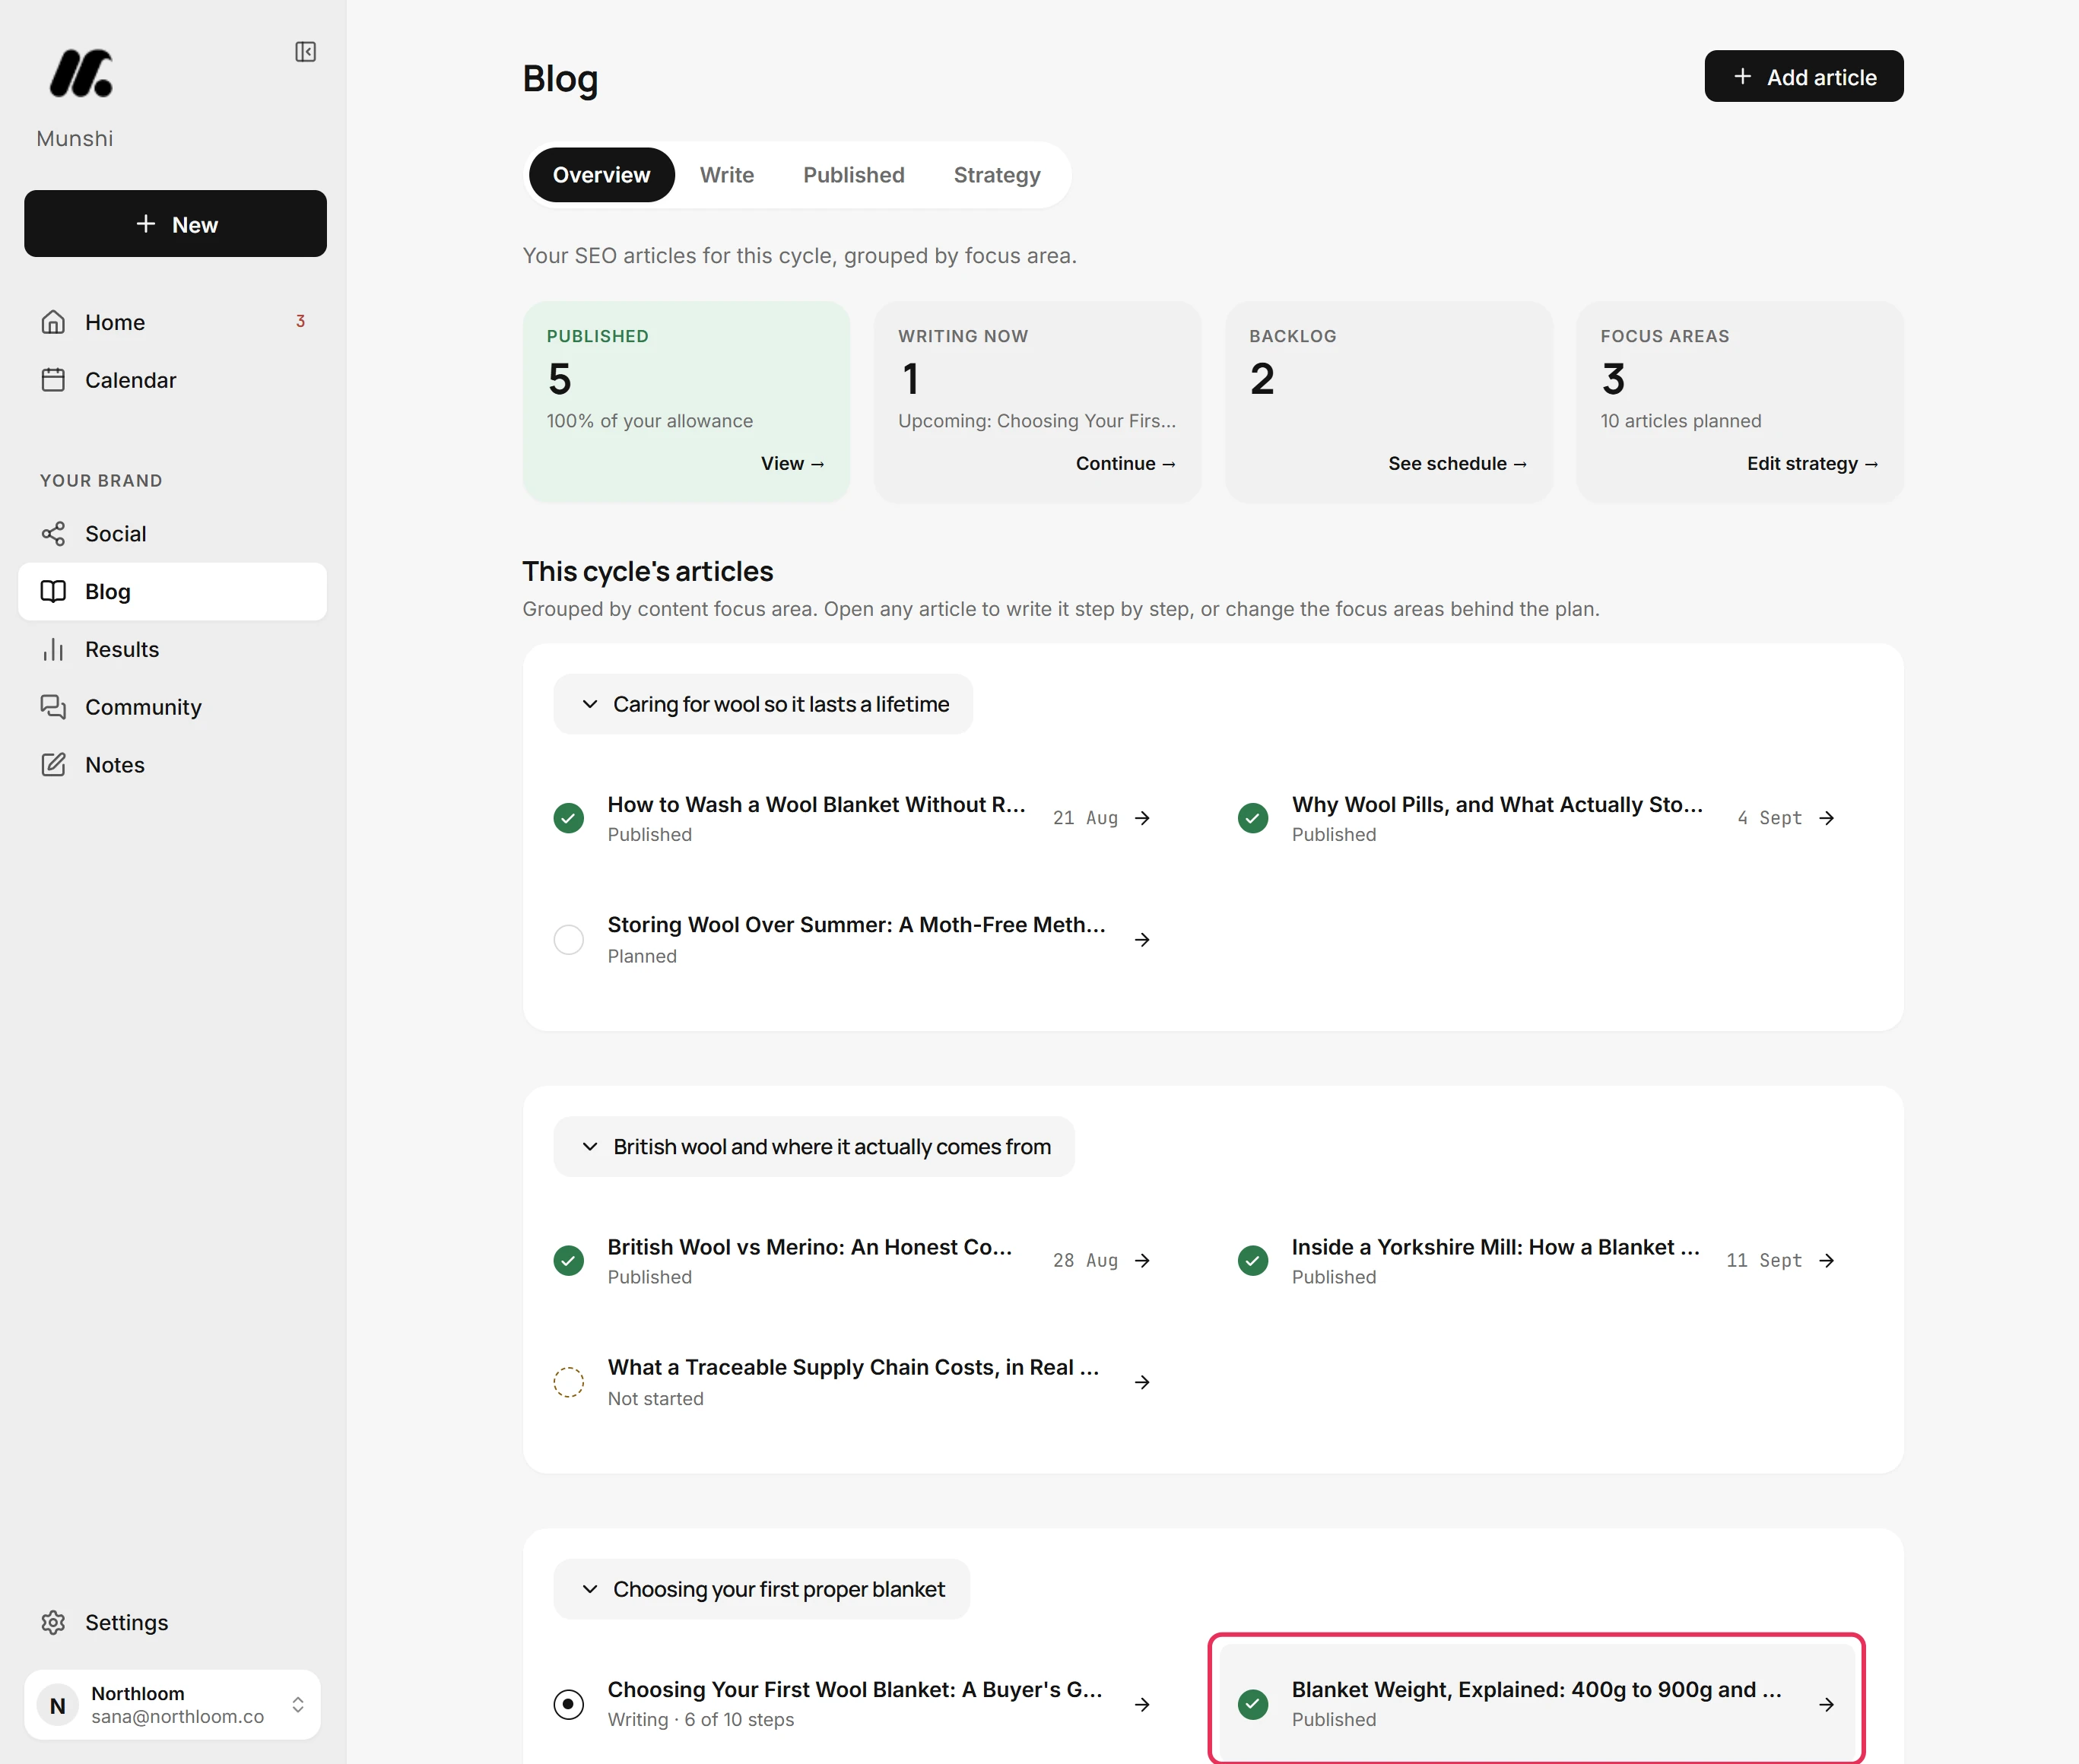
On the Blog Overview, click the article you want to take elsewhere. A finished article opens on Read. Its status and word count are at the top.
-
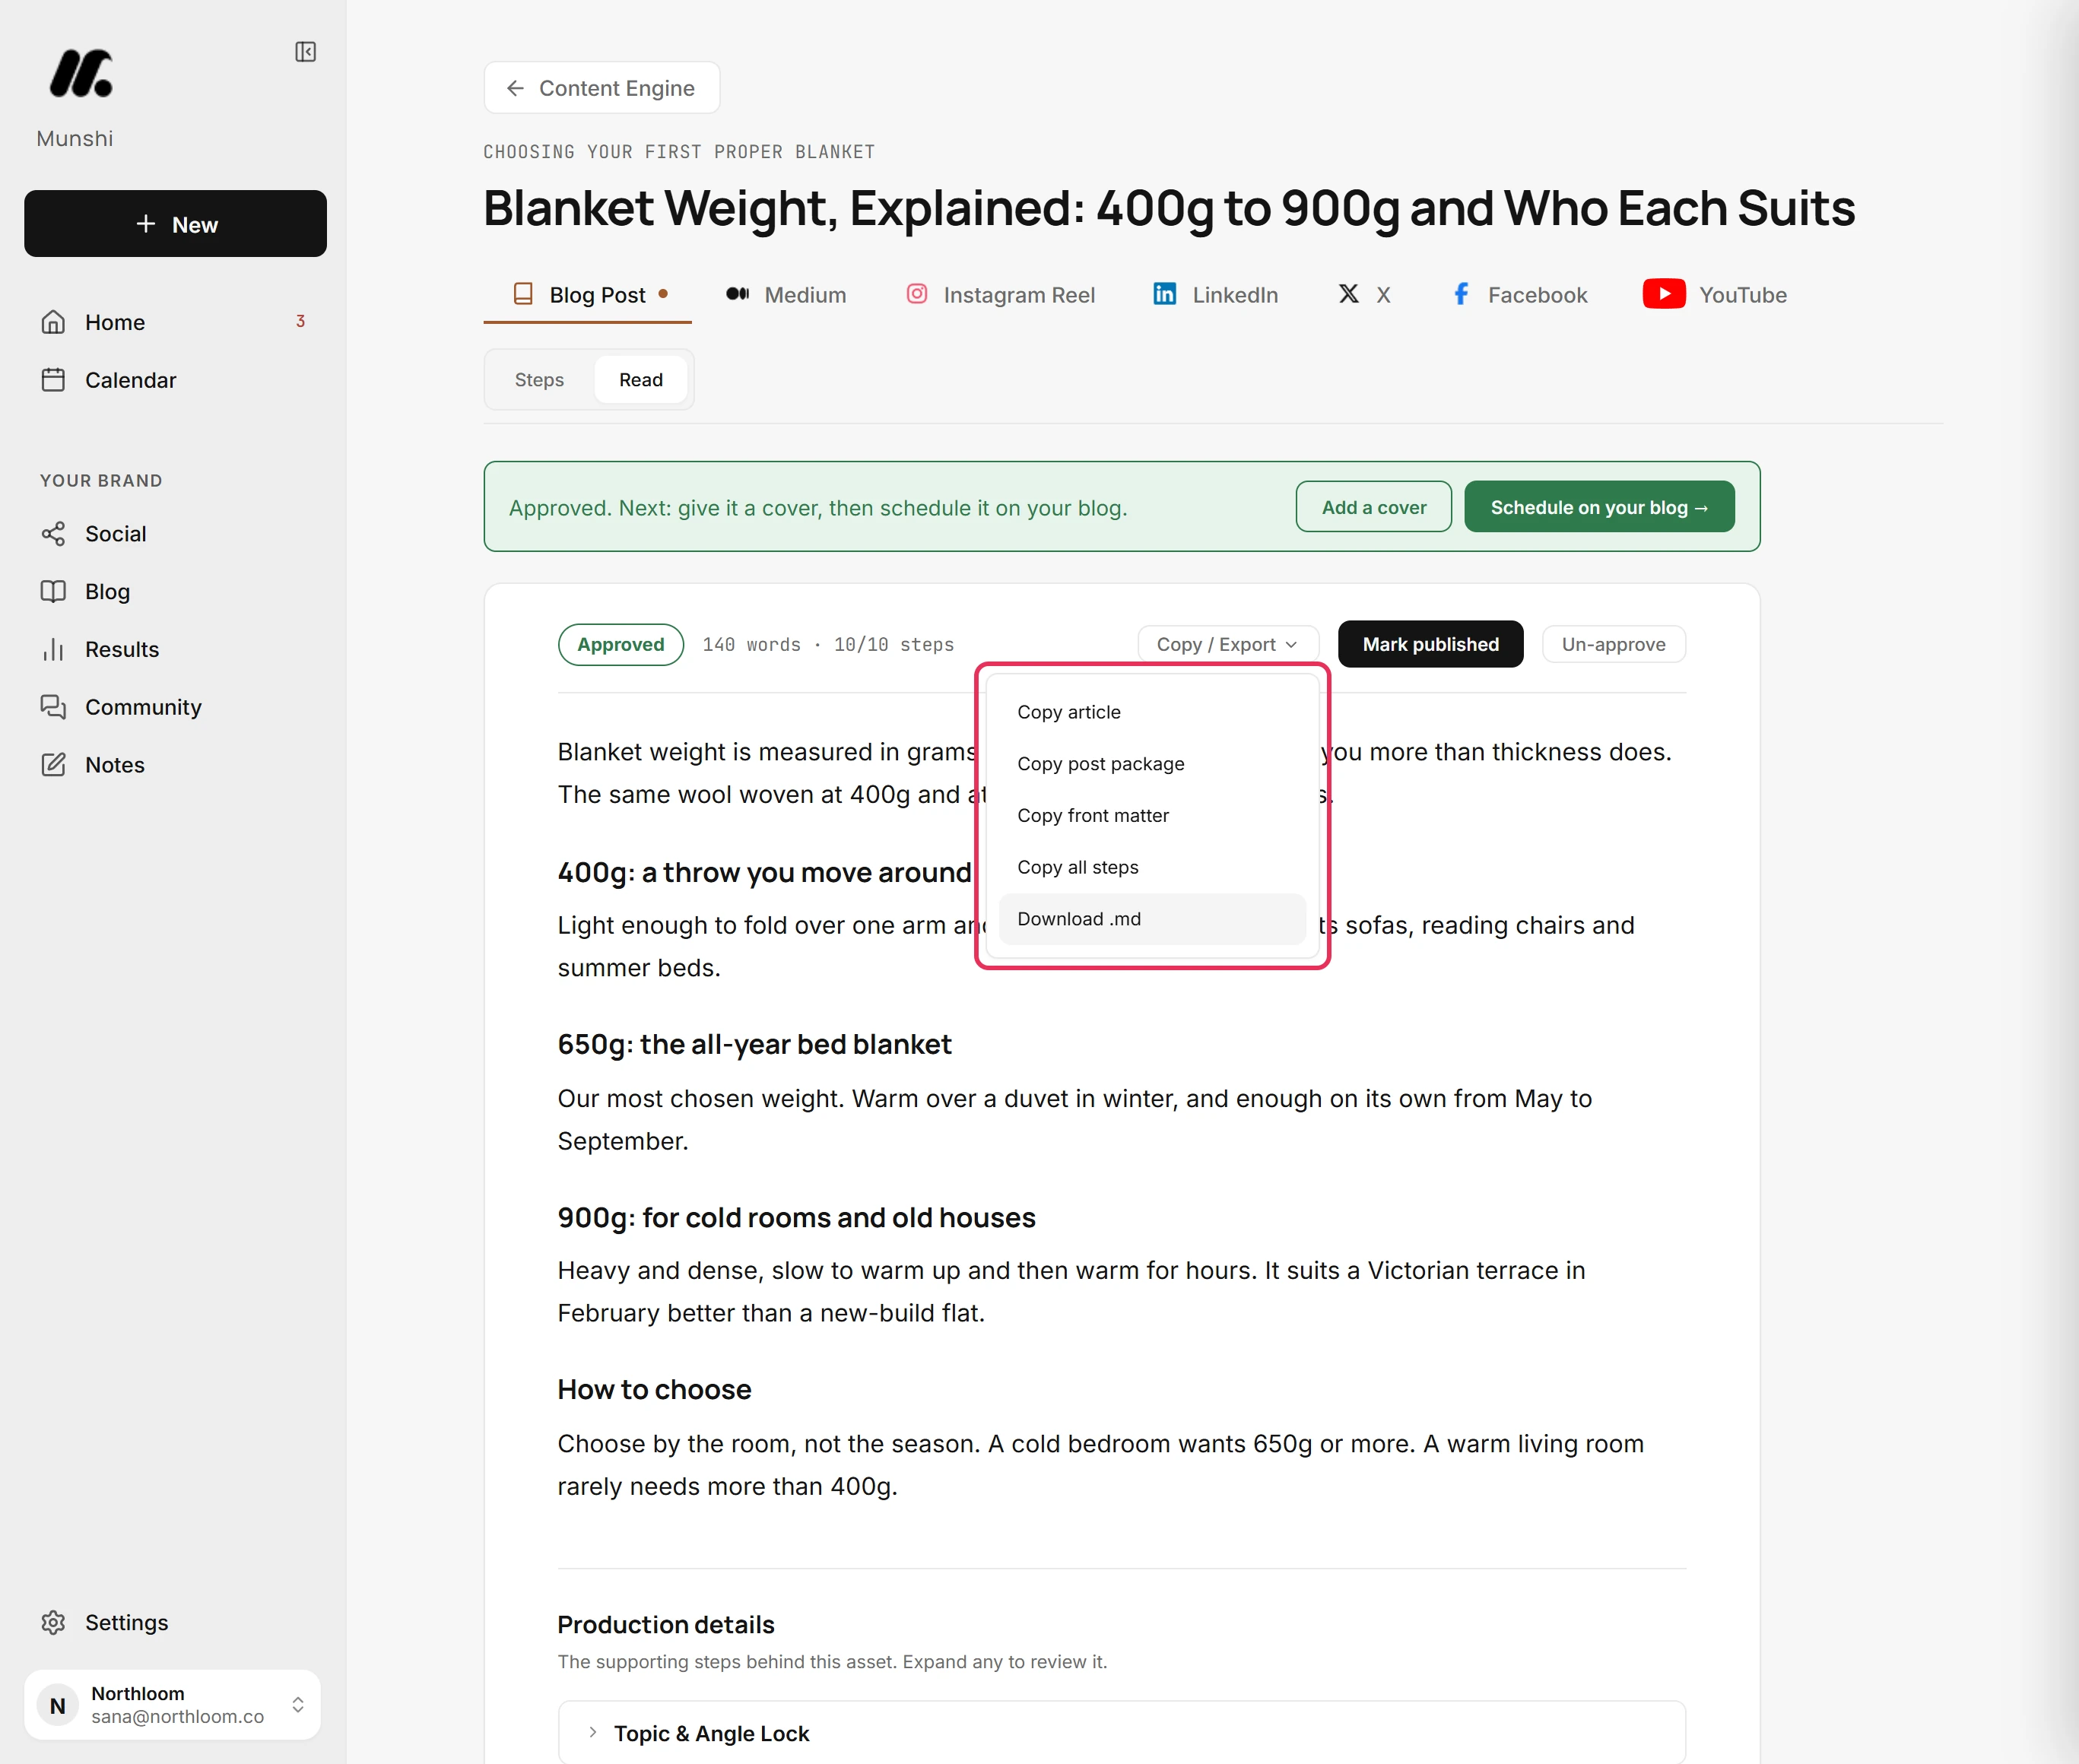
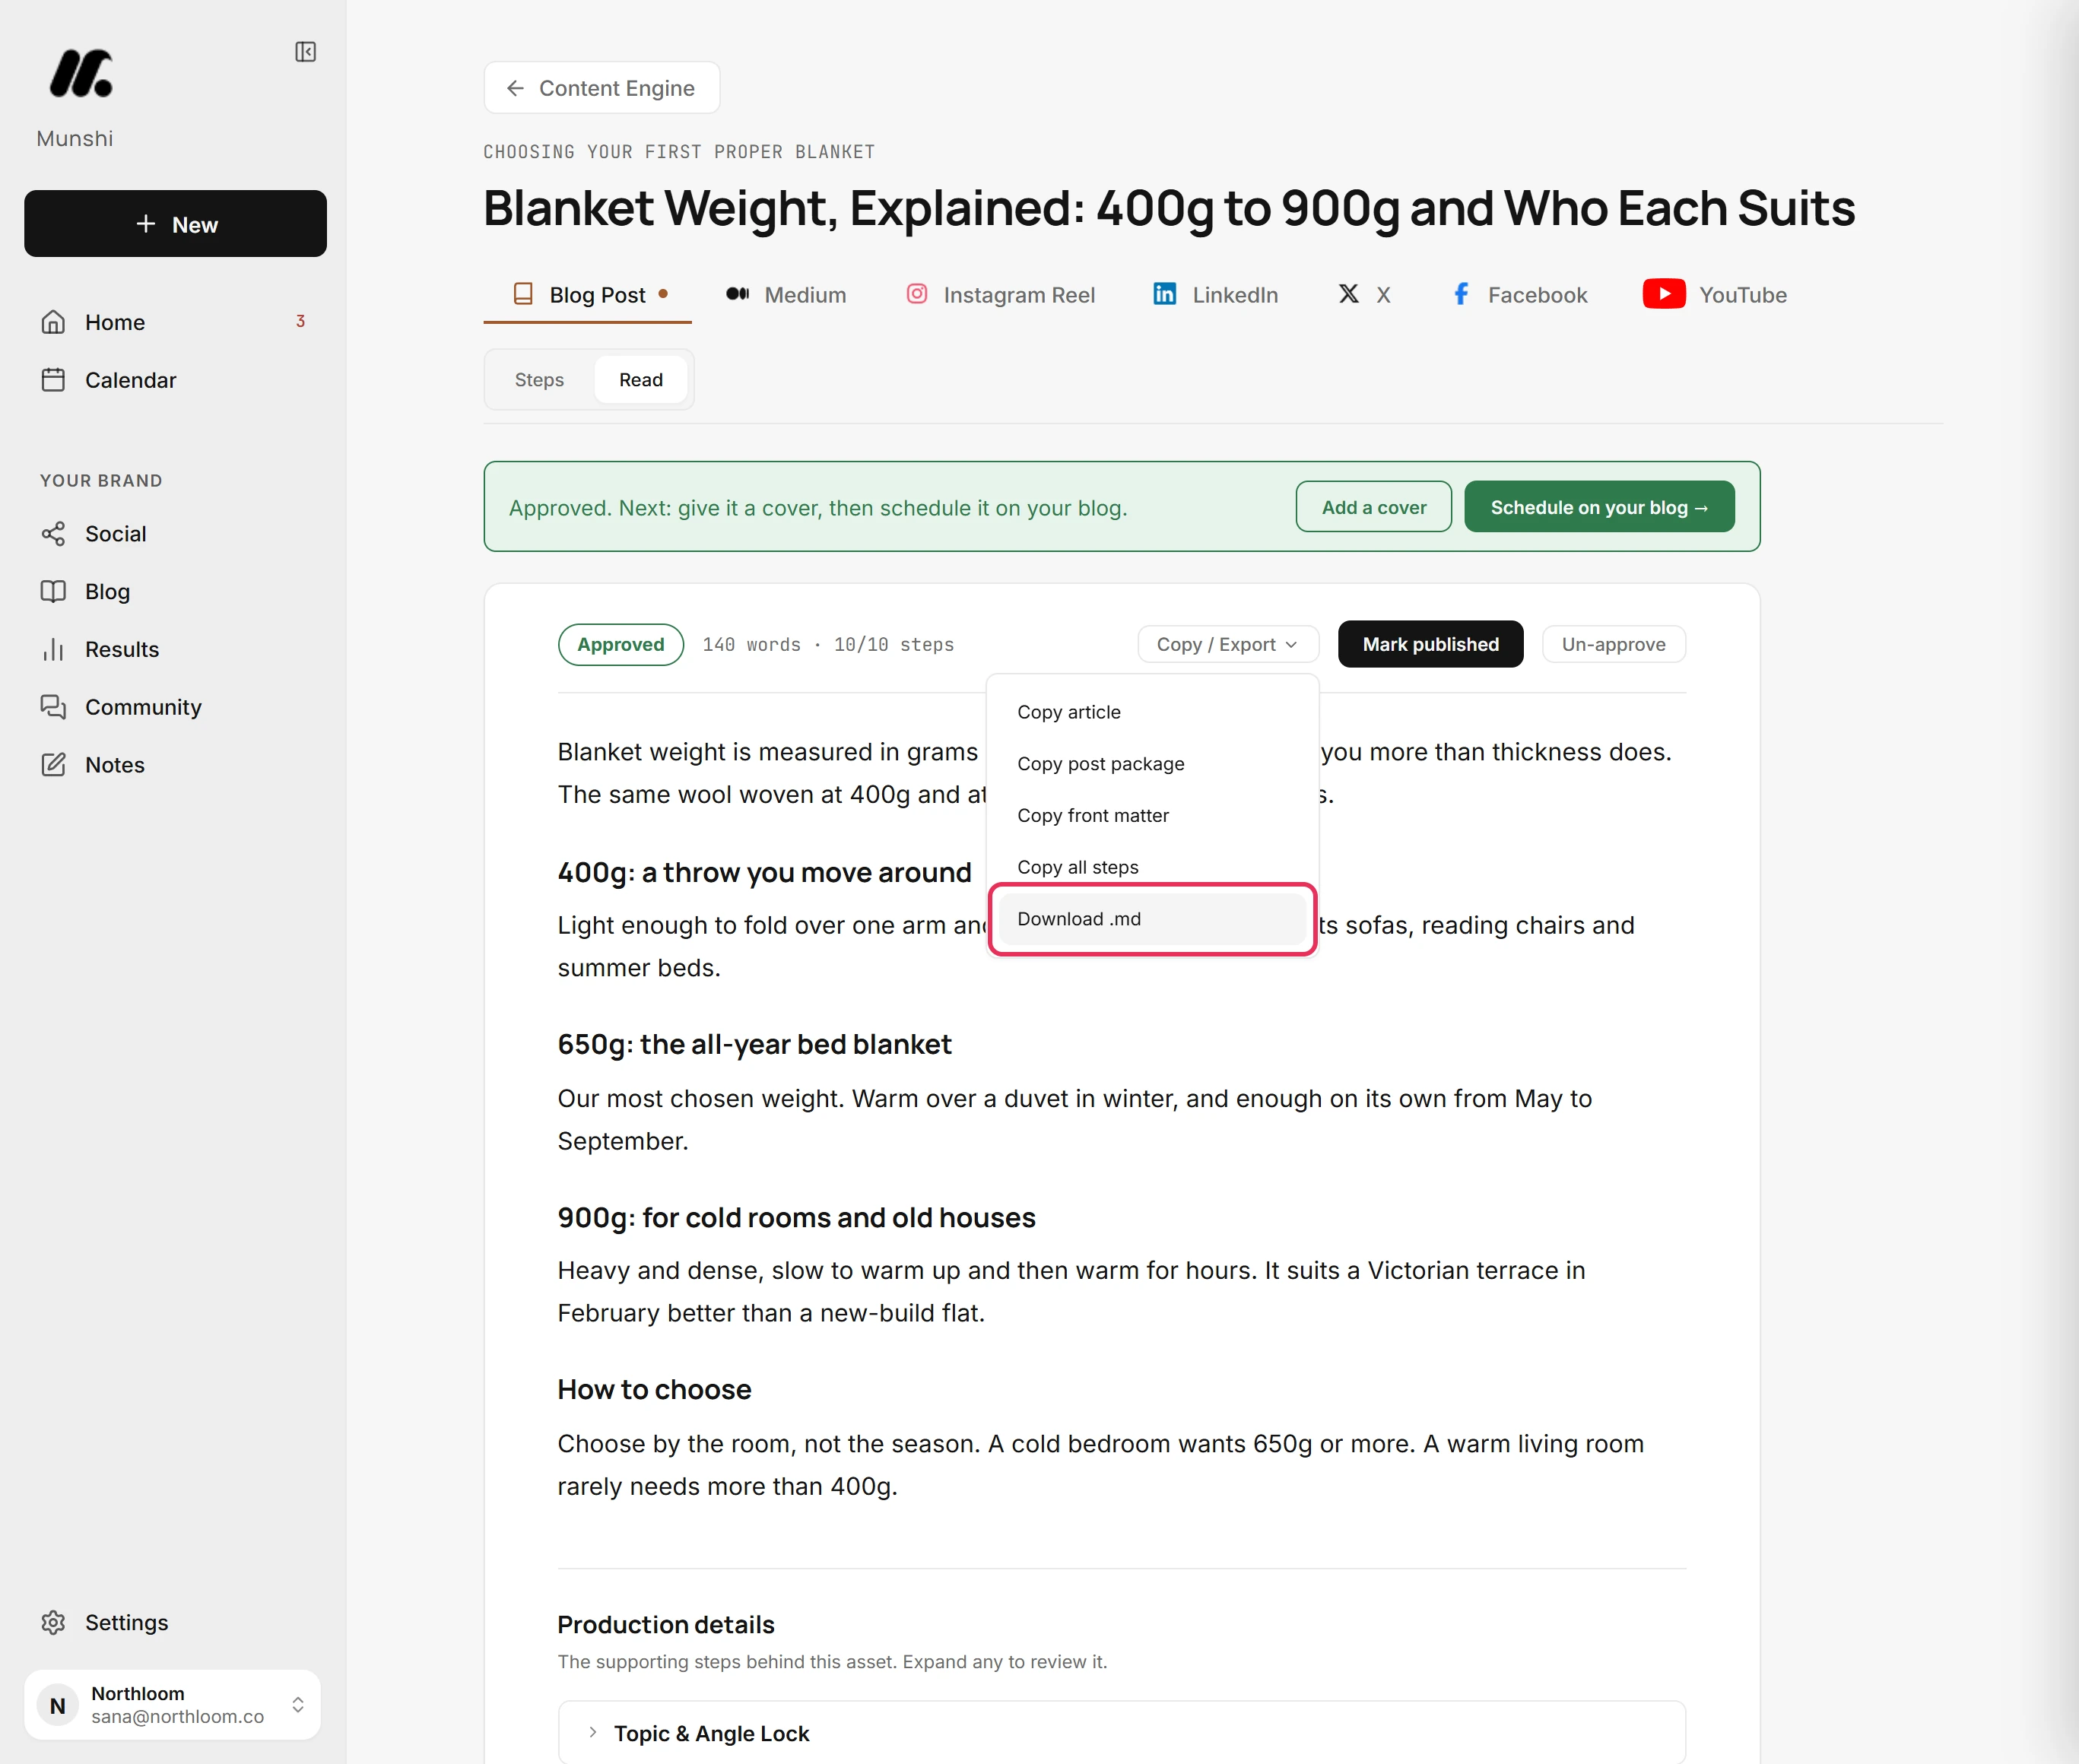
Click Copy / Export, on the same line as the article's status. Every way to take the article out is in this one menu.
-
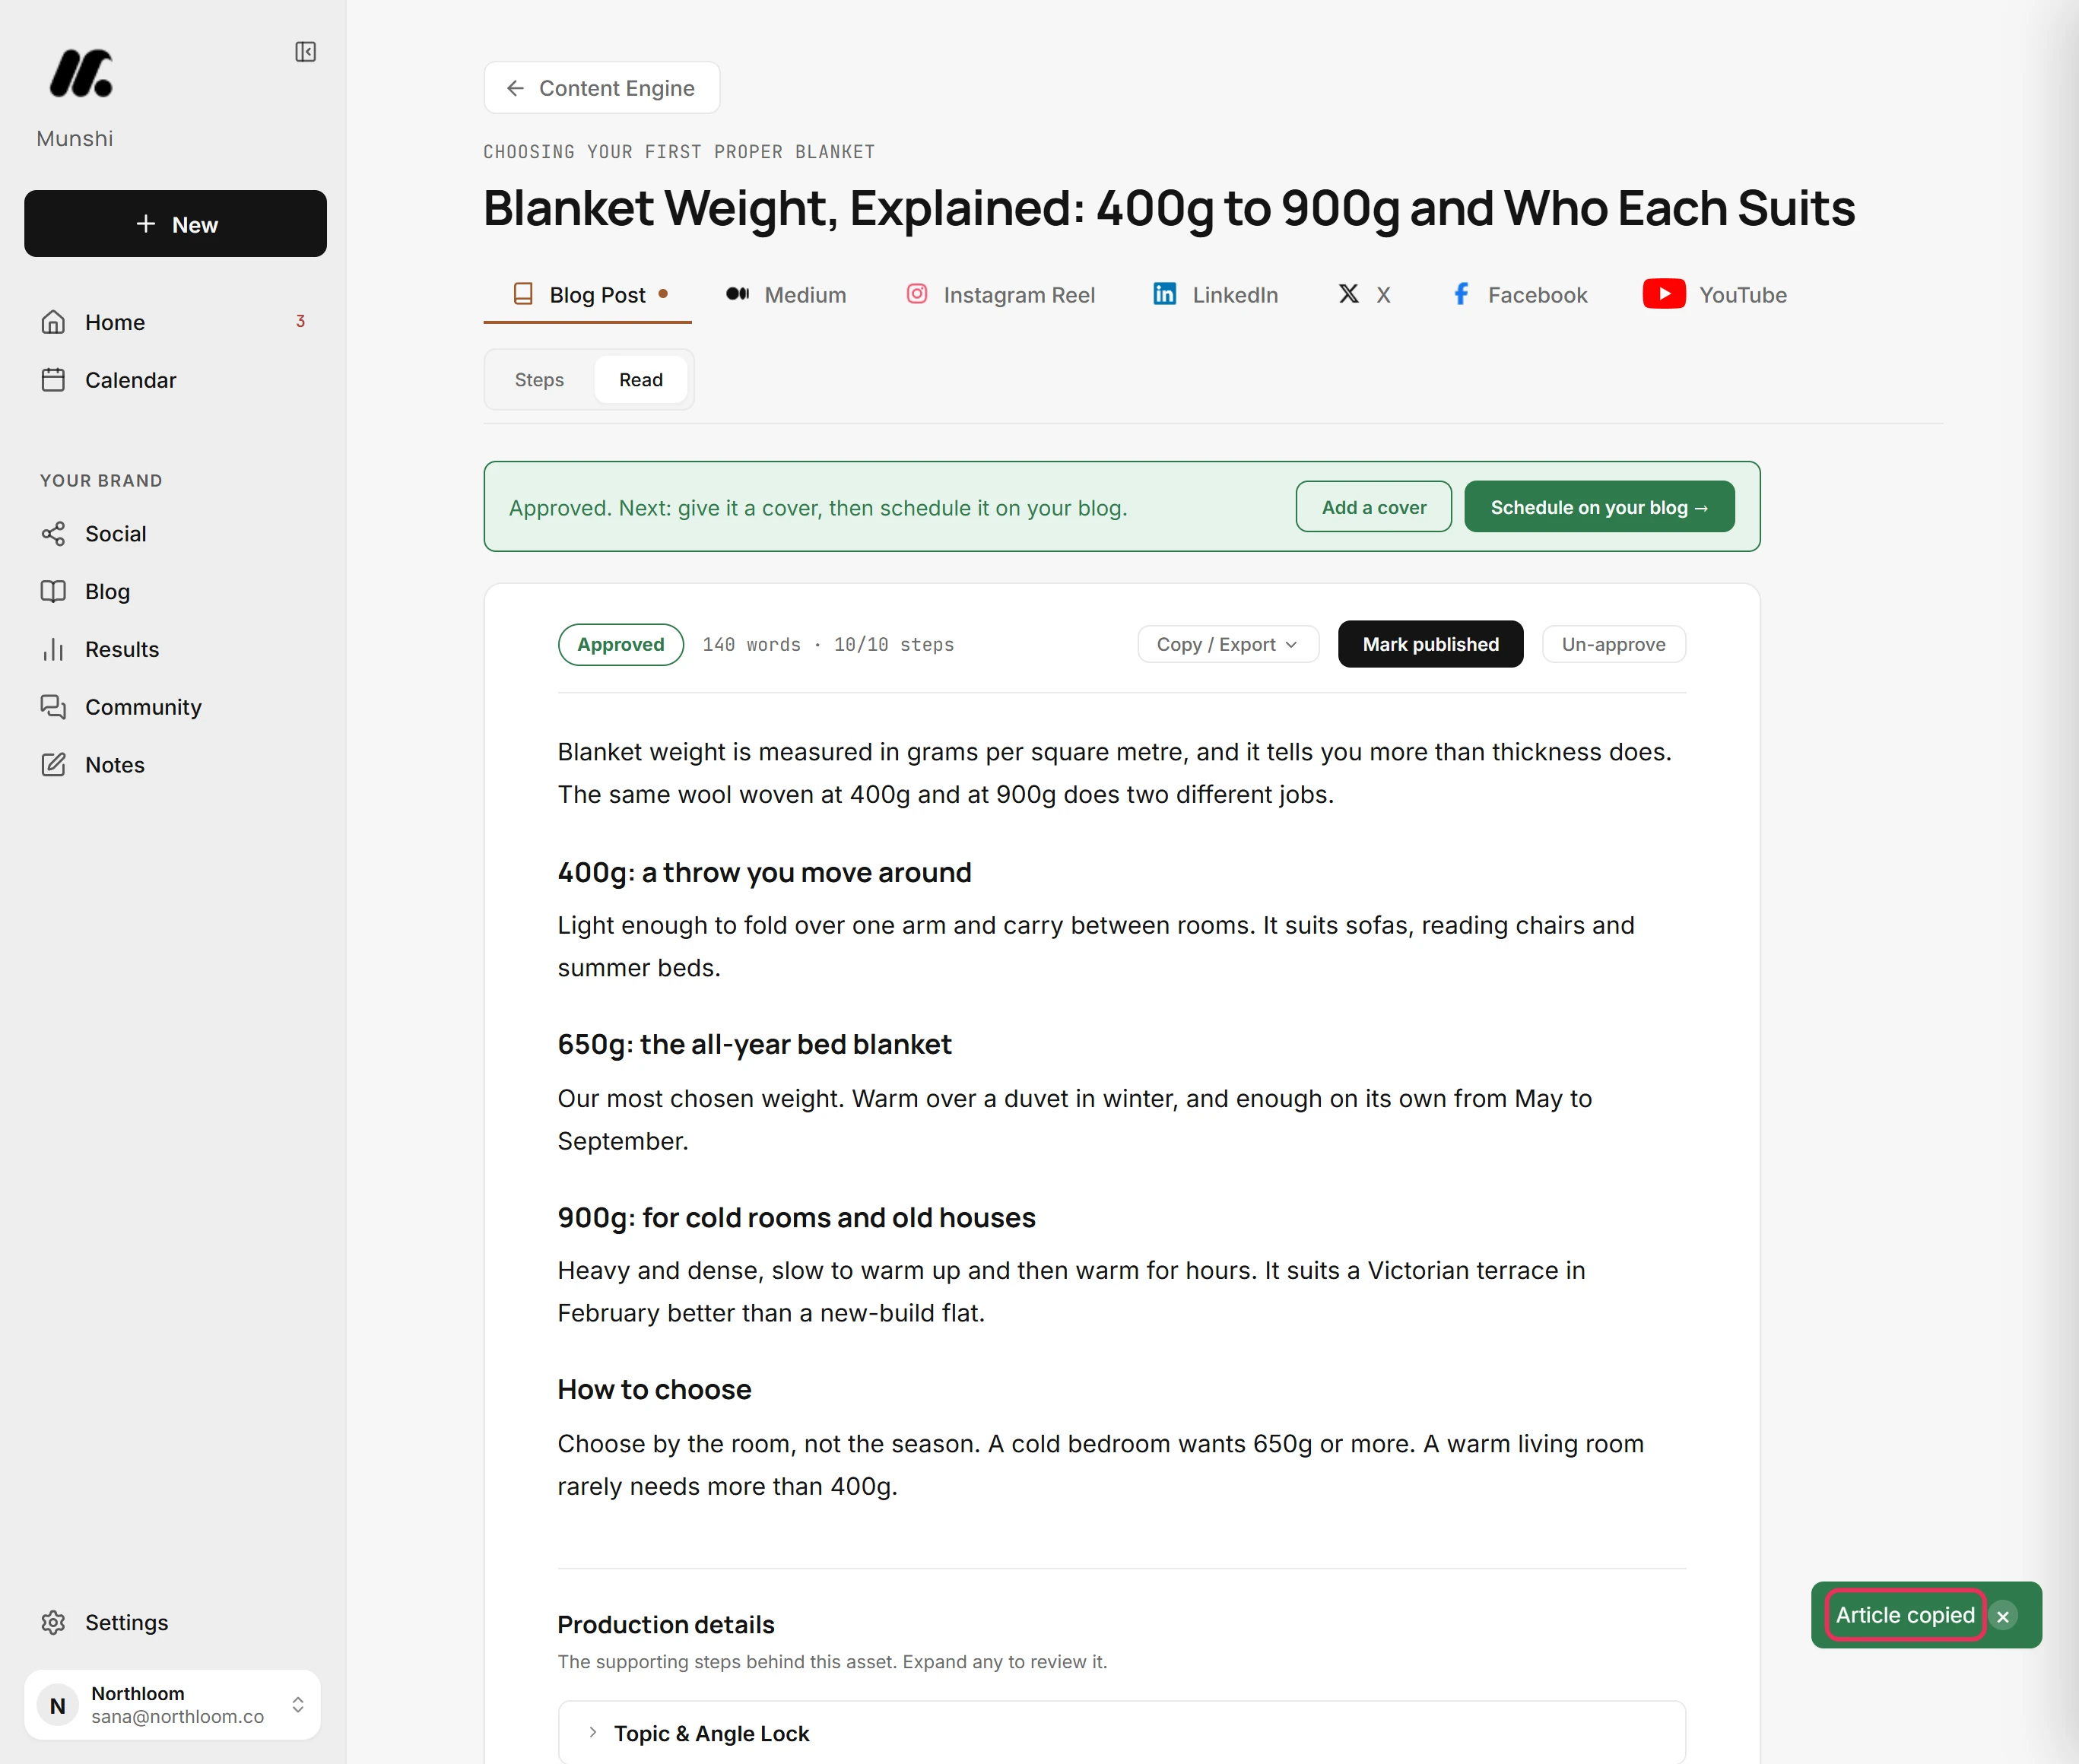
Click Copy article, then paste into your platform's editor. Munshi shows Article copied. The text comes as Markdown, a plain text format that keeps its headings and lists.
-
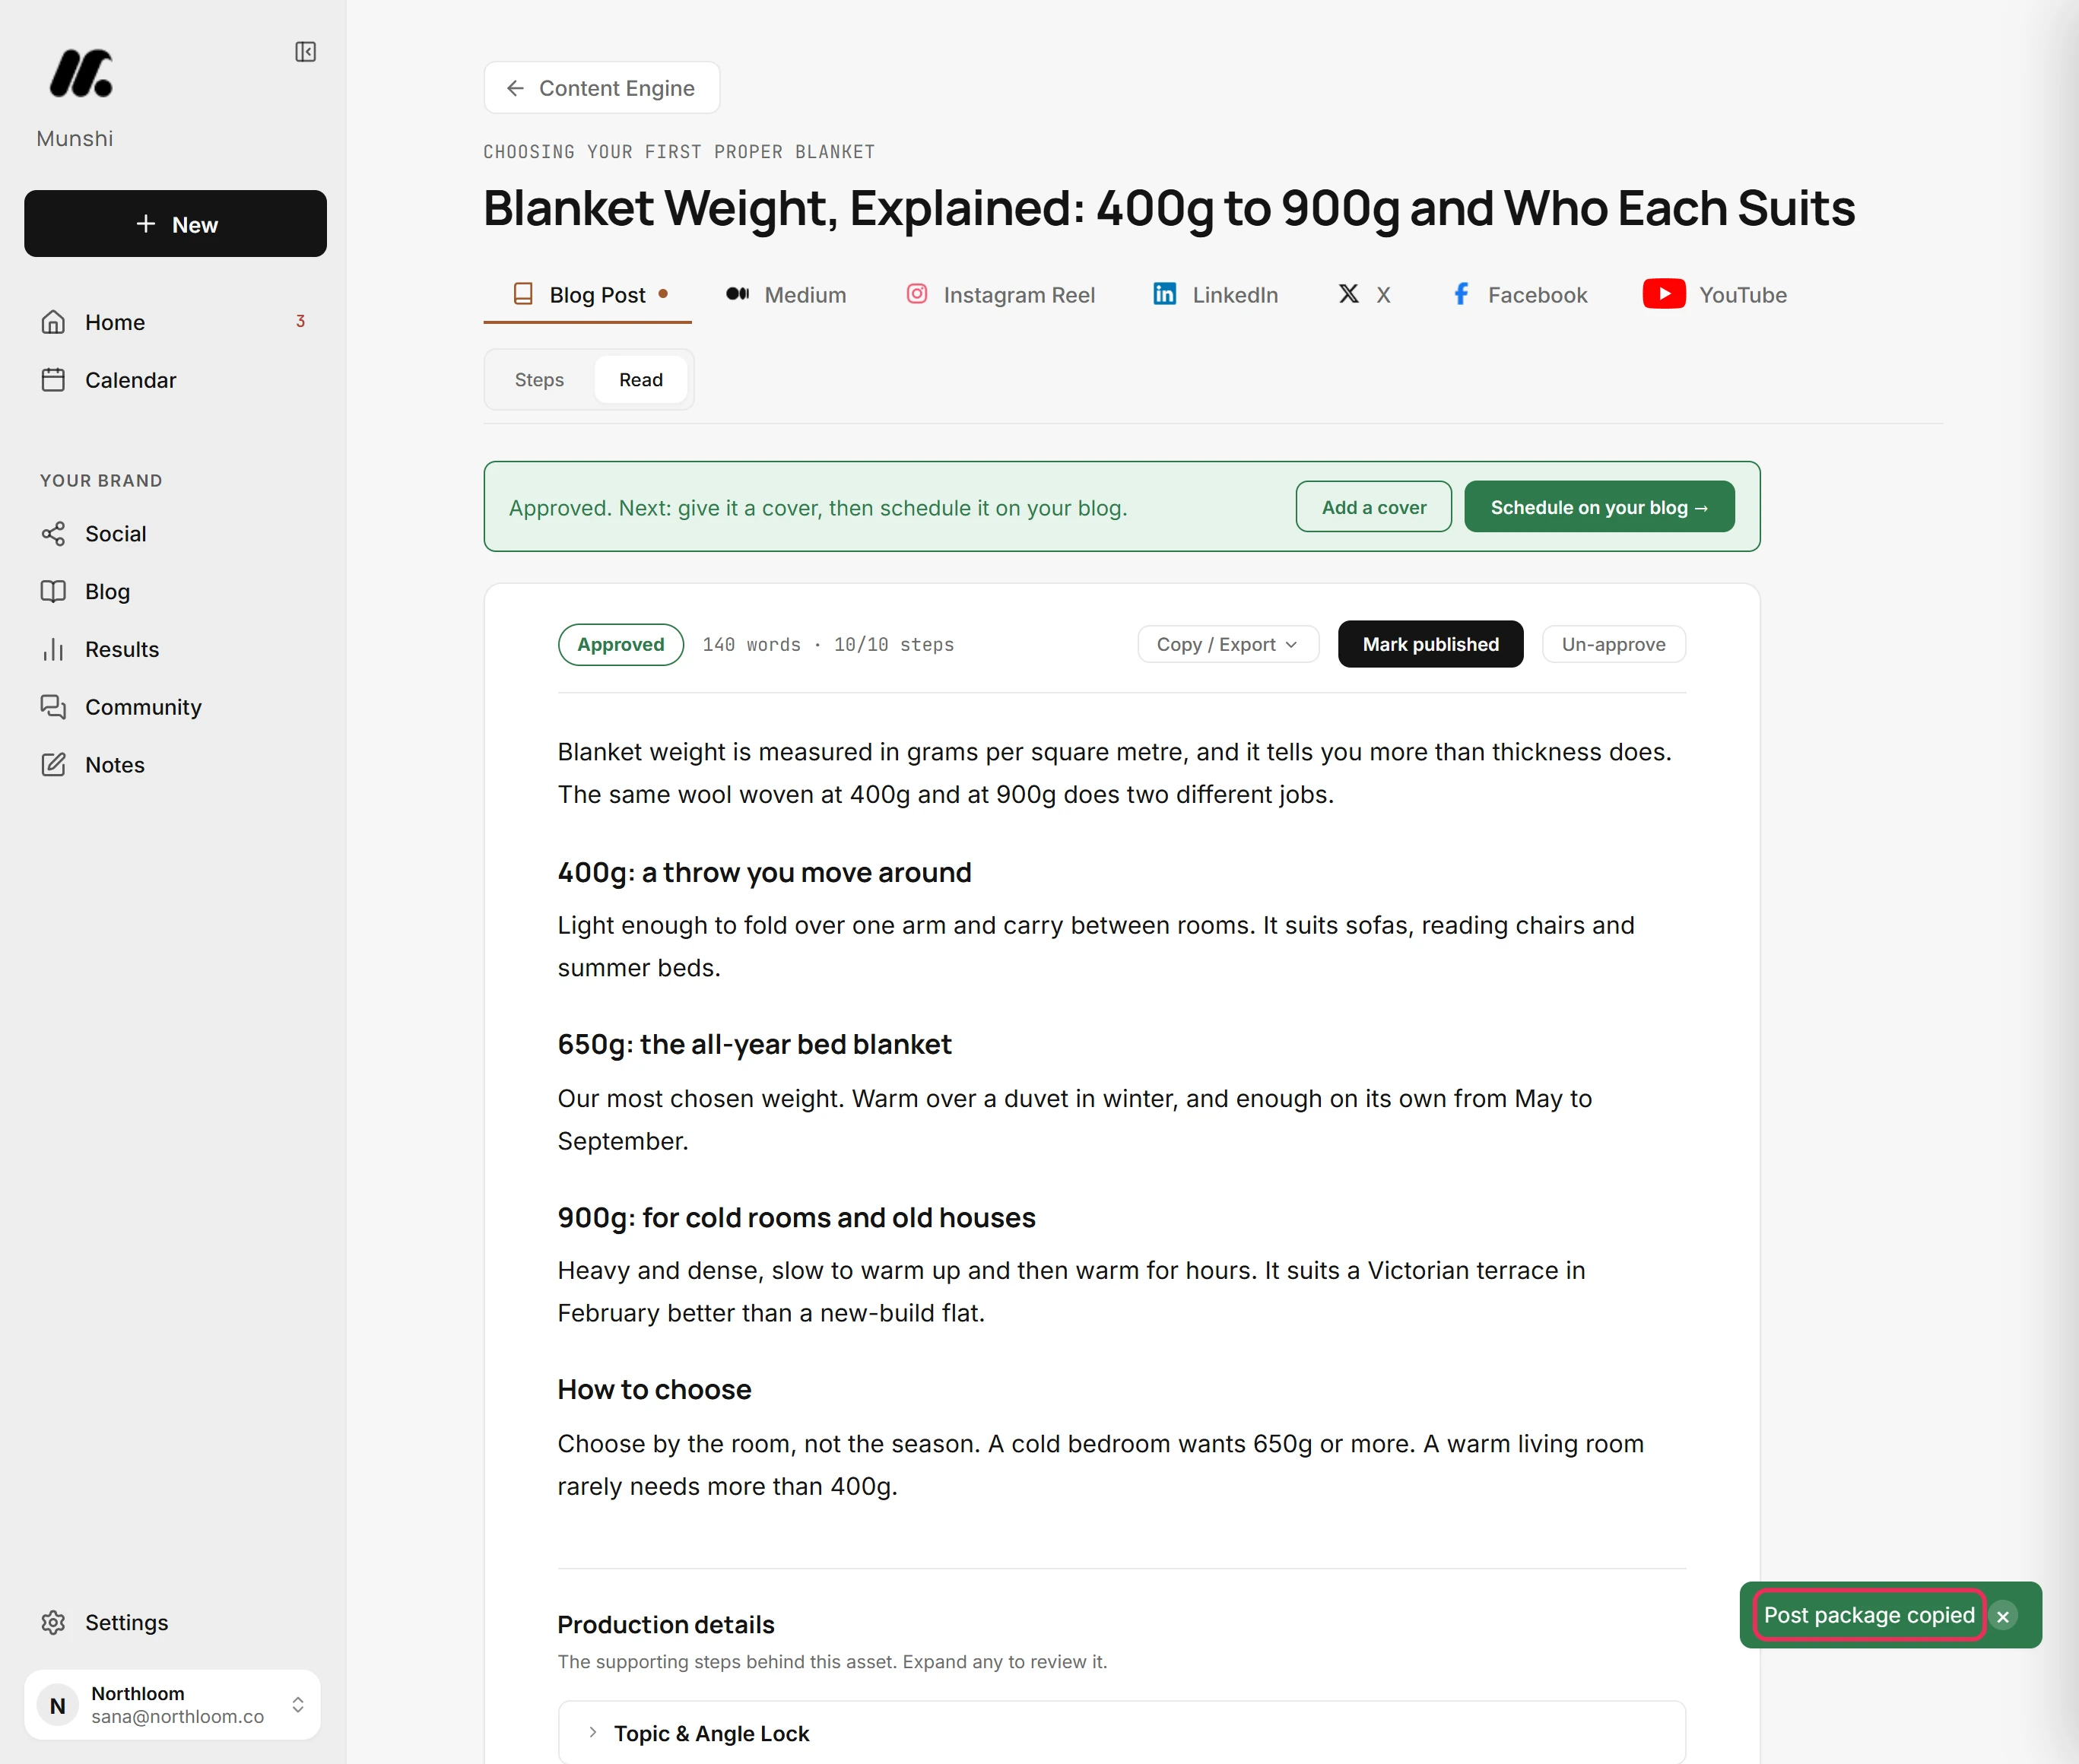
Copy post package copies the article with its meta and schema step and its internal links step. Each sits under its own heading, as far as those steps are done. Copy front matter puts a front matter block above the article instead, for platforms that read one. The block holds the title, plus the description and slug once the meta and schema step is done.
-
Click Download .md to save the article as a Markdown file named after its title. Any platform that imports Markdown can take it.
-
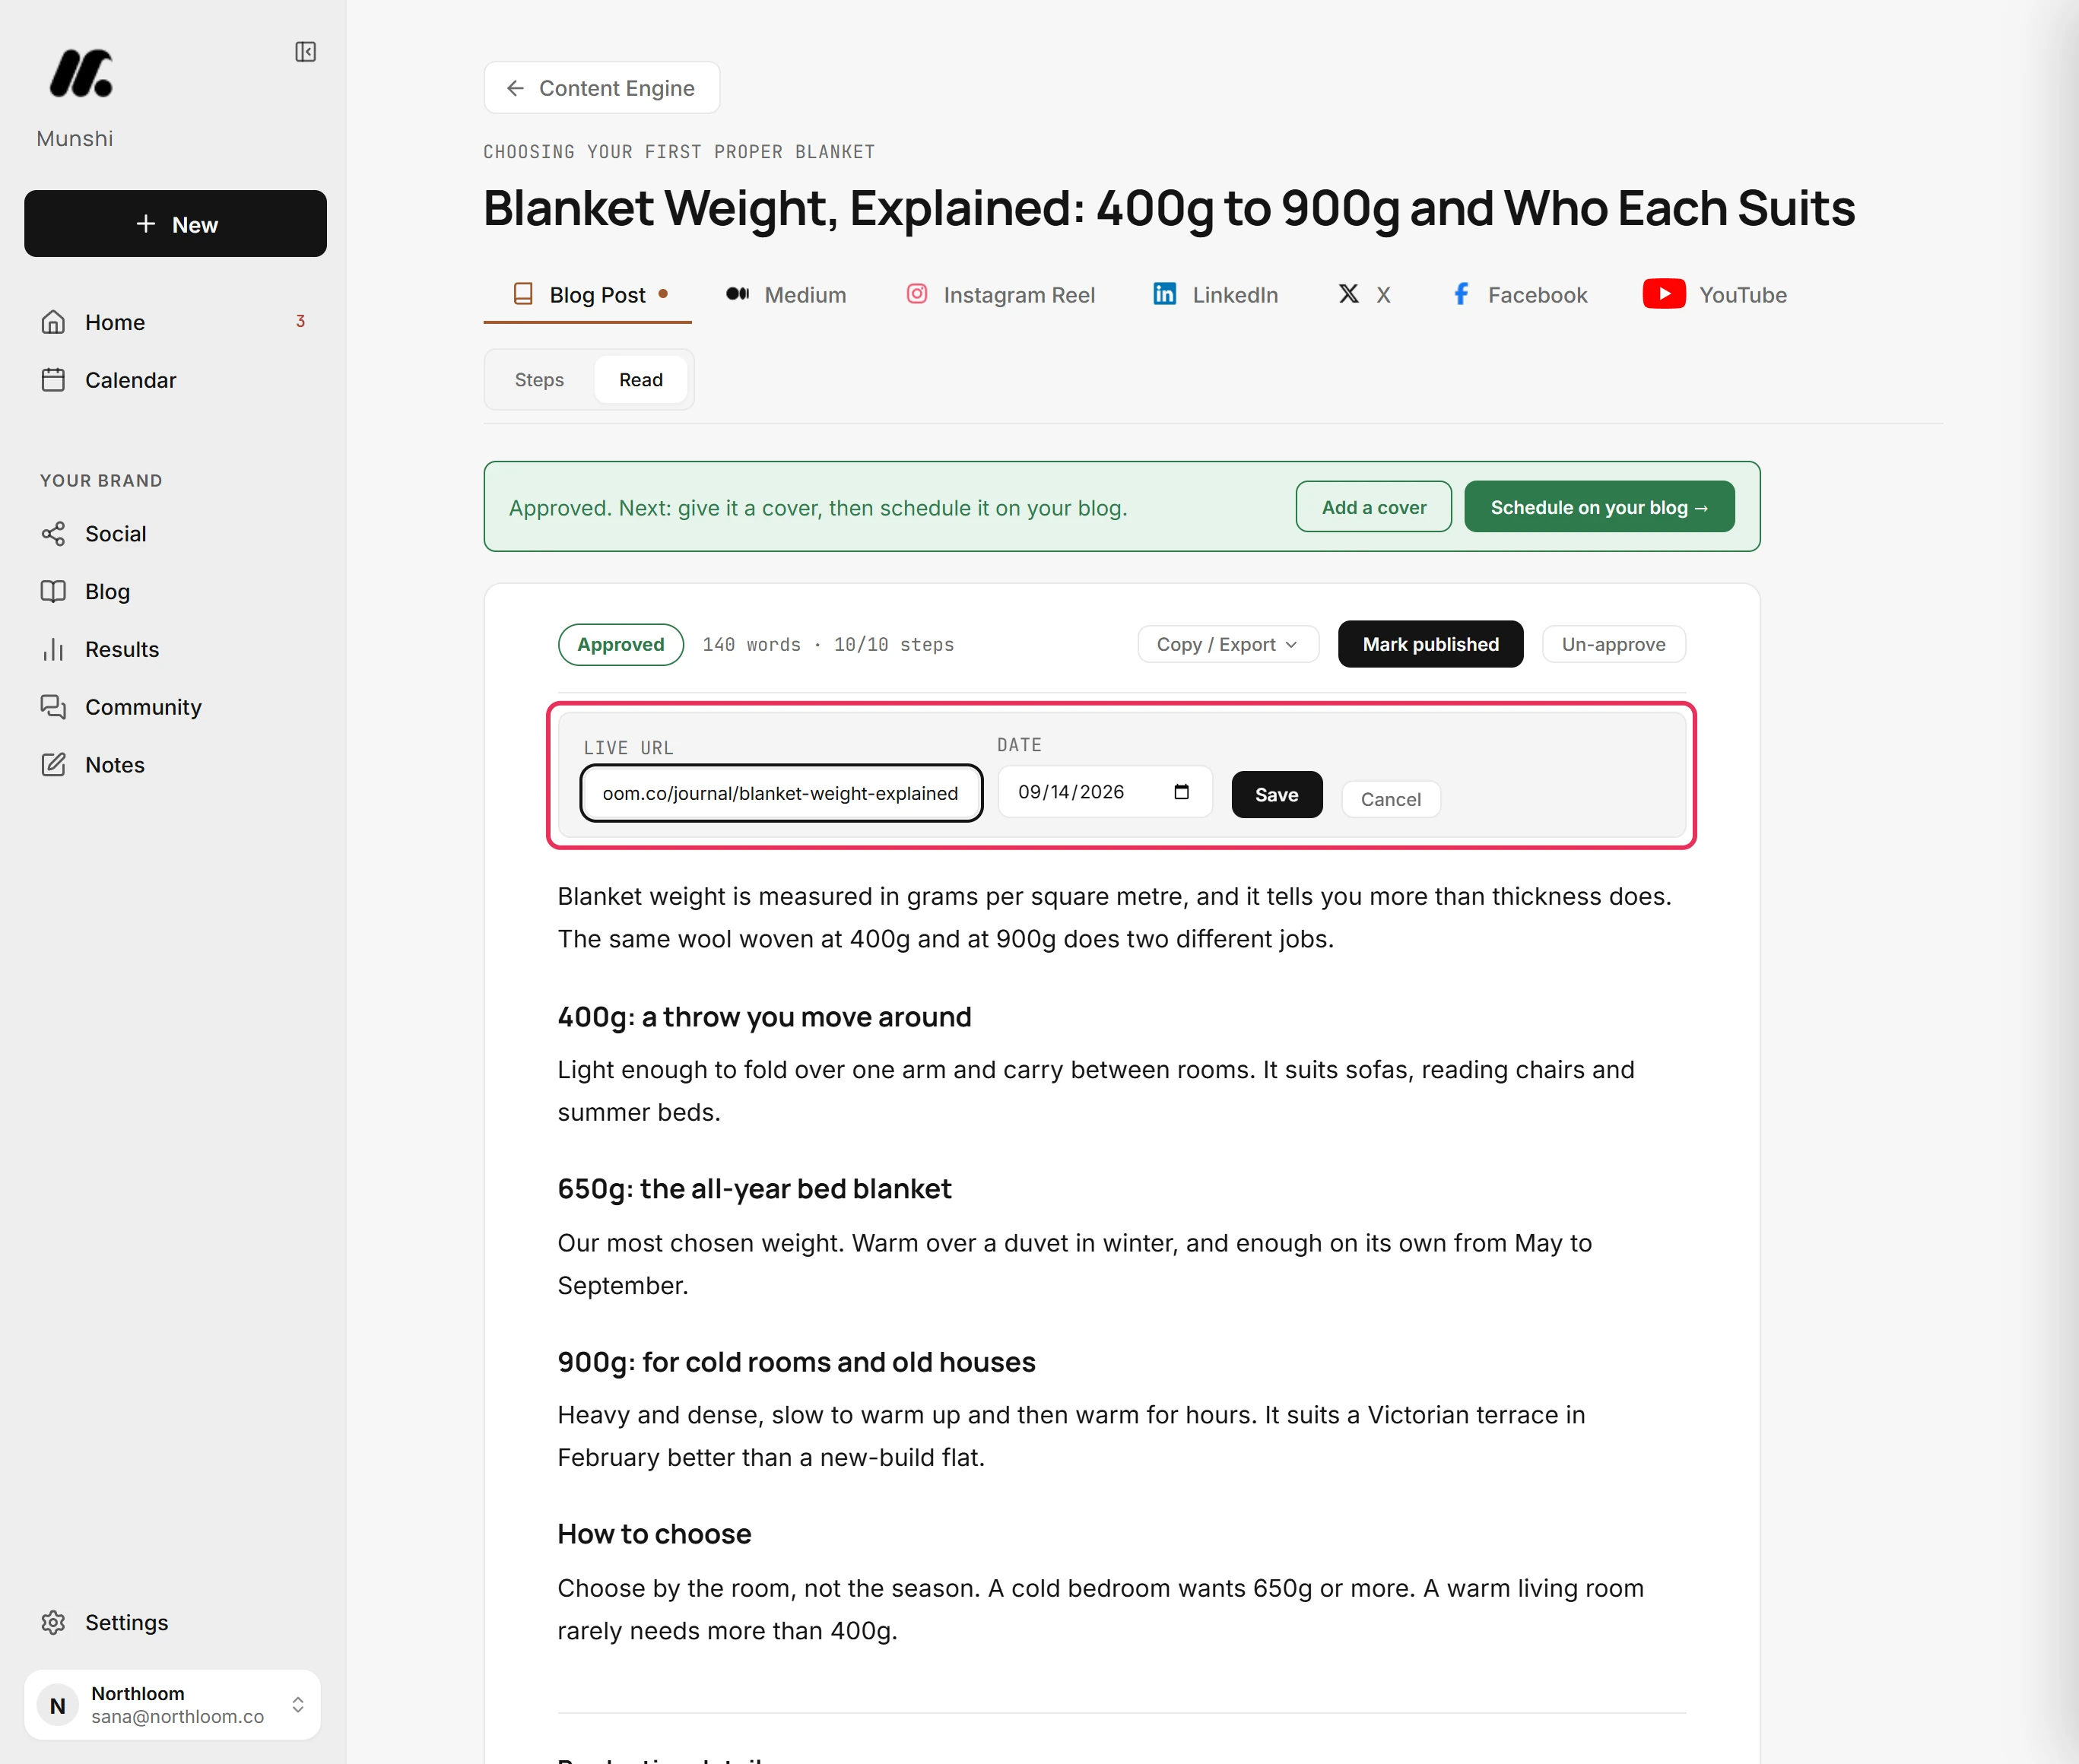
After the article goes live on your platform, click Mark published. Paste the live address into Live URL and check the Date. Then click Save.
-
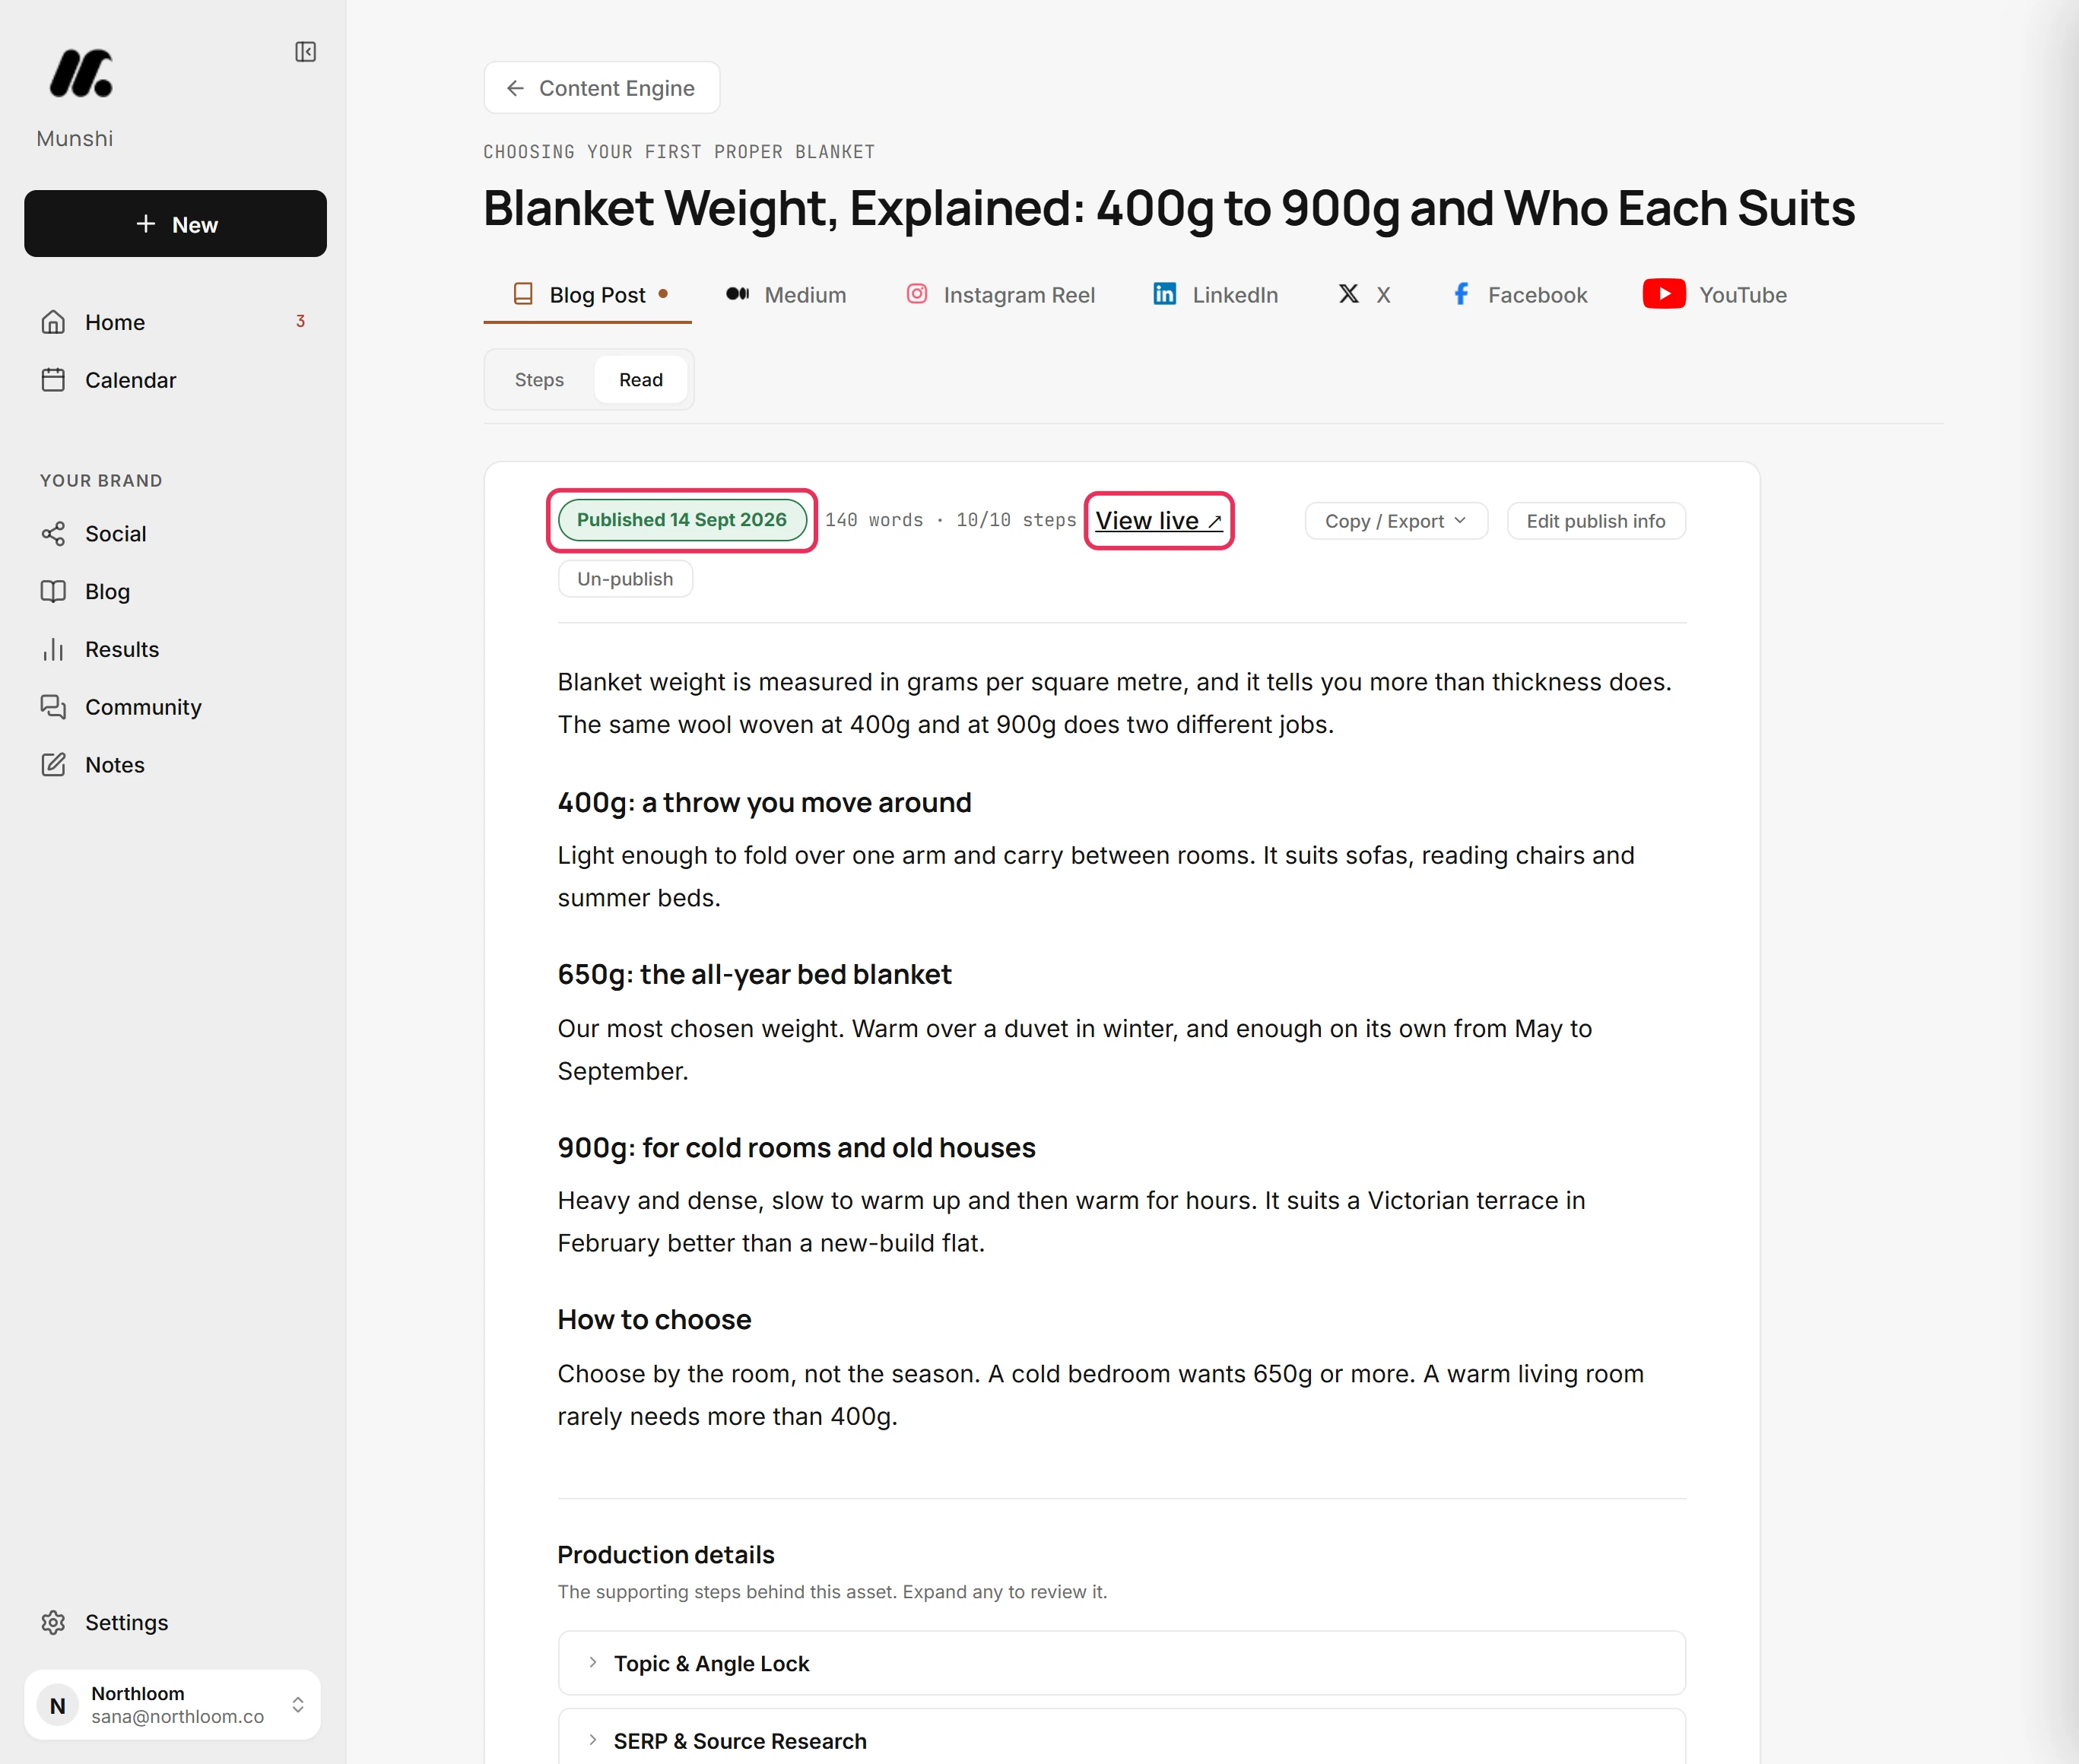
The status now reads Published with its date. View live opens the live page. Use Edit publish info to change the address or the date later.
Where you are now
The article is live on your platform and marked published in Munshi, with its date and a link to the live page.
If something goes wrong
Mark published is not there
Approve the article first. When every step is done, click Mark completed on the banner above the article. Mark published then appears beside Copy / Export.
“Enter a valid URL (https://…) or leave it blank.”
Paste the full live link, with its https:// part. Live URL only takes a full web address. You can also clear the box and save with just the date.
“Could not copy. Check clipboard permissions.”
Allow clipboard access for Munshi in your browser's site settings. The browser blocked Munshi from the clipboard. You can also use Download .md, which needs no permission.
“No Blog Post document yet”
Click Continue steps and finish Section-by-Section Drafting. The supporting steps are done, but the drafting step is not, so there is no article to copy yet.
Try it on your own brand this week.
Munshi Social, the AI content marketing engine for small teams, plans, writes, publishes, and tracks your blog and socials. The guide above shows the real app, not a mock-up.
Start your workspace