How to connect your first channel
Connect a social network from Settings > Integrations, or from a post you are writing. The network's sign-in opens in a window, then you are back.
Before you start
- The sign-in details for the social account you want Munshi to publish to.
-
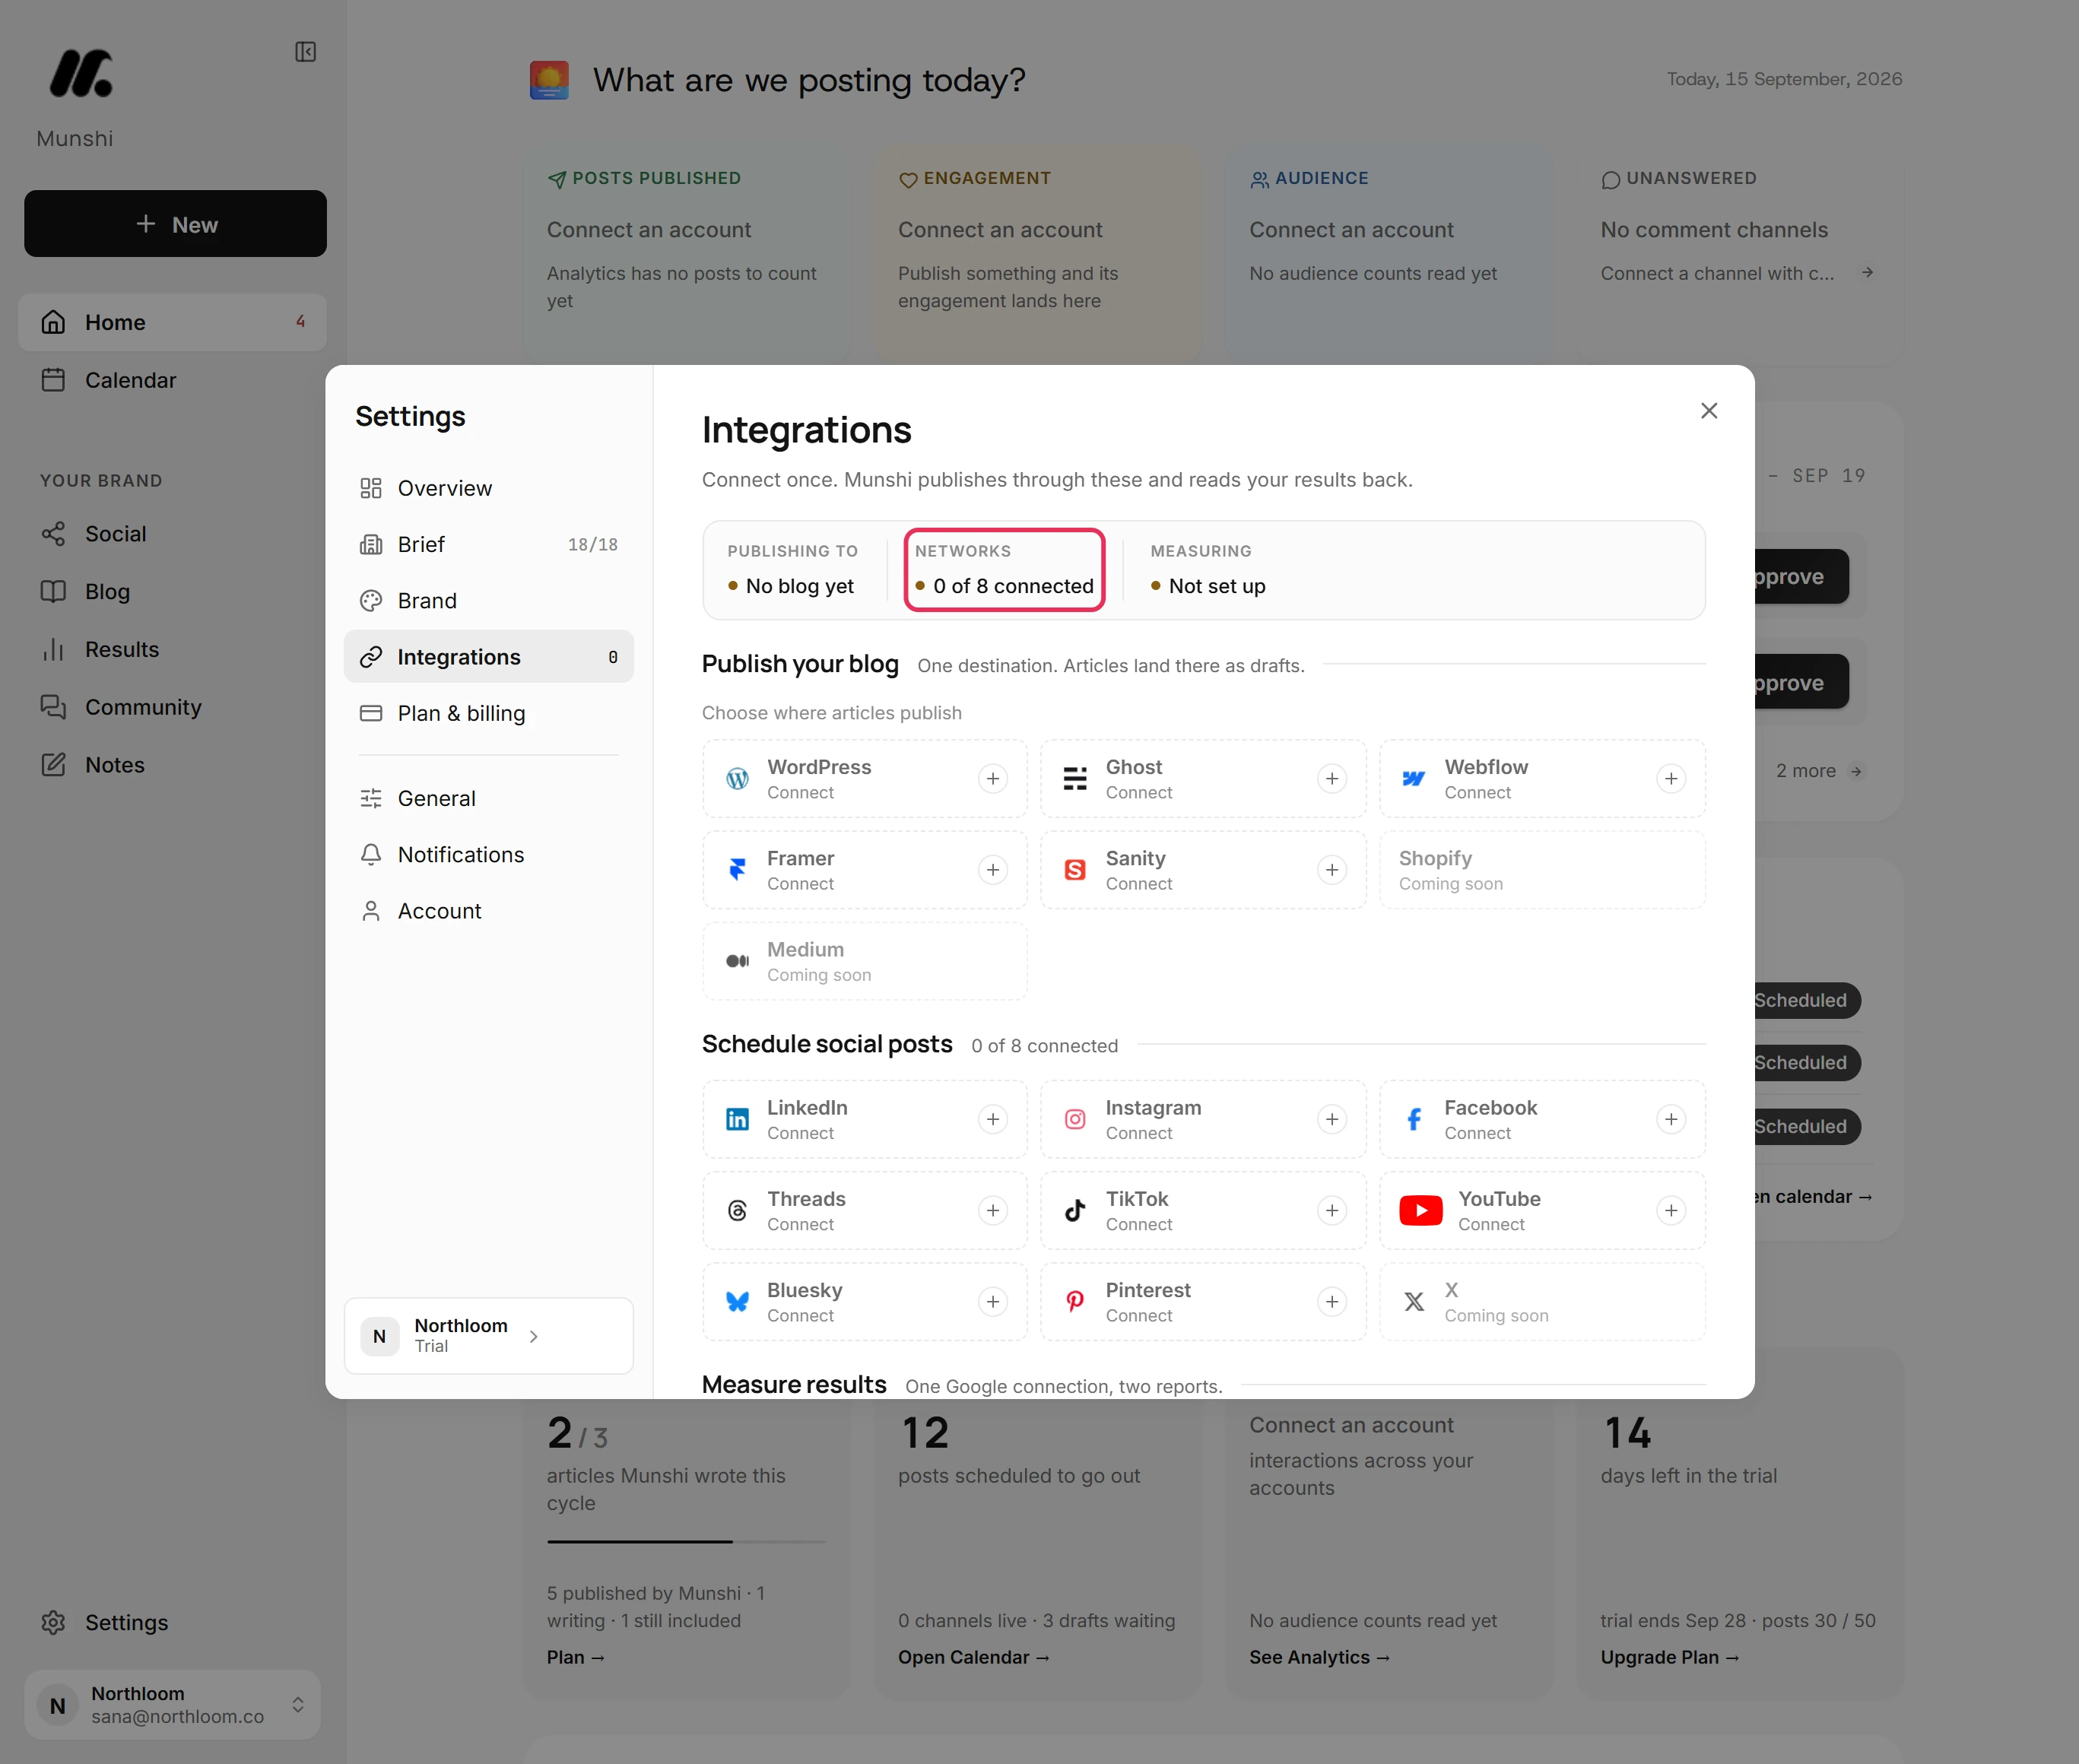
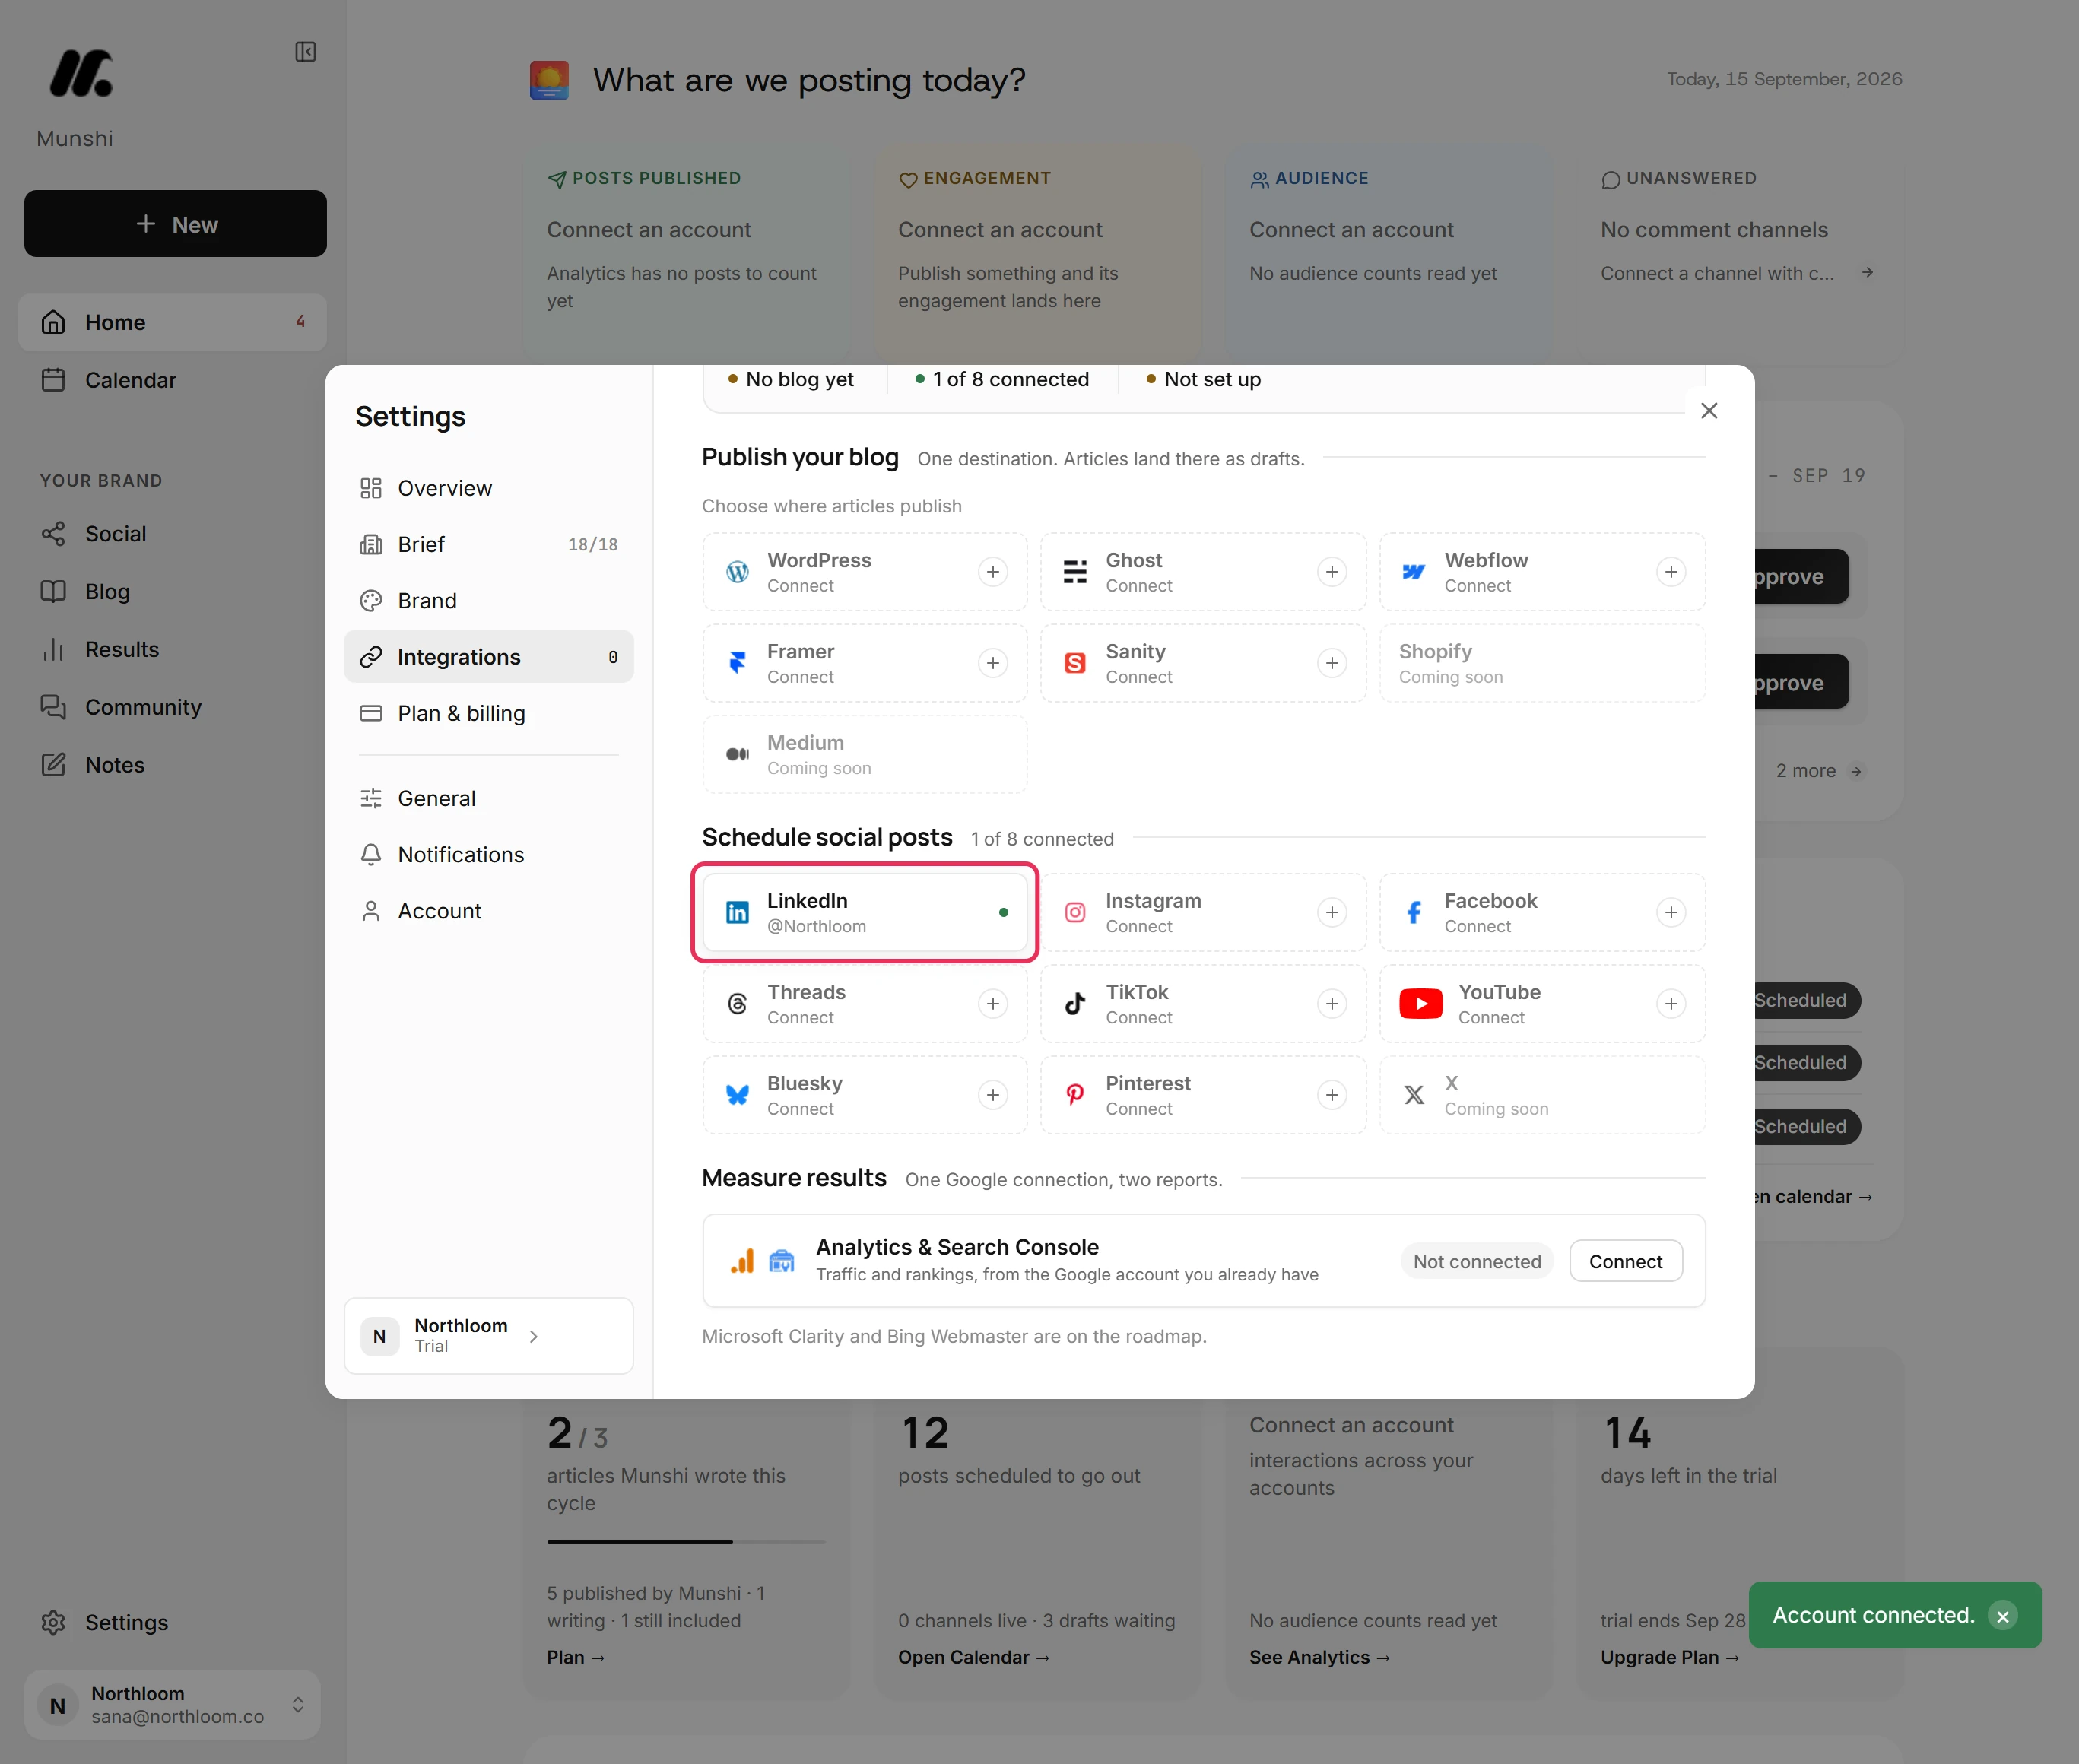
Click Settings at the bottom of the sidebar, then Integrations. The strip at the top counts your networks. It reads 0 of 8 connected until you connect one.
-
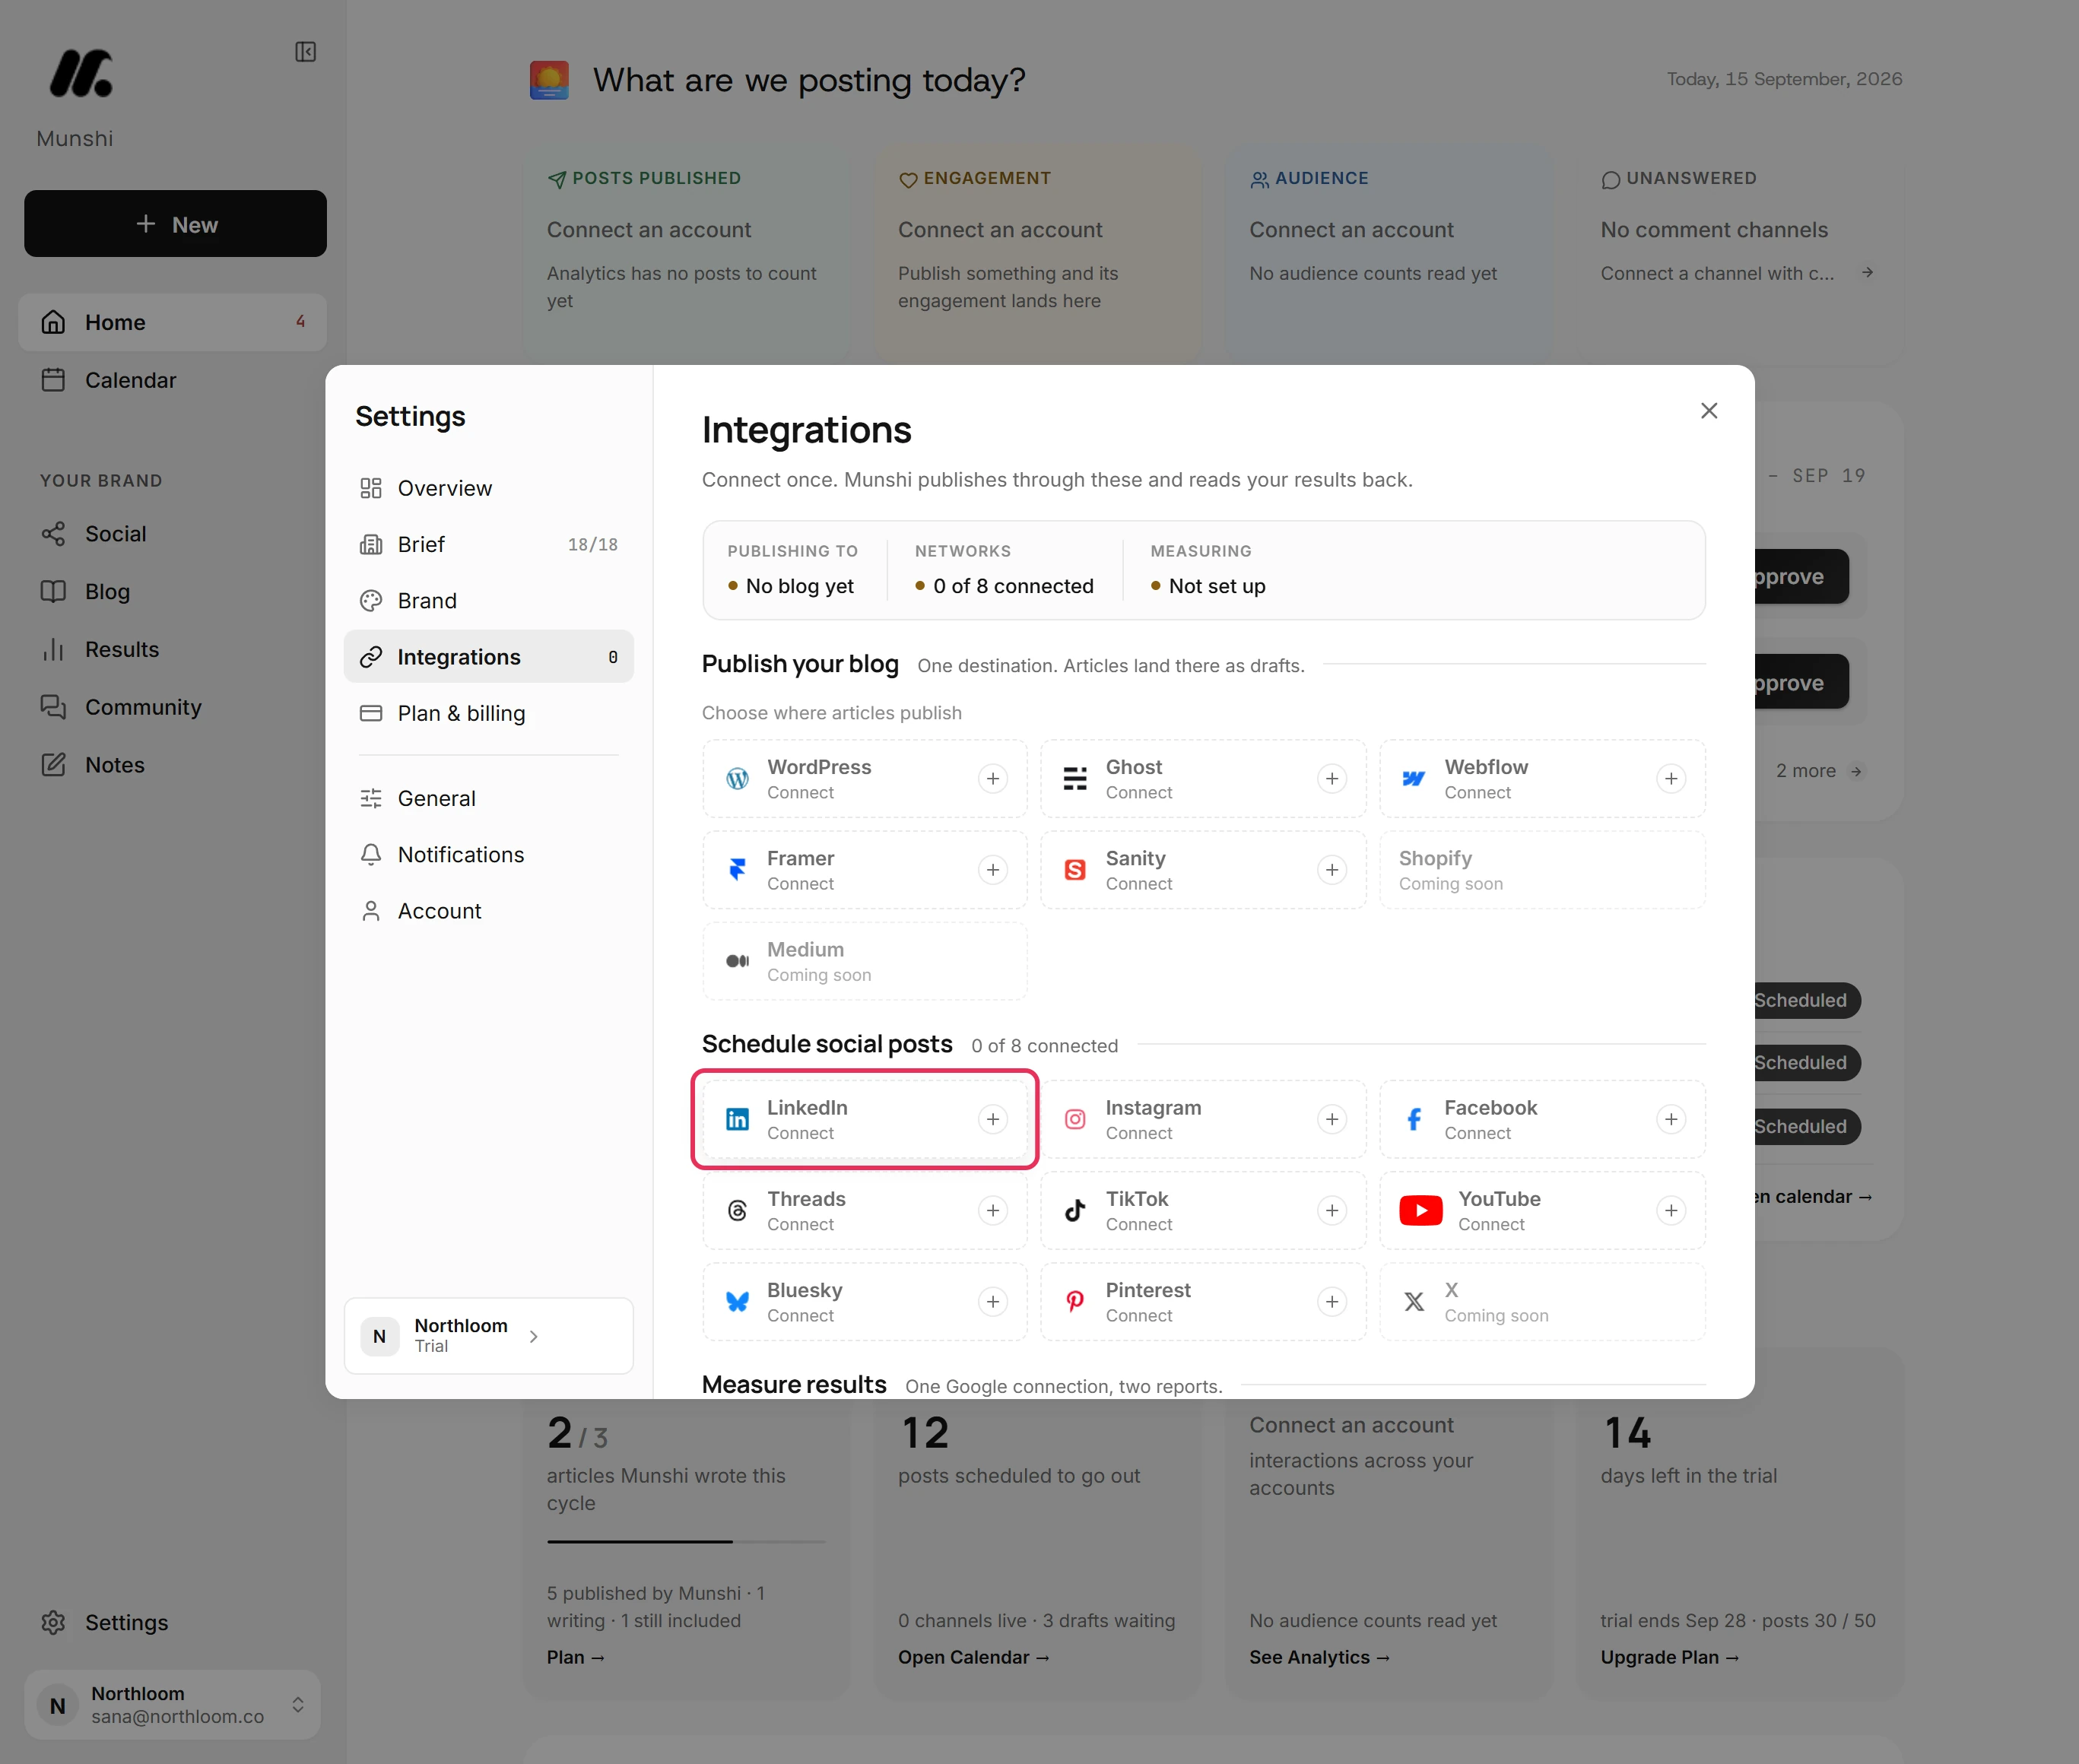
Under Schedule social posts, every network you can connect reads Connect. Click the one you want. Here it is LinkedIn.
-
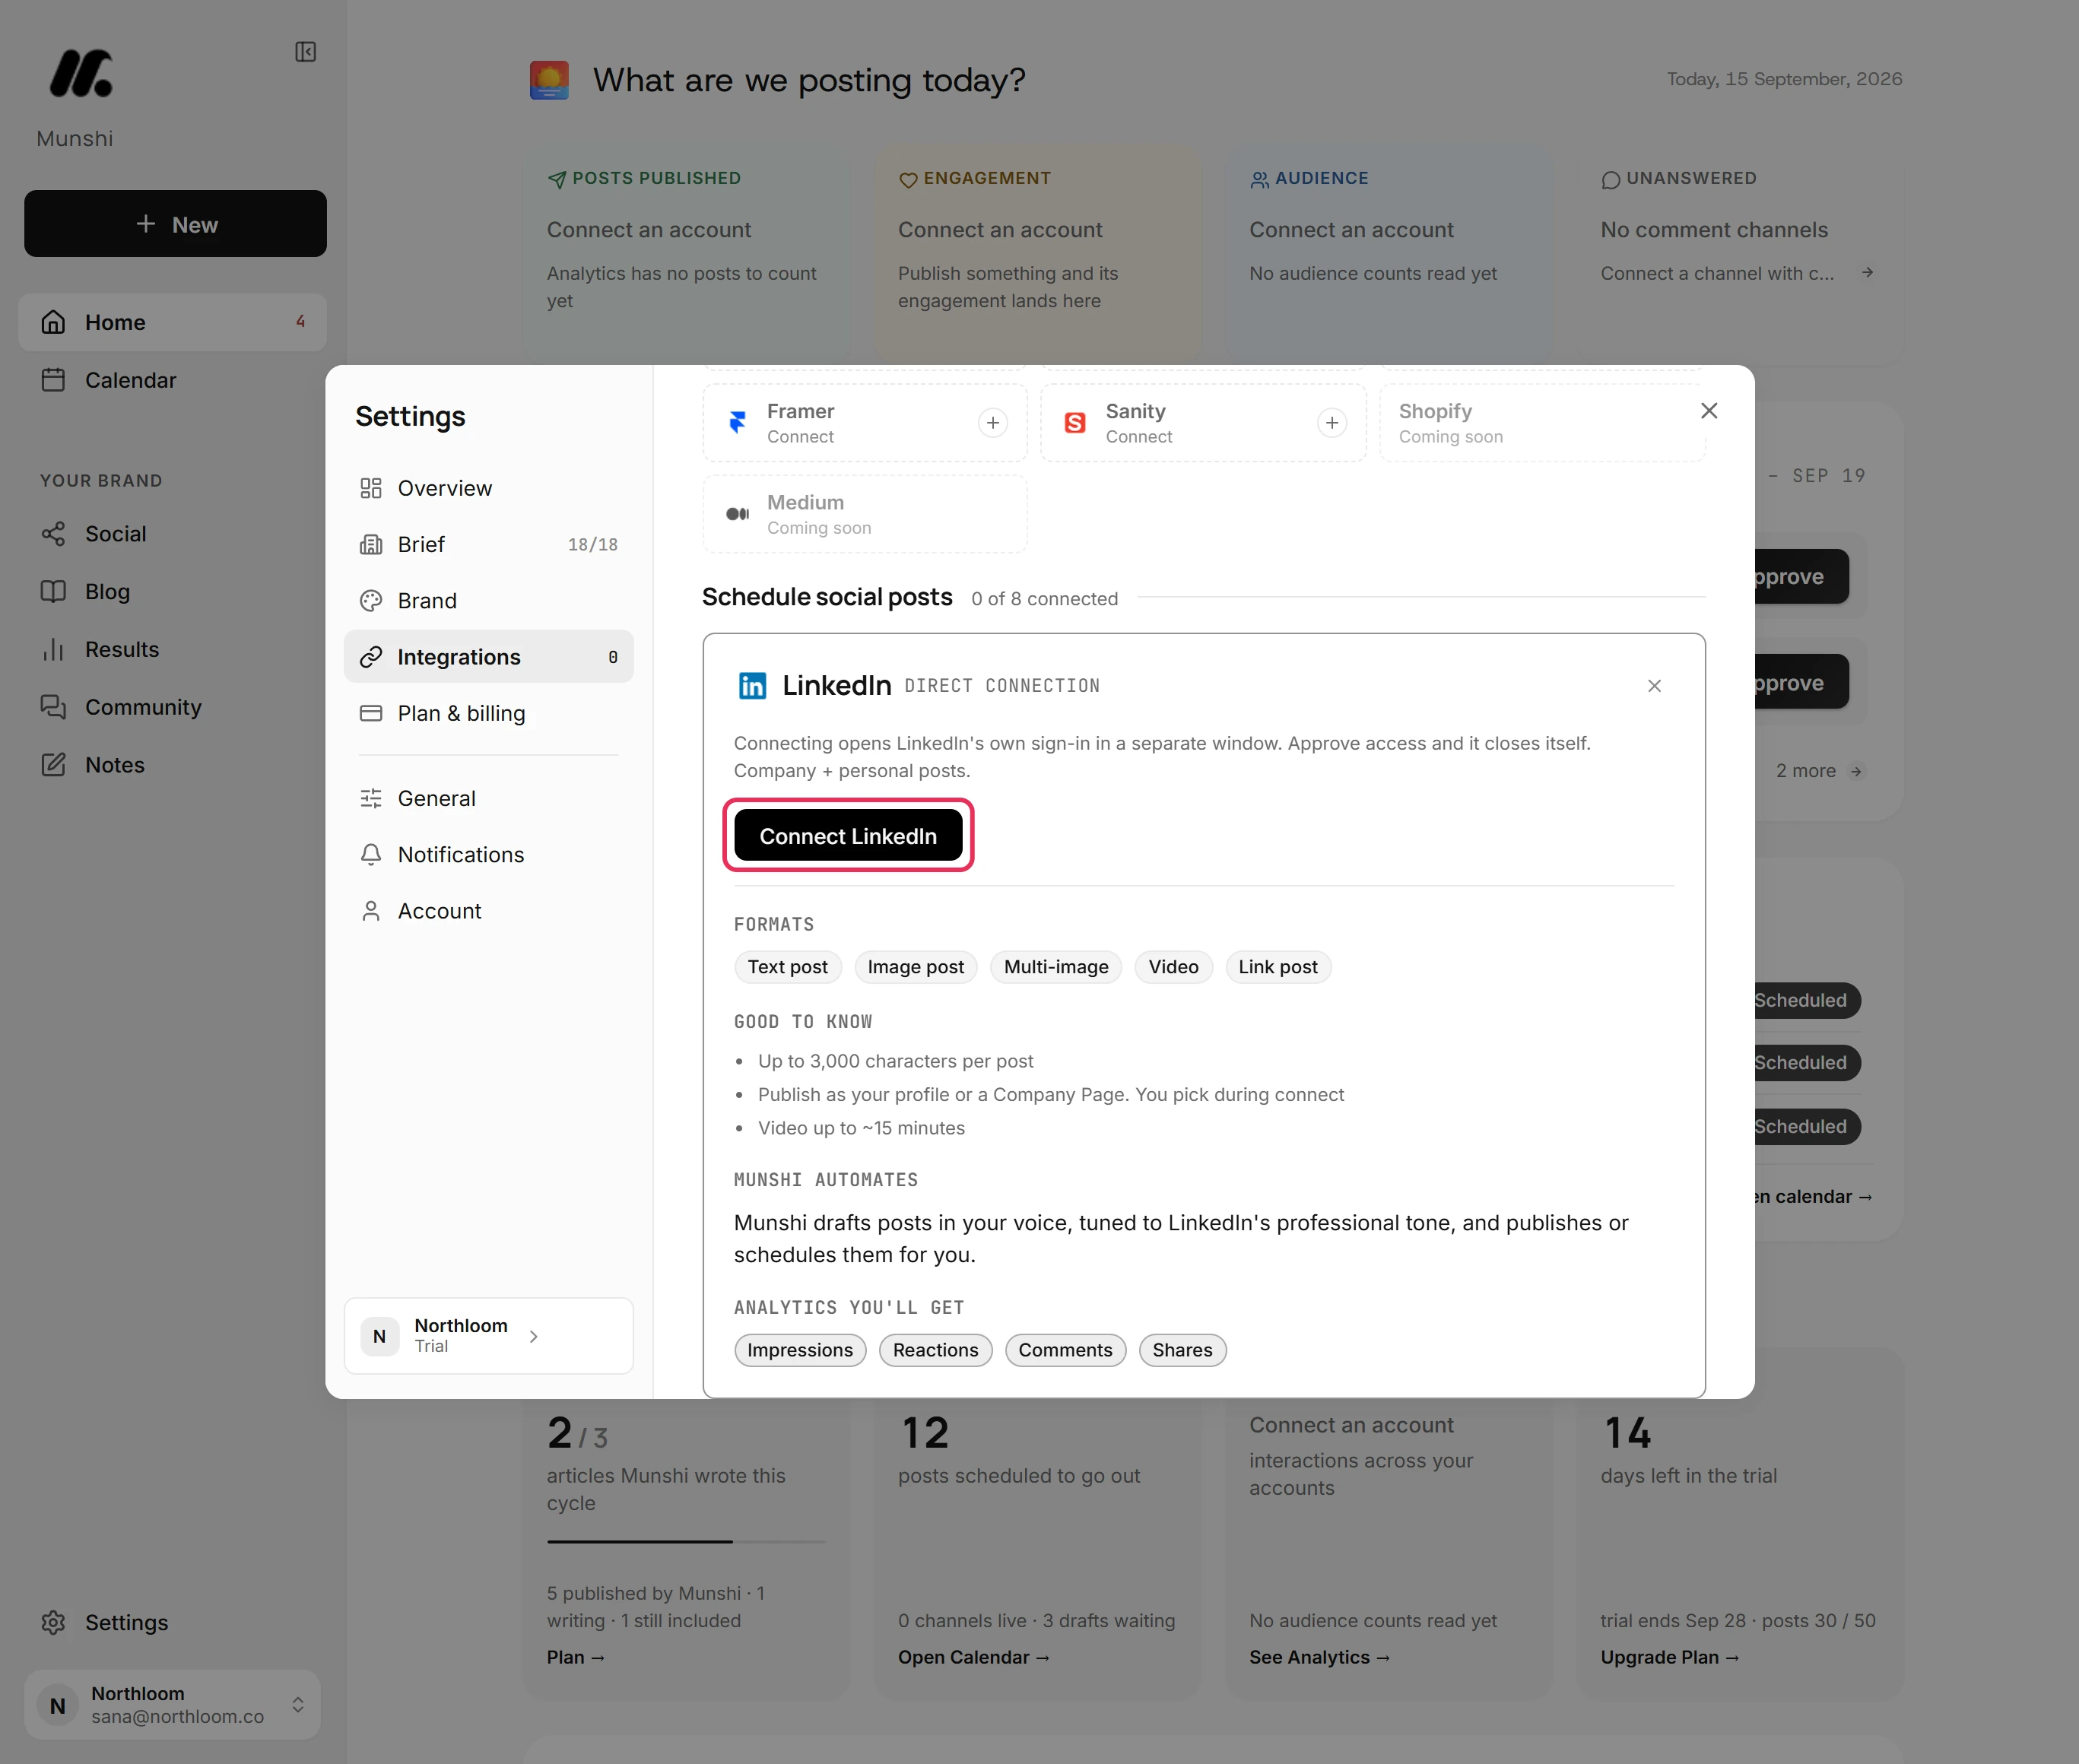
The card explains that the network's own sign-in opens in a separate window. Click Connect LinkedIn, sign in there and approve the access. The window closes itself.
-
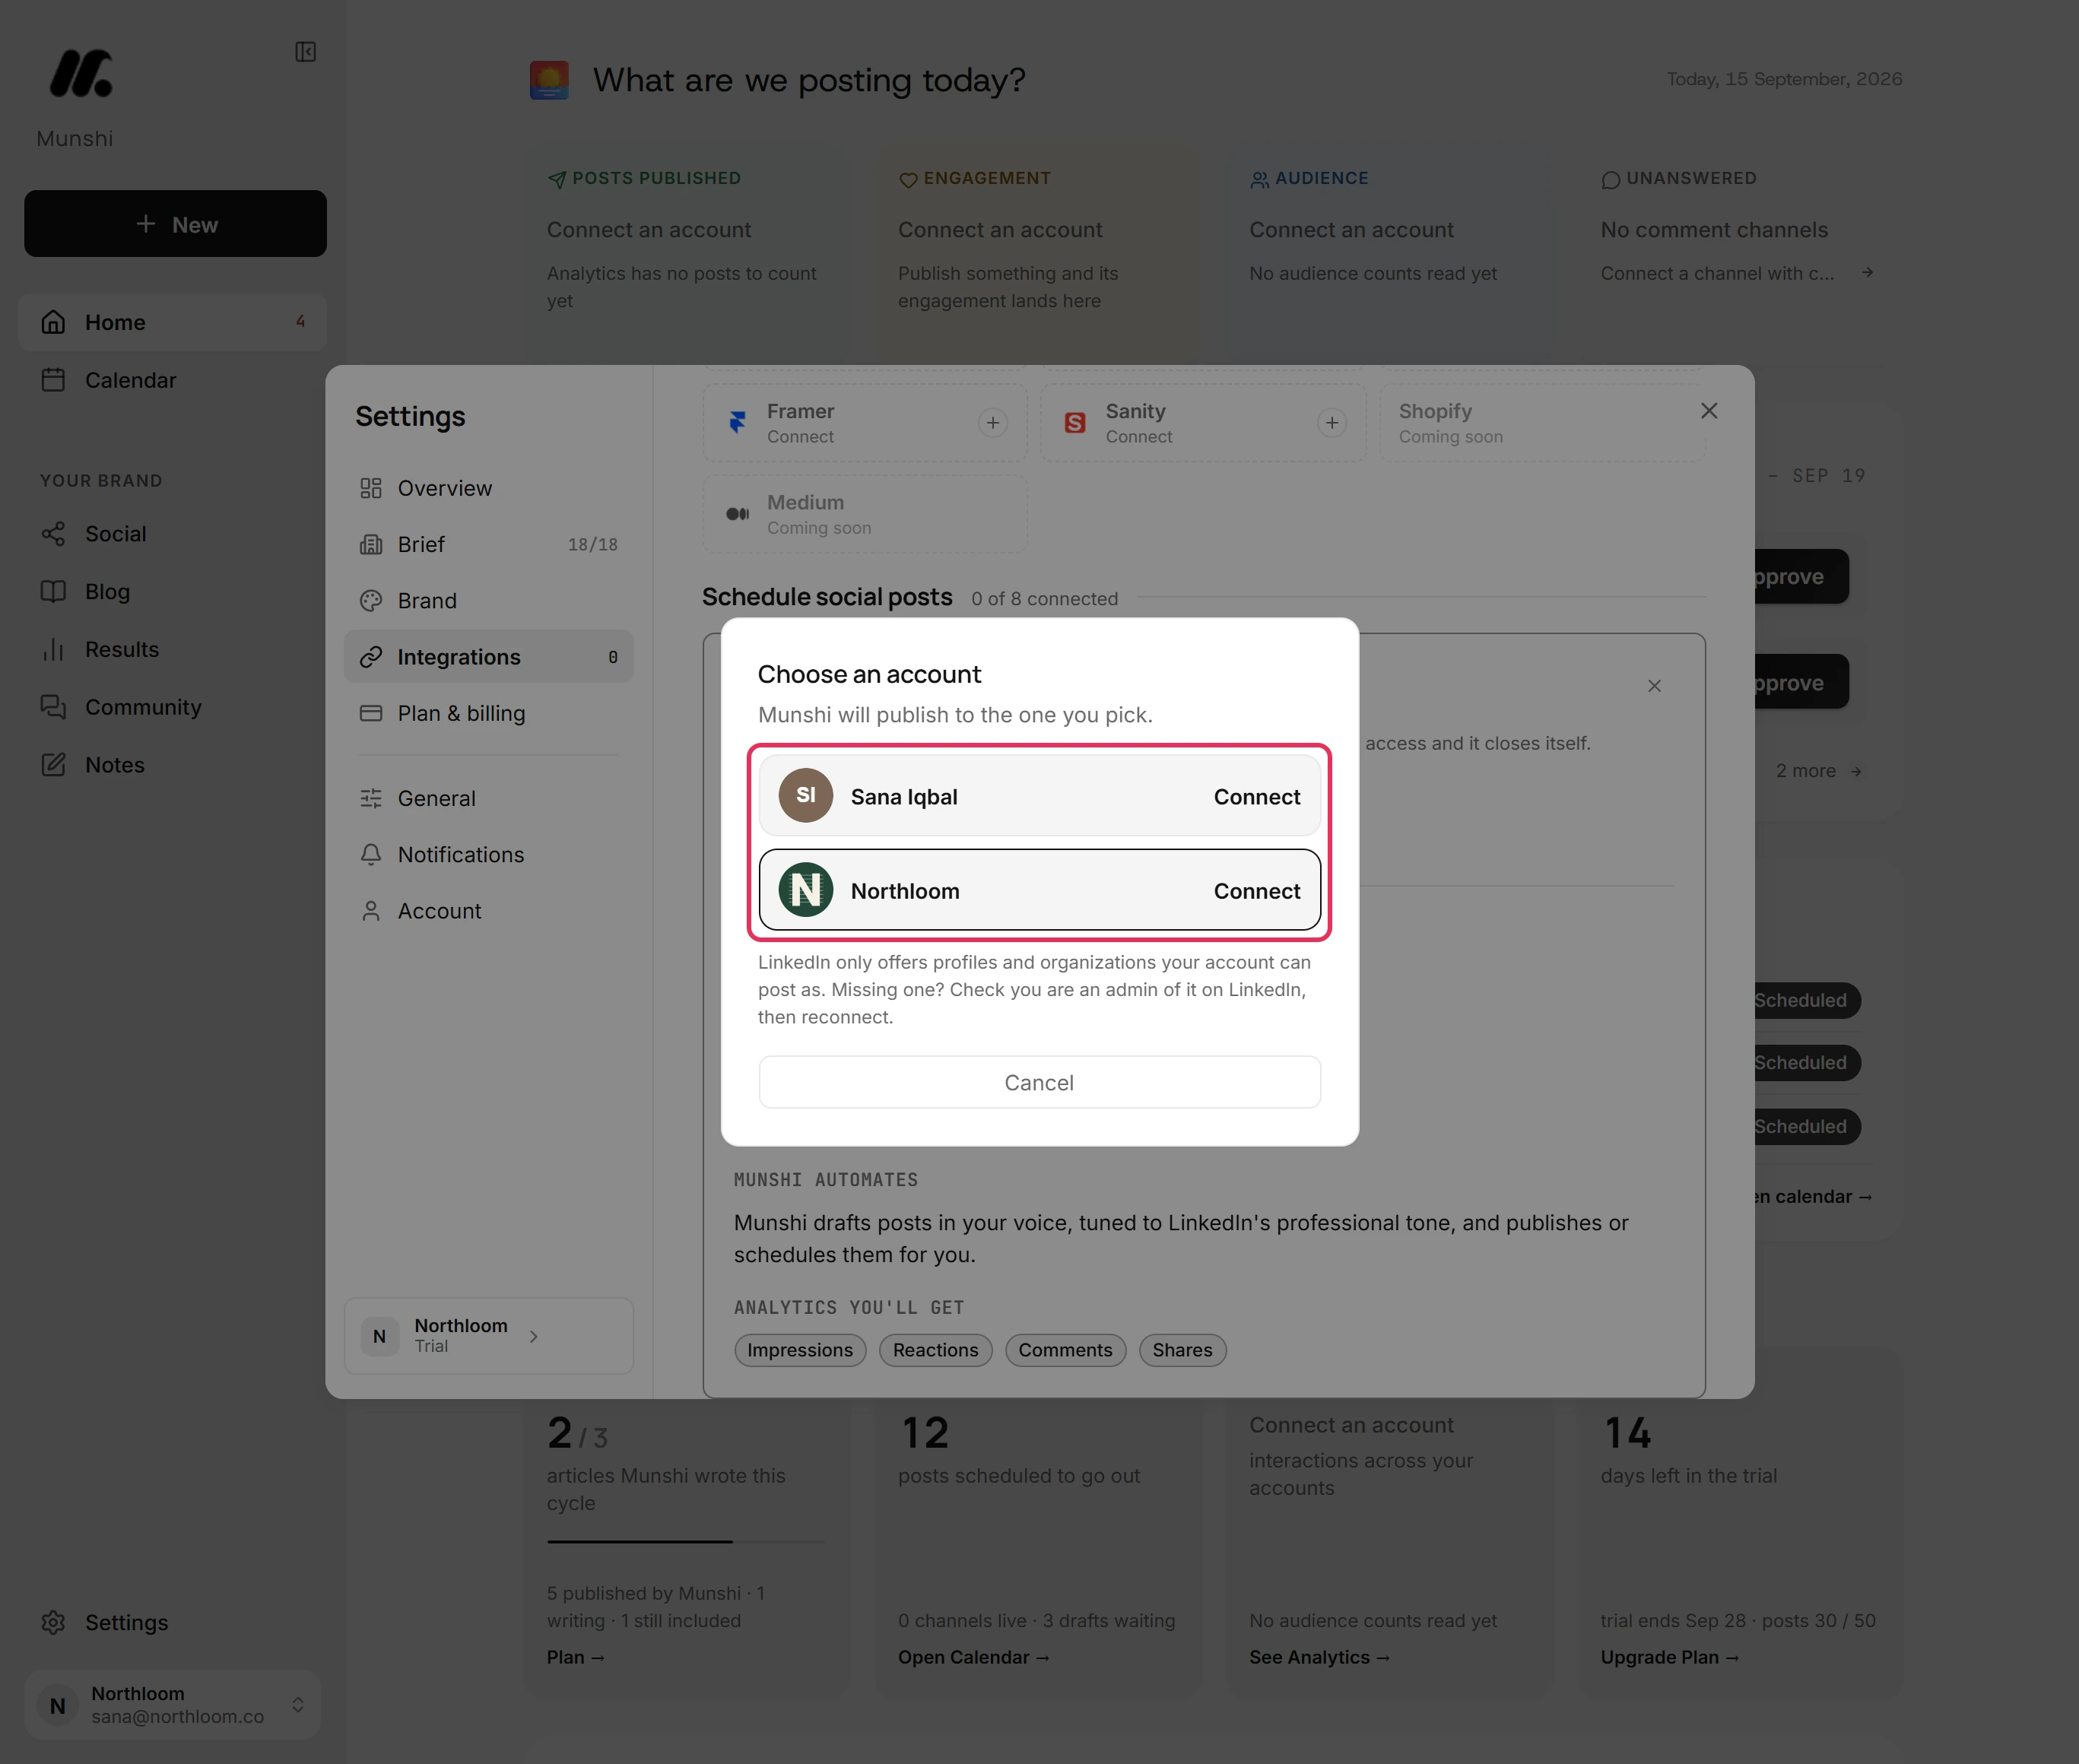
LinkedIn and Facebook can hand back more than one account, so Munshi asks which one to publish to. Choose an account lists your own profile and the Company Pages you manage. Click the one you want.
-
Munshi says Account connected. Close the card. The tile now shows the account with a green dot, and the strip reads 1 of 8 connected.
-
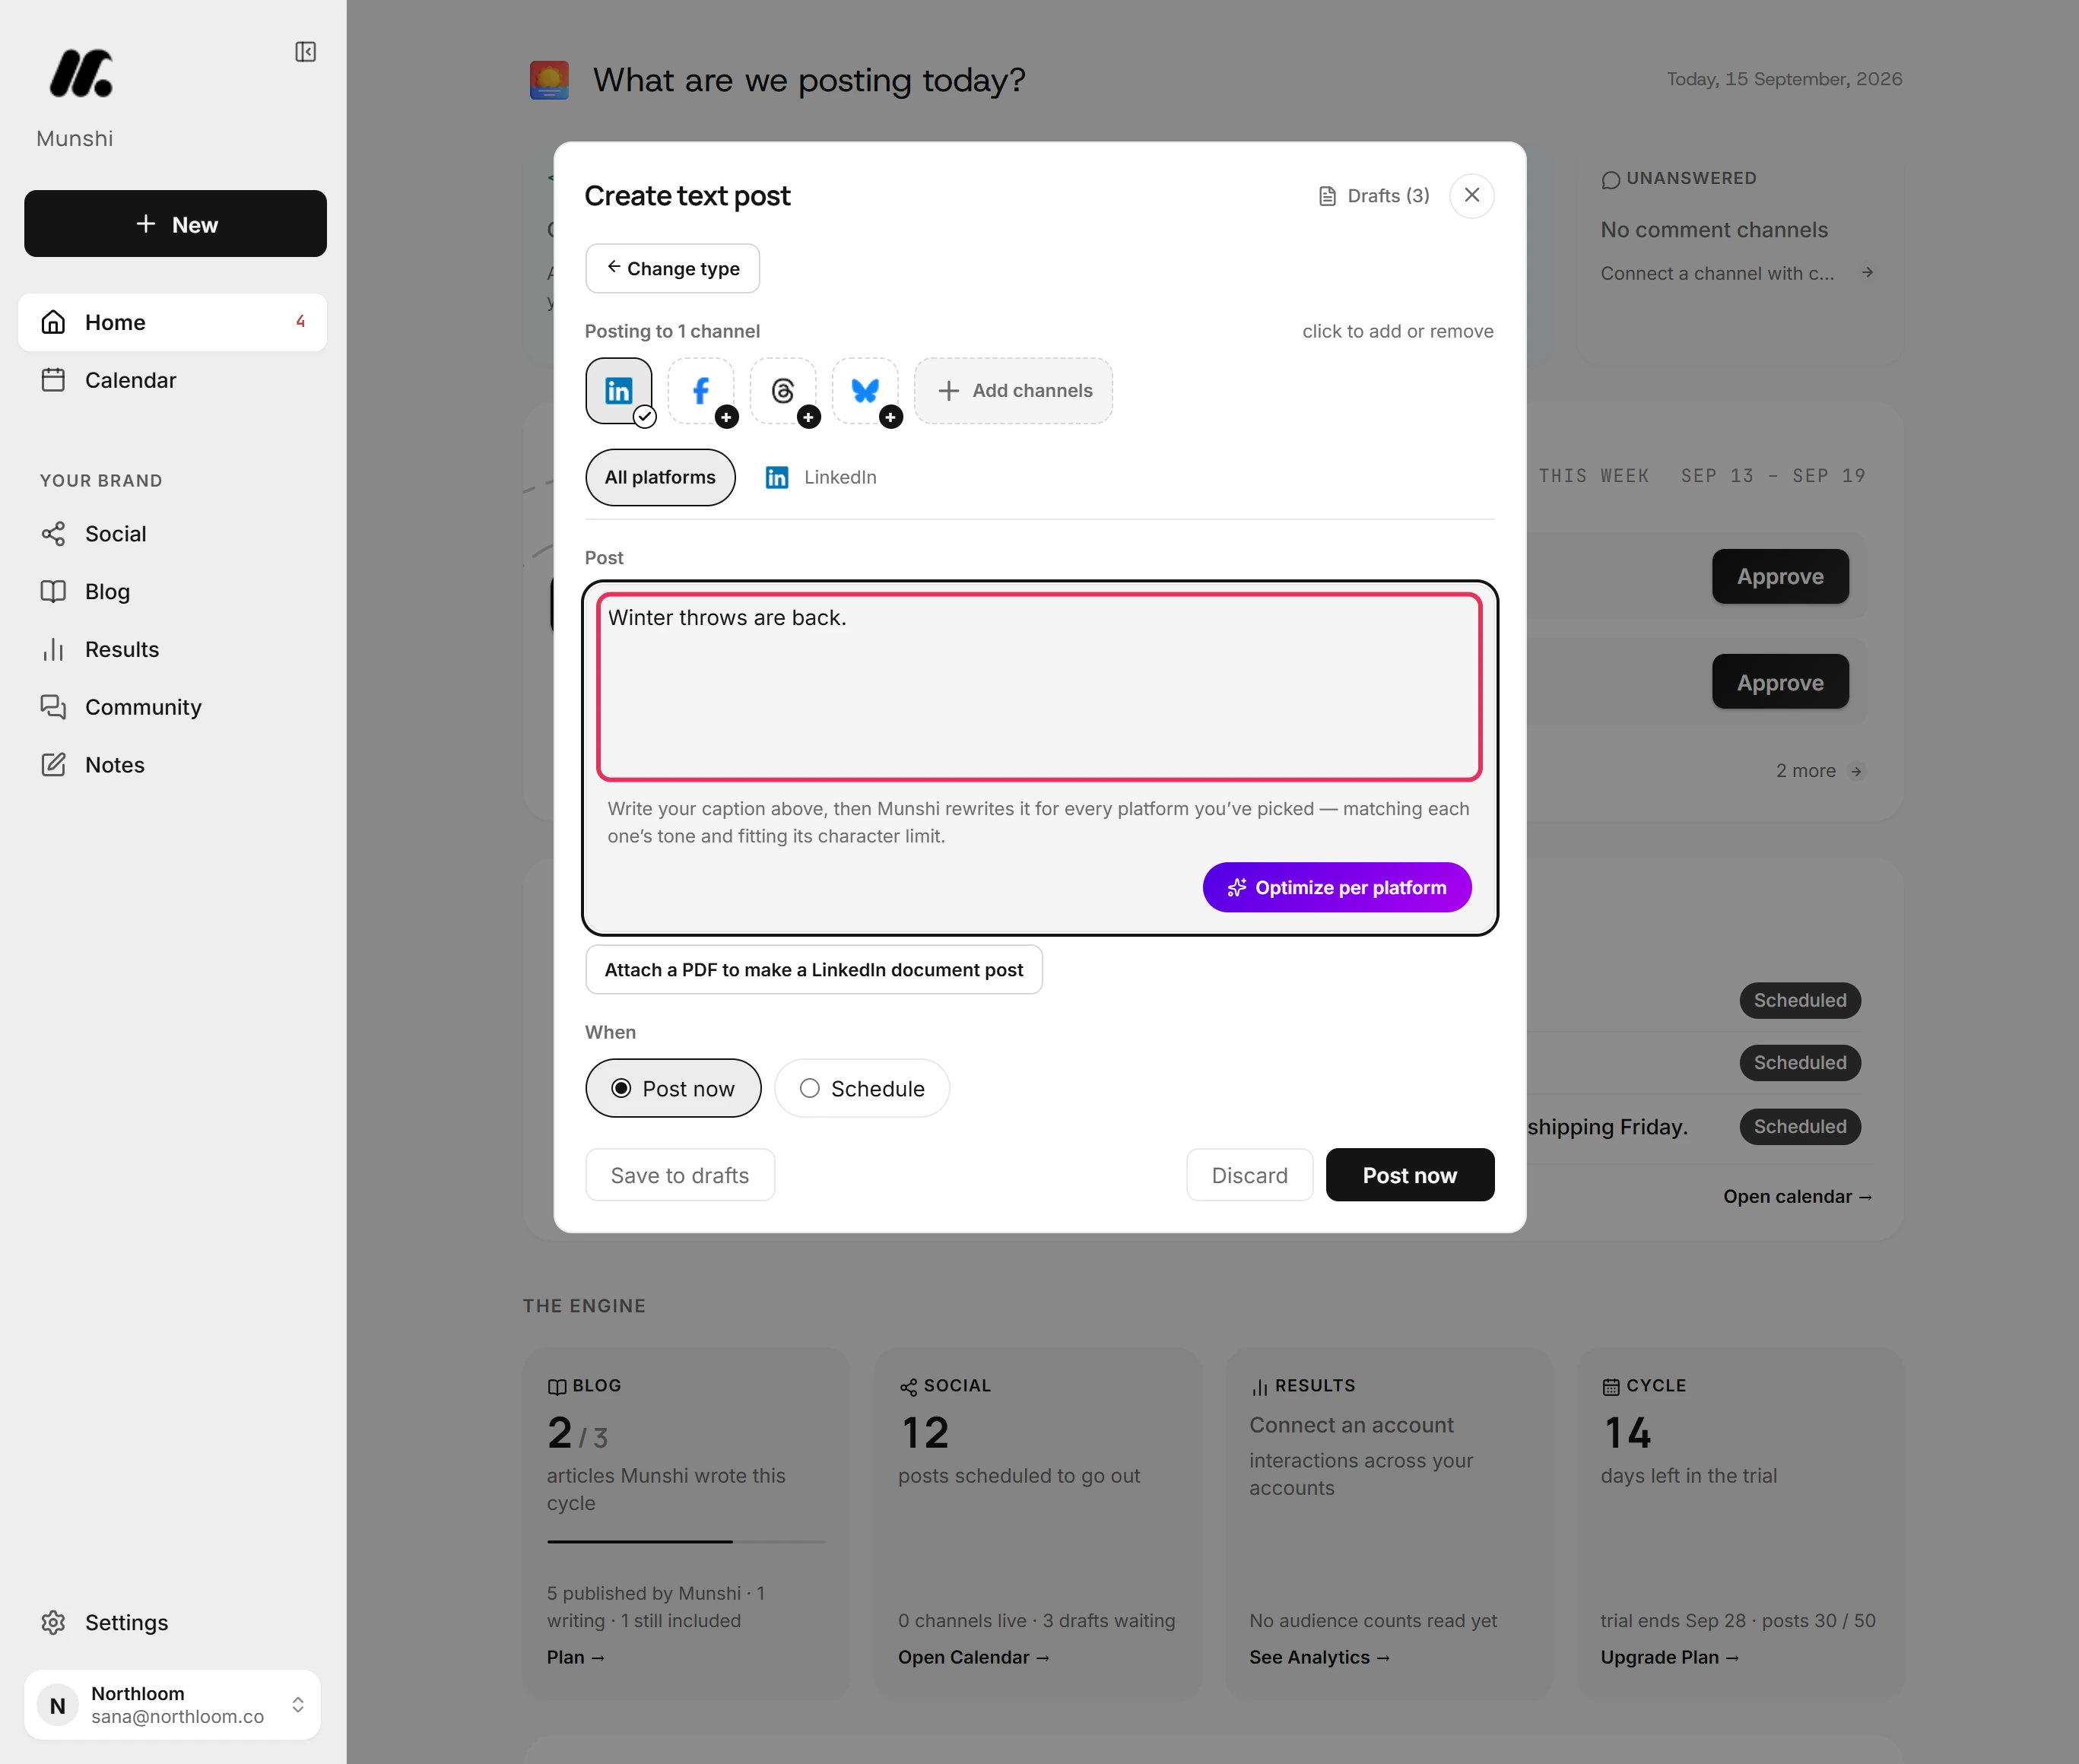
You do not have to leave a post to connect a network. Close Settings, click New in the sidebar, pick Text post and write it.
-
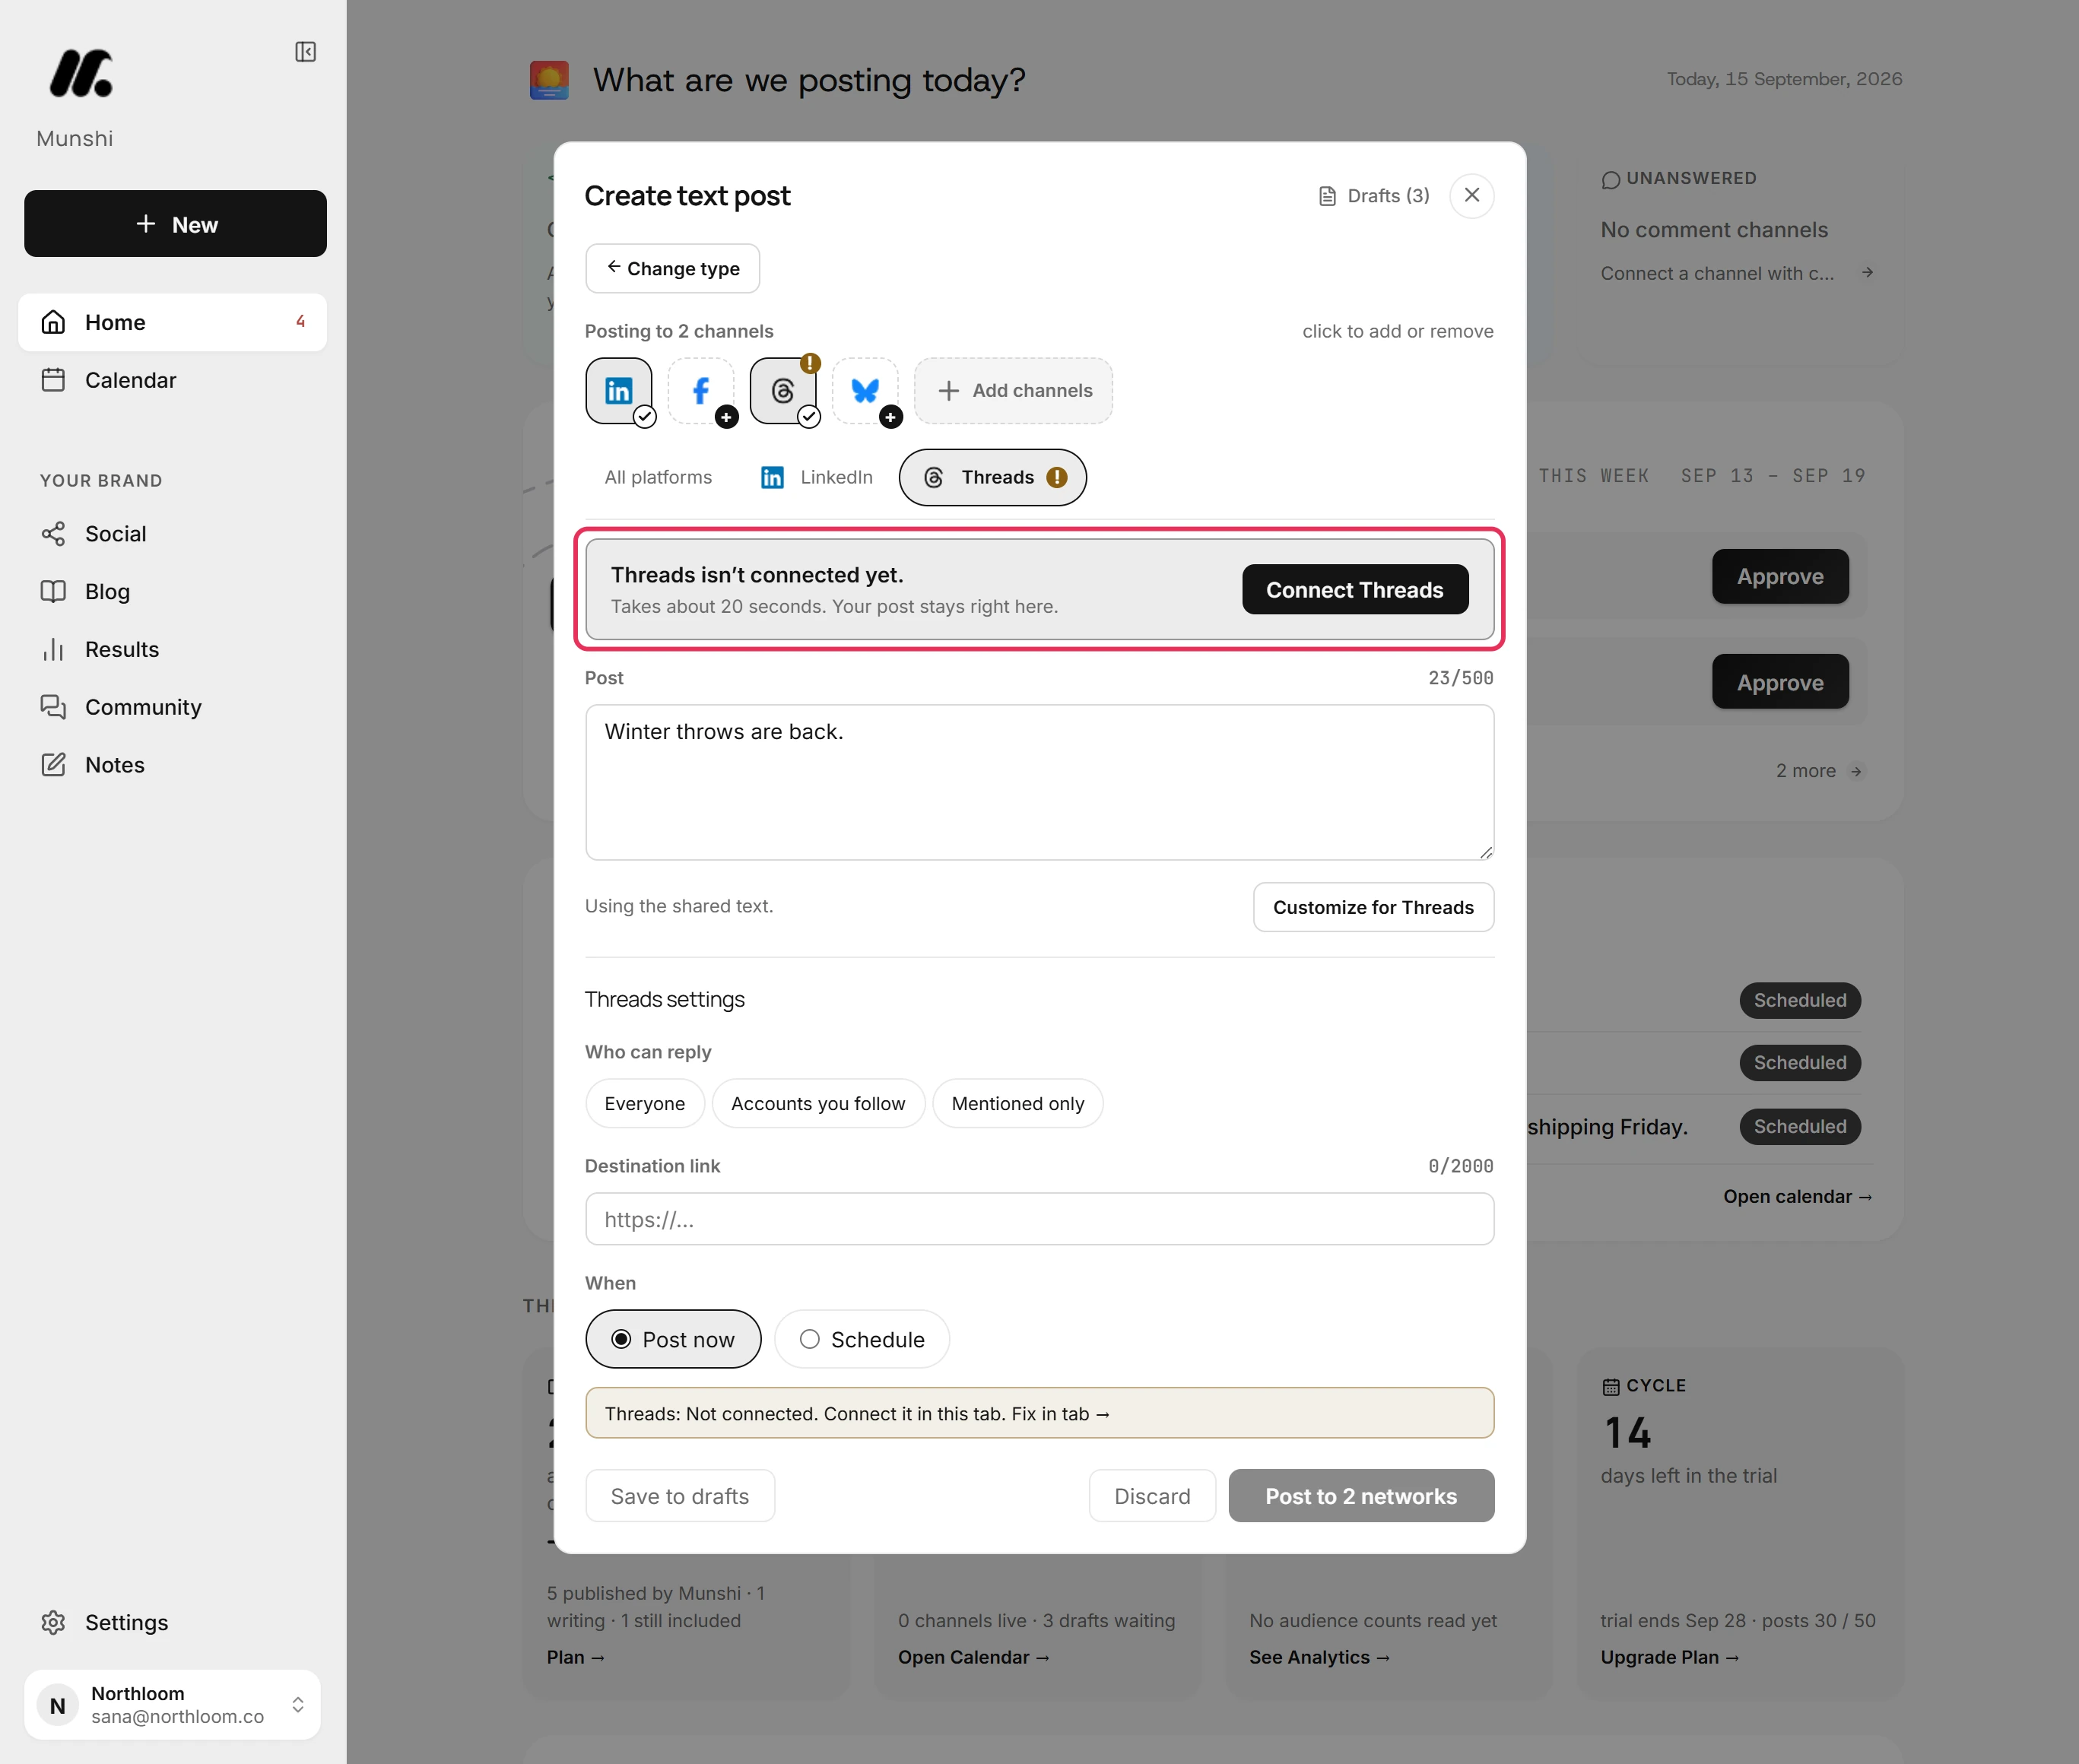
A plus on a network's icon means it is not connected yet. Pick it anyway, here Threads. Its tab says Threads isn’t connected yet. and that your post stays right here.
-
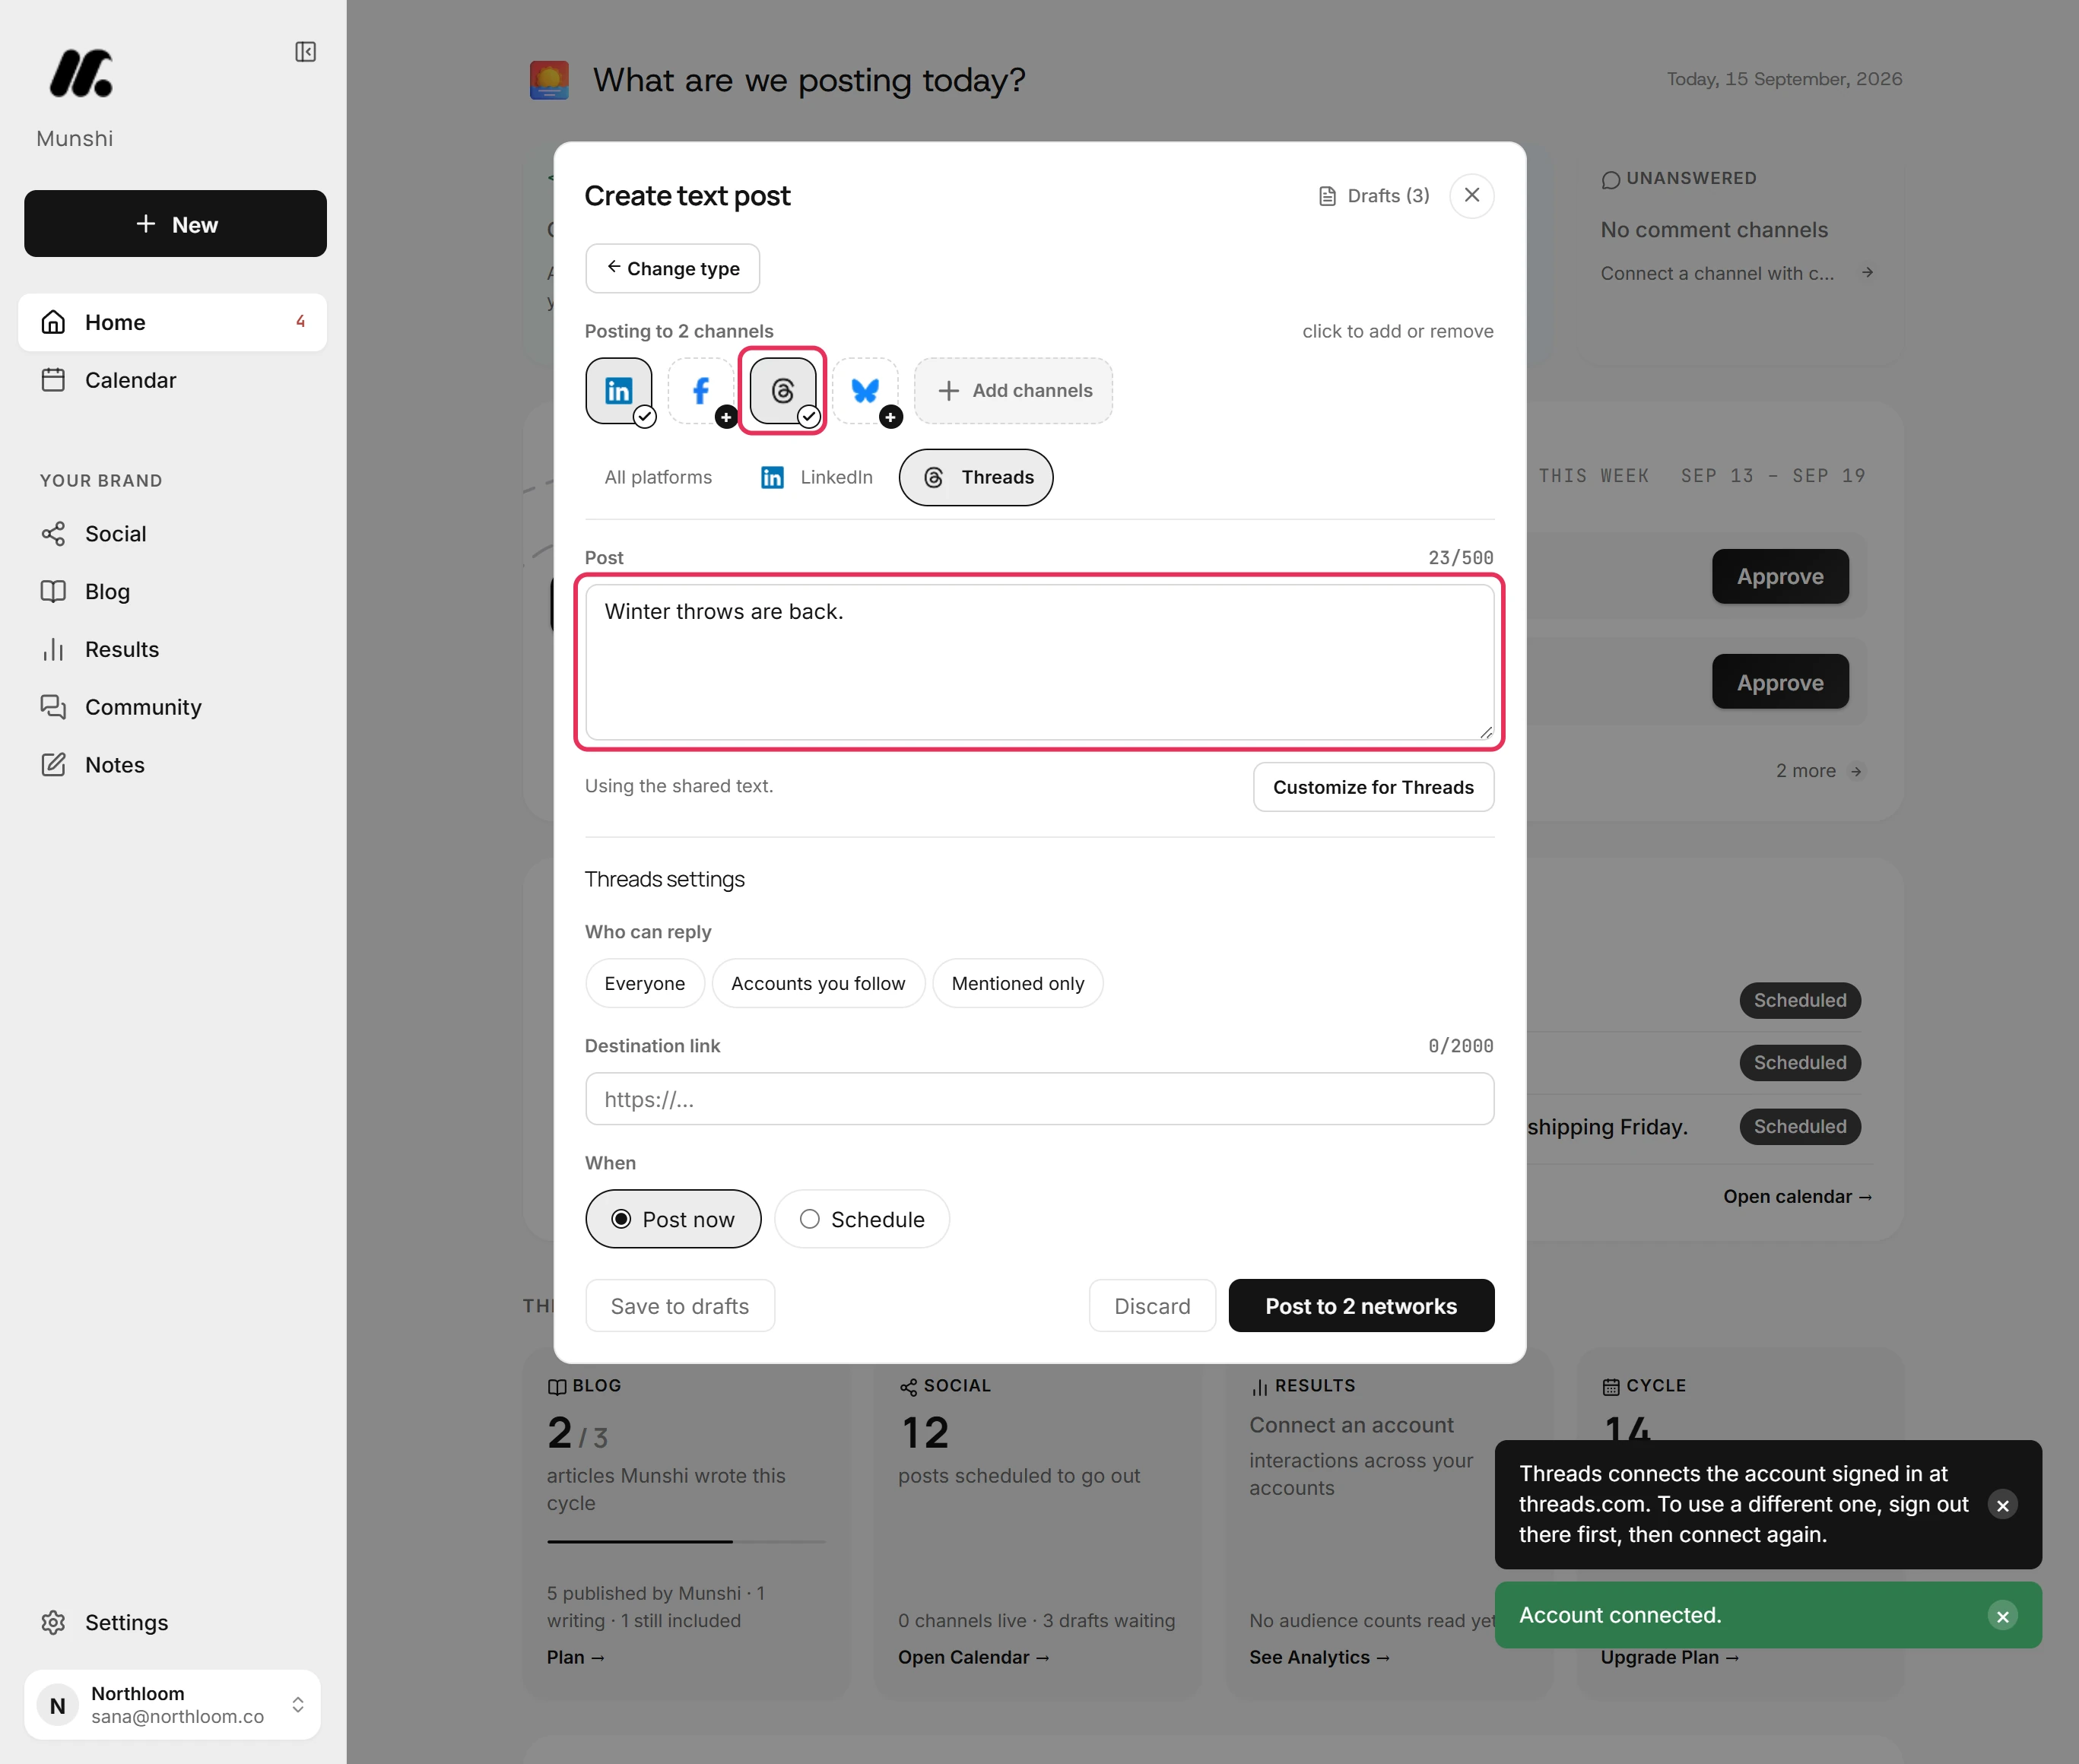
Click Connect Threads. In the Threads window, sign in and approve, and the window closes itself. Threads is now ticked, and the post is as you left it.
Where you are now
LinkedIn and Threads are connected, and posts you write can go to both. Munshi starts reading each account's numbers and bringing in its past posts.
If something goes wrong
“Your browser blocked the popup. Allow popups for Munshi and try again.”
Allow popups for Munshi in your browser, then click the Connect button again. The network's window could not open.
“The connection was declined or cancelled. Nothing was saved.”
Connect again, and approve the access the network asks for. Access was not approved in the network's window. The connect window did not finish explains the other messages.
“That account is already connected to another workspace.”
Disconnect the account in the workspace that has it, then connect it here. An account belongs to one workspace at a time, including your own other workspaces. On Facebook and LinkedIn, where you pick the Page or profile in Munshi, the message is “Couldn't finish connecting. Please try again.” instead.
“Saved your post to drafts. Delete it there if you meant to discard.”
Open the post in Social, under Drafts, to carry on. The post window closed before the post was sent, so Munshi kept it there.
Try it on your own brand this week.
Munshi Social, the AI content marketing engine for small teams, plans, writes, publishes, and tracks your blog and socials. The guide above shows the real app, not a mock-up.
Start your workspace